Article Number: 000218709
NetWorker: How to Perform a VMware FLR from the NetWorker Web User Interface
Summary: This article provides an overview of how to use the NetWorker Web User Interface (NWUI) to perform a NetWorker VMware Protection (NVP) vProxy File Level Recovery (FLR).
Article Content
Instructions
Pre-Requisites
- The virtual machine (VM) file system is supported for File Level Recovery (FLR) operations. See the NetWorker VMware Integration Guide for details on FLR limitations. These limitations may vary depending on the NetWorker version in use. The VMware Integration Guides are available through the Dell Support NetWorker Product Page.
- The Data Domain Systems in NetWorker has a Management User and password specified:
- Expand the Devices and Media drop down in the left menu.
- Go to Data Domain Systems.
- Select the Data Domain system.
- Click Edit.
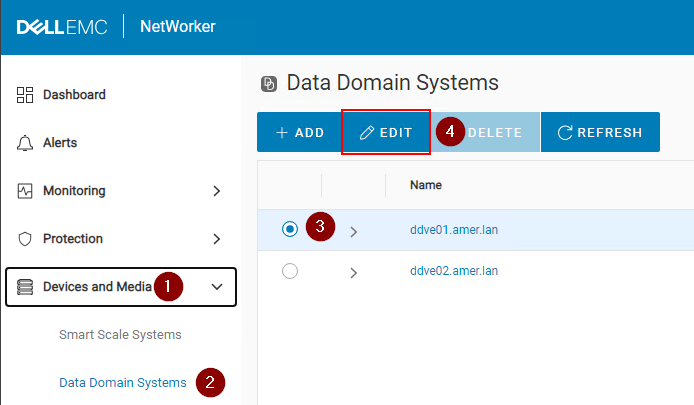
Figure 1: Edit the Data Domain system.
- Enter a Data Domain "admin" user and password for the "management user":
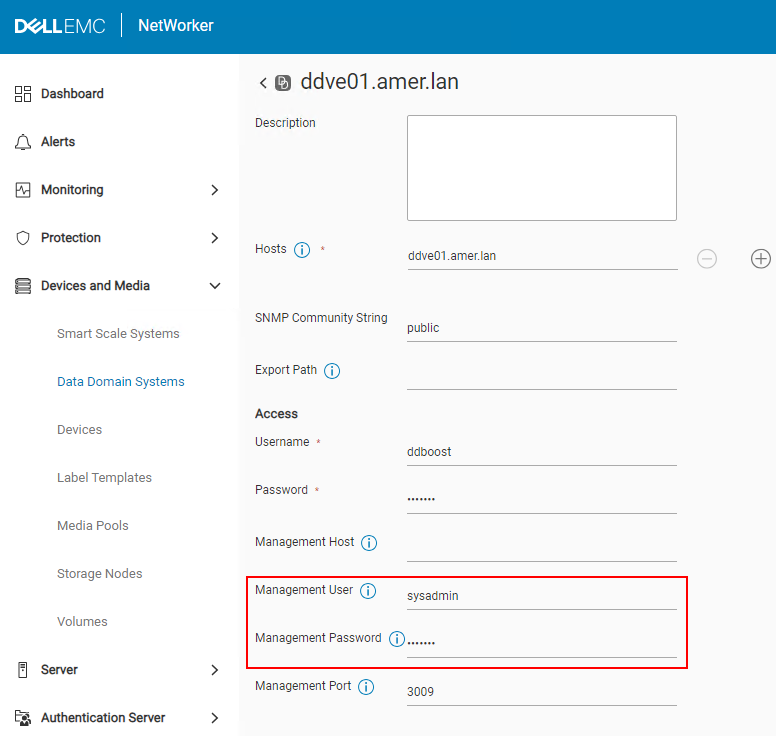
Figure 2: Add the Data Domain user and password.
NOTE: If you have multiple Data Domains, this must be done for each Data Domain configured in NetWorker. VM FLR and Instant Access restore require creating a Network File System (NFS) export on the Data Domain. This requires a user account which has been granted "admin" rights on the Data Domain system. This is typically the "sysadmin" account. If this field is not populated correctly, backups and other restore methods may still complete successfully as they use the ddboost protocol and not NFS to move the data between the Data Domain and VMware datastores.
- Port requirements for FLR are met. See Dell article 203350: NVP vProxy: Troubleshooting Network Connectivity For Backup and Restore Operations
- vProxies are registered and enabled in NetWorker. See Dell article 10494: NetWorker Management Web UI (NWUI): How to Use
Process
- Click Recover and Savesets in the left menu.
- Select or specify a Time Range.
- Select the VMware client type.
- Select the source vCenter.
- Select the Virtual Machine needed for restore. Click Refresh if Virtual Machine pane does not populate.
- Click Refresh over the right pane to populate a list of backups and clones within the time range specified.
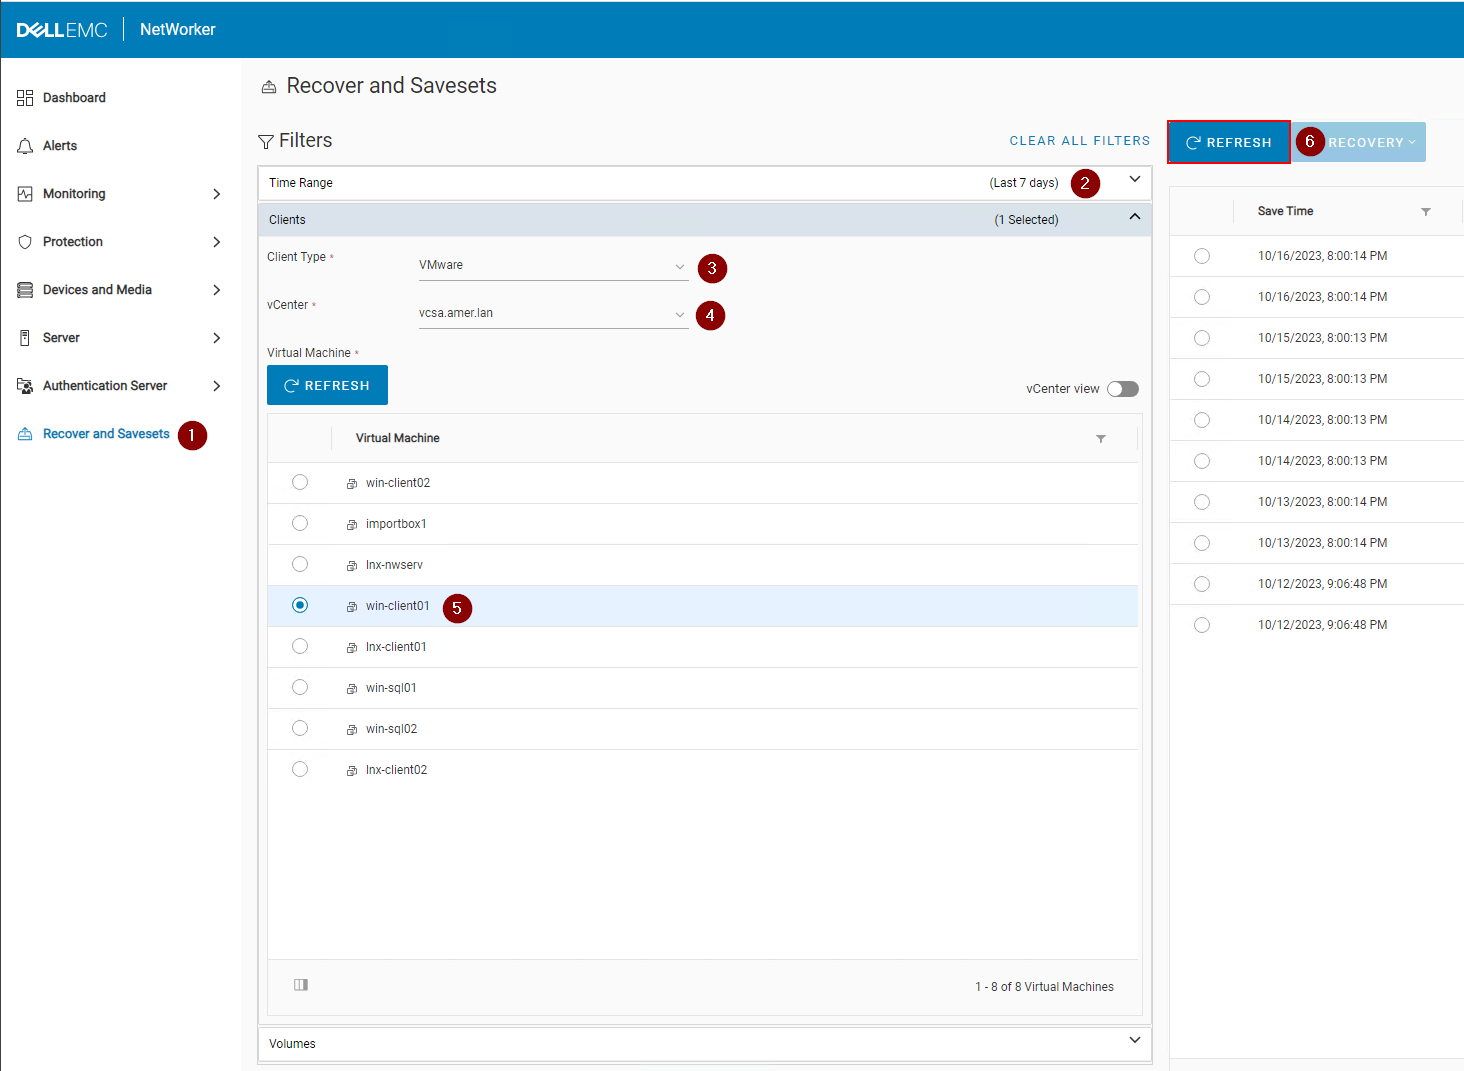
Figure 3: Click Refresh to populate a list of backups and clones.
- Click the Recovery drop down over the right pane and select File Level:

Figure 4: Select File Level
- By default the source vCenter is set. You can FLR the save to a VM in another vCenter if the target VM is the same operating system type (Linux or Windows). By default vProxy selection is set to automatic, however, you can manually pick a vProxy to use.
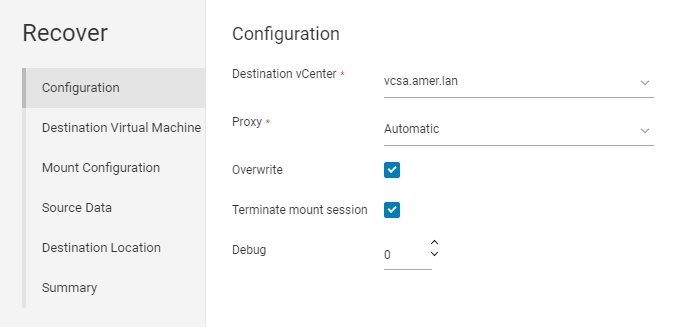
Figure 5: Manually picking a vProxy to use
- Click Next.
- By default the source VM is selected as the target. However, you can select another VM if it is the same operating system type (Linux or Windows):
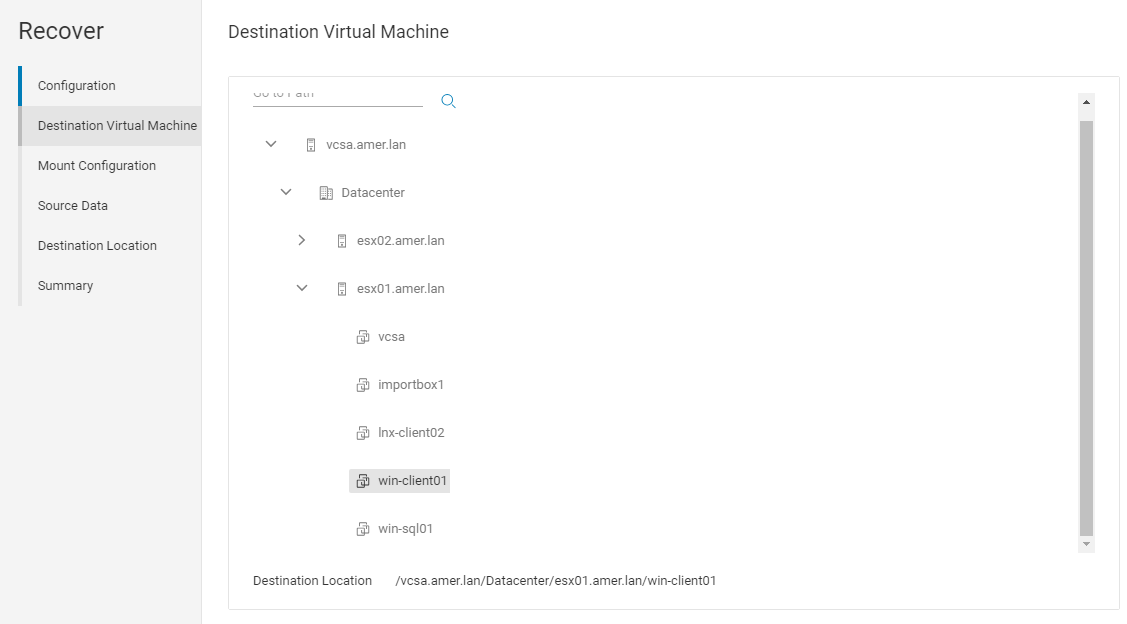
Figure 6: Manually picking a VM as target
- Click Next.
- Specify an FLR user account and password. It is recommended to use the Run with Elevated Privileges account when using a user account which may require UAC elevation (Windows) or is a nonroot sudo user account (Linux).
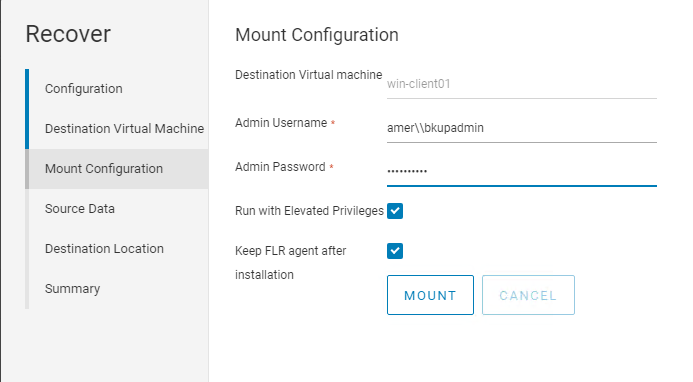
Figure 7: Specify an FLR user account to use with Run with Elevated Privileges.
- Click Mount, and monitor for mount completion status.
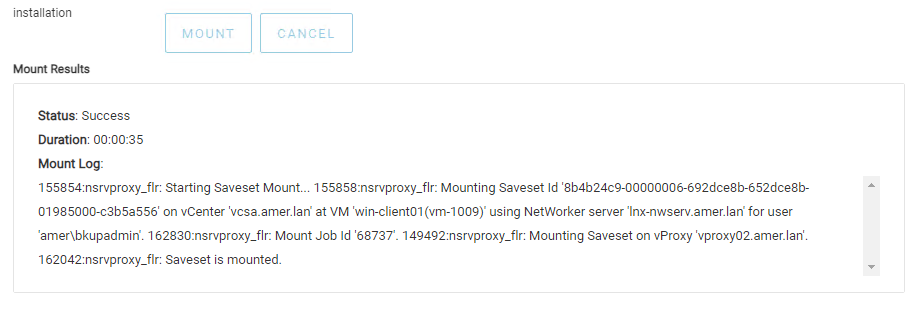
Figure 8: Monitor Mount status.
- Click Next.
- Select the source data that you must recover.
- Click Next.
- Choose a destination location to recover the data to
- Click Next.
- To start the recovery, click Finish.
- To monitor the recovery and check the completion status, go to Monitoring > Recover Jobs:
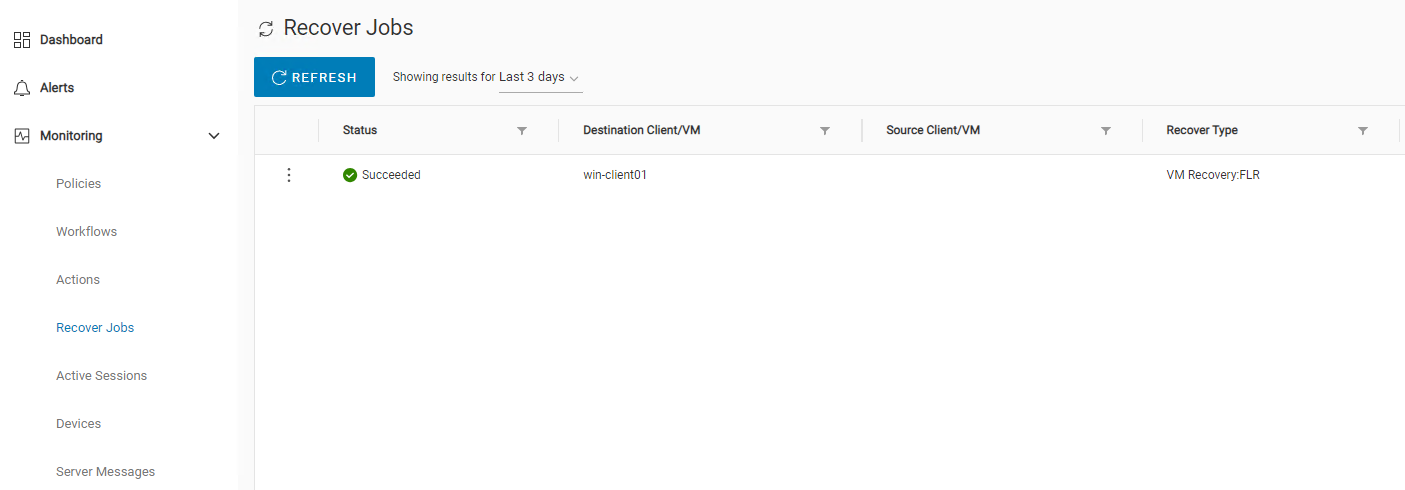
Figure 9: Check status of Recovery job.
Additional Information
- Dell article 8876 NVP: How To Perform a VM FLR Using the 'EMC Data Protection Restore Client' Web user interface
- Dell article 158482 NVP vProxy: How To Perform A File Level Recovery When FLR Is Failing or Not Supported By the VM
- Dell article 218459 NetWorker: NVP vProxy FLR user account with sudo access is unable to browse /root directory
- Dell article 10494 NetWorker Management Web UI (NWUI): How to Use
Article Properties
Affected Product
NetWorker
Product
NetWorker Family, NetWorker Series
Last Published Date
31 Oct 2023
Version
4
Article Type
How To