Article Number: 000179763
How to add a second hard drive to the Precision Tower 7910 using the LSI 9361 RAID controller
Summary: Adding a second hard drive to the Precision Tower 7910 using the LSI SAS 9361 RAID controller.
Article Content
Instructions
This article details how to add a second hard drive to the Precision Tower 7910 which has the LSI SAS 9361 RAID controller card installed.
Adding a second hard drive to the Precision Tower 7910 using the LSI SAS 9361 RAID controller
On the Precision Tower 7910 with the LSI SAS RAID 9361 RAID controller installed, you may wish to add a second hard drive for data purposes. If the Precision Tower 7910 is shipped with a virtual RAID 0 configuration, follow the steps below to add the second hard drive to the controller:
- Install the additional hard drive in an available bay in the front of the system. For instructions on installing the hard drive, reference the section on adding and removing the hard drive at the following link: Removing and installing components on the Dell Precision Tower 7910.
- Enter the LSI MegaRAID BIOS Configuration Utility by pressing Ctrl + R at boot.
 NOTE: The system will need to be in Legacy Boot Mode in order to access the LSI MegaRAID BIOS Configuration Utility. Once the changes are made, the system can be put back in UEFI mode.
- Choose PD Mgmt from the menu. The new hard drive should appear in the UG (Unconfigured - Good) State(Figure 1):
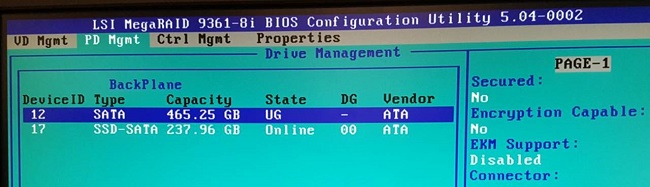
Figure 1: LSI MegaRAID BIOS PD Mgmt screen - Select VD Mgmt from the menu and press F2.
- On the Virtual Drive Management screen, select Create Virtual Drive(Figure 2):
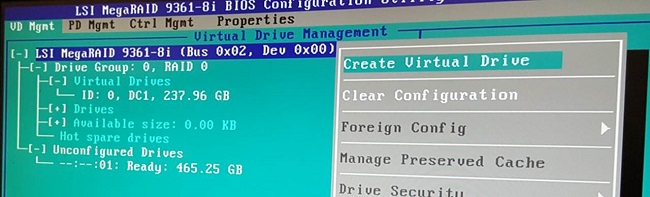
Figure 2: LSI MegaRAID BIOS Create Virtual Drive - Select the X for the new hard drive by pressing the Spacebar (Figure 3):
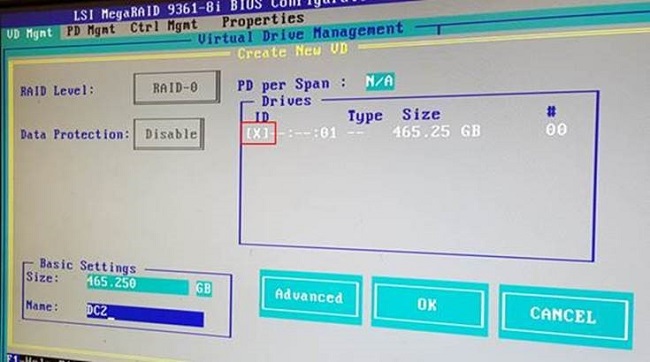
Figure 3: LSI MegaRAID BIOS Virtual Drive Management drive selection screen - Select Advanced.
- On the next screen, set the Disc cache to Enabled. Do not check Initialize Drive.
- Select the new drive under Drive Group 1, select Initialization and then Fast Init (Figure 4):
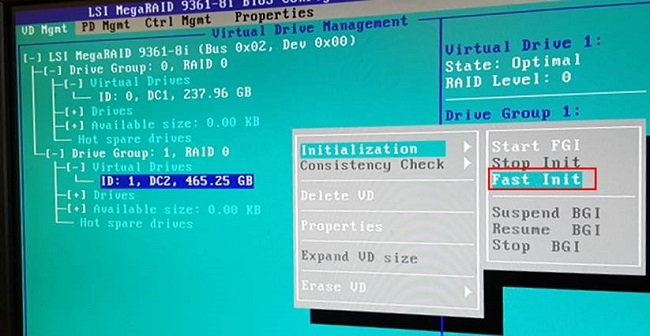
Figure 4: LSI MegaRAID Bios HDD Initialization screen - Reboot the system and look for the new hard drive in the POST screen (Figure 5):
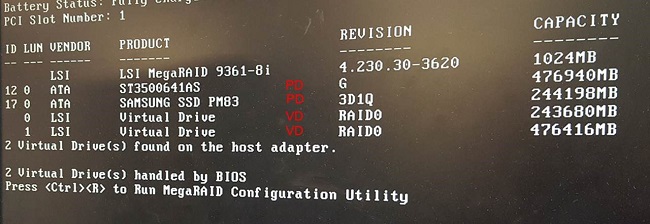
Figure 5: POST screen showing hard drives installed
Article Properties
Affected Product
Precision Tower 7910
Last Published Date
16 Feb 2024
Version
5
Article Type
How To