Article Number: 000129214
Installing Dell Laser Printers on Apple Mac Systems
Summary: Guide for installing Dell laser printers on Apple computers.
Article Content
Instructions
Note: This article is no longer being maintained or updated.
Table of Contents:
- Installing Dell Laser Printers on Apple Mac Systems
- USB Installation Steps
- IP/Network Installation Steps
- Windows Share Installation
- Installable Options
Note: Dell is aware that there are no Laser printer drivers for macOS 10.15, also known as macOS Catalina. Due to circumstances beyond our control, Dell cannot offer Laser printer drivers for macOS Catalina.
Installing Dell Laser Printers on Apple Mac Systems
This guide helps you do a basic install of our printer drivers on the MAC OS X environment. These steps were tested in the 10.4 and 10.5 environment.
- Download the driver package for the printer in question and run the file to install it. There are two options for accessing the Printer Setup Utility.
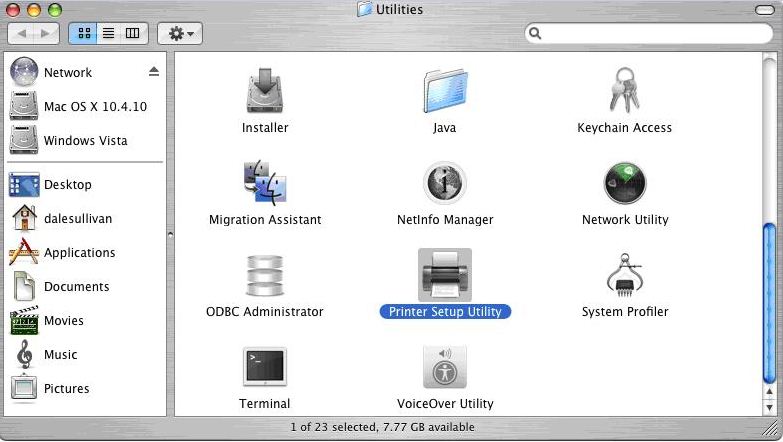
Option 1:- Open the Utilities folder by going to the Go Menu and selecting Utilities.

- Locate and open the Printer Setup Utility.
- Click Apple icon in the upper left by default, then click System Preferences.
- Locate and open the Print and Fax Icon.

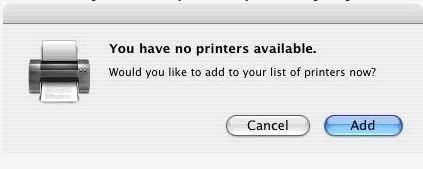
- If there are no printers already installed, you are prompted to add a new printer. Click the Add to add a new printer.
- If there are printers already installed click the +, and you can add additional printers.
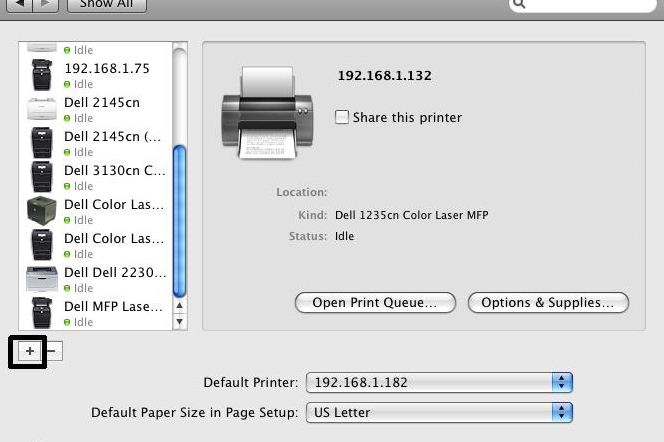
- There are three options that we support for the setup of the printer once the driver has been installed USB, IP/Network, and Windows Share.
USB Installation Steps
- Select the Default printer icon.
- The printer is polled, and the drivers previously installed are selected automatically or you can manually select the printer from the list.
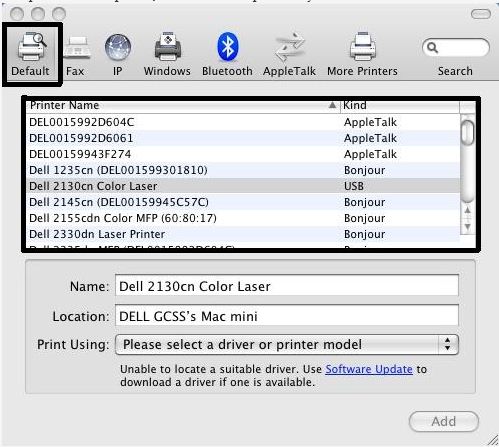
- To designate what driver to use and not based off the printer polled in the previous step, you can select the drop-down box in the Printer Using.
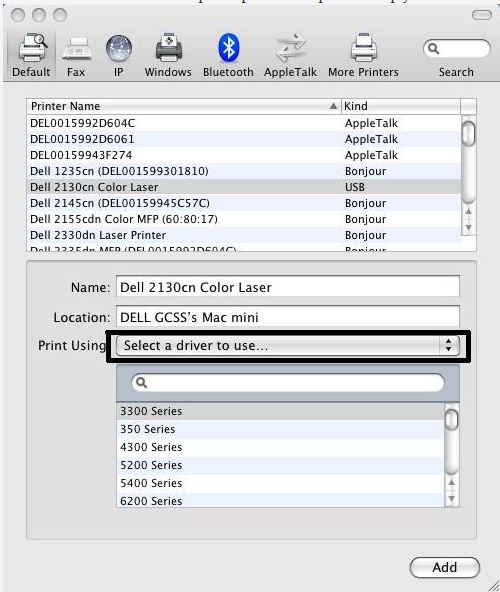
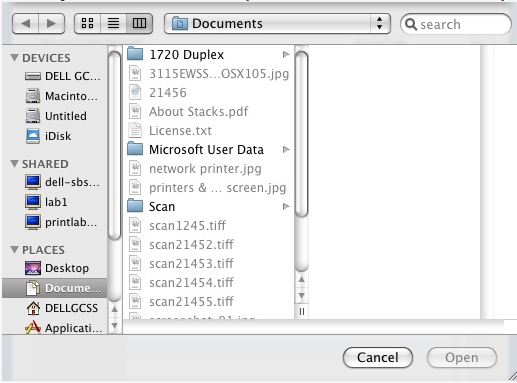
- In the drop-down list, select Other and you are taken to a new window where you can navigate to where the driver is at.
IP/Network Installation Steps
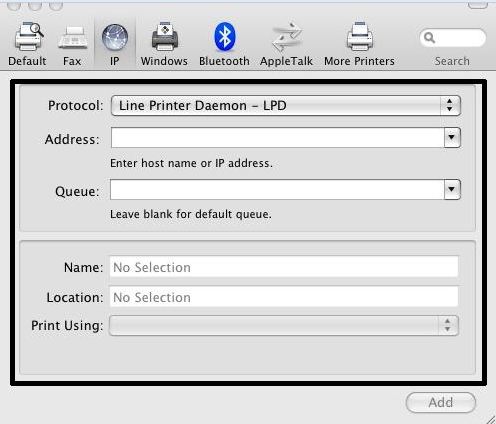
- Set the protocol to Line Printer Daemon (LPD) and then enter the Host Name or IP Address of the printer in question into the Address field. DO NOT enter anything in the Queue field.
- The Name, Location, and Print Using options are entered automatically. Click the Add to continue.
Windows Share Installation
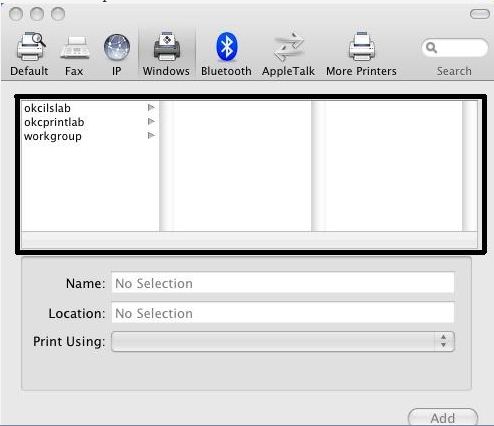
- When accessing a printer on a Windows Share, it can either be USB or a IP/Network printer.
- From the Add Printer window that we have been using for both USB and IP/Network installation select the Windows icon on the bar at the top.

- Then select the option in the boxes below that for where it is located. In this example workgroup for a Windows Share.
- It is self-explanatory for the last few steps to connect to it as they select the printer and click the Add at the bottom.
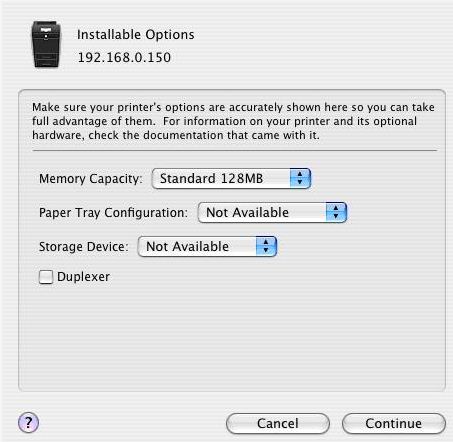
Installable Options
Note: Printer Options are not available to select on every model in a mac environment.- If there are options for the printer you are using (Duplexer, optional paper trays, memory, and so on) you are shown a screen which allows you to select the options you have installed on the printer.
- Select options installed on the printer accordingly and click Continue.
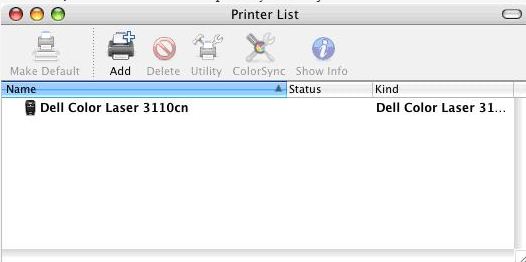
- You are returned to the Printer List and should now see the printer that you have installed in the list. Bolded text indicates that the printer in question is set as the default printer.
- Open the Utilities folder by going to the Go Menu and selecting Utilities.
Article Properties
Last Published Date
18 Apr 2024
Version
4
Article Type
How To