Cannot Log in to Windows with the XPS 7390 2-in-1 Laptop Fingerprint Reader
Summary: The following article provides information about resolving an issue with the fingerprint login not working in Windows 10 on an XPS 7390 2-in-1 laptop.
This article applies to
This article does not apply to
Symptoms
Cannot log in to Windows 10 on an XPS 7390 2-in-1 laptop using the Fingerprint scanner?
XPS 7390 2-in-1 laptop owners may experience the following issue. Attempting to log in to the Windows operating system using fingerprint identification gives an error. An on-screen error reports that the device does not recognize you.

(Figure.1 identification error)
Cause
Dells Engineering group has identified that this issue is linked to version A03 (v3.0.35.516) of the Goodix Fingerprint Sensor Driver.
Resolution
This issue is resolved with version A04 (v3.0.35.516) which was available for download October 25, 2019.
To download the driver, carry out the following steps:
-
Go to the: XPS 7390 2-in-1 Drivers & Downloads page
-
Ensure you have the correct operating system set.
-
Select the Security drop-down category.
-
Look for the Goodix Fingerprint Sensor Driver (version A04 or newer.)
-
Click on the Download button.
-
To install the driver update, follow these steps:
-
Double-click the package and select install to run the package on your laptop.

(Figure.2 Goodix Update Package)
-
A warning appears to advise that there is already a driver installed on the computer. Click Yes to overwrite that driver and finish the installation.

(Figure.3 Warning Install Error)
-
After the installation is complete, press the Win + I keys together as a shortcut to go to the settings page. Click Accounts.
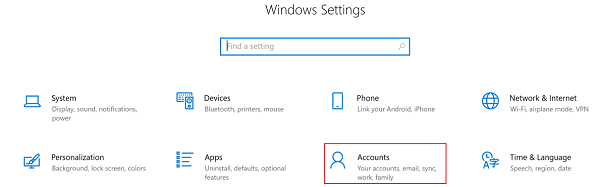
(Figure.4 Windows Settings)
-
Browse to the Sign in options and click on the Remove button under Windows Hello Fingerprint.

(Figure.5 Sign-in Options)
-
Follow the on-screen instructions and set up a new Windows Hello fingerprint account.
-
Best Practice Recommendation
Best practice for correctly using one of the combination Power Button and/or Fingerprint readers: Place your finger in the center of the button to have it recognize your fingerprint and sign in to the Windows Operating System.

(Figure.6 Correct Fingerprint Usage)
Additional Information
Other Links:
If you are experiencing a different fingerprint issue, then try the following link for further help:
Affected Products
XPS 13 7390 2-in-1Article Properties
Article Number: 000138062
Article Type: Solution
Last Modified: 05 Oct 2023
Version: 8
Find answers to your questions from other Dell users
Support Services
Check if your device is covered by Support Services.