Article Number: 000201100
How to Resolve a 077-900 and 077-901 Paper Jam Error Code on the 1250c, 1355cn, 1355cnw, C1660w, C1760nw, C1765nf, C1765nfw, E525w Dell Laser Printers
Summary: This article provides information about 077-900 and 077-901 Error Codes on Dell Printer models E525w, C1660w, C1760nw, C1765nf, C1765nfw, 1250c, 1355cn, and 1355cnw.
Article Content
Instructions
Caution: Any conditions that require inspection or troubleshooting near the printer’s fuser must be done so with care. During the normal printing process, the fuser body and internals become heated. This heat is normal, but care should be taken in this area to not touch the fuser body or internals.
Note: Due to the sensitive nature of the transfer belt; care should be taken when troubleshooting at the rear of the printer. When clearing paper jammed in the printing path, contact may occur. This can result in light markings on the printed documents which can be cleared by performing an extended print job with light print coverage.
Note: It is recommended that only Dell Branded toner, drums, transfer rollers, or other consumables are used in our laser printers. Dell cannot guarantee compatibility or the print quality of any third-party consumables.
- Inspect the front panel display for the paper jam error code. Take note of this six-digit number (i.e. 077-9XX) as separate steps are required to clear the paper jam.
- Power off the printer.
- Remove the paper tray (E525w only) or paper from 1250, 1355, C1660, C1760, C1765 (Figure 1).
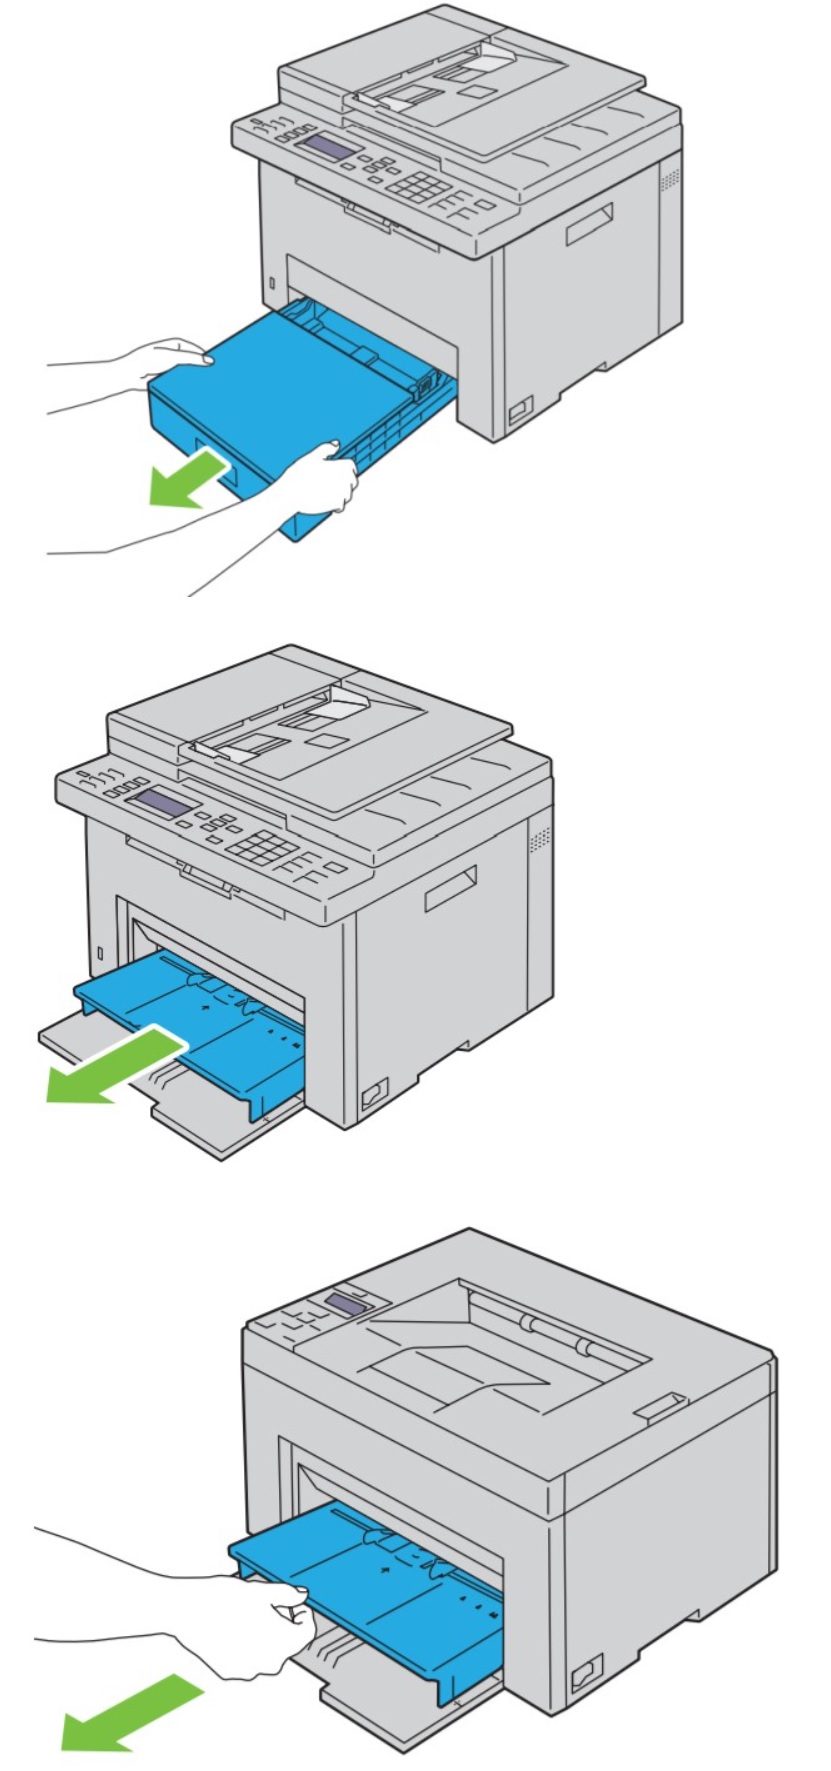
Figure 1: Remove paper tray - Inspect the paper tray cavity or MPF cavity for partially fed paper.
- If partially fed paper is found, carefully remove it by grasping both left and right edges of the paper. Pulling slowly out towards the front of the printer (Figure 2)
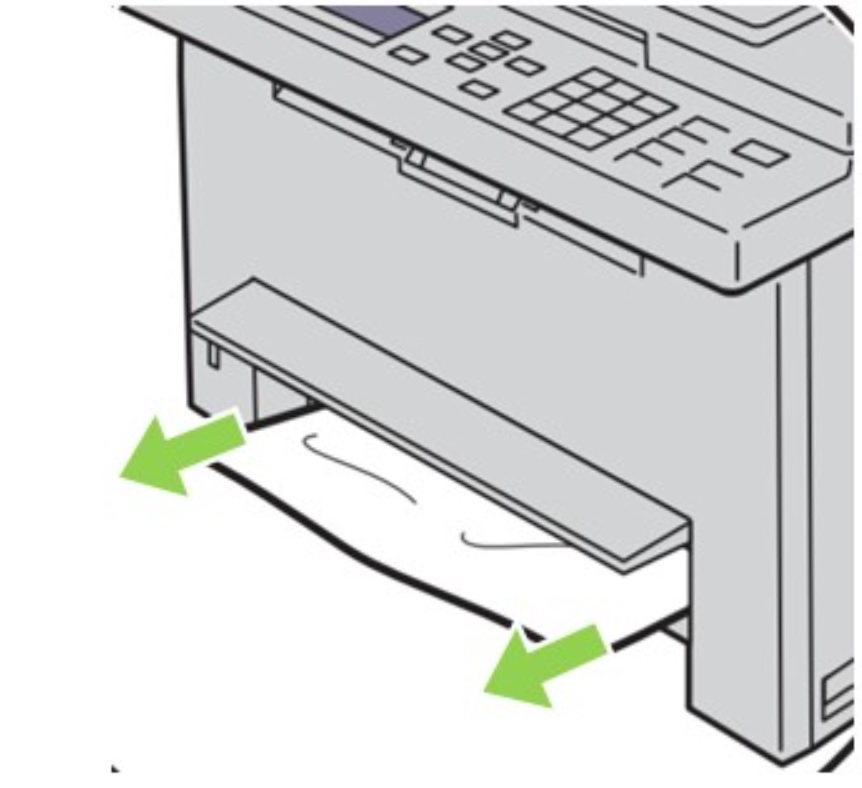
Figure 2: Partially fed paper - Power on the printer and check for error. If error is cleared, then normal printing may continue. If jam error message remains, continue to step 7.
- Power off printer and unplug from the wall power outlet.
- Push the rear cover release handle and open the rear cover (Figure 3).
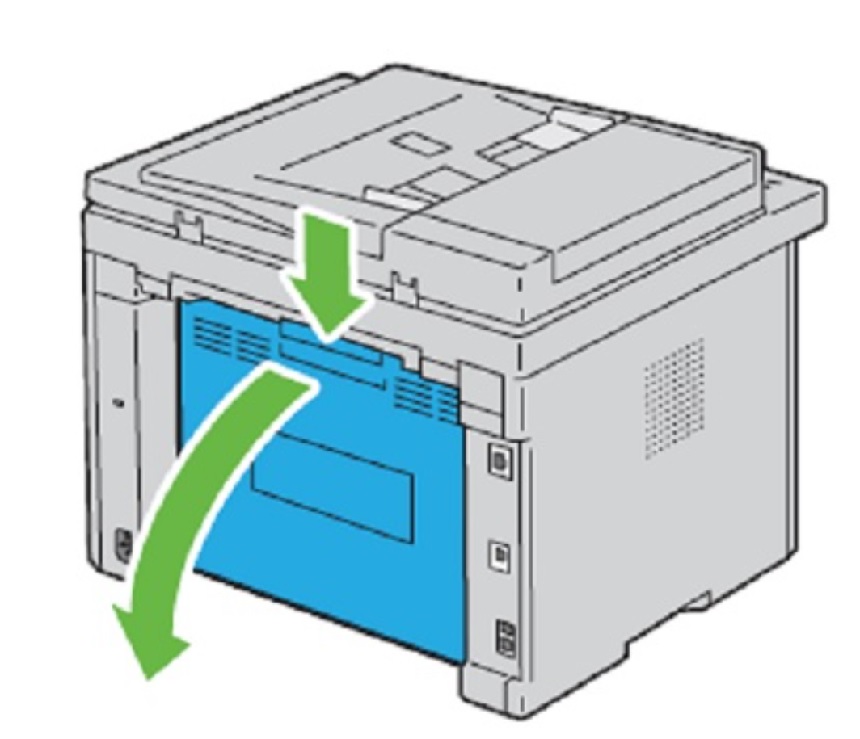
Figure 3: Rear cover release handle remove rear cover - Release pressure on the fuser rollers by lifting on the blue tabs that are located on the upper right and left behind the rear cover (Figure 4).
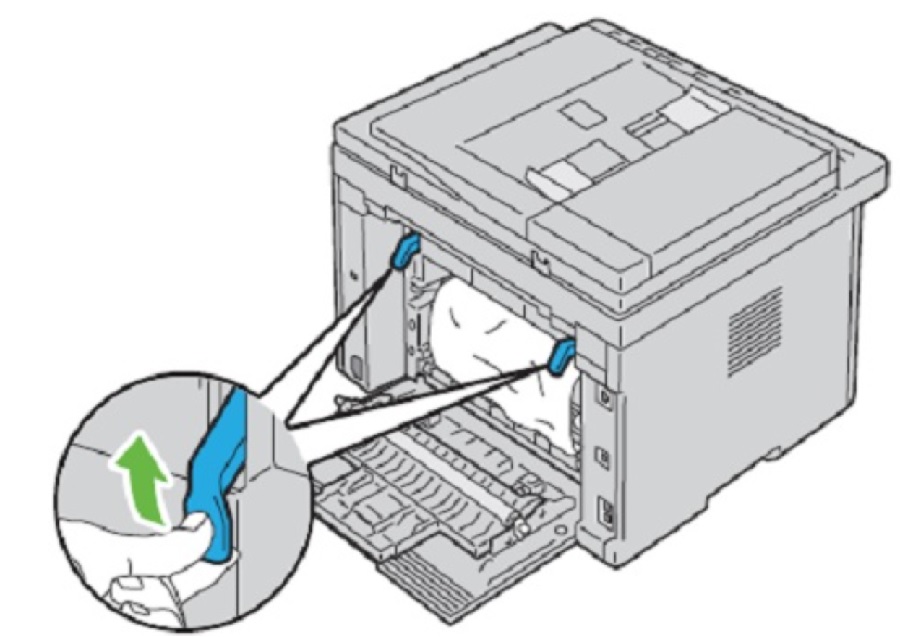
Figure 4: Fuser roller tabs - Using the six-digit error code information displayed on the panel from step 1, follow the paper removal steps.
- 077-901
- Take hold of the paper by the far right and left edges. Slowly but firmly pull the paper up towards the top of the unit taking care not to come in contact with the transfer belt.
- Go to step 13.
Warning: Do not jerk or pull paper from the printer in a fast action. Doing can cause damage to the Regi sensor and feed rollers. At no time should excessive pressure be applied to the feed rollers or the lower chute (Figure 5).

Figure 5: Regi sensor and feed rollers
- 077-900
- Inspect the rear of the printer for jammed paper.
- Carefully and slowly pull the paper from the outer edges evenly down away from the fuser (Figure 6).
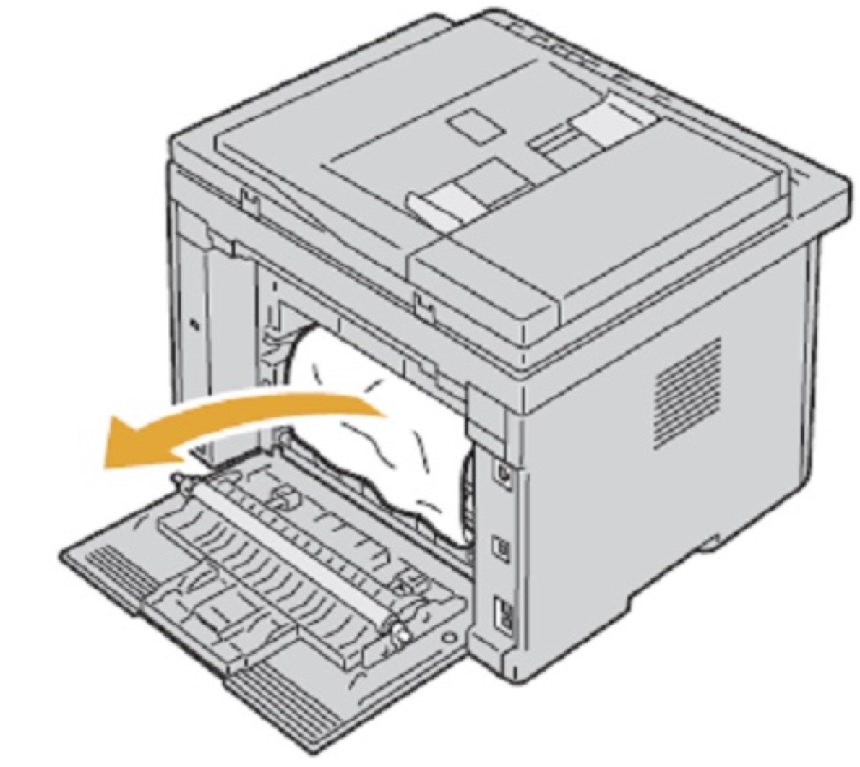
Figure 6: Rear paper jam - Once the paper is free of the fuser, remove it buy lifting the paper up towards the top of the printer.
Warning: Do not jerk or pull paper from the printer in a fast action. Doing can cause damage to the Regi sensor and feed rollers. At no time should excessive pressure be applied to the feed rollers or the lower chute (Figure 7).
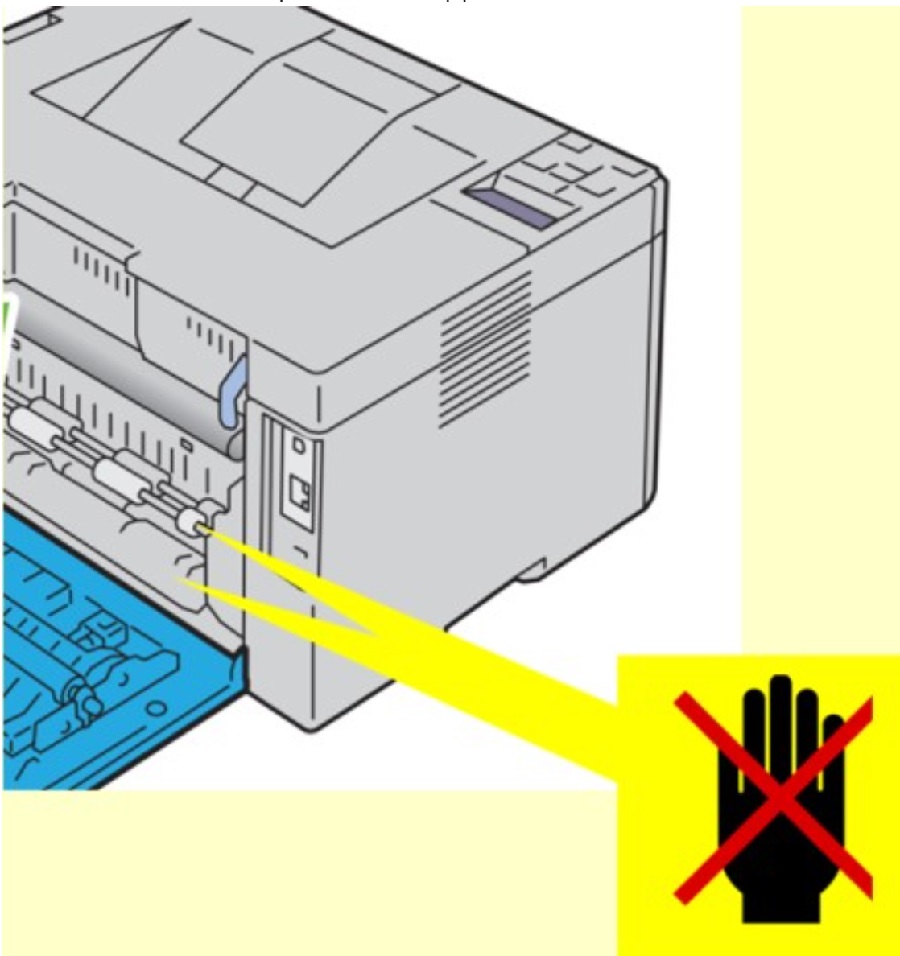 Figure 7: Regi sensor and feed rollers
- Inspect the output tray for any remaining paper in the path (Figure 8). (For 1355/C1765/E525 lift the Scanner output tray.)
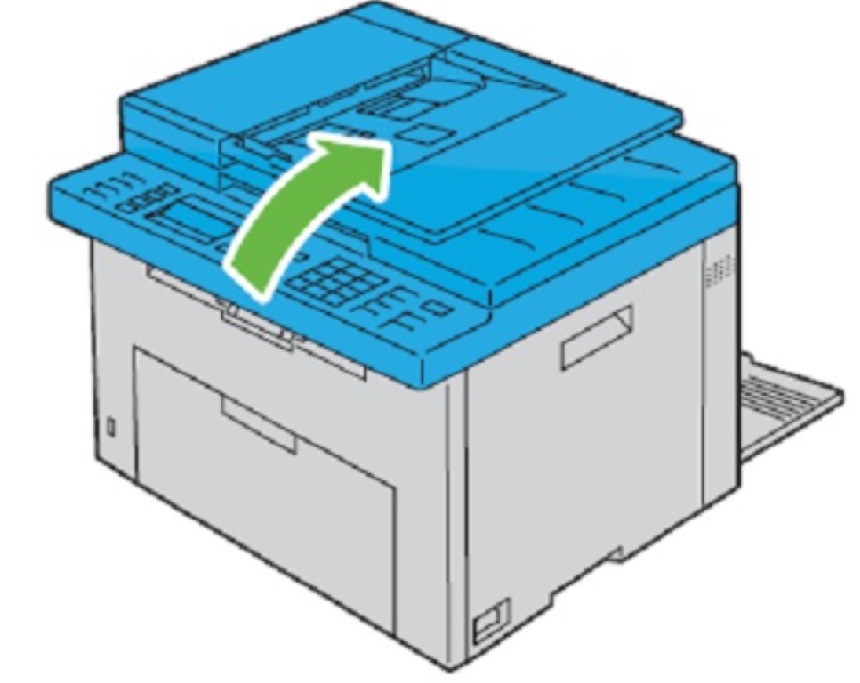
Figure 8: Output tray - Remove any paper jammed out of the output tray (Figure 9).
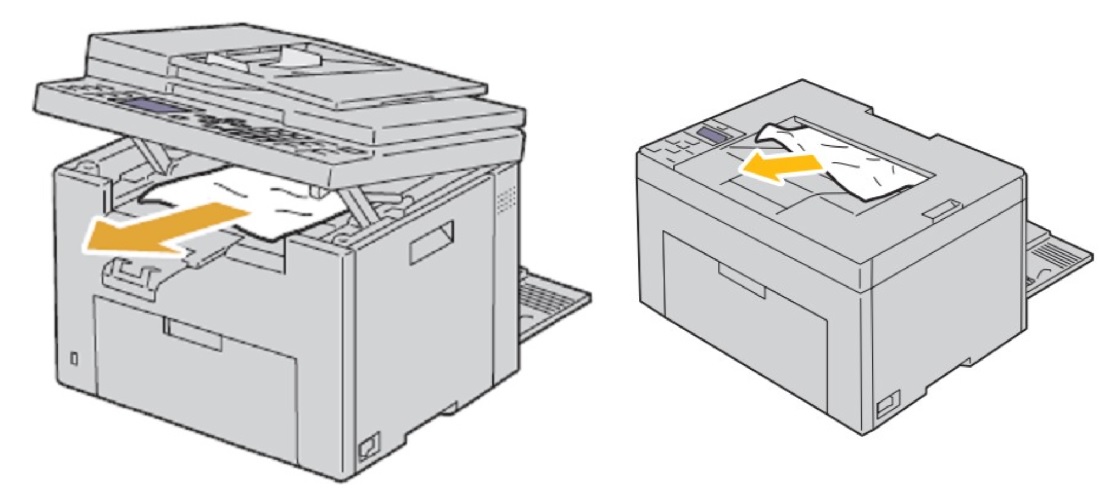
Figure 9: Remove paper jammed in output tray - Lower and close the scanner unit (Figure 10). (Only 1355/C1765/E525)
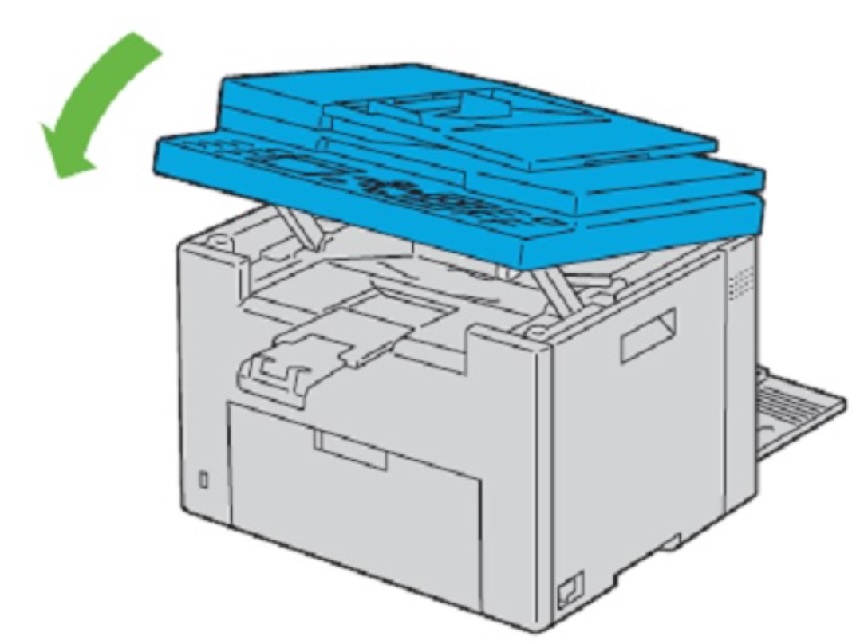
Figure 10: Scanner unit only on 1355, C1765, and E525 printers
- 077-901
- Lower the blue fuser pressure release tabs at the rear of the printer back to their original position.
- Close the rear cover (Figure 11).
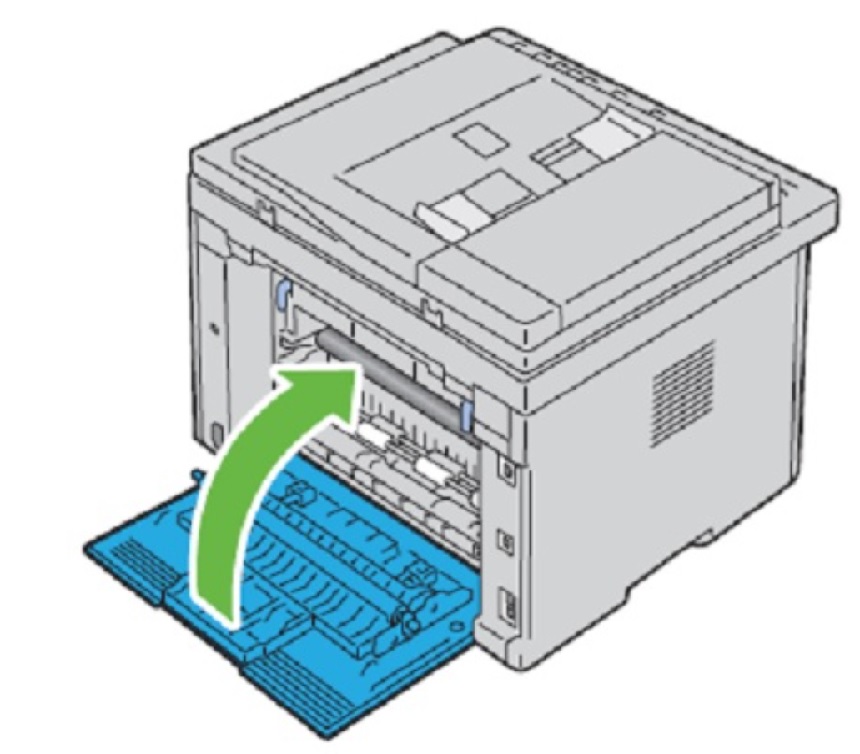
Figure 11: Close rear cover - Close the rear cover.
- Plug the printer back into the outlet.
- Power the printer back on.
- Load 1 sheet into the paper tray.
- Perform a paper purge.
- For models 1250/C1660/C1760, hold the cancel button for 5 seconds until the paper is pulled through the printer.
- For models 1355/C1765/E525, hold the "AC" button for 5 seconds until the paper is pulled through the printer.
- For model E525w, hold the "Cancel" button for 5 seconds until the paper is pulled through the printer.
- Print a test page document.
Article Properties
Affected Product
Dell 1250c Color Laser Printer, Dell 1355cn/cnw Color Laser Printer, Dell C1660W Color Laser Printer, Dell C1760NW Color Laser Printer, Dell C1765NF MFP Laser Printer, Dell C1765NFW MFP Laser Printer, Dell E525w Color Multifunction Printer
Last Published Date
30 Nov 2022
Version
3
Article Type
How To