Dell Alienware 920H Tri-Mode Wireless (AW920H) Gaming Headset Usage and Troubleshooting Guide
Summary: The following article provides information about the Dell Alienware 920H Tri-Mode Wireless (AW920H). You can reference each section to learn more about the features of the Dell AW920H and how to use it. ...
Instructions
Table of Contents:
- What is in the Alienware 920H Tri-Mode Wireless box
- Alienware 920H Tri-Mode Wireless Features
- Setting up your Alienware 920H Tri-Mode Wireless
- Using the headset
- Troubleshooting
- Additional Information
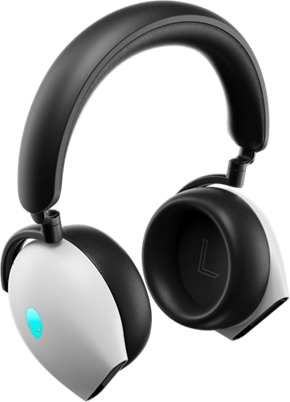
Figure 1: Work faster and smarter with the Dell AW920H
What is in the Alienware 920H Tri-Mode Wireless box
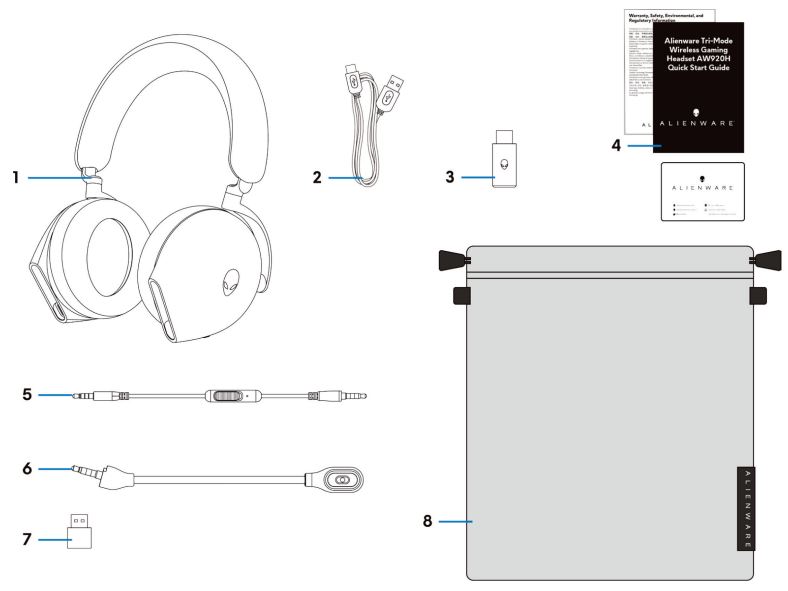
Figure 2: Dell Alienware 920H Tri-Mode Wireless Box Contents
| 1 | Alienware Tri-Mode Wireless Gaming Headset AW920H | 2 | USB-A to USB-C charging cable |
| 3 | USB wireless dongle | 4 | Documents |
| 5 | 3.5 mm inline audio cable | 6 | Detachable boom microphone |
| 7 | USB-A to USB-C adapter | 8 | Soft carry pouch |
Dell Alienware 920H Tri-Mode Wireless Features
Headset
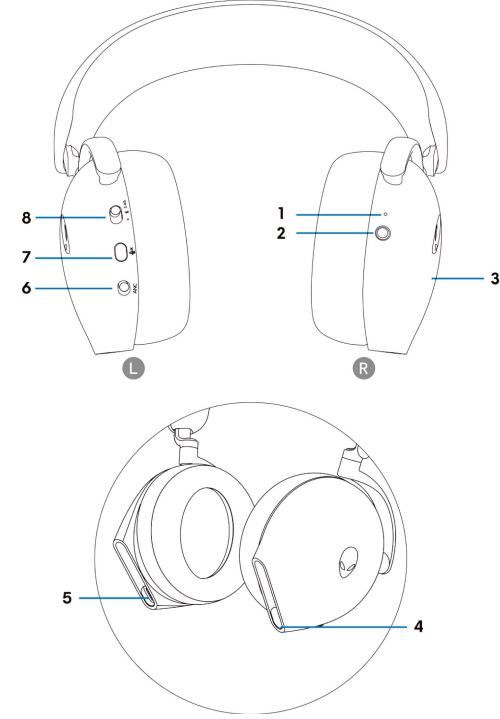
Figure 3: Alienware 920H Tri-Mode Wireless headset
| 1 | Indicator LED | 2 | Power button |
| 3 | Headset touch control area | 4 | Port for Inline audio cable and Boom microphone |
| 5 | USB-C Charging port | 6 | Automatic Noise Cancellation (ANC) On / Off slider |
| 7 | Microphone mute button | 8 | Slider switch for 2.4 GHz, Bluetooth, and Bluetooth pairing |
Accessories
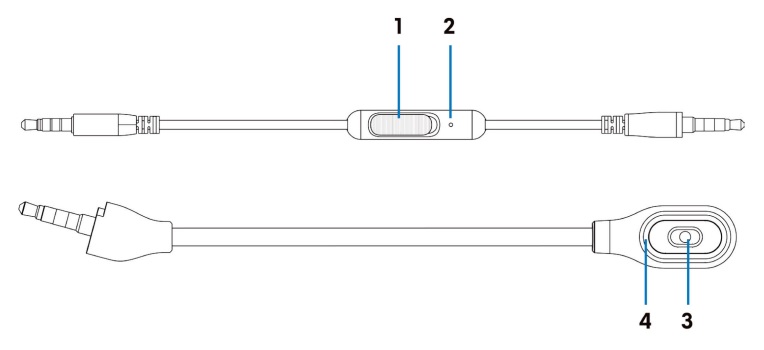
Figure 4: Alienware 920H Tri-Mode Wireless accessories
| 1 | Microphones mute slider | 2 | Microphone |
| 3 | Microphone | 4 | Microphone mute LED |
Charging the headset
To charge the headset, use the USB-A to USB-C cable:
- Connect USB-C end of the cable to the headset.
- Connect USB-A end of the cable to the computer.
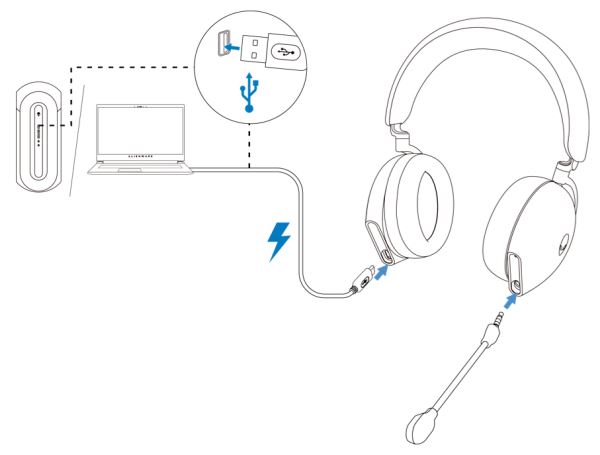
Figure 5: Charging Alienware 920H Tri-Mode Wireless
Battery Status
The complete charging of the battery may take less than 2.5 hours. When the headset is turned off and charging, the LED light and Alienhead logo indicate the battery status.
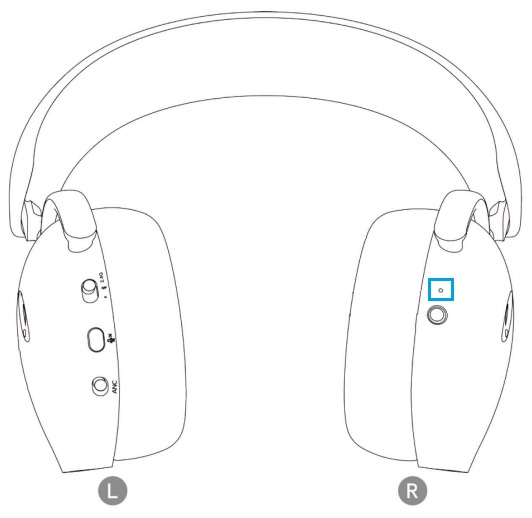
Figure 6: Battery status LED
| Green | Fully charged | Power LED and Alienhead logo lights stay green. |
| Blinking Green and Amber | Charging | Power on: LED light and Alienhead logo changes between amber and green for 12 seconds, then goes to previous lighting effect. Power off: Light changes between amber and green. |
| Blinking Amber | Battery less than 20% | Power LED: LED light slowly blinks in amber. Alienhead logo: Light fast blinks in amber for 5 seconds, then go dark for 15 seconds. This cycle repeats until the battery is dead. |
The headset automatically turns off after 30 minutes when;
- USB wireless dongle connection is lost.
- Bluetooth is not connected.
- The connected computer is turned off.
- Thee USB wireless dongle is removed from the USB port.
To turn the headset on, press the Power button for two seconds.
Setting up your Alienware 920H Tri-Mode Wireless
System requirements
- One USB port for USB wireless dongle
- One USB port for charging (optional)
- Microsoft Windows 11 or Windows 10 64-bit, Mobile, PS4, or XboxOne
Inserting the boom microphone
Insert the boom microphone firmly into the boom microphone port of the headset when connected using wireless dongle or Bluetooth.
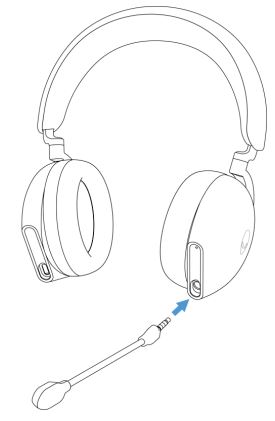
Figure 7: Detachable Boom microphone
Connecting the headset to your device using the USB wireless dongle
- Plug the USB wireless dongle into the USB-A to USB-C adapter, and then connect the adapter to the USB port on your computer.
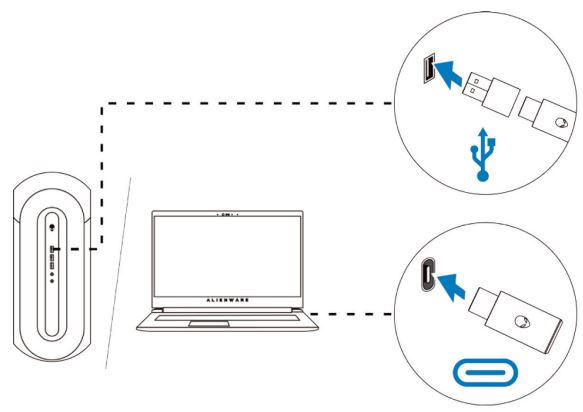
Figure 8: Plug the USB wireless dongle - Slide the pairing switch slider on the headset to 2.4 GHz mode. The headset and the USB wireless dongle are pre-paired.
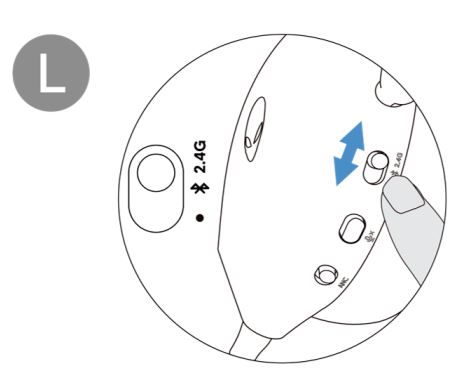
Figure 9: Switch the slider on the headset to 2.4 GHz mode - The LED lights up white when connected.
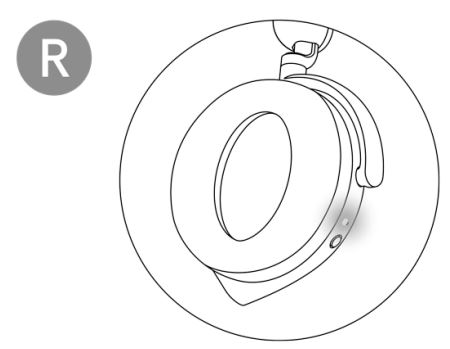
Figure 10: White LED when connected
Connecting the headset to your device using Bluetooth
- Turn on the Bluetooth in your computer before connecting the headset using Bluetooth.
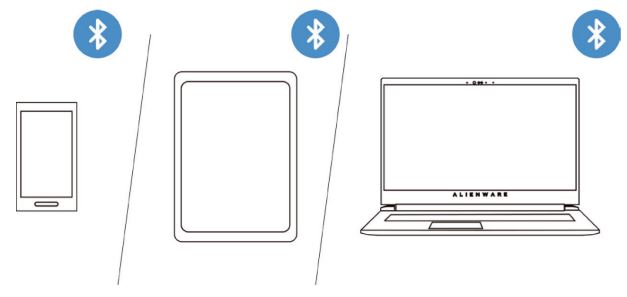
Figure 11: Turn on the Bluetooth on your computer - Slide the pairing switch slider to the bottom for two seconds. When you see that the blue light blinks, the pairing mode is on.

Figure 12: Turn on Bluetooth pairing - Connect the headset to a computer, laptop, smartphone, or tablet and so on. The LED lights up blue when connected.
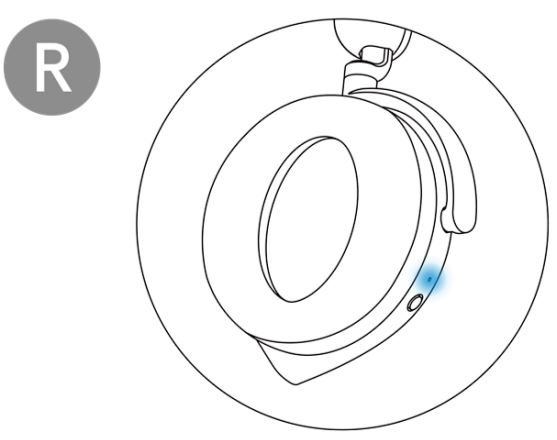
Figure 13: The LED lights up blue when connected through Bluetooth
Connecting the headset to your device using the Inline audio cable
- Connect one end of the 3.5 mm inline audio cable to the boom microphone port on your headset.
- Connect the other end to the audio or headset port on your computer or mobile device.
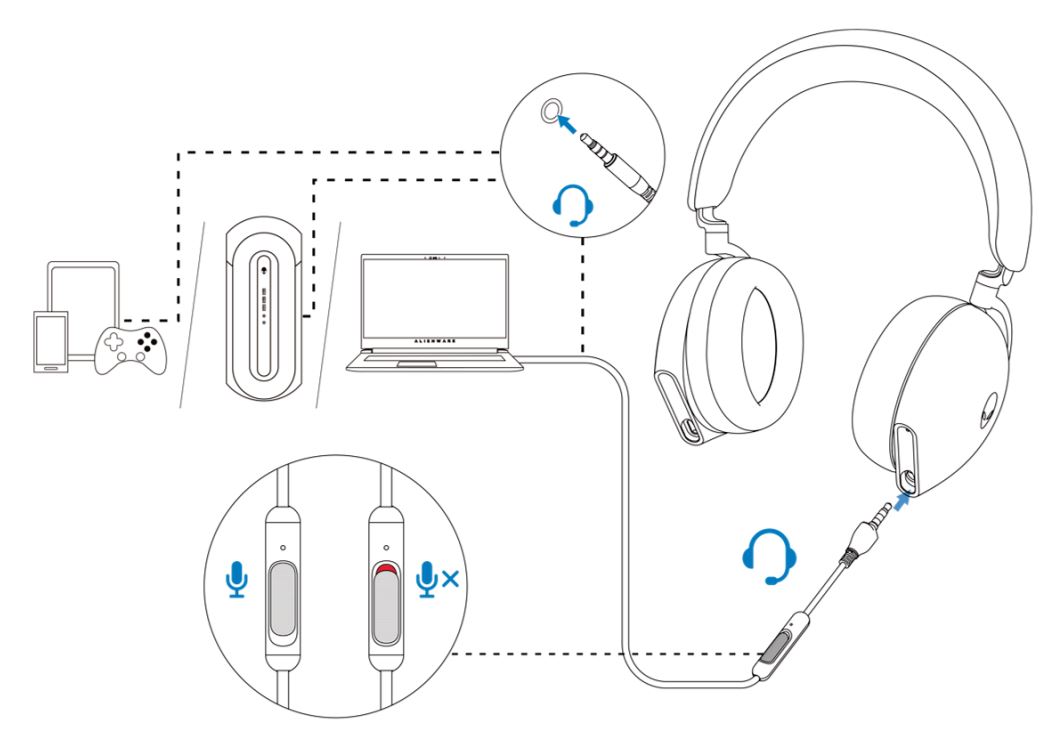
Figure 14: Connecting the headset to your device using the Inline audio cable
- The headset speakers and the microphone on the cable continue to work even when the headset is turned off, as long as the headset is connected to a 3.5 mm inline audio cable. However, the buttons and LEDs stop functioning if the headset is turned off.
- While using the 3.5 mm inline audio cable, the audio source is provided only by the Inline cable. The 2.4G mode and the Bluetooth mode still continue to work even after removing the audio cable.
- When using the 3.5 mm inline audio cable, the headset is compatible with any device with an audio jack port like mobile, XboxOne, and PS4.
For more information, see Dell Knowledge Base article Alienware Headset Does Not Work When Connected Using 3.5 mm Cable.
Using the headset
Adjusting the headset
Adjust the headband and ear pads to find the optimal fit for your head. When using boom microphone, position it approximately two centimeters away from your mouth.
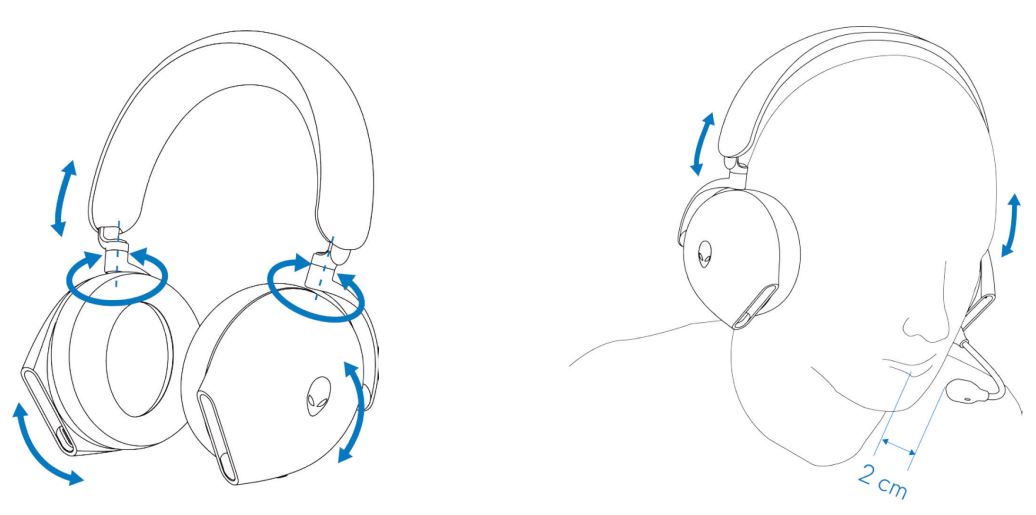
Figure 15: Adjust the headband and ear pads
The ear cups can be rotated to wear the headset around the neck comfortably, or for easier storage.
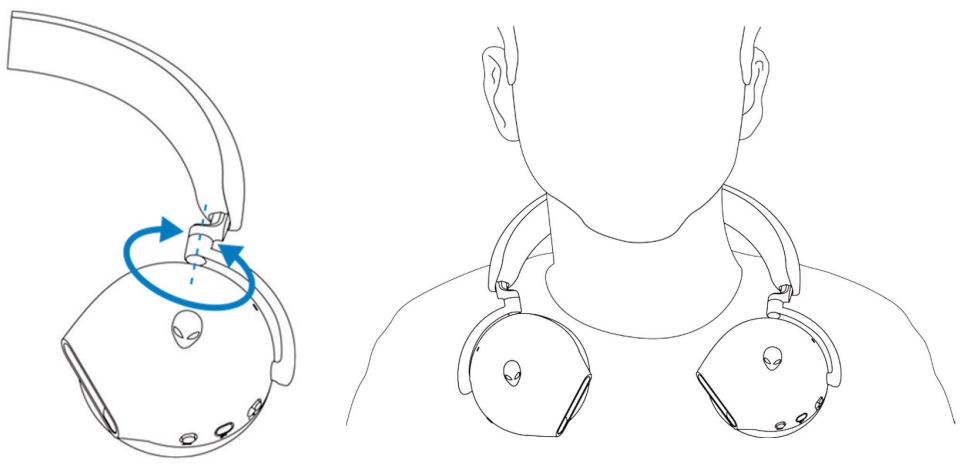
Figure 16: Rotating the ear cups
Troubleshooting
| Problems | Possible solutions |
|---|---|
| Headset has no sound. |
|
| The person on the other end cannot hear me. |
|
| Abnormal sound is coming out of the headset. |
|
| Unbalanced sound in the headset | Check that the computer volume balance is set correctly.
|
| Headset lights do not light up. |
|
| Wireless range is too short. |
|
| Microphone picks up too much background noise. |
|
| Microphone mute is not working when connected with an inline audio cable. |
|
| Alienware command center does not recognize the headset. |
|
Additional Information
Learn how to use and troubleshoot problems with the AW920H. You can find information about Troubleshooting steps, How-To guides, and relevant Support Videos for assistance.
For the Alienware Tri-Mode Wireless Gaming Headset User Guide, go to the Dell Alienware Tri-Mode Wireless Gaming Headset Documentation. Then click View PDF to the right of the Alienware Tri-Mode Wireless Gaming Headset AW920H User Guide, located in the Manuals and Documents section.
For more information, see these Dell Knowledge Base articles: