Guide to Disk Cloning with SupportAssist OS Recovery
Summary: Learn how to clone a hard drive using Dell SupportAssist OS Recovery v5.5.1 and later, if there is hardware upgrades, disaster recovery, or computer replacements.
This article applies to
This article does not apply to
This article is not tied to any specific product.
Not all product versions are identified in this article.
Instructions
Affected Products:
- Dell SupportAssist OS Recovery
Affected Versions:
- v5.5.1 and later
Dell SupportAssist OS Recovery v5.5.1 and later supports Disk Cloning functionality. Disk cloning is the process of creating a one-for-one copy of a hard drive or solid state drive (SSD).
Note: For versioning information, reference How to Identify the Dell SupportAssist OS Recovery Version.
Disk cloning may be needed during:
- Hardware upgrade
- Disaster Recovery
- Computer replacement
Requirements to use disk cloning:
- The primary drive must be bootable into Windows.
- BitLocker must be disabled.
- Secondary hard drive, SSD, or USB drive with greater disk space as the original hard drive or SSD
- A power adapter is connected for the entire process.
Warning: If the computer shuts down during the cloning progress, the process must be restarted.
Note: For more information about BitLocker, reference How to Enable or Disable BitLocker with TPM in Windows.
To create a disk clone:
- On boot, hold the F12.
- In the One-Time Boot Settings menu, click SupportAssist OS Recovery.
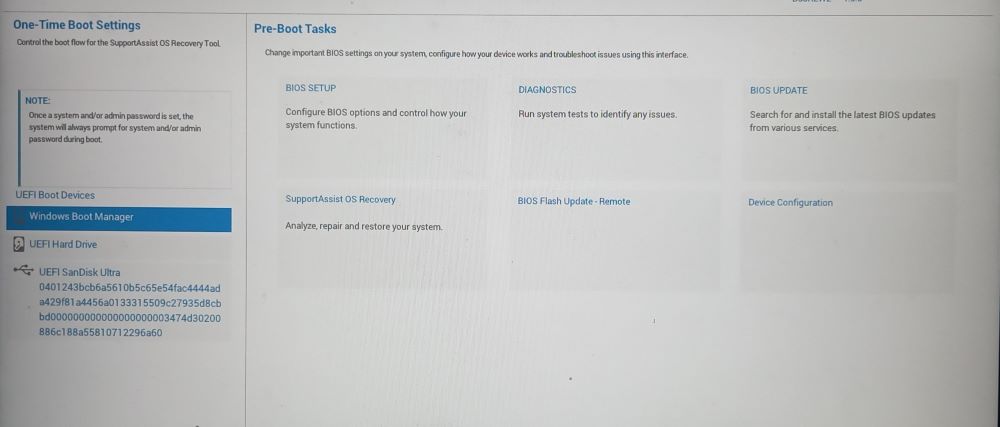
Figure 1: (English Only) One-Time Boot Settings menu
- Click Back Up Files / Disk Cloning.
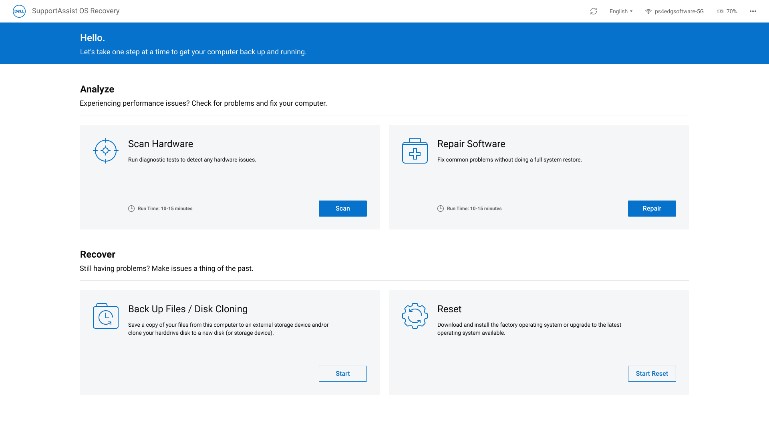
Figure 2: (English Only) SupportAssist OS Recovery
- Select Disk Cloning and then click Next.
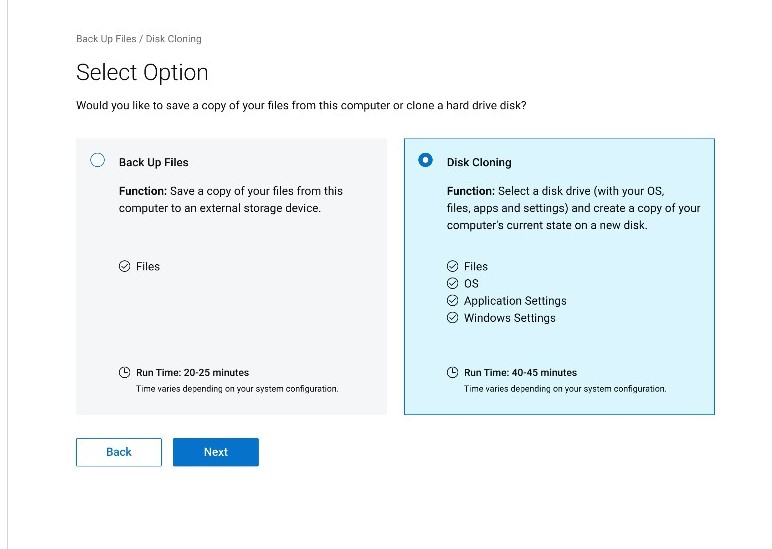
Figure 3: (English Only) Disk Cloning
- Select and then click Next for one of the following options:
- Hard drive that is already installed
- This option should be selected when cloning an internal hard drive or SDD to a secondary internal computer hard drive or SDD.
- Hard drive in a USB housing
- This option should be selected when cloning an internal hard drive to an external USB enclosure that contains a hard drive or SDD.
- USB storage device
- This option should be selected when cloning from an internal hard drive or SDD to an external USB drive.
- Hard drive that is already installed
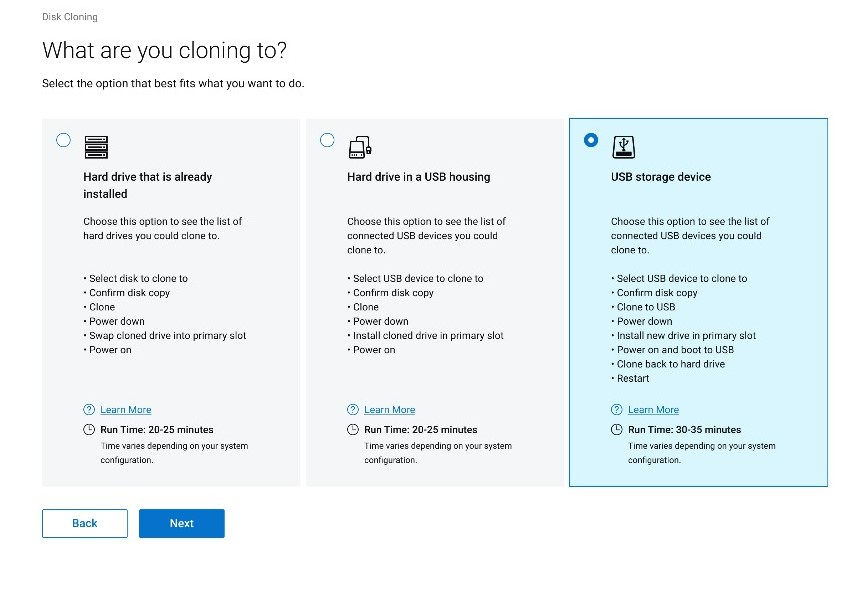
Figure 4: (English Only) What are you cloning to
- Select the appropriate destination drive and then click Next.
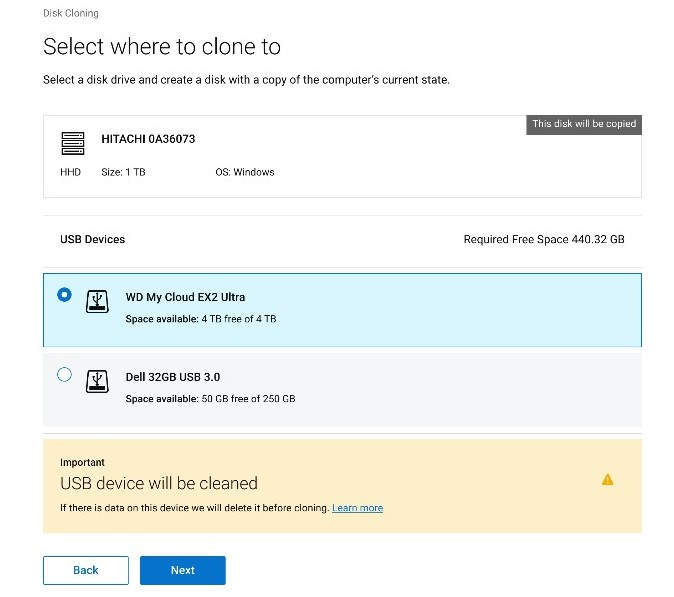
Figure 5: (English Only) Select where to clone to
Caution: Any data on the destination drive will be lost. This action cannot be reversed.
- Click Next to confirm disk cloning.

Figure 6: (English Only) Your disk copy was a success, continue the cloning process
- Once the cloning process is complete, click Continue to turn off the computer.
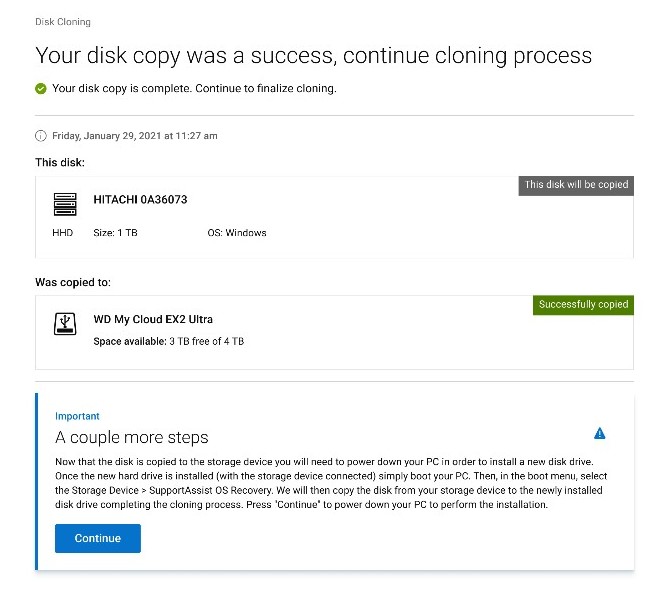
Figure 7: (English Only) Continue the cloning process.
Note: If a Hard drive that is already installed was selected (Step 5) go to step 9.
- On shutdown, swap the old hard drive or SDD with the replacement drive.
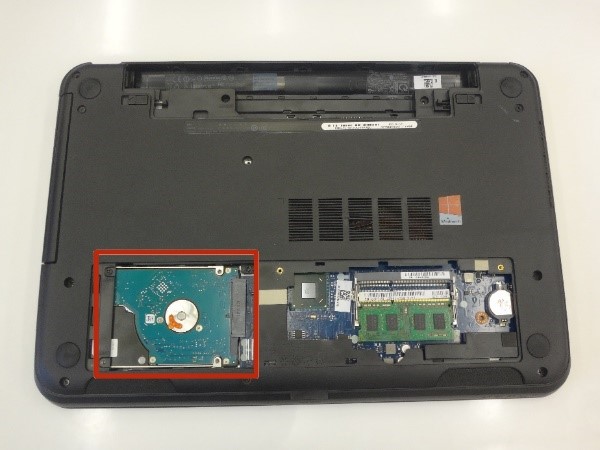
Figure 8: Hard drive location
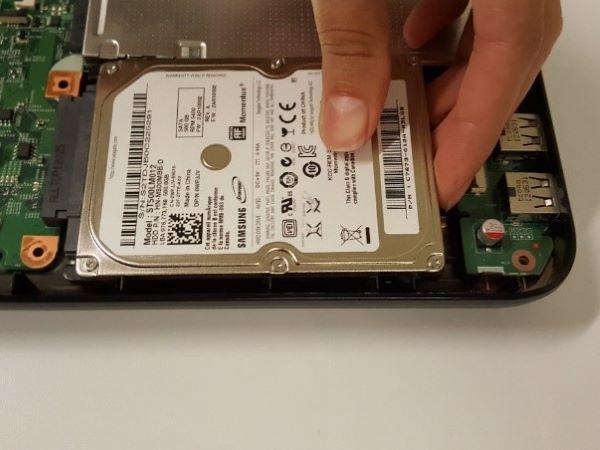
Figure 9: Replace hard drive
Warning: Dell Technical Support provides replacement drives. Third-party drives may void your hardware warranty.
Note: The hard drive locations in the figures may differ on your computer. Consult your hardware manual for the specific location.
- Ensure the cloned drive (step 6) is connected and then turn on the computer while pressing F12 to access the one-time boot menu.
- Select the cloned drive and then press Enter.

Figure 10: (English Only) One-Time Boot menu
Note:
- The example screenshot reflects USB DISK 2.0 being the cloned drive.
- This drive name may differ in your environment.
- If a Hard drive that is already installed was selected (Step 5) no further action is required.
- On SupportAssist OS Recovery launch, click Okay.
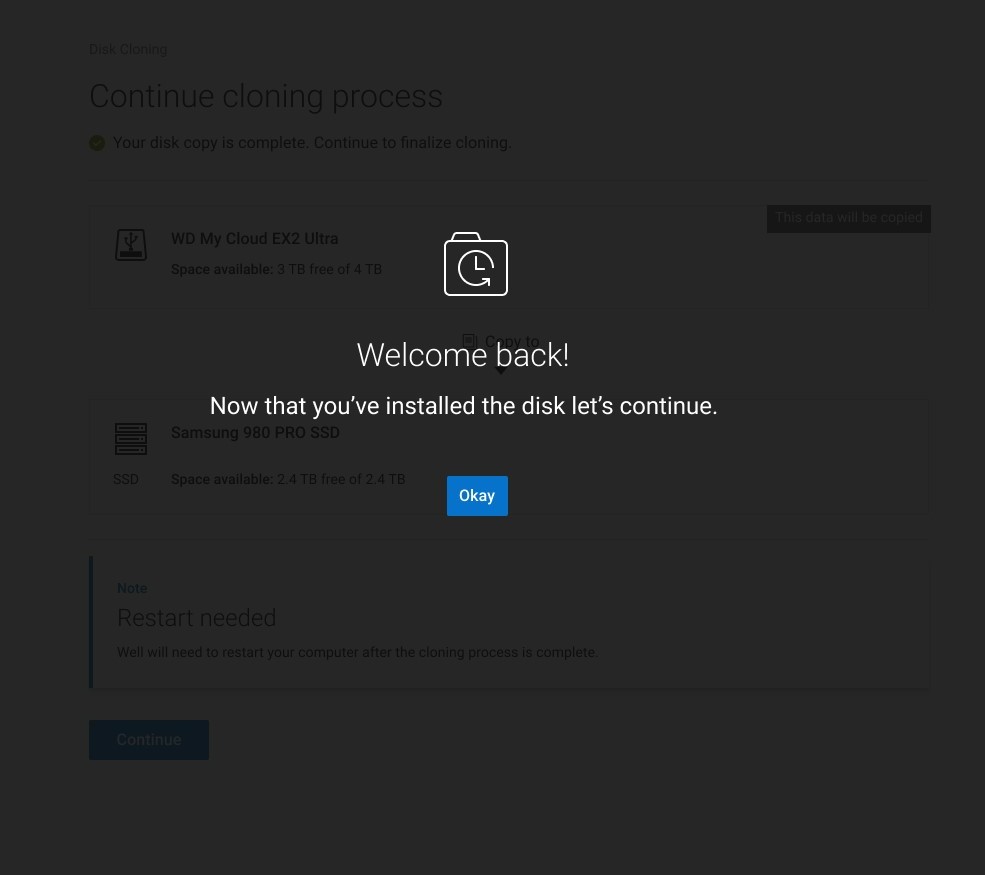
Figure 11: (English Only) Welcome back!
- Click Continue to clone the destination drive (step 6) to the replacement drive (step 8).
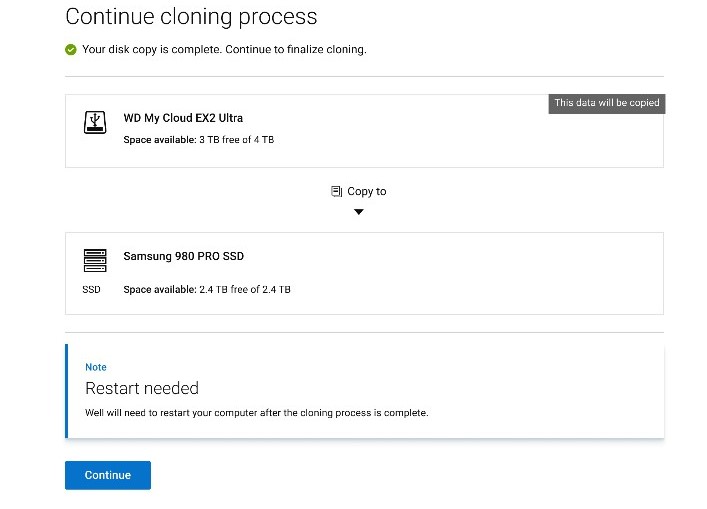
Figure 12: (English Only) Continue cloning process
- On success, click Continue to boot from the newly installed primary drive.
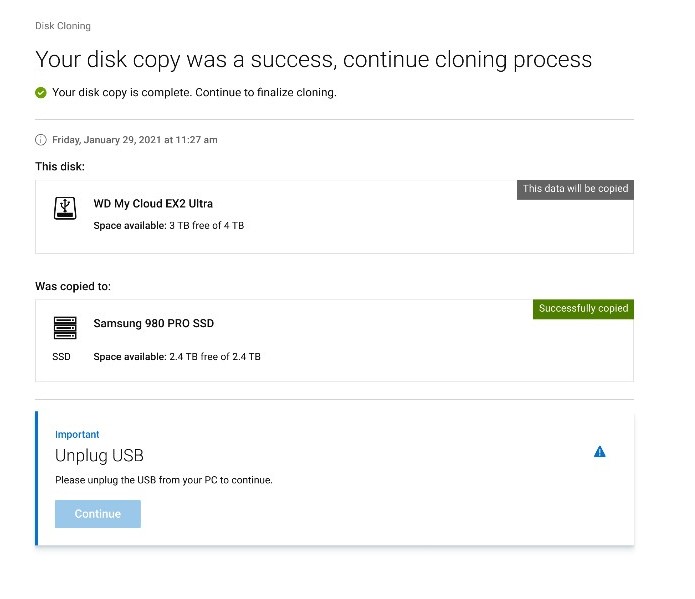
Figure 13: (English Only) Unplug USB
Note: BitLocker can be reenabled if it was disabled as part of cloning requirements.
See these Dell Knowledge Base articles for related information:
Affected Products
SupportAssist OS RecoveryArticle Properties
Article Number: 000197685
Article Type: How To
Last Modified: 07 Feb 2025
Version: 12
Find answers to your questions from other Dell users
Support Services
Check if your device is covered by Support Services.