文章編號: 000131368
Dell Security Management Server Virtual Accessing the Postgres Database Using pgAdmin
摘要: In order to change the database of a Dell Security Management Server Virtual (formerly Dell Data Protection | Virtual Edition), you have to access postgres. This can be done in command line, but third-party tools such as pgAdmin can provide a better experience. ...
文章內容
症狀
Affected Products:
- Dell Security Management Server Virtual
- Dell Data Protection | Virtual Edition
原因
Not Applicable
解析度
To access the database:
- Set a password.
- Allow remote access.
Note: These options can be found within the advanced configuration menu of the Dell Security Management Server Virtual console.
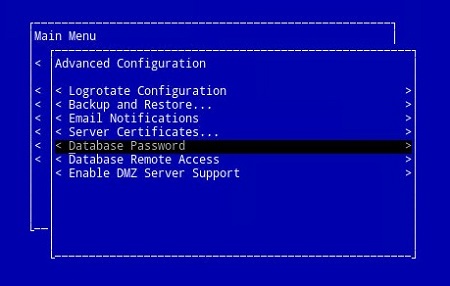
Figure 1: (English Only) Select Database Password
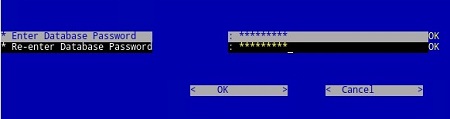
Figure 2: (English Only) Update Database Password
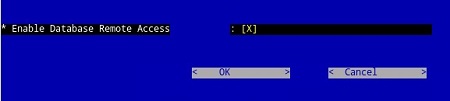
Figure 3: (English Only) Enable Database Remote Access
- Now that access is configured, launch pgAdmin. From the drop-down menu, select File > Add Server….
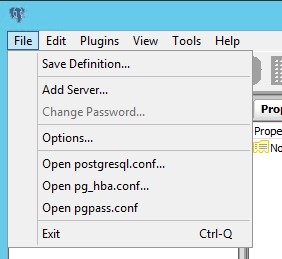
Figure 4: (English Only) Click Add Server
- Populate the necessary fields in the New Server Registration screen:
- Name: The friendly name for the server you would like to appear in the pgAdmin console.
- Host: The hostname or IP address of the Dell Data Protection | Virtual Edition server
- Port: The port number for accessing the database (It is 5432 by default and should be pre-populated.)
- Username:
ddp_admin - Password: The password that was entered in the database password field of the Dell Data Protection | Virtual Edition server console.
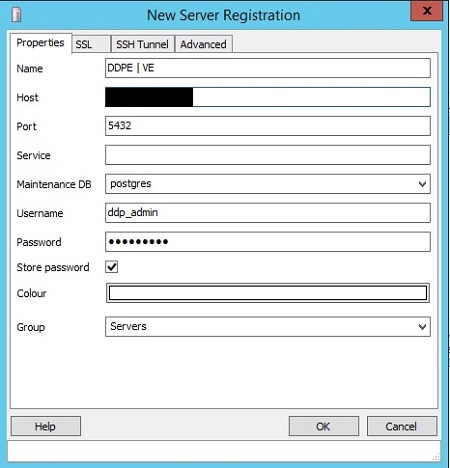
Figure 5: (English Only) Populate the fields in the new server Registration screen
- Once that information is entered, press OK to complete the addition of the server to the pgAdmin console.

Figure 6: (English Only) Expand Servers to verify that your server is listed
- Select ddp_8_2_0 and the red X should disappear, and a SQL icon should become available:
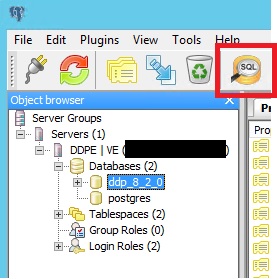
Figure 7: (English Only) SQL icon
- Click that icon to bring up a query window:
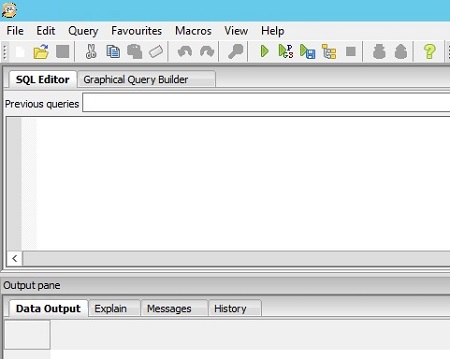
Figure 8: (English Only) Open the Graphical Query Builder
- Now that access is configured, open pgAdmin. From the drop-down menus select Object > Create> Server:
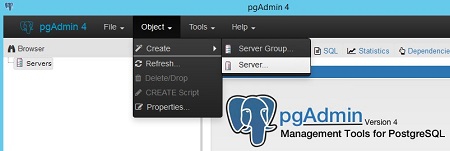
Figure 9: (English Only) Click Server
- Give the Server a name (this is how it appears in your pgAdmin browser):
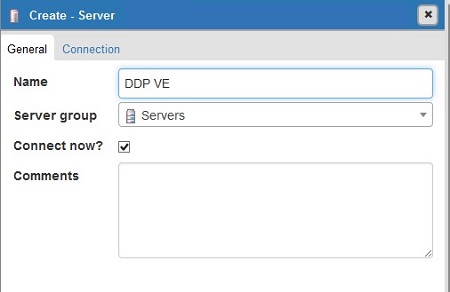
Figure 10: (English Only) Update Server Name
- Click the connection tab. Enter the following fields:
- Host: The hostname or IP address of the Dell Data Protection | Virtual Edition server
- Port: The port number for accessing the database (It is 5432 by default and should be pre-populated.)
- Username:
ddp_admin - Password: The password that was entered in the database password field of the Dell Data Protection | Virtual Edition server console.
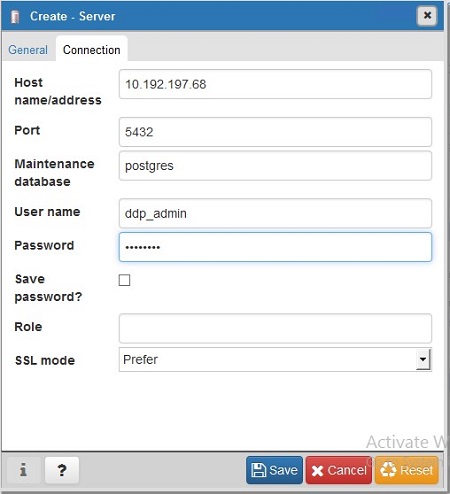
Figure 11: (English Only) Update the Create - Server fields
- Open your server and go to the ddp database:
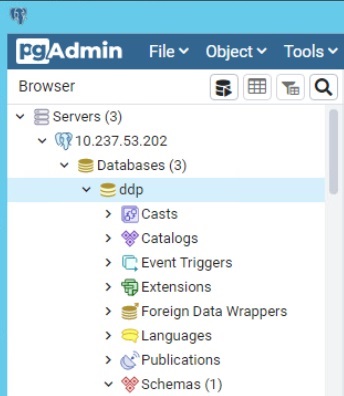
Figure 12: (English Only) Open ddp
- Right Click on the database and select Query Tool…:
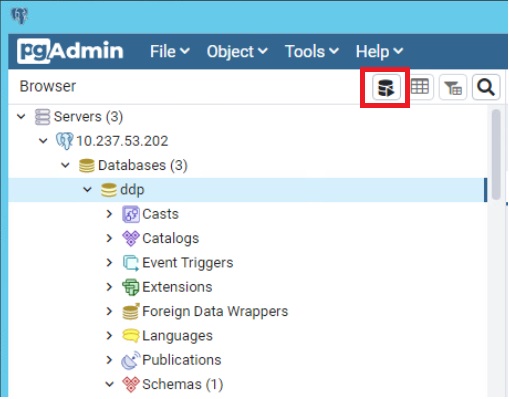
Figure 13: (English Only) Click Query Tool…
This brings up the query window:
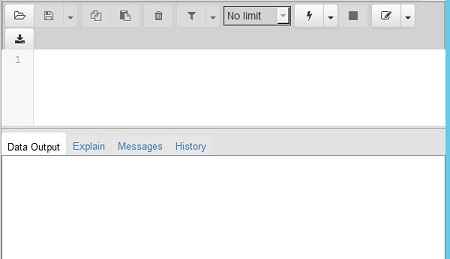
Figure 14: (English Only) Query Window
To contact support, reference Dell Data Security International Support Phone Numbers.
Go to TechDirect to generate a technical support request online.
For additional insights and resources, join the Dell Security Community Forum.
文章屬性
受影響的產品
Dell Encryption
上次發佈日期
03 8月 2023
版本
10
文章類型
Solution