文章編號: 000129321
How to Configure the Dell Data Security Server Administration Console
摘要: Initial configuration of the Dell Data Security (formerly Dell Data Protection) server administration console may be performed by following these instructions.
文章內容
症狀
The Dell Data Security (formerly Dell Data Protection) server administration console must be configured before managing endpoints.
Affected Products:
- Dell Security Management Server
- Dell Data Protection | Enterprise Edition
- Dell Security Management Server Virtual
- Dell Data Protection | Virtual Edition
Affected Versions:
- v8.0.0 and later
原因
Not applicable
解析度
The instructions to configure the Dell Data Security server administration console differ between:
Click the appropriate Dell Data Security server version for appropriate administration console configurations. For versioning information, reference How to Identify the Dell Data Security / Dell Data Protection Server Version.
v11.0.0 and Later
After installation, an administrator may configure Domain Access, Administrator Rights, Volume Entitlements, Services Management, and Initial Policies. Click the appropriate task for more information.
- Sign in to the Dell Data Security administration console.

Note: For more information, reference How to Access the Dell Data Security Server Administration Console.
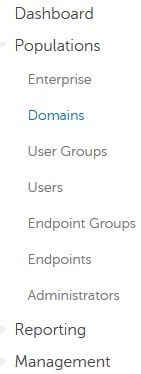
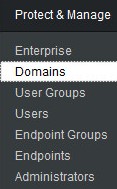
- From the left menu pane, click Populations, and then Domains.
- Click Add.

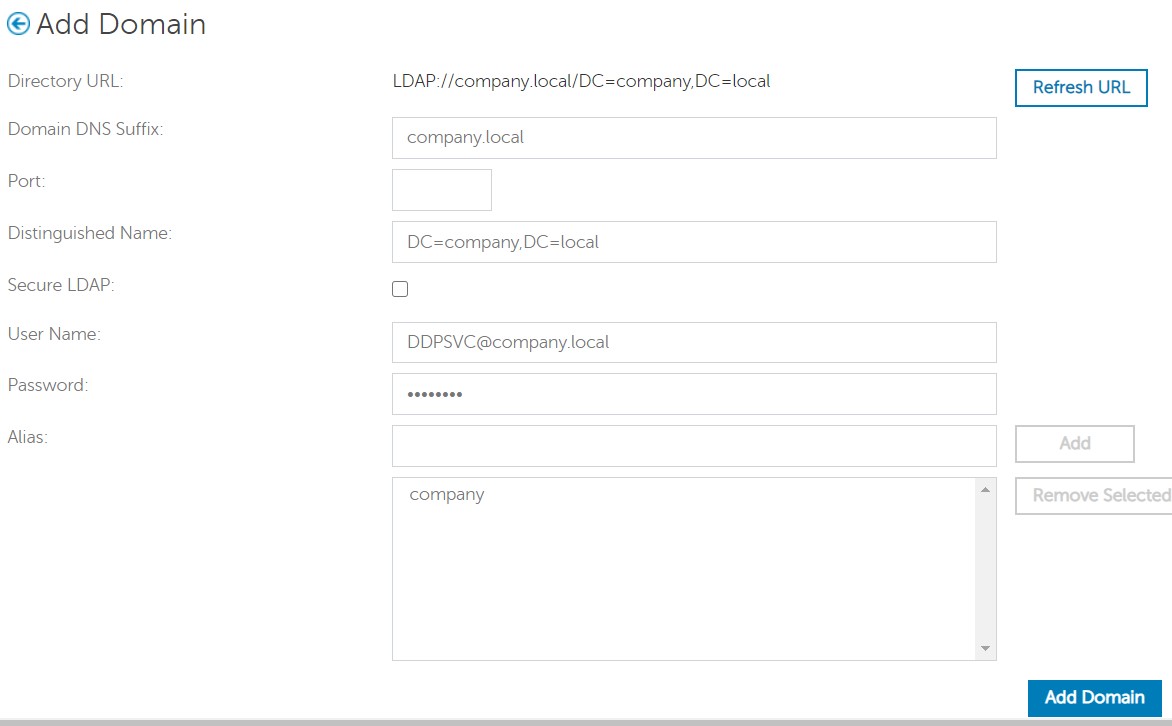
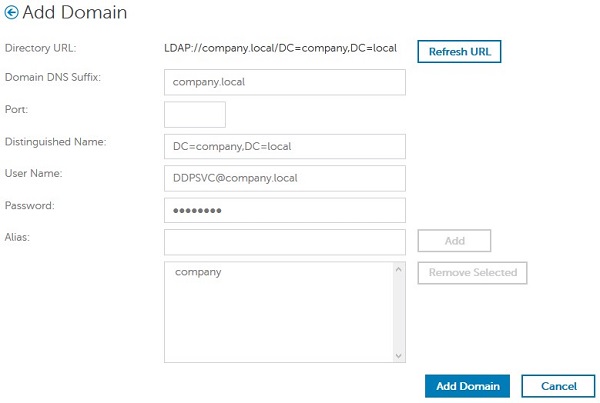
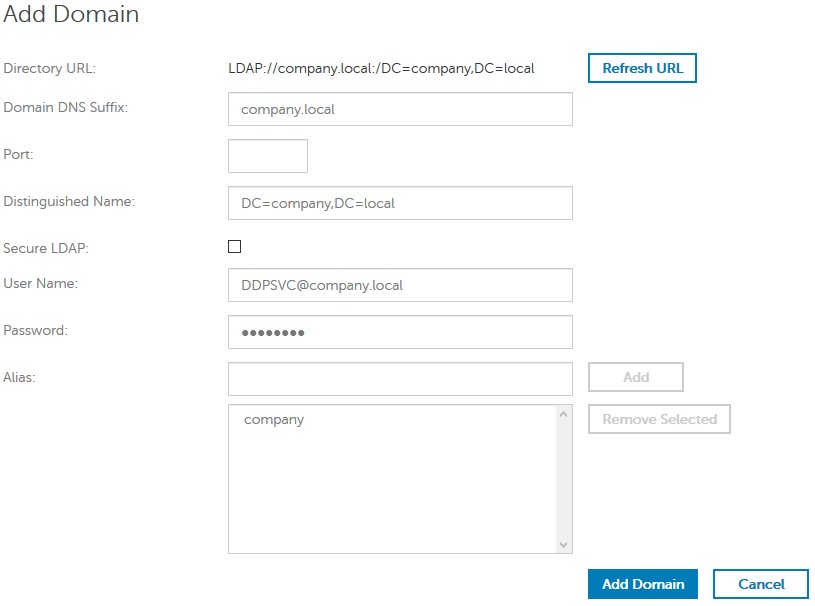
- From the Add Domain menu:
- Populate the Domain DNS Suffix.
- Optionally, populate a port.
- Optionally, click to enable Secure LDAP.
- Populate a username and password of a domain service account.
- Optionally, populate domain aliases and click Add after each alias.
- Click Add Domain.

Note:
- Port 389 is used if left unpopulated.
- The Distinguished Name is populated automatically after clicking away from the Host Name field.
- The examples that are used in the screenshot will differ in your environment.
- Password-less authentication supports configuration for Active Directory Federation Services (AD FS) and Azure Active Directory connections for credential validation. For more information, reference How to Configure Dell Encryption Enterprise to Authenticate with Windows Hello.
Dell Technologies recommends assigning appropriate privileges to each individual administrator to create an audit trail on access, data key requests, and policy changes.
- Sign in to the Dell Data Security administration console.

Note: For more information, reference How to Access the Dell Data Security Server Administration Console.
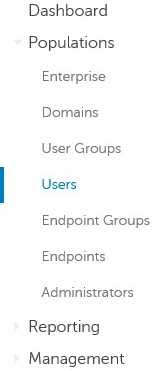
- From the left menu pane, click Populations, and then Users.
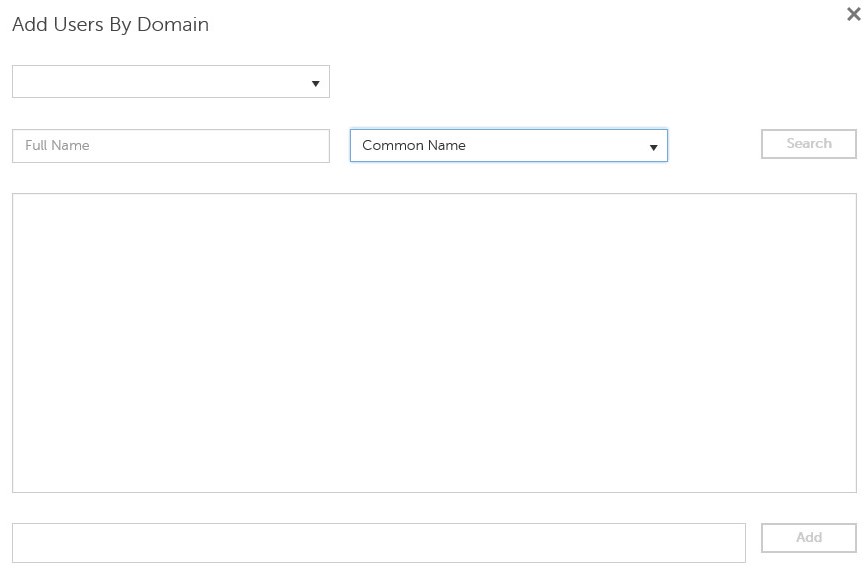
- Click the Add Users By Domain button.

- From the Add Users By Domain menu:
- Select the domain in the top drop-down menu.
- Populate the Full Name of the active directory account to be added.
- Select either Common Name, Universal Principal Name, or sAM Account Name to search by.
- Click Search.
- Click the account in the search results.
- Click Add.
Note:
- If searching by Universal Principal Name, the full account name must be populated.
- For example: Jane_Doe@Dell.com
- A wildcard (*) symbol may be used in searching instead of populating a full name.
- For example:
Jan*
- For example:
- In the bottom right, click the refresh button.

- Click the newly added account in the list.
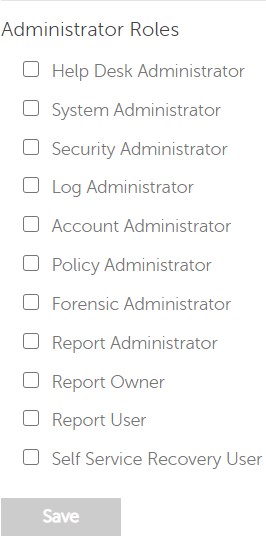
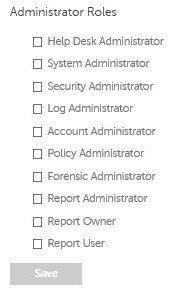
- Click the Admin tab.

- Check all wanted administrator roles, and then click Save.

Note: For more information about the functions each role allows, click the question mark in the upper right and then click Administrator Roles.
Entitlements are software licenses that are used to validate purchased software and are available:
- On select Dell hardware (on-the-box) at https://www.dell.com/
- In bulk volume by contacting a sales specialist
Volume entitlements must be uploaded to the administration console before activating a Dell Data Security product. On-the-box (OTB) licenses are activated after configurating the Dell Data Security product.
Note: For more information about configuring OTB, reference How to Manage Entitlements for Dell Data Security.
- Sign in to the Dell Data Security administration console.

Note: For more information, reference How to Access the Dell Data Security Server Administration Console.
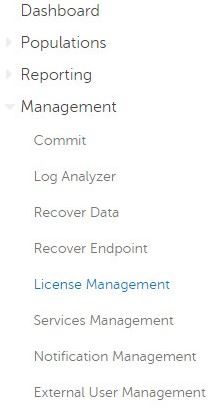
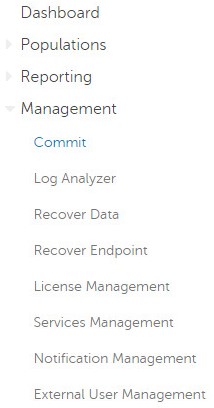
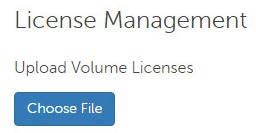
- From the left menu pane, click Management and then License Management.
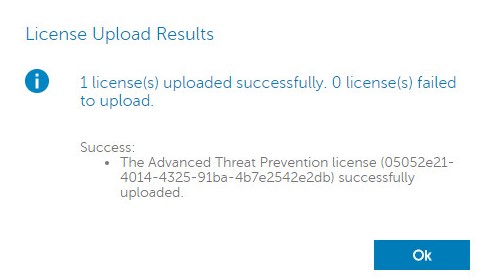
- Click Choose File.

- Browse to and then double-click the [VOLUME-LICENSE].xml.

- Click OK.

Note: The example image results may differ in your environment.
Services Management configuration is only required if using Dell Endpoint Security Suite Enterprise. Before provisioning, the Advanced Threat Prevention license must be imported into the console using the Entitlement process that is covered earlier in this article.
Note: If the Advanced Threat Prevention service has been previously activated and the service is being restored, reference How to Back Up and Restore the Advanced Threat Prevention Certificate for Dell Data Security Servers and then go to Initial Policies.
- Sign in to the Dell Data Security administration console.

Note: For more information, reference How to Access the Dell Data Security Server Administration Console.
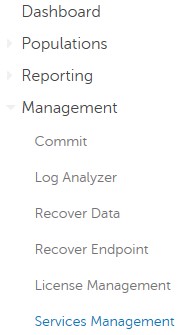
- From the left menu pane, click Management and then Services Management.

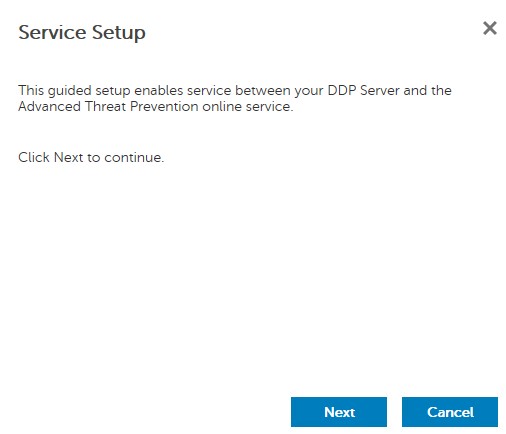
- Click Set Up Advanced Threat Prevention Service.

- Click Next.

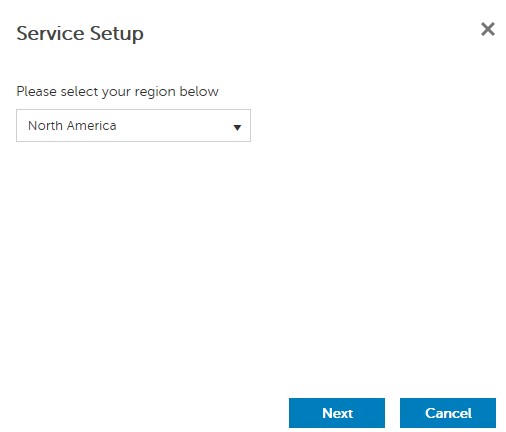
- Select your Region and then click Next.

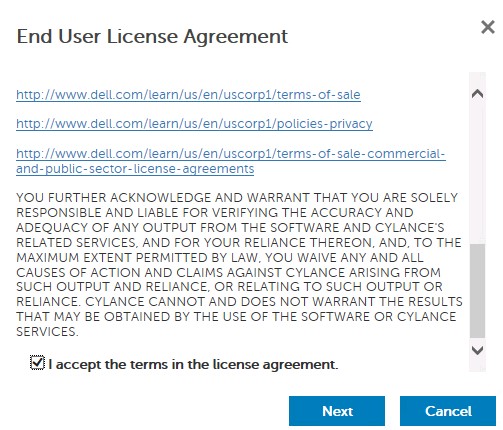
- Accept the terms and then click Next.

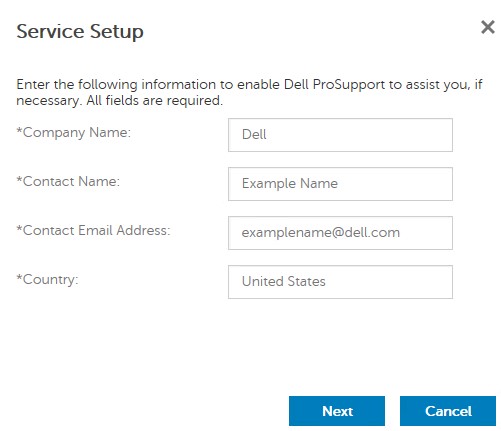
- From the Service Setup menu:
- Populate the Company Name.
- Populate the Contact Name.
- Populate the Contact Email Address.
- Populate the Country.
- Click Next.

Note: The example image populations may differ in your environment.
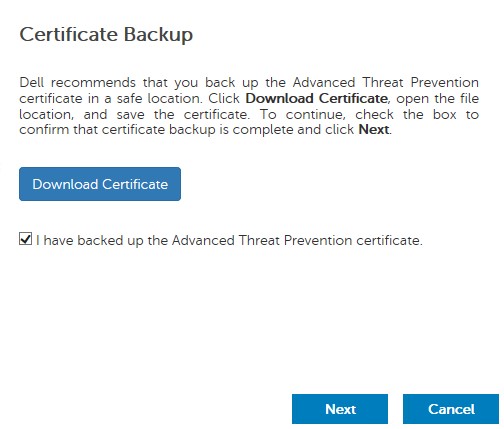
- From the Certificate Backup menu:
- Download Certificate to a location available for recovery.
- Check I have backed up the Advanced Threat Prevention certificate.
- Click Next.

Warning: The certificate that is downloaded is used if the Advanced Threat Prevention service must be recovered. For more information, reference How to Back Up and Restore the Advanced Threat Prevention Certificate for Dell Data Security Servers.
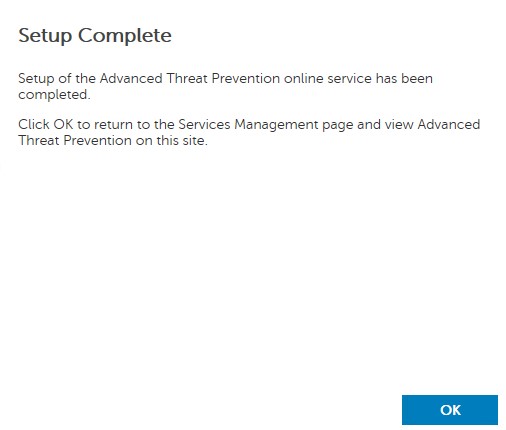
- Click OK.

- Sign in to the Dell Data Security administration console.

Note: For more information, reference How to Access the Dell Data Security Server Administration Console.
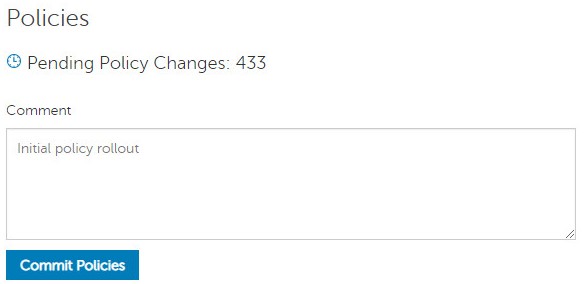
- From the left menu pane, click Management and then Commit.
- Populate a comment and then click Commit Policies.

Note: The number of pending policy changes may differ in your environment.
v10.2.13 to 10.2.14
After installation, an administrator may configure Domain Access, Administrator Rights, Volume Entitlements, Services Management, and Initial Policies. Click the appropriate task for more information.
- Sign in to the Dell Data Security administration console.

Note: For more information, reference How to Access the Dell Data Security Server Administration Console.
- From the left menu pane, click Populations, and then Domains.

- Click Add.

- From the Add Domain menu:
- Populate the Domain DNS Suffix.
- Optionally, populate a port.
- Optionally, click to enable Secure LDAP.
- Populate a username and password of a domain service account.
- Optionally, populate domain aliases and click Add after each alias.
- Click Add Domain.
Note:
- Port 389 is used if left unpopulated.
- The Distinguished Name is populated automatically after clicking away from the Host Name field.
- The examples that are used in the screenshot will differ in your environment.
Dell Technologies recommends assigning appropriate privileges to each individual administrator to create an audit trail on access, data key requests, and policy changes.
- Sign in to the Dell Data Security administration console.

Note: For more information, reference How to Access the Dell Data Security Server Administration Console.
- From the left menu pane, click Populations, and then Users.

- Click Add Users By Domain.

- From the Add Users By Domain menu:
- Select the domain in the top drop-down menu.
- Populate the Full Name of the active directory account to be added.
- Select either Common Name, Universal Principal Name, or sAM Account Name to search by.
- Click Search.
- Click the account in the search results.
- Click Add.

Note:
- If searching by Universal Principal Name, the full account name must be populated.
- For example: Jane_Doe@Dell.com
- A wildcard (*) symbol may be used in searching instead of populating a full name.
- For example:
Jan*
- For example:
- In the bottom right, click the refresh button.

- Click the newly added account in the list.
- Click the Admin tab.

- Check all wanted administrator roles, and then click Save.
Note: For more information about the functions each role allows, click the question mark in the upper right and then click Administrator Roles.
Entitlements are software licenses that are used to validate purchased software and are available:
- On select Dell hardware (on-the-box) at https://www.dell.com/
- In bulk volume by contacting a sales specialist
Volume entitlements must be uploaded to the administration console before activating a Dell Data Security product. On-the-box (OTB) licenses are activated after configurating the Dell Data Security product.
Note: For more information about configuring OTB, reference How to Manage Entitlements for Dell Data Security.
- Sign in to the Dell Data Security administration console.

Note: For more information, reference How to Access the Dell Data Security Server Administration Console.
- From the left menu pane, click Management and then License Management.

- Click Choose File.
- Browse to and then double-click the [VOLUME-LICENSE].xml.

- Click OK.

Note: The example image results may differ in your environment.
Services Management configuration is only required if using Dell Endpoint Security Suite Enterprise. Before provisioning, the Advanced Threat Prevention license must be imported into the console using the Entitlement process that is covered earlier in this article.
Note: If the Advanced Threat Prevention service has been previously activated and the service is being restored, reference How to Back Up and Restore the Advanced Threat Prevention Certificate for Dell Data Security Servers and then go to Initial Policies.
- Sign in to the Dell Data Security administration console.

Note: For more information, reference How to Access the Dell Data Security Server Administration Console.
- From the left menu pane, click Management and then Services Management.

- Click Set Up Advanced Threat Prevention Service.

- Click Next.

- Select your Region and then click Next.

- Accept the terms and then click Next.

- From the Service Setup menu:
- Populate the Company Name.
- Populate the Contact Name.
- Populate the Contact Email Address.
- Populate the Country.
- Click Next.

Note: The example image populations may differ in your environment.
- From the Certificate Backup menu:
- Download Certificate to a location available for recovery.
- Check I have backed up the Advanced Threat Prevention certificate.
- Click Next.

Warning: The certificate that is downloaded is used if the Advanced Threat Prevention service must be recovered. For more information, reference How to Back Up and Restore the Advanced Threat Prevention Certificate for Dell Data Security Servers.
- Click OK.
- Sign in to the Dell Data Security administration console.

Note: For more information, reference How to Access the Dell Data Security Server Administration Console.
- From the left menu pane, click Management and then Commit.

- Populate a comment and then click Commit Policies.

Note: The number of pending policy changes may differ in your environment.
v10.2.12
After installation, an administrator may configure Domain Access, Administrator Rights, Volume Entitlements, Services Management, and Initial Policies. Click the appropriate task for more information.
- Sign in to the Dell Data Security administration console.

Note: For more information, reference How to Access the Dell Data Security Server Administration Console.
- From the left menu pane, click Populations, and then Domains.

- Click Add.

- From the Add Domain menu:
- Populate the Domain DNS Suffix.
- Optionally, populate a port.
- Optionally, click to enable Secure LDAP.
- Populate a username and password of a domain service account.
- Optionally, populate domain aliases and click Add after each alias.
- Click Add Domain.

Note:
- Port 389 is used if left unpopulated.
- The Distinguished Name is populated automatically after clicking away from the Host Name field.
- The examples that are used in the screenshot will differ in your environment.
Dell Technologies recommends assigning appropriate privileges to each individual administrator to create an audit trail on access, data key requests, and policy changes.
- Sign in to the Dell Data Security administration console.

Note: For more information, reference How to Access the Dell Data Security Server Administration Console.
- From the left menu pane, click Populations, and then Users.

- Click Add Users By Domain.

- From the Add Users By Domain menu:
- Select the domain in the top drop-down menu.
- Populate the Full Name of the active directory account to be added.
- Select either Common Name, Universal Principal Name, or sAM Account Name to search by.
- Click Search.
- Click the account in the search results.
- Click Add.

Note:
- If searching by Universal Principal Name, the full account name must be populated.
- For example: Jane_Doe@Dell.com
- A wildcard (*) symbol may be used in searching instead of populating a full name.
- For example:
Jan*
- For example:
- In the bottom right, click the refresh button.

- Click the newly added account in the list.
- Click the Admin tab.

- Check all wanted administrator roles, and then click Save.
Note: For more information about the functions each role allows, click the question mark in the upper right and then click Administrator Roles.
Entitlements are software licenses that are used to validate purchased software and are available:
- On select Dell hardware (on-the-box) at https://www.dell.com/
- In bulk volume by contacting a sales specialist
Volume entitlements must be uploaded to the administration console before activating a Dell Data Security product. On-the-box (OTB) licenses are activated after configurating the Dell Data Security product.
Note: For more information about configuring OTB, reference How to Manage Entitlements for Dell Data Security.
- Sign in to the Dell Data Security administration console.

Note: For more information, reference How to Access the Dell Data Security Server Administration Console.
- From the left menu pane, click Management and then License Management.

- Click Choose File.

- Browse to and then double-click the [VOLUME-LICENSE].xml.

- Click OK.

Note: The example image results may differ in your environment.
Services Management configuration is only required if using Dell Endpoint Security Suite Enterprise. Before provisioning, the Advanced Threat Prevention license must be imported into the console using the Entitlement process that is covered earlier in this article.
Note: If the Advanced Threat Prevention service has been previously activated and the service is being restored, reference How to Back Up and Restore the Advanced Threat Prevention Certificate for Dell Data Security Servers and then go to Initial Policies.
- Sign in to the Dell Data Security administration console.

Note: For more information, reference How to Access the Dell Data Security Server Administration Console.
- From the left menu pane, click Management and then Services Management.

- Click Set Up Advanced Threat Prevention Service.

- Click Next.

- Select your Region and then click Next.

- Accept the terms and then click Next.
- From the Service Setup menu:
- Populate the Company Name.
- Populate the Contact Name.
- Populate the Contact Email Address.
- Populate the Country.
- Click Next.

Note: The example image populations may differ in your environment.
- From the Certificate Backup menu:
- Download Certificate to a location available for recovery.
- Check I have backed up the Advanced Threat Prevention certificate.
- Click Next.
Warning: The certificate that is downloaded is used if the Advanced Threat Prevention service must be recovered. For more information, reference How to Back Up and Restore the Advanced Threat Prevention Certificate for Dell Data Security Servers.
- Click OK.

- Sign in to the Dell Data Security administration console.
Note: For more information, reference How to Access the Dell Data Security Server Administration Console.
- From the left menu pane, click Management and then Commit.

- Populate a comment and then click Commit Policies.
Note: The number of pending policy changes may differ in your environment.
v10.2.10 to 10.2.11
After installation, an administrator may configure Domain Access, Administrator Rights, Volume Entitlements, Services Management, and Initial Policies. Click the appropriate task for more information.
- Sign in to the Dell Data Security administration console.

Note: For more information, reference How to Access the Dell Data Security Server Administration Console.
- From the left menu pane, click Populations, and then Domains.

- Click Add.
- From the Add Domain menu:
- Populate the Domain DNS Suffix.
- Optionally, populate a port.
- Populate a username and password of a domain service account.
- Optionally, populate domain aliases and click Add after each alias.
- Click Add Domain.
Note:
- Port 389 is used if left unpopulated.
- The Distinguished Name is populated automatically after clicking away from the Host Name field.
- The examples that are used in the screenshot will differ in your environment.
Dell Technologies recommends assigning appropriate privileges to each individual administrator to create an audit trail on access, data key requests, and policy changes.
- Sign in to the Dell Data Security administration console.

Note: For more information, reference How to Access the Dell Data Security Server Administration Console.
- From the left menu pane, click Populations, and then Users.

- Click Add Users By Domain.

- From the Add Users By Domain menu:
- Select the domain in the top drop-down menu.
- Populate the Full Name of the active directory account to be added.
- Select either Common Name, Universal Principal Name, or sAM Account Name to search by.
- Click Search.
- Click the account in the search results.
- Click Add.

Note:
- If searching by Universal Principal Name, the full account name must be populated.
- For example: Jane_Doe@Dell.com
- A wildcard (*) symbol may be used in searching instead of populating a full name.
- For example:
Jan*
- For example:
- In the bottom right, click the refresh button.

- Click the newly added account in the list.
- Click the Admin tab.

- Check all wanted administrator roles, and then click Save.

Note: For more information about the functions each role allows, click the question mark in the upper right and then click Administrator Roles.
Entitlements are software licenses that are used to validate purchased software and are available:
- On select Dell hardware (on-the-box) at https://www.dell.com/
- In bulk volume by contacting a sales specialist
Volume entitlements must be uploaded to the administration console before activating a Dell Data Security product. On-the-box (OTB) licenses are activated after configurating the Dell Data Security product.
Note: For more information about configuring OTB, reference How to Manage Entitlements for Dell Data Security.
- Sign in to the Dell Data Security administration console.

Note: For more information, reference How to Access the Dell Data Security Server Administration Console.
- From the left menu pane, click Management and then License Management.

- Click Choose File.

- Browse to and then double-click the [VOLUME-LICENSE].xml.

- Click OK.

Note: The example image results may differ in your environment.
Services Management configuration is only required if using Dell Endpoint Security Suite Enterprise. Before provisioning, the Advanced Threat Prevention license must be imported into the console using the Entitlement process that is covered earlier in this article.
Note: If the Advanced Threat Prevention service has been previously activated and the service is being restored, reference How to Back Up and Restore the Advanced Threat Prevention Certificate for Dell Data Security Servers and then go to Initial Policies.
- Sign in to the Dell Data Security administration console.

Note: For more information, reference How to Access the Dell Data Security Server Administration Console.
- From the left menu pane, click Management and then Services Management.

- Click Set Up Advanced Threat Prevention Service.

- Click Next.

- Select your Region and then click Next.

- Accept the terms and then click Next.

- From the Service Setup menu:
- Populate the Company Name.
- Populate the Contact Name.
- Populate the Contact Email Address.
- Populate the Country.
- Click Next.

Note: The example image populations may differ in your environment.
- From the Certificate Backup menu:
- Download Certificate to a location available for recovery.
- Check I have backed up the Advanced Threat Prevention certificate.
- Click Next.

Warning: The certificate that is downloaded is used if the Advanced Threat Prevention service must be recovered. For more information, reference How to Back Up and Restore the Advanced Threat Prevention Certificate for Dell Data Security Servers.
- Click OK.

- Sign in to the Dell Data Security administration console.

Note: For more information, reference How to Access the Dell Data Security Server Administration Console.
- From the left menu pane, click Management and then Commit.

- Populate a comment and then click Commit Policies.

Note: The number of pending policy changes may differ in your environment.
v9.2.0 to 10.2.9
After installation, an administrator may configure Domain Access, Administrator Rights, Volume Entitlements, Services Management, and Initial Policies. Click the appropriate task for more information.
- Sign in to the Dell Data Security administration console.

Note: For more information, reference How to Access the Dell Data Security Server Administration Console.
- From the left menu pane, click Populations, and then Domains.

- Click Add.

- From the Add Domain menu:
- Populate the Domain DNS Suffix.
- Optionally, populate a port.
- Optionally, enable Secure LDAP.
- Populate a username and password of a domain service account.
- Optionally, populate domain aliases and click Add after each alias.
- Click Add Domain.
Note:
- Port 389 is used if left unpopulated.
- The Distinguished Name is populated automatically after clicking away from the Host Name field.
- The examples that are used in the screenshot will differ in your environment.
Dell Technologies recommends assigning appropriate privileges to each individual administrator to create an audit trail on access, data key requests, and policy changes.
- Sign in to the Dell Data Security administration console.

Note: For more information, reference How to Access the Dell Data Security Server Administration Console.
- From the left menu pane, click Populations, and then Users.

- Click Add Users By Domain.

- From the Add Users By Domain menu:
- Select the domain in the top drop-down menu.
- Populate the Full Name of the active directory account to be added.
- Select either Common Name, Universal Principal Name, or sAM Account Name to search by.
- Click Search.
- Click the account in the search results.
- Click Add.

Note:
- If searching by Universal Principal Name, the full account name must be populated.
- For example: Jane_Doe@Dell.com
- A wildcard (*) symbol may be used in searching instead of populating a full name.
- For example:
Jan*
- For example:
- In the bottom right, click the refresh button.

- Click the newly added account in the list.
- Click the Admin tab.

- Check all wanted administrator roles, and then click Save.

Note: For more information about the functions each role allows, click the question mark in the upper right and then click Administrator Roles.
Entitlements are software licenses that are used to validate purchased software and are available:
- On select Dell hardware (on-the-box) at https://www.dell.com/
- In bulk volume by contacting a sales specialist
Volume entitlements must be uploaded to the administration console before activating a Dell Data Security product. On-the-box (OTB) licenses are activated after configurating the Dell Data Security product.
Note: For more information about configuring OTB, reference How to Manage Entitlements for Dell Data Security.
- Sign in to the Dell Data Security administration console.

Note: For more information, reference How to Access the Dell Data Security Server Administration Console.
- From the left menu pane, click Management and then License Management.

- Click Choose File.

- Browse to and then double-click the [VOLUME-LICENSE].xml.

- Click OK.
Note: The example image results may differ in your environment.
Services Management configuration is only required if using Dell Endpoint Security Suite Enterprise. Before provisioning, the Advanced Threat Prevention license must be imported into the console using the Entitlement process that is covered earlier in this article.
Note: If the Advanced Threat Prevention service has been previously activated and the service is being restored, reference How to Back Up and Restore the Advanced Threat Prevention Certificate for Dell Data Security Servers and then go to Initial Policies.
- Sign in to the Dell Data Security administration console.

Note: For more information, reference How to Access the Dell Data Security Server Administration Console.
- From the left menu pane, click Management and then Services Management.
- Click Set Up Advanced Threat Prevention Service.

- Click Next.
- Select your Region and then click Next.
- Accept the terms and then click Next.

- From the Service Setup menu:
- Populate the Company Name.
- Populate the Contact Name.
- Populate the Contact Email Address.
- Populate the Country.
- Click Next.
Note: The example image populations may differ in your environment.
- From the Certificate Backup menu:
- Download Certificate to a location available for recovery.
- Check I have backed up the Advanced Threat Prevention certificate.
- Click Next.

Warning: The certificate that is downloaded is used if the Advanced Threat Prevention service must be recovered. For more information, reference How to Back Up and Restore the Advanced Threat Prevention Certificate for Dell Data Security Servers.
- Click OK.

- Sign in to the Dell Data Security administration console.

Note: For more information, reference How to Access the Dell Data Security Server Administration Console.
- From the left menu pane, click Management and then Commit.

- Populate a comment and then click Commit Policies.

Note: The number of pending policy changes may differ in your environment.
v8.0.0 to 9.1.5
After installation, an administrator may configure Domain Access, Administrator Rights, Volume Entitlements, and Initial Policies. Click the appropriate task for more information.
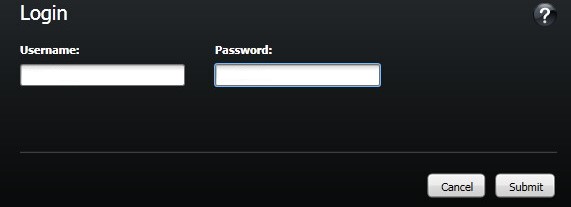
- Submit credentials to sign in to the Remote Management Console.

Note: For more information, reference How to Access the Dell Data Security Server Administration Console.
- From the left pane, click Domains.
- In the bottom right, click Add Domain.

- From the Add Domains menu:
- Populate the domain name in the Host Name field.
- Optionally, populate a port.
- Populate a username and password of a domain service account.
- Optionally, populate domain aliases and click Add after each alias.
- Click Add Domain.
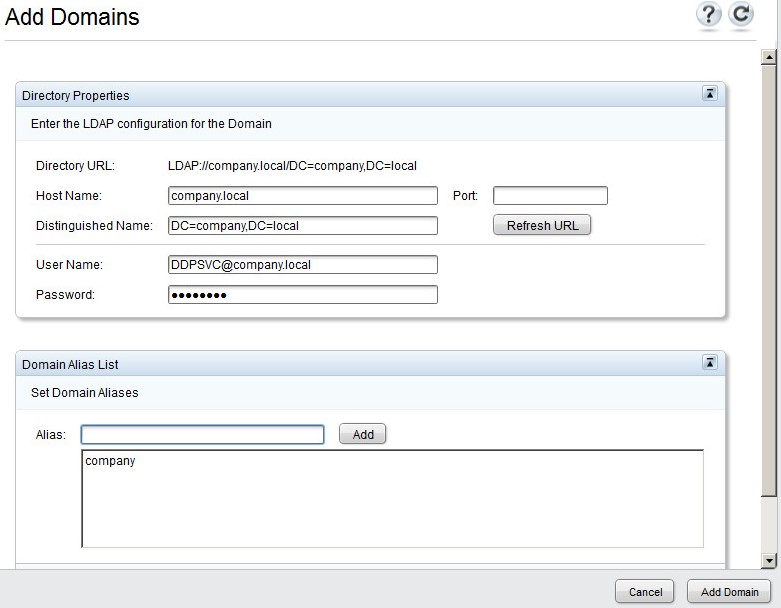
Note:
- Port 389 is used if left unpopulated,
- The Distinguished Name is populated automatically after clicking away from the Host Name field.
- The examples that are used in the screenshot will differ in your environment.
Dell Technologies recommends assigning administrator rights to all users who need management rights, as opposed to sharing one account. This results in a clear audit trail to identify changes.
- Submit credentials to sign in to the Remote Management Console.

Note: For more information, reference How to Access the Dell Data Security Server Administration Console.
- From the left pane, click Domains.

- Click the Members folder of the added domain (Reference Add Domain for more information).
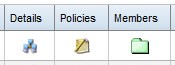
- In the bottom left, click Add Users.

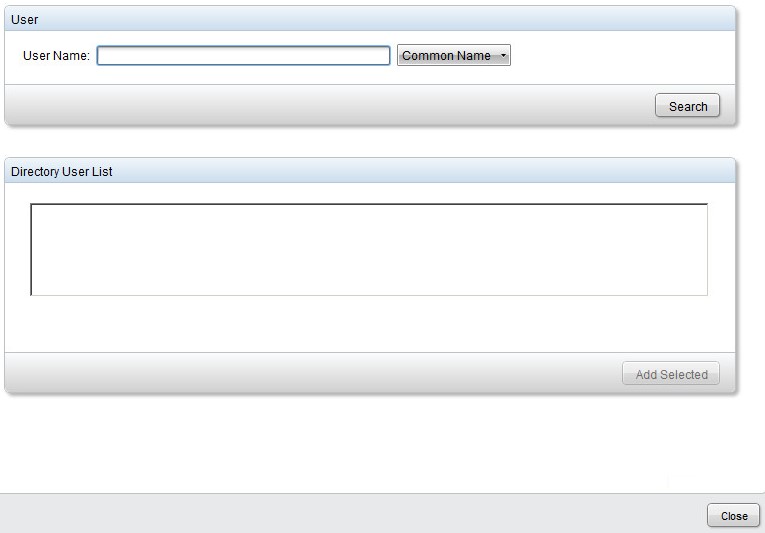
- From Add Users for Domain:
- Populate a User Name.
- Select to search by Common Name, Universal Principal Name, or sAMAccount Name from the drop-down menu.
- Click Search.
- Click the account in the search results.
- Click Add Selected.
- Click Close.
Note:
- If searching by Universal Principal Name, the full account name must be populated.
- For example: Jane_Doe@Dell.com
- A wildcard (*) symbol may be used in searching instead of populating a full name.
- For example:
Jan*
- For example:
- In the upper right, click the refresh button.

- Click Details for the newly added account in the list.
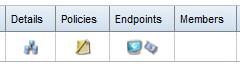
- Click the Admin tab.

- Check all wanted administrator roles, and then click Save.

Note: For more information about the functions each role allows, click the question mark in the upper right and then click Administrator Roles.
Entitlements are software licenses that are used to validate purchased software and are available:
- On select Dell hardware (on-the-box) at https://www.dell.com/
- In bulk volume by contacting a sales specialist
Volume entitlements must be uploaded to the administration console before activating a Dell Data Security product. On-the-box (OTB) licenses are activated after configurating the Dell Data Security product.
Note: For more information about configuring OTB, reference How to Manage Entitlements for Dell Data Security.
- Submit credentials to sign in to the Remote Management Console.

Note: For more information, reference How to Access the Dell Data Security Server Administration Console.
- From the left pane, click Software Licenses.
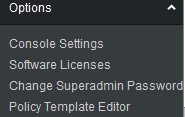
- Click Upload License File.
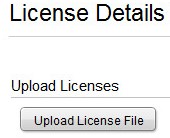
- Browse to and then double-click the [VOLUME-LICENSE].xml.

- Submit credentials to sign in to the Remote Management Console.
Note: For more information, reference How to Access the Dell Data Security Server Administration Console.
- From the left pane click Commit Policies.
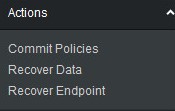
- Populate a comment and then Apply Changes.
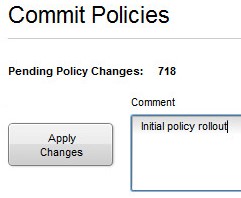
Note: The number of pending policy changes may differ in your environment.
To contact support, reference Dell Data Security International Support Phone Numbers.
Go to TechDirect to generate a technical support request online.
For additional insights and resources, join the Dell Security Community Forum.
文章屬性
受影響的產品
Dell Encryption
上次發佈日期
16 11月 2023
版本
17
文章類型
Solution