文書番号: 000111205
Microsoft Windows: How to Change and Localize Language on Windows Server 2019
概要: This article explains how to change and localize your Windows Server 2019 using the language settings. Follow our guide to add and configure a new language, adjust time zone, and set regional settings. ...
文書の内容
手順
Article Summary This article provides steps to localize a language on Windows Server 2019.
Change the Language of Windows Server 2019
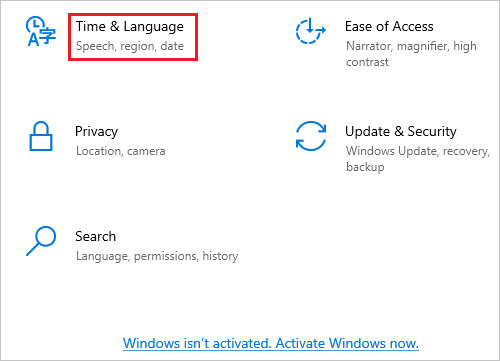
- Open the Start menu and click the gear icon.

- Click Time & Language.
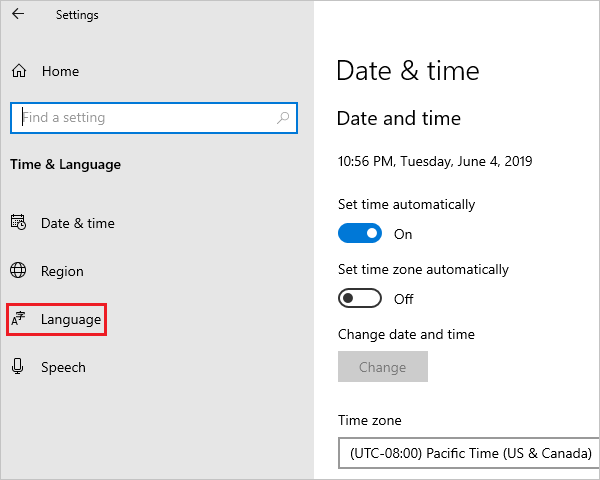
- Click Language in the left pane.
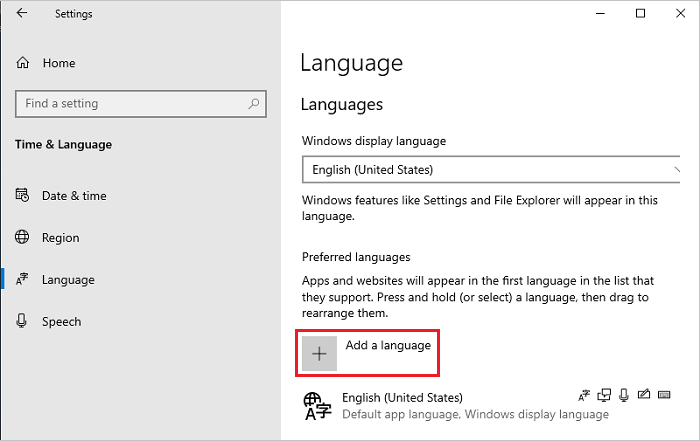
- In the Language screen on the right, click Add a Language.
Note: If your language is displayed under the Preferred languages section, click it and click the up arrow to move it to the top. Go to step 8.
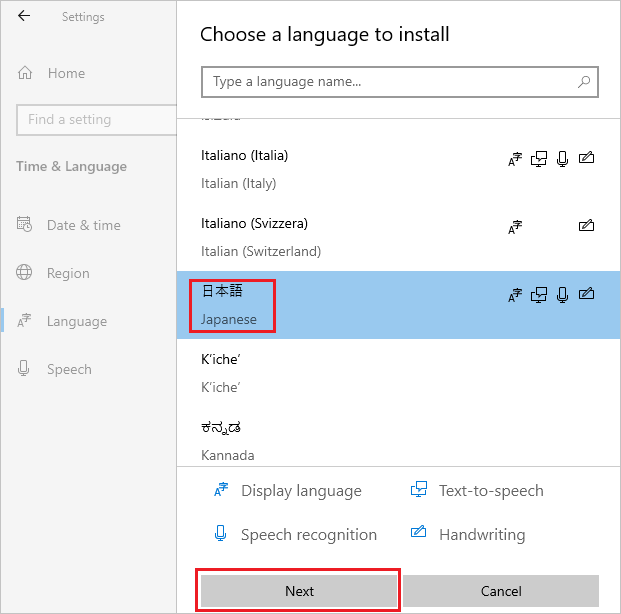
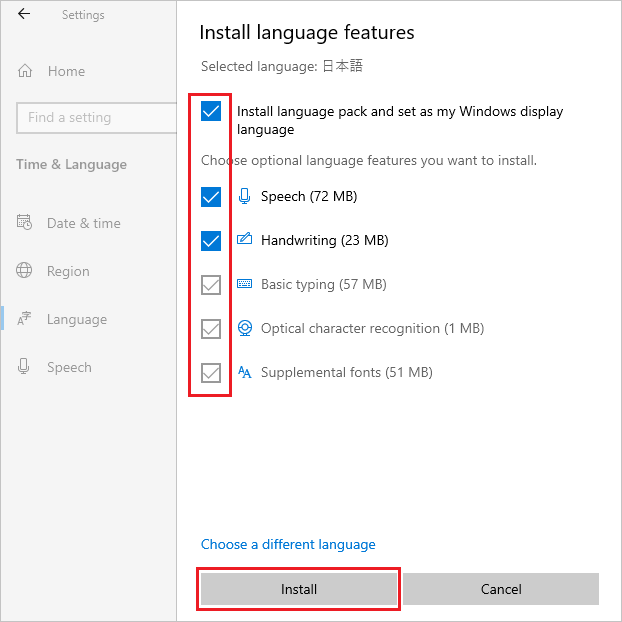
- In the Choose a Language to Install screen, select your language from the list, and click Next. In this step, the Japanese is selected as an example.
- In the Installed Language Features screen, check if all items are selected, and click Install.
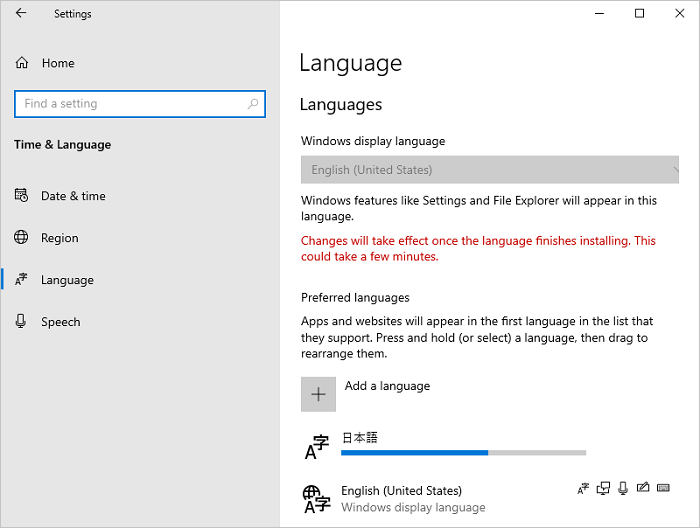
- If your system can connect to the Internet, downloading and installation of a language pack starts.
Note: If your system is in an offline environment where it cannot connect to the Internet, download and install the language pack ISO by using method 2 from the Microsoft Technical Information
 .
.
After the installation, return to step 5, select your language, and click Next. If the following message is displayed, ignore it and click Install.
"You are offline. When you are connected, go to Language settings, select the language in the list, select Options, and finish downloading."
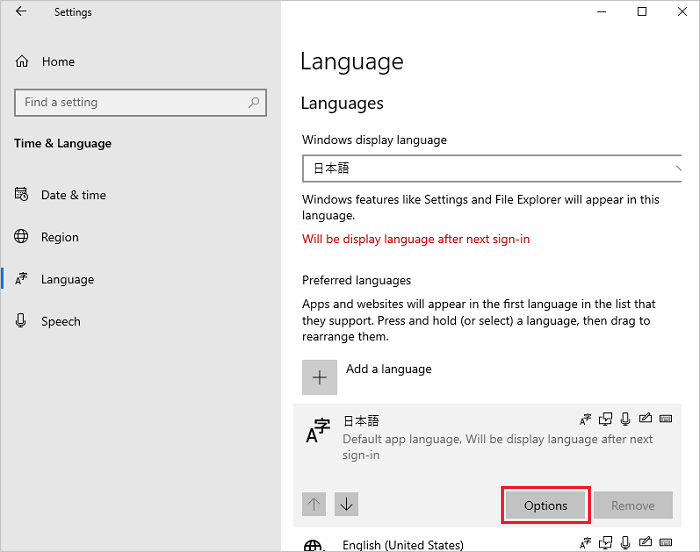
- Click Options of the added language.
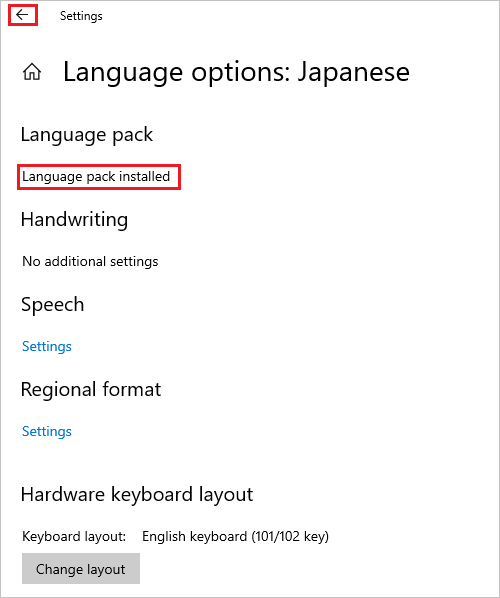
- In the Language Options screen, check if Language pack installed is displayed in the "Language Pack" section, and click left arrow icon in the upper left corner.
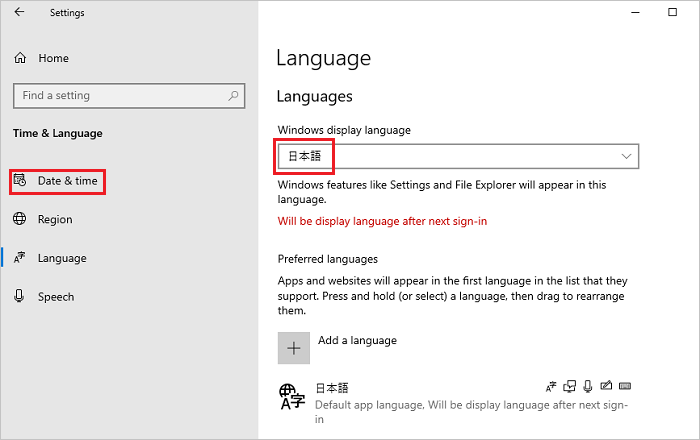
- In the Language screen, select your language from the Windows Display Language drop-down menu, and click Date & time in the left pane.
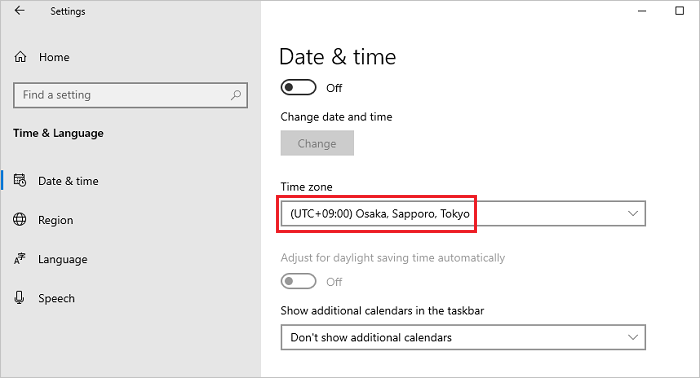
- In the Date & time screen, select your time zone from the Time Zone drop-down menu.
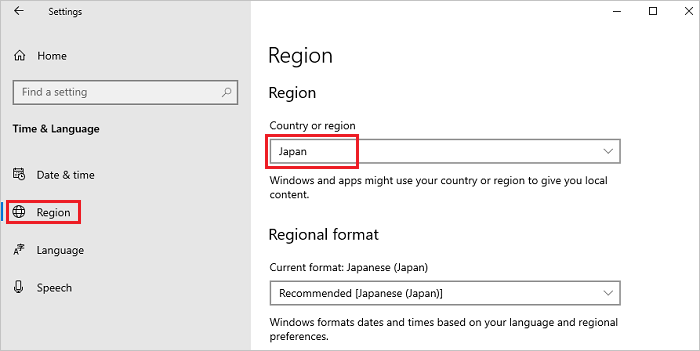
- Select Region from the left pane, and select your region from the Country or Region drop-down menu.
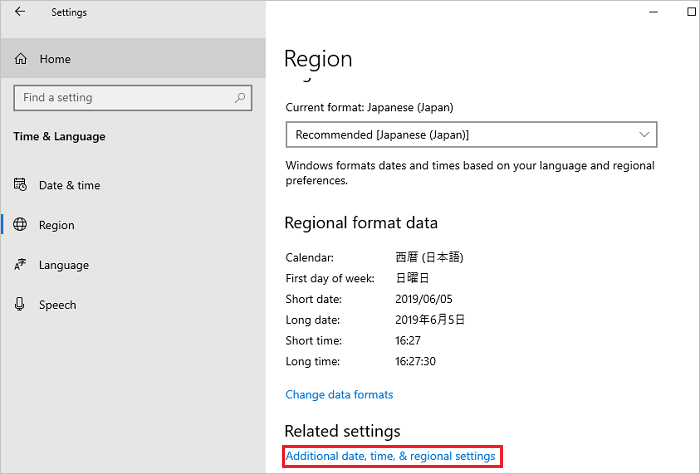
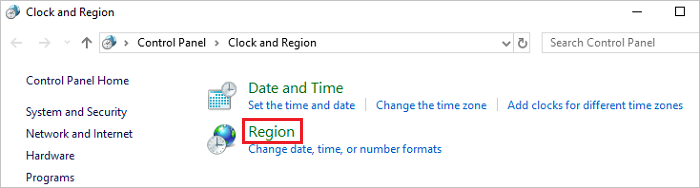
- Scroll down on the Region screen, find Related Settings, and click Additional date, time, and regional settings.
- In the Clock and Region window, click Region.
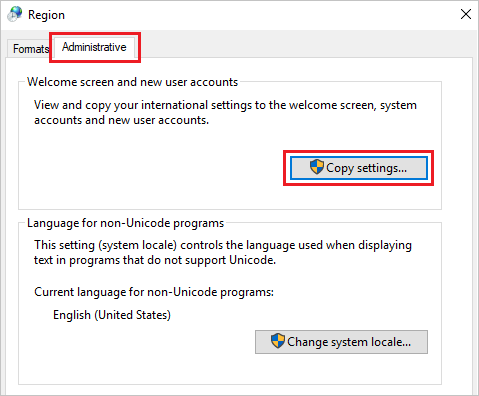
- In the Region window, open the Administrative tab, and in the Welcome Screen and New User Accounts section, click Copy settings.
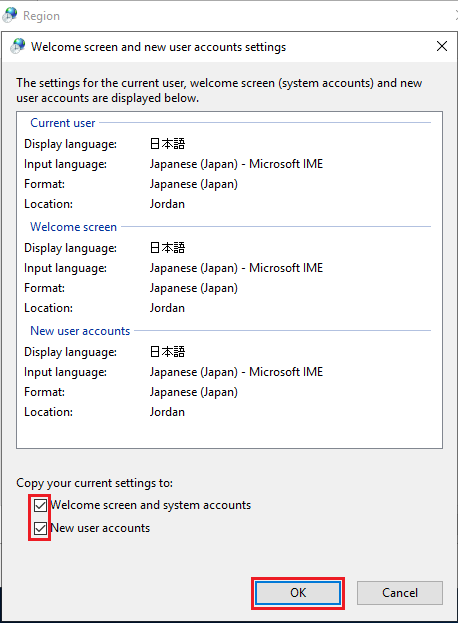
- In the Welcome Screen and New User Accounts screen, select all items under the Copy Your Current Setting to section, and click OK.
Note: If the dialog box Restart request is displayed, click Cancel at this step.
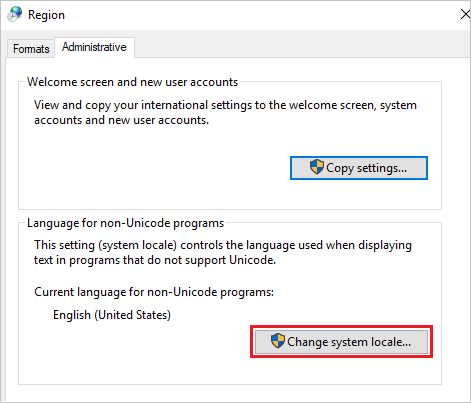
- In the Administrative tab screen, in the Language for Non-Unicode Programs section, click Change System Locale.
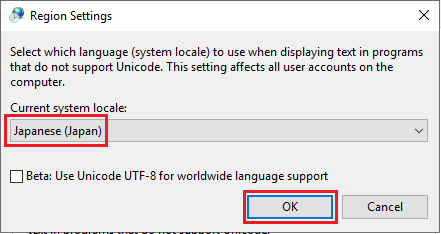
- In the Region Settings screen, select your region in the Current System Locale drop-down menu, and click OK.
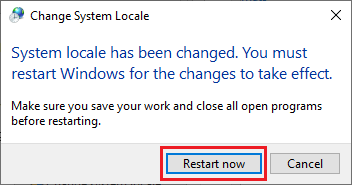
- In the dialog box Restart request, click Restart Now to restart the system.
- After the restart is completed, check if the language of interfaces such as login screen has changed to the selected language.
文書のプロパティ
影響を受ける製品
Servers, Microsoft Windows Server 2016
最後に公開された日付
18 7月 2024
バージョン
7
文書の種類
How To