CloudIQ: Single Sign-on for CloudIQ Authentication
Summary: CloudIQ is a cloud-based application that allows users to proactively monitor the overall health of their Dell Technologies infrastructure through intelligent, comprehensive, and predictive analytics. This article introduces single sign-on (SSO) for the CloudIQ authentication feature allowing CloudIQ to connect with the Dell Identity Portal for centralized identity management by using the customer’s Identity Provider (IdP). ...
This article applies to
This article does not apply to
This article is not tied to any specific product.
Not all product versions are identified in this article.
Instructions
Prerequisites
- The customer must have an Identity Expert available to configure the IdP in the Dell Identity Portal.
- The CloudIQ user must be a CloudIQ Admin to access the Identity Management menu in CloudIQ and send an invitation to the Identity Expert. CloudIQ Admins are defined as Company Administrators in MyService360. See article 191817, CloudIQ: How to Determine CloudIQ Admins for a Company for additional information.
- The CloudIQ Admin must send an invitation to their Identity Expert from the SSO tab under Identity Management menu in the CloudIQ portal. The Identity Expert does not need to be a CloudIQ user.
- The Identity Expert must validate and select the domain that is associated to their email address.
Implementation
- Using the left navigation pane, access the SSO configuration from Admin > Identity Management menu. The user must be a CloudIQ Admin to access the Identity Management menu.
- Select the Single Sign-On tab from the Identity Management window.
- Select the Invite Dell Identity Admin button to send an email with an invitation to the company Identity Administrator to become a Dell Identity Admin. The invitation includes a link to the Dell Identity Portal to setup and manage the IdP.
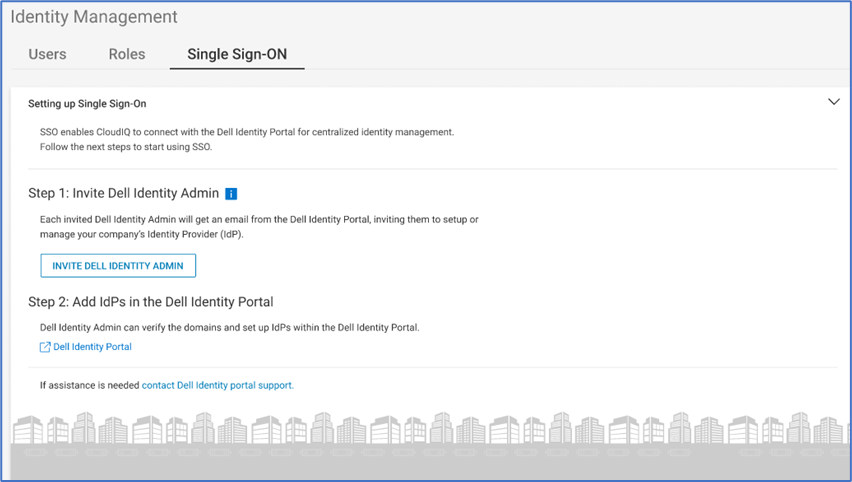
Figure 1: Identity Management
- Enter First Name, Last Name, and Email Address for the Identity Administrator.
- Click the
 Icon to add the user.
Extra users can be added as Identity Administrators using the same process.
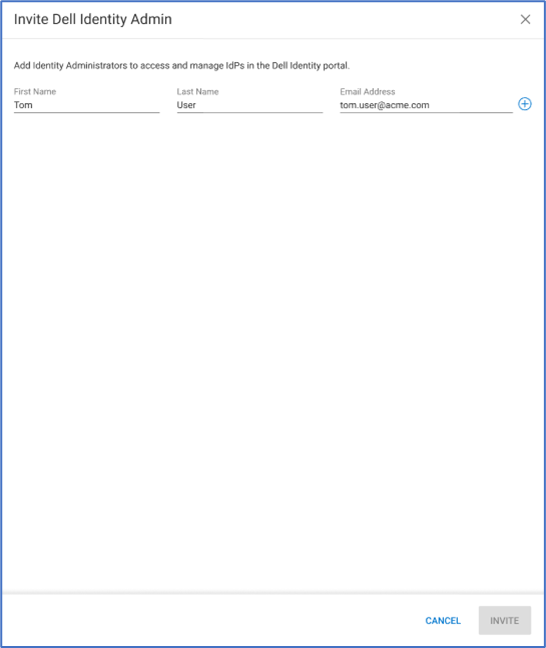
Figure 2: Invite Dell Identity Admin
- Click Invite to send the invitation to the Identity Administrators. Invitations expire after 30 days.
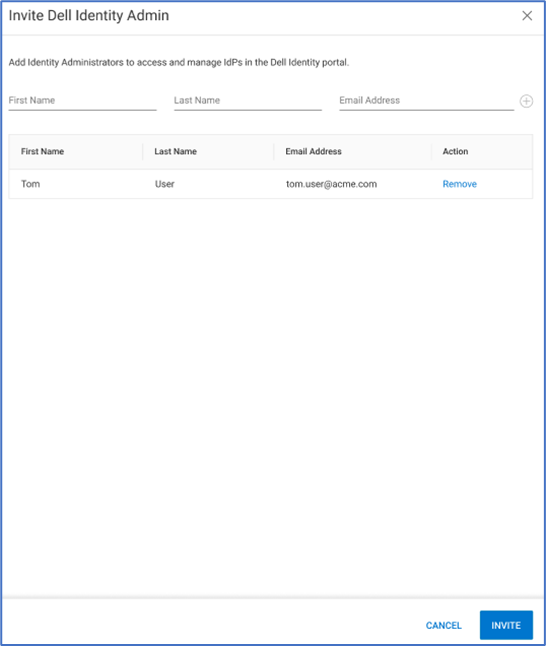
Figure 3: Invite Dell Identity Admin (continued).
Once the invitation is sent, the Identity Administrator receives a link to configure their IdP on the Dell Identity Portal. For questions concerning the Dell Identity Portal, send an email to contact Dell Identity Support.
Once the Identity Administrator successfully links their IdP in the Dell Identity Portal, it appears under the IDPS tab in the CloudIQ UI. SSO is now enabled for all users in the associated domain.
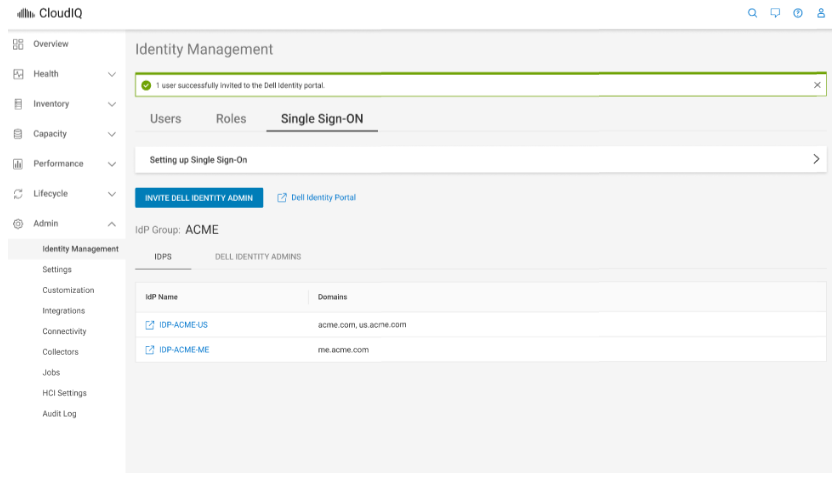
Figure 4: Identity Management
Affected Products
CloudIQArticle Properties
Article Number: 000212047
Article Type: How To
Last Modified: 10 May 2023
Version: 3
Find answers to your questions from other Dell users
Support Services
Check if your device is covered by Support Services.