Windows 11 和 Windows 10 影片設定
Summary: 本文帶您瞭解 Windows 11 和 Windows 10 桌面環境中內建的基本影像設定公用程式。
This article applies to
This article does not apply to
This article is not tied to any specific product.
Not all product versions are identified in this article.
Instructions
目錄
設定或變更螢幕解析度
可從桌上型電腦調整螢幕解析度。
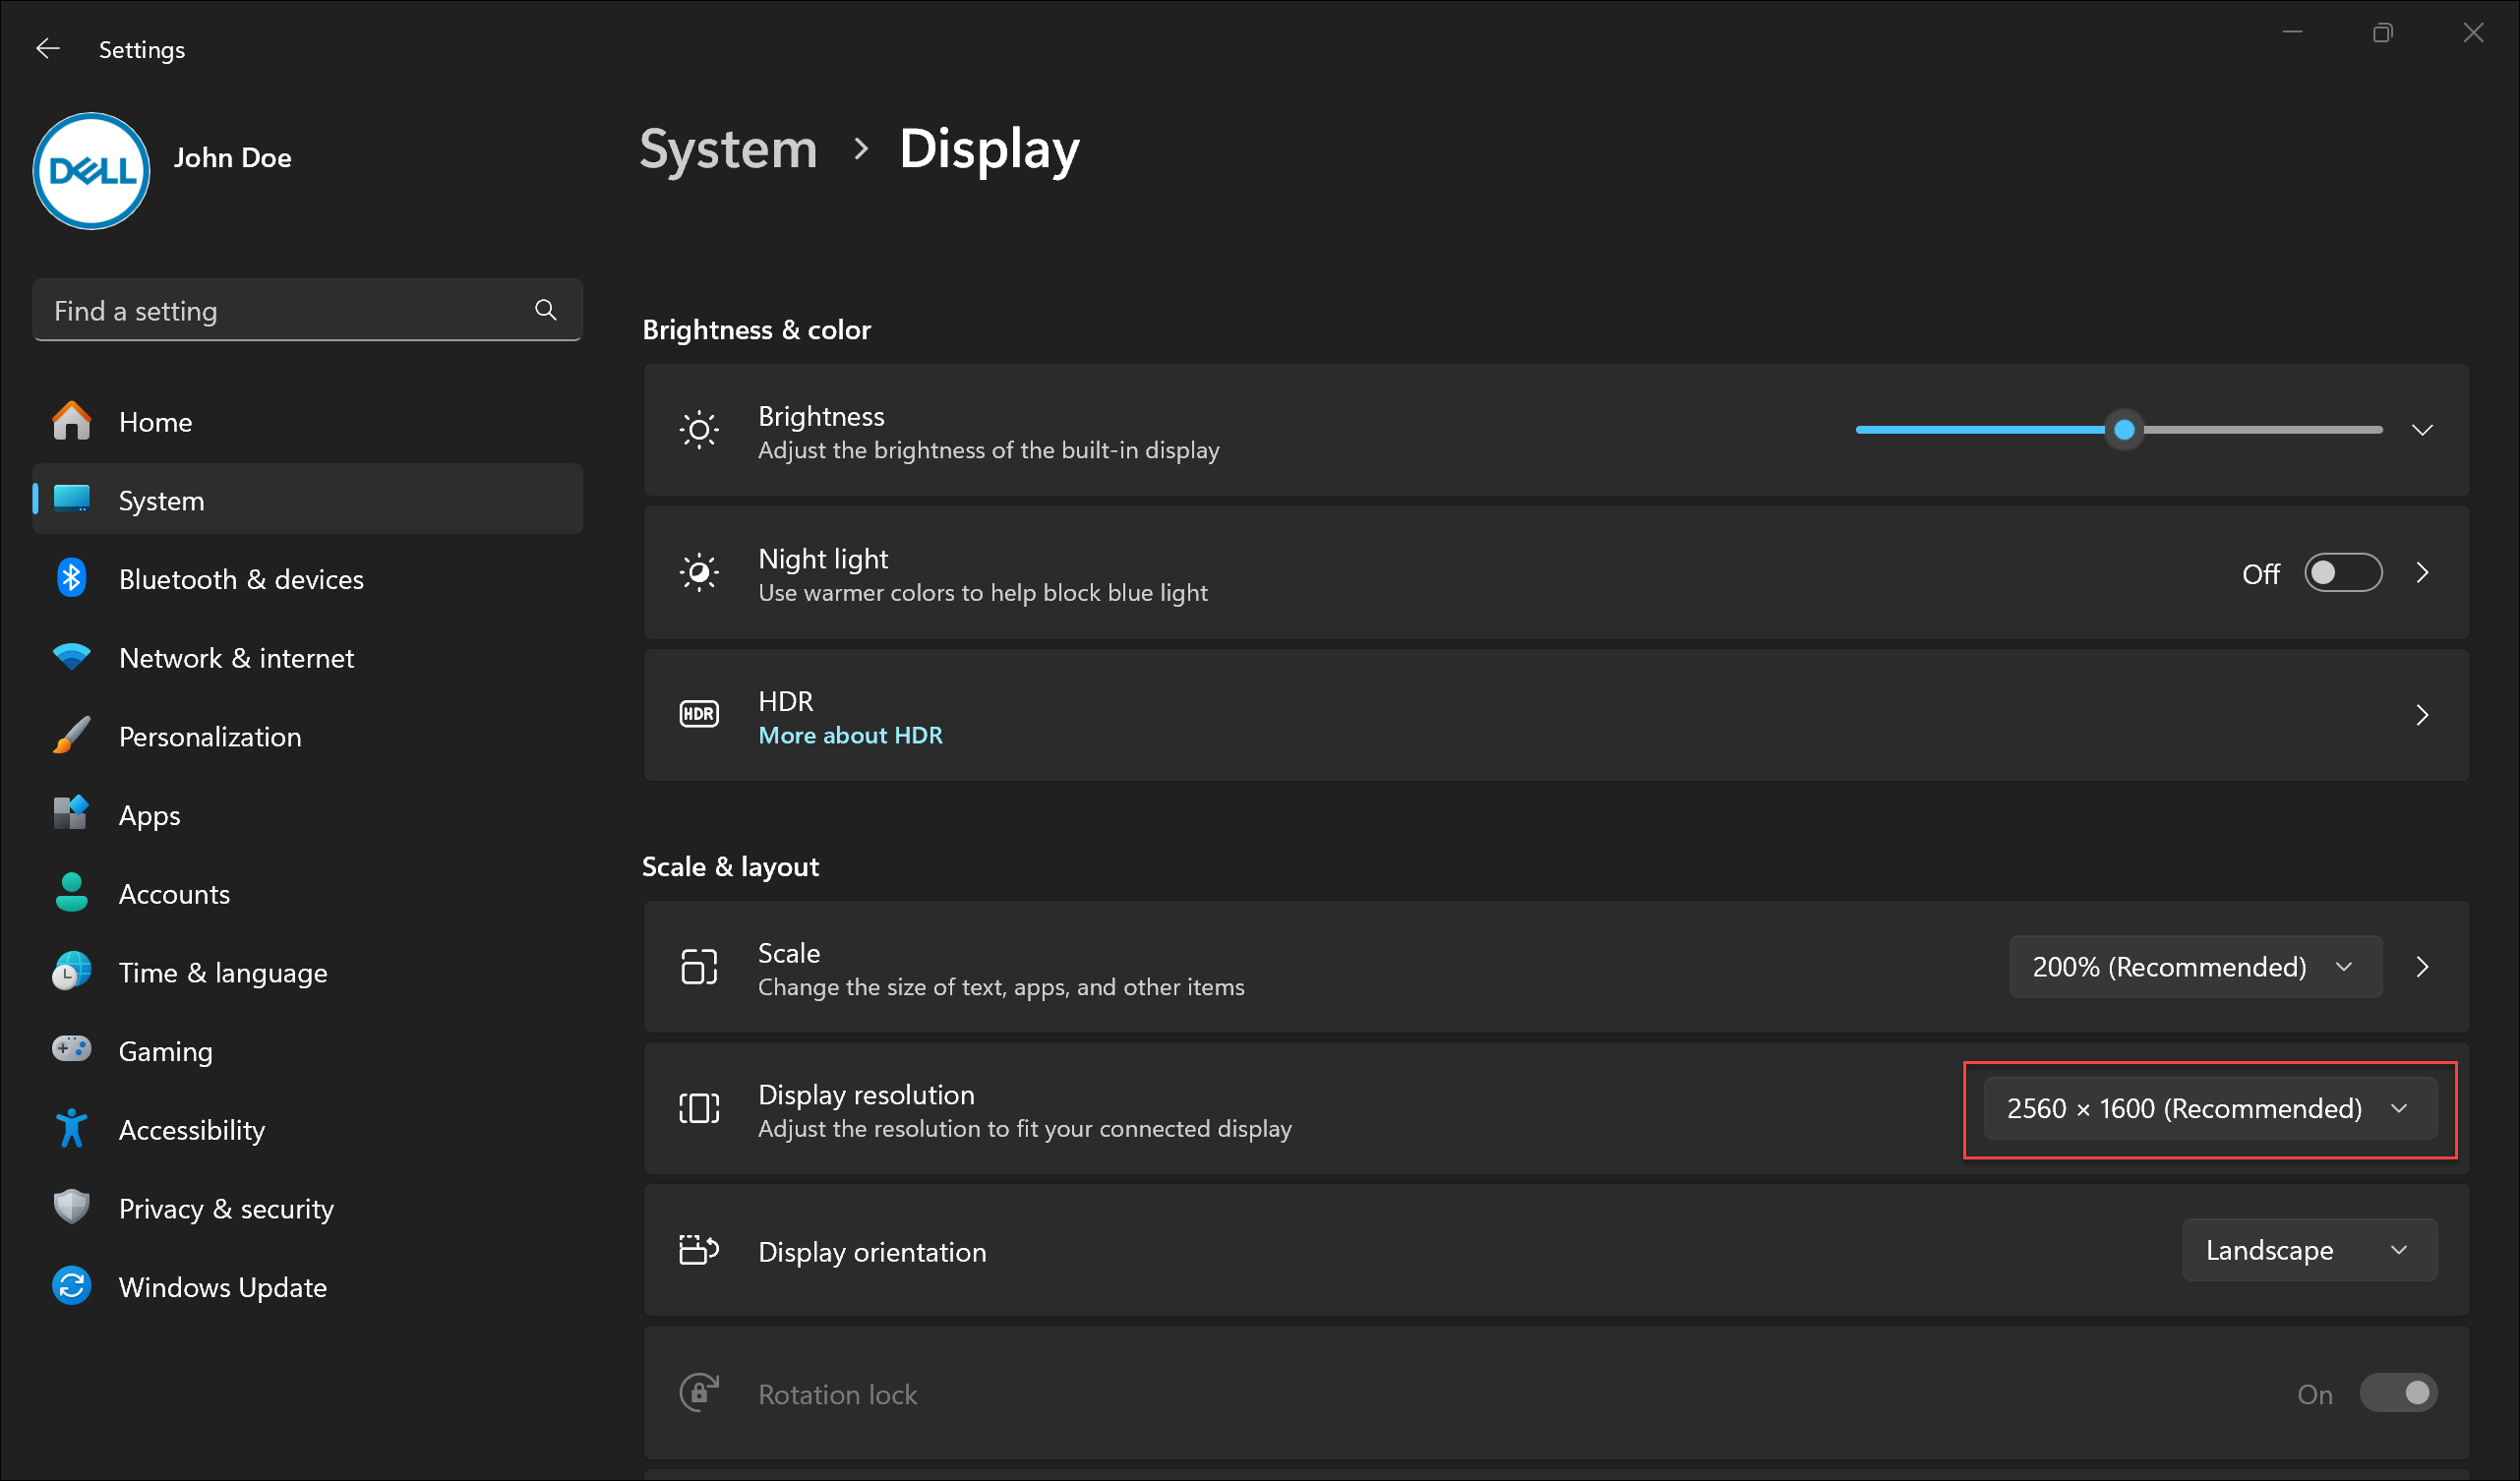
- 選取 開始>設定>系統>顯示器,然後查看顯示您的顯示器的部分,然後選取您要變更的顯示器。
- 在 「顯示解析度 」行中,選擇清單並選擇一個選項。最好堅持使用標示 (推薦)。顯示器可以支援低於其原始解析度的解析度,但文本看起來不會那麼清晰,而且顯示器可能很小、在螢幕上居中、用黑色邊緣或拉伸。

調整更新率
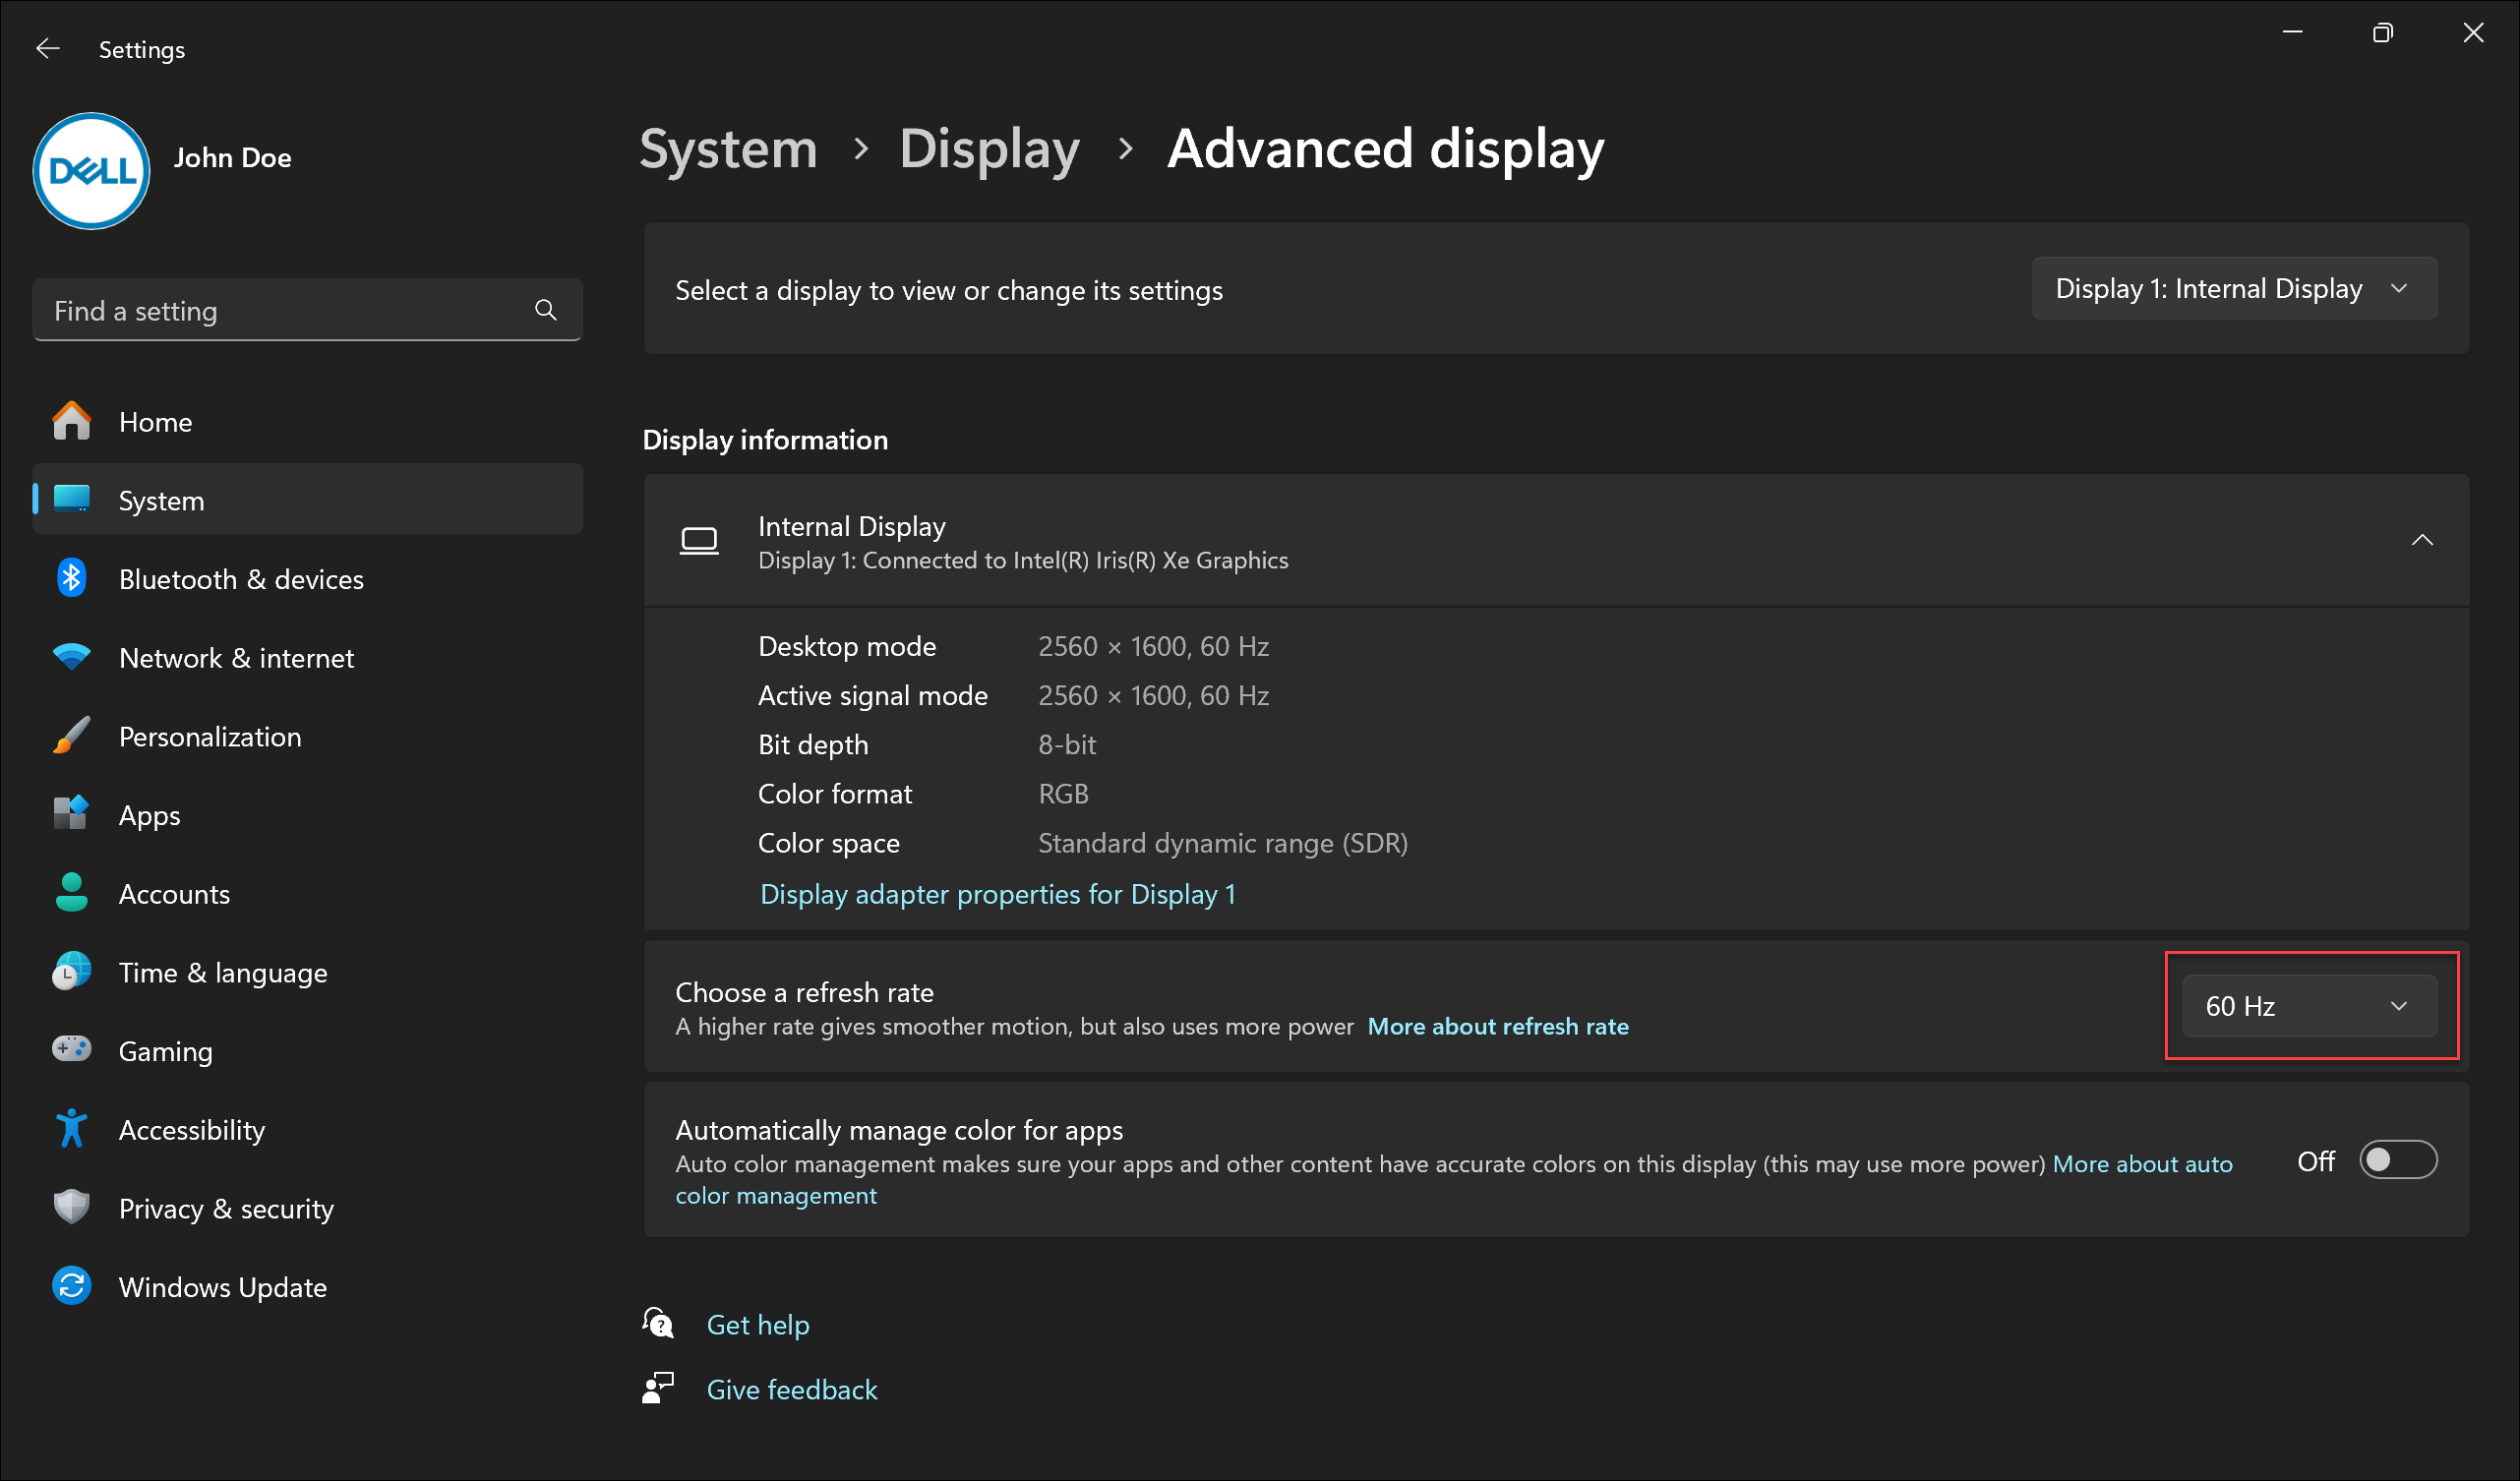
- 選取開始>設定>系統>顯示器>進階顯示。
- 在 選擇更新率旁邊,選擇您想要的刷新率。出現的更新率取決於您的顯示器和支援項目。特定筆記型電腦和外接顯示器支援更高的更新率。

變更字型與圖示大小
若要調整 Windows 中的項目大小,請按照以下步驟操作:
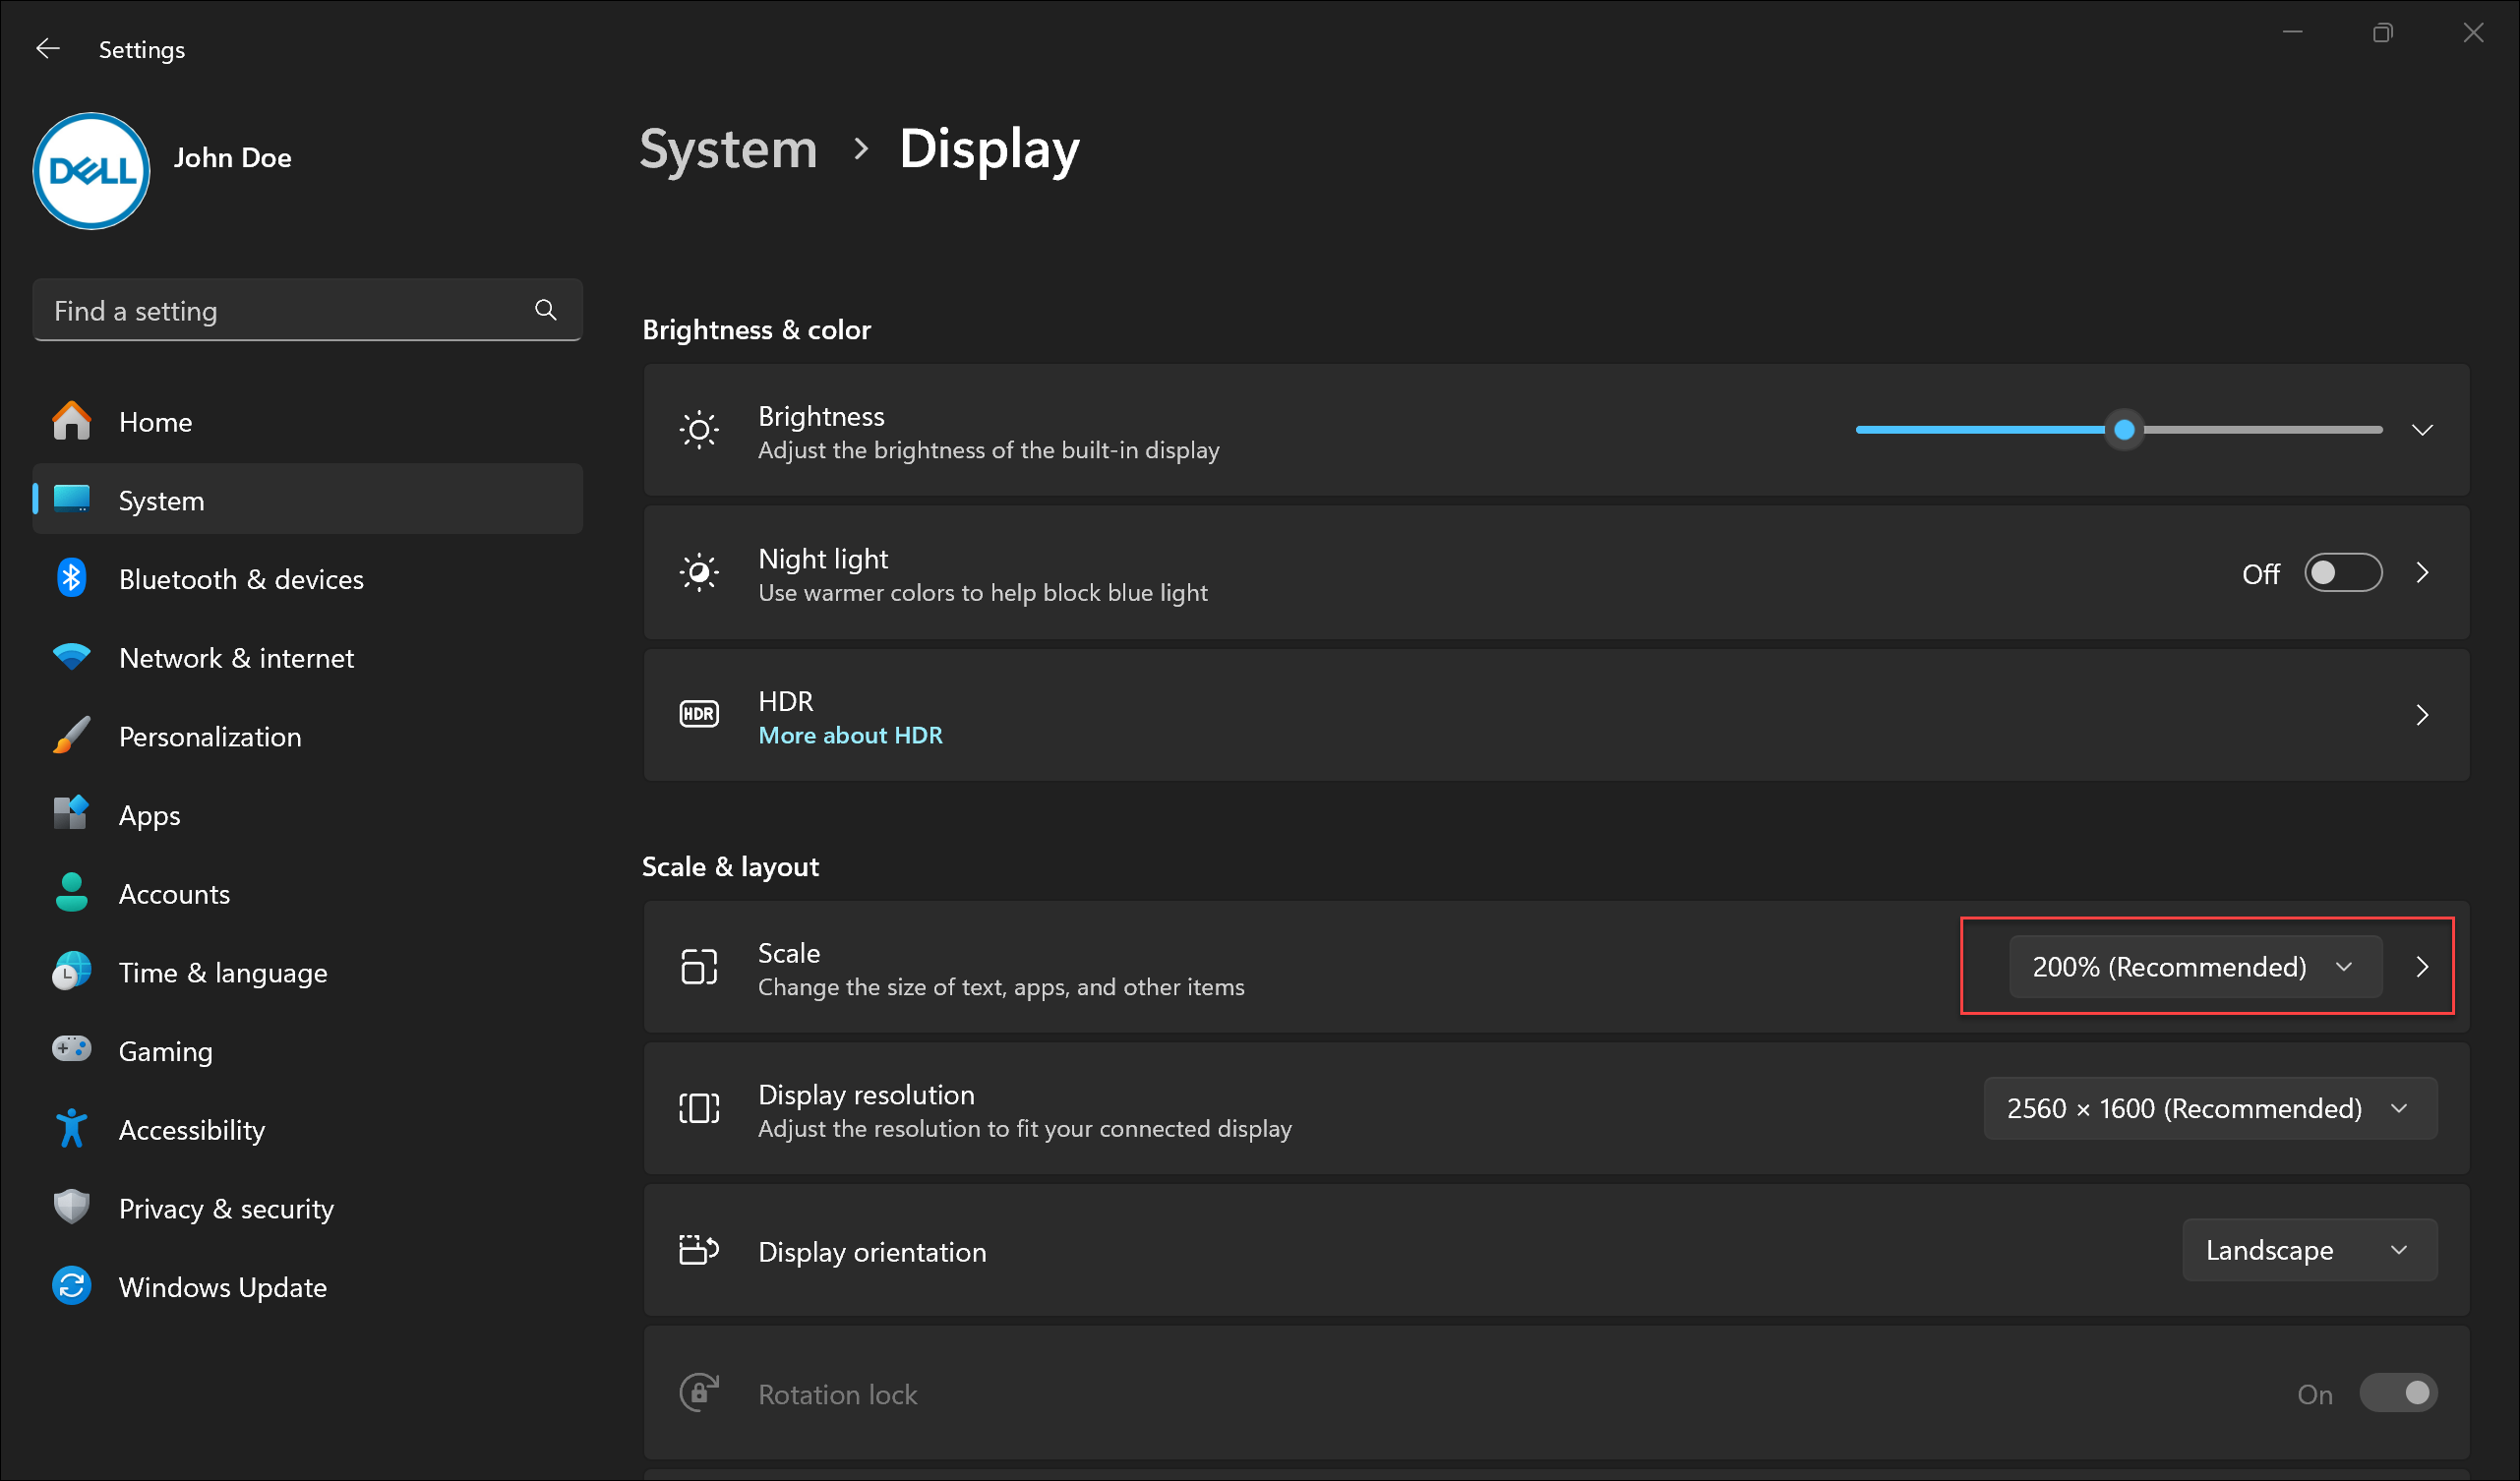
- 選取 開始>設定>系統>顯示器。
- 滾動到 比例和佈局 部分。
- 選擇 “縮放”,然後選擇一個選項。通常,最好選擇標有(推薦)的那個。

Article Properties
Article Number: 000149499
Article Type: How To
Last Modified: 17 Jun 2024
Version: 8
Find answers to your questions from other Dell users
Support Services
Check if your device is covered by Support Services.