How to Install the Dell Data Security Server Front End
Summary: The Dell Data Security Server front-end can be installed by following these instructions.
This article applies to
This article does not apply to
This article is not tied to any specific product.
Not all product versions are identified in this article.
Symptoms
This article covers the basic installation process for the Dell Data Security (formerly Dell Data Protection) server front-end.
Affected Products:
- Dell Security Management Server
- Dell Data Protection | Enterprise Edition Server
Affected Versions:
- v8.0.0 and Later
Affected Operating Systems:
- Windows
Cause
Not applicable
Resolution
Click the Dell Data Security (formerly Dell Data Protection) server front-end version for appropriate installation Steps. For versioning information, reference How to Identify the Dell Data Security Server Front End Version.
Warning:
- Before installation, ensure that the environment meets Dell Security Management Server Front-End / Dell Data Protection Front-End Server System Requirements.
- Anti-virus and anti-malware should be disabled while installing or upgrading the Dell Data Security front-end server to avoid impacting Microsoft C++ runtime installers, Java activities (certificate creation and manipulation), and PostgreSQL modifications. Executables or scripts initiate all these items.
- As a workaround, exclude:
[INSTALLATION PATH]:\Dell\Enterprise EditionC:\Windows\Installer- The file path from which the installer is run
- As a workaround, exclude:
Note:
- This article only covers a new front-end deployment of the Dell Data Security front-end server. For information about a back-end deployment of Dell Security Management Server, reference How to Install Dell Security Management Server.
- Client services are required for more complex or custom deployments of Dell Security Management Server. Client service engagements can be purchased through your sales representative.
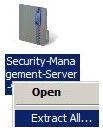
- Right-click and Extract the server software.

Note: For more information about how to download the server software, reference How to Download Dell Security Management Server.
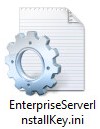
- From the extracted root folder, copy EnterpriseServerInstallKey.ini to C:\Windows.

Note: Optionally, the product key may be populated manually in Step 8.
- Go to
\x64and then double-click setup.exe.

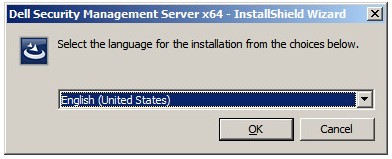
- Select the language and then click OK.

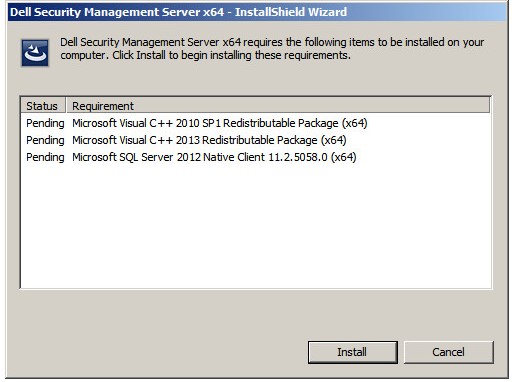
- If any missing requirements are detected, click Install. Otherwise, go to Step 6.

Note: For more information about system requirements, reference Dell Security Management Server Front-End / Dell Data Protection Front-End Server System Requirements.
- Click Next.

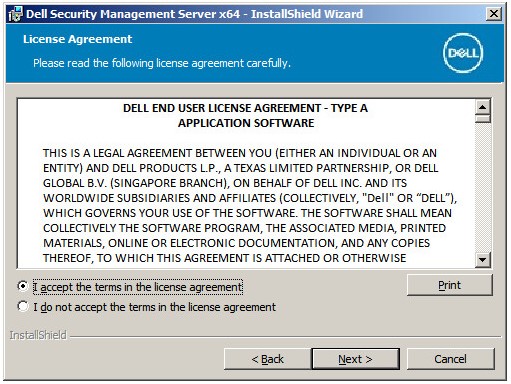
- Select I accept the terms in the license agreement and then click Next.

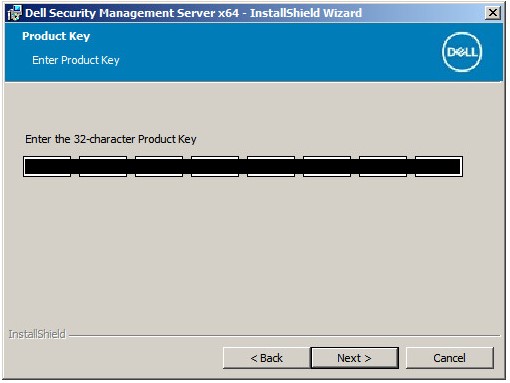
- Click Next.

Note: The product key is autopopulated (Step 2).
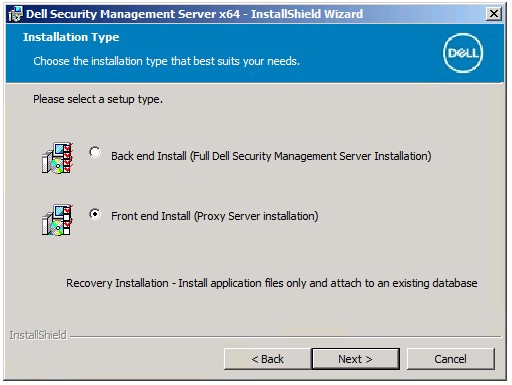
- Verify Front end Install (Proxy Server Installation) is selected and then click Next.

- Optionally Change the install directory and then click Next.

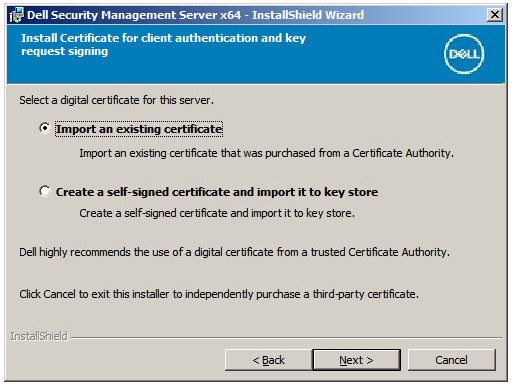
- Select either:
- Import an existing certificate and then go to Step 12.
- Create a self-signed certificate and import it to key store and then go to Step 13.

Note:
- This certificate is used to securely communicate data from the front-end server to the back-end server.
- Dell Technologies recommends a third-party certificate.
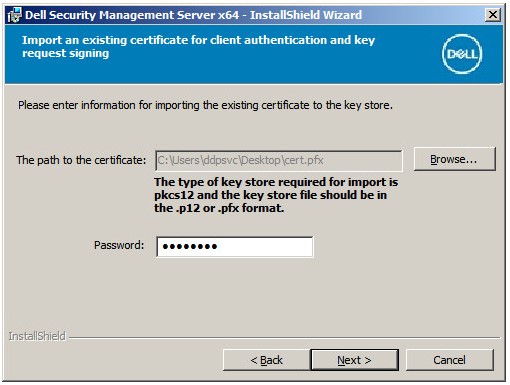
- Browse to the path of the certificate to import and populate the Password of the certificate. Once finished, click Next. Go to Step 14.

Note:
- The certificate path and name will differ in your environment.
- For more information, reference How to Create a Domain or Third-Party Certificate for Dell Data Security / Dell Data Protection Server.
- In the Create Self-Signed certificate menu:
- Confirm the Fully-qualified Computer Name.
- Populate the Organization.
- Populate the Organizational Unit.
- Populate the City/Municipality.
- Populate the State/Province.
- Populate the Country as a two-letter abbreviation.
- Click Next and then go to Step 14.

Note: The examples used in the screenshot will differ in your environment.
- Populate the fully qualified hostname or DNS alias of the back-end Dell Data Security server and then click Next.

Note: The example above will differ in your environment.
- In the Front End Server Install Setup menu:
- Optionally click Edit Hostnames and go to Step 16.
- Optionally click Edit External Facing Ports and go to Step 17.
- Optionally click Edit Internal Connecting Ports and then go to Step 18.
- Click Next and go to Step 19.

- If Edit Hostnames was clicked (Step 15), edit the appropriate front-end hostnames, and then click OK to return to Step 15.

Note:
- The hostname used must match the server name referenced in the certificate (Step 12).
- The hostnames in the screenshot examples will differ in your environment.
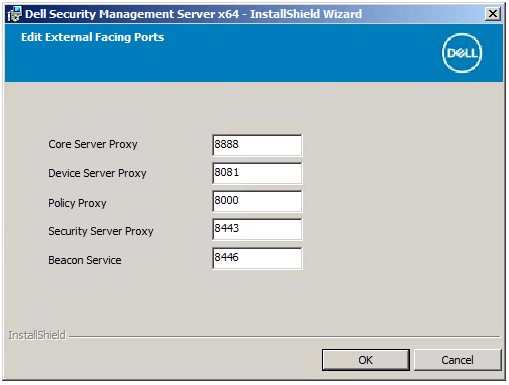
- If Edit External Facing Ports was clicked (Step 15), edit the appropriate ports, click OK, and return to Step 15.

Note:
- It is highly recommended to only change ports when there is a conflict in your environment.
- Due to the complexity of the software, ports can only be modified during the installation process.
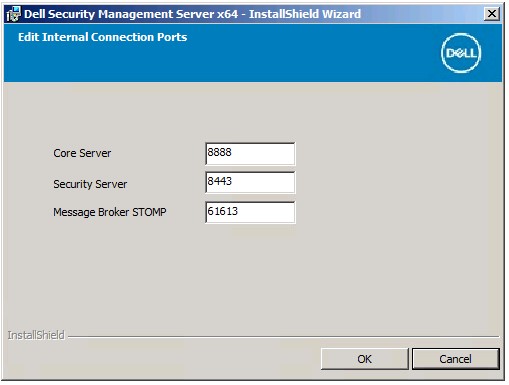
- If Edit Internal Connecting Ports was clicked (Step 15), edit the appropriate ports, click OK, and return to Step 15.

Note:
- It is highly recommended to only change ports when there is a conflict in your environment.
- Due to the complexity of the software, ports can only be modified during the installation process.
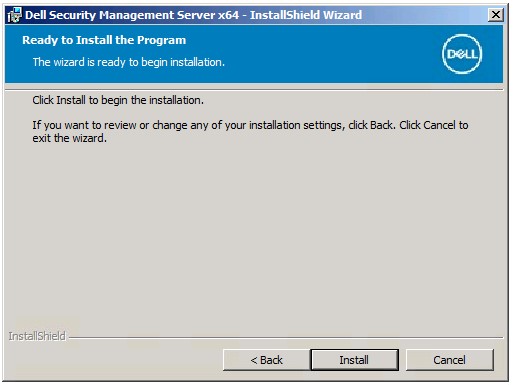
- Click Install.

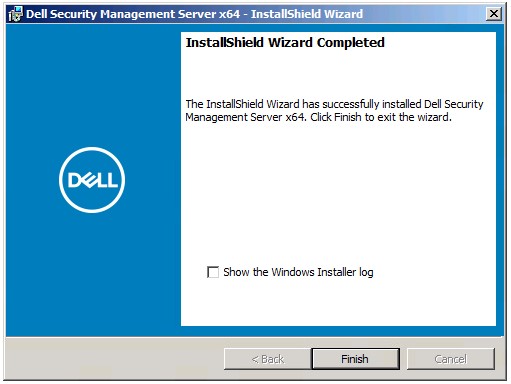
- Click Finish.

- Right-click and Extract the server software.

Note: For more information about how to download the server software, reference How to Download Dell Security Management Server.
- From the extracted root folder, copy EnterpriseServerInstallKey.ini to C:\Windows.

Note: Optionally, the product key may be populated manually in Step 8.
- Go to
\x64and then double-click setup.exe.

- Select the language and then click OK.

- If any missing requirements are detected, click Install. Otherwise, go to Step 6.

Note: For more information about system requirements, reference Dell Security Management Server Front-End / Dell Data Protection Front-End Server System Requirements.
- Click Next.

- Select I accept the terms in the license agreement and then click Next.

- Click Next.

Note: The product key is autopopulated (Step 2).
- Verify Front end Install (Proxy Server Installation) is selected and then click Next.

- Optionally Change the install directory and then click Next.

- Select either:
- Import an existing certificate and then go to Step 12.
- Create a self-signed certificate and import it to key store and then go to Step 13.

Note:
- This certificate is used to securely communicate data from the front-end server to the back-end server.
- Dell Technologies recommends a third-party certificate.
- Browse to the path of the certificate to import and populate the Password of the certificate. Once finished, click Next. Go to Step 14.

Note:
- The certificate path and name will differ in your environment.
- For more information, reference How to Create a Domain or Third-Party Certificate for Dell Data Security / Dell Data Protection Server.
- In the Create Self-Signed certificate menu:
- Confirm the Fully-qualified Computer Name.
- Populate the Organization.
- Populate the Organizational Unit.
- Populate the City/Municipality.
- Populate the State/Province.
- Populate the Country as a two-letter abbreviation.
- Click Next and then go to Step 14.

Note: The examples used in the screenshot will differ in your environment.
- Populate the fully qualified hostname or DNS alias of the back-end Dell Data Security server and then click Next.

Note: The example above will differ in your environment.
- In the Front End Server Install Setup menu:
- Optionally click Edit Hostnames and go to Step 16.
- Optionally click Edit External Facing Ports and go to Step 17.
- Optionally click Edit Internal Connecting Ports and then go to Step 18.
- Click Next and go to Step 19.

- If Edit Hostnames was clicked (Step 15), edit the appropriate front-end hostnames, and then click OK to return to Step 15.

Note:
- The hostname used must match the server name referenced in the certificate (Step 12).
- The hostnames in the screenshot examples will differ in your environment.
- If Edit External Facing Ports was clicked (Step 15), edit the appropriate ports, click OK, and return to Step 15.

Note:
- It is highly recommended to only change ports when there is a conflict in your environment.
- Due to the complexity of the software, ports can only be modified during the installation process.
- If Edit Internal Connecting Ports was clicked (Step 15), edit the appropriate ports, click OK, and return to Step 15.

Note:
- It is highly recommended to only change ports when there is a conflict in your environment.
- Due to the complexity of the software, ports can only be modified during the installation process.
- Click Install.

- Click Finish.

- Right-click and Extract the server software.
Note: For more information about how to download the server software, reference How to Download Dell Security Management Server.
- From the extracted root folder, copy EnterpriseServerInstallKey.ini to C:\Windows.
Note: Optionally, the product key may be populated manually in Step 8.
- Go to
Security Management Server\x64and then double-click setup.exe.

- Select the language and then click OK.
- If any missing requirements are detected, click Install. Otherwise, go to Step 6.
Note: For more information about system requirements, reference Dell Security Management Server Front-End / Dell Data Protection Front-End Server System Requirements.
- Click Next.
- Select I accept the terms in the license agreement and then click Next.
- Click Next.
Note: The product key is autopopulated (Step 2).
- Verify Front end Install (Proxy Server Installation) is selected and then click Next.
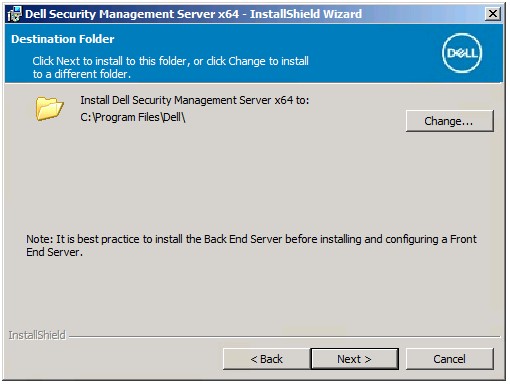
- Optionally Change the install directory and then click Next.
- If the UAC Enabled prompt appears:
- Click Yes to disable UAC.
- Reboot the server.
- Go to Step 3.
If the UAC Enabled prompt does not appear, go to Step 12.
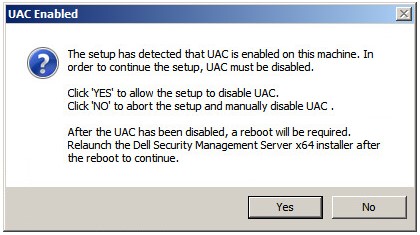
Note: Clicking No closes setup to allow UAC to be disabled manually using Windows.
- Select either:
- Import an existing certificate and then go to Step 13.
- Create a self-signed certificate and import it to key store and then go to Step 14.
Note:
- This certificate is used to securely communicate data from the front-end server to the back-end server.
- Dell Technologies recommends a third-party certificate.
- Browse to the path of the certificate to import and populate the Password of the certificate. Once finished, click Next. Go to Step 15.
Note:
- The certificate path and name will differ in your environment.
- For more information, reference How to Create a Domain or Third-Party Certificate for Dell Data Security / Dell Data Protection Server.
- In the Create Self-Signed certificate menu:
- Confirm the Fully-qualified Computer Name.
- Populate the Organization.
- Populate the Organizational Unit.
- Populate the City/Municipality.
- Populate the State/Province.
- Populate the Country as a two-letter abbreviation.
- Click Next and then go to Step 15.
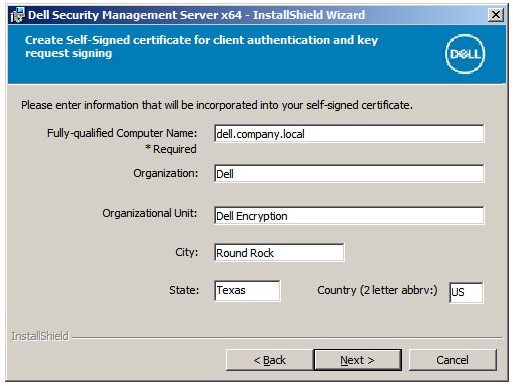
Note: All fields populated in the example above may differ in your environment.
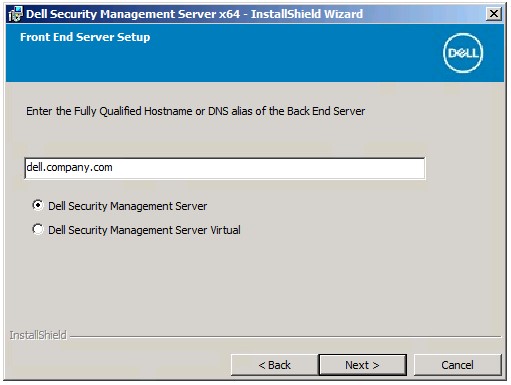
- In the Front End Server Setup menu:
- Populate the back-end server fully qualified hostname or internal DNS alias.
- Select either Dell Security Management Server or Dell Security Management Server Virtual.
- Click Next.
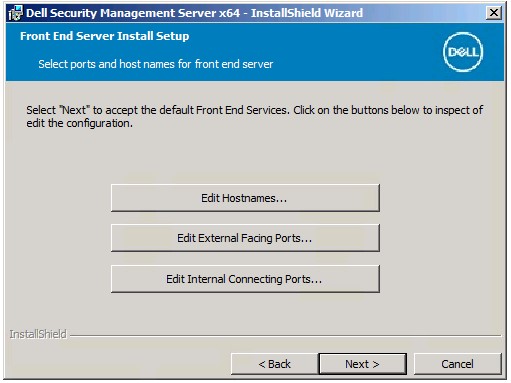
- In the Front End Server Install Setup menu:
- Optionally click Edit Hostnames and go to Step 17.
- Optionally click Edit External Facing Ports and go to Step 18.
- Optionally click Edit Internal Connecting Ports and then go to Step 19.
- Click Next and go to Step 20.
- If Edit Hostnames was clicked (Step 16), edit the appropriate front-end hostnames, and then click OK to return to Step 16.
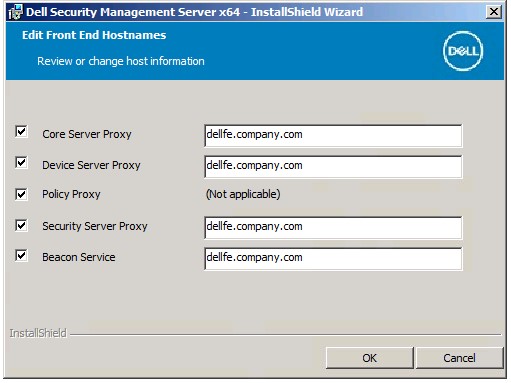
Note:
- The hostname used must match the server name referenced in the certificate (Step 12).
- The hostnames in the screenshot examples will differ in your environment.
- If Edit External Facing Ports was clicked (Step 16), edit the appropriate ports, click OK, and return to Step 16.
Note:
- It is highly recommended to only change ports when there is a conflict in your environment.
- Due to the complexity of the software, ports can only be modified during the installation process.
- If Edit Internal Connecting Ports was clicked (Step 16), edit the appropriate ports, click OK, and return to Step 16.
Note:
- It is highly recommended to only change ports when there is a conflict in your environment.
- Due to the complexity of the software, ports can only be modified during the installation process.
- Click Install.
- Click Finish.
- Right-click and Extract the server software.

Note: For more information about how to download the server software, reference How to Download Dell Security Management Server.
- From the installers directory of the extracted folder, copy EnterpriseServerInstallKey.ini to C:\Windows.

Note: Optionally, the product key may be populated manually in Step 8.
- Go to
Installers\Enterprise Server\x64and then double-click setup.exe.

- Select the language and then click OK.

- If any missing requirements are detected, click Install. Otherwise, go to Step 6.

Note: For more information about system requirements, reference Dell Security Management Server Front-End / Dell Data Protection Front-End Server System Requirements.
- Click Next.

- Select I accept the terms in the license agreement and then click Next.

- Click Next.

Note: The product key is autopopulated (Step 2).
- Verify Front end Install (Proxy Server Installation) is selected and then click Next.

- Optionally Change the install directory and then click Next.

- Select either:
- Import an existing certificate and then go to Step 12.
- Create a self-signed certificate and import it to key store and then go to Step 13.

Note:
- This certificate will be used to securely communicate data from the front-end server to the back-end server.
- Dell Technologies recommends a third-party certificate.
- Browse to the path of the certificate to import and populate the Password of the certificate. Once finished, click Next. Go to Step 14.

Note:
- The certificate path and name will differ in your environment.
- For more information, reference How to Create a Domain or Third-Party Certificate for Dell Data Security / Dell Data Protection Server.
- In the Create Self-Signed certificate menu:
- Confirm the Fully-qualified Computer Name.
- Populate the Organization.
- Populate the Organizational Unit.
- Populate the City/Municipality.
- Populate the State/Province.
- Populate the Country as a two-letter abbreviation.
- Click Next and then go to Step 14.

Note: All fields populated in the example above may differ in your environment.
- In the Front End Server Setup menu:
- Populate the back-end server fully qualified hostname or internal DNS alias.
- Select either Enterprise Edition or Virtual Edition.
- Click Next.

- In the Front End Server Install Setup menu:
- Optionally click Edit Hostnames and go to Step 16.
- Optionally click Edit External Facing Ports and go to Step 17.
- Optionally click Edit Internal Connecting Ports and then go to Step 18.
- Click Next and go to Step 19.

- If Edit Hostnames was clicked (Step 15), edit the appropriate front-end hostnames, and then click OK to return to Step 15.

Note:
- The hostname used must match the server name referenced in the certificate (Step 12).
- The hostnames in the screenshot examples will differ in your environment.
- If Edit External Facing Ports was clicked (Step 15), edit the appropriate ports, click OK, and return to Step 15.

Note:
- It is highly recommended to only change ports when there is a conflict in your environment.
- Due to the complexity of the software, ports can only be modified during the installation process.
- If Edit Internal Connecting Ports was clicked (Step 15), edit the appropriate ports, click OK, and return to Step 15.

Note:
- It is highly recommended to only change ports when there is a conflict in your environment.
- Due to the complexity of the software, ports can only be modified during the installation process.
- Click Install.

- Click Finish.

- Right-click and Extract the server software.

Note: For more information about how to download the server software, reference How to Download Dell Security Management Server.
- From the extracted root folder, copy EnterpriseServerInstallKey.ini to C:\Windows.

Note: Optionally, the product key may be populated manually in Step 8.
- Go to
Installers\Enterprise Server\[BIT]and then double-click setup.exe.

Note:
[BIT] = x64 or x86
- Select the language and then click OK.

- If any missing requirements are detected, click Install. Otherwise, go to Step 6.

Note: For more information about system requirements, reference Dell Security Management Server Front-End / Dell Data Protection Front-End Server System Requirements.
- Click Next.

- Select I accept the terms in the license agreement and then click Next.

- Click Next.

Note: The product key is autopopulated (Step 2).
- Verify Front end Install (Proxy Server Installation) is selected and then click Next.

- Optionally Change the install directory and then click Next.

- Select either:
- Import an existing certificate and then go to Step 12.
- Create a self-signed certificate and import it to key store and then go to Step 13.

Note:
- This certificate is used to securely communicate data from the front-end server to the back-end server.
- Dell Technologies recommends a third-party certificate.
- Browse to the path of the certificate to import and populate the Password of the certificate. Once finished, click Next. Go to Step 14.

Note:
- The certificate path and name will differ in your environment.
- For more information, reference How to Create a Domain or Third-Party Certificate for Dell Data Security / Dell Data Protection Server.
- In the Create Self-Signed certificate menu:
- Confirm the Fully-qualified Computer Name.
- Populate the Organization.
- Populate the Organizational Unit.
- Populate the City.
- Populate the State.
- Populate the Country as a two-letter abbreviation.
- Click Next and then go to Step 14.

Note: All fields populated in the example above may differ in your environment.
- In the Front End Server Setup menu:
- Populate the back-end server fully qualified hostname or internal DNS alias.
- Select either Enterprise Edition or Virtual Edition.
- Click Next.

- In the Front End Server Install Setup menu:
- Optionally click Edit Hostnames and go to Step 16.
- Optionally click Edit External Facing Ports and go to Step 17.
- Optionally click Edit Internal Connecting Ports and then go to Step 18.
- Click Next and go to Step 19.

- If Edit Hostnames was clicked (Step 15), edit the appropriate front-end hostnames, and then click OK to return to Step 15.

Note:
- The hostname used must match the server name referenced in the certificate (Step 12).
- The hostnames in the screenshot examples will differ in your environment.
- If Edit External Facing Ports was clicked (Step 15), edit the appropriate ports, click OK, and return to Step 15.

Note:
- It is highly recommended to only change ports when there is a conflict in your environment.
- Due to the complexity of the software, ports can only be modified during the installation process.
- If Edit Internal Connecting Ports was clicked (Step 15), edit the appropriate ports, click OK, and return to Step 15.

Note:
- It is highly recommended to only change ports when there is a conflict in your environment.
- Due to the complexity of the software, ports can only be modified during the installation process.
- Click Install.

- Click Finish.

Note: Upon completion, the Administration Console must be configured. For more information, reference How to Configure the Dell Data Security / Dell Data Protection Server Administration Console.
- Right-click and Extract the server software.

Note: For more information about how to download the server software, reference How to Download Dell Security Management Server.
- From the extracted root folder, copy EnterpriseServerInstallKey.ini to C:\Windows.

Note: Optionally, the product key may be populated manually in Step 8.
- Go to
Installers\Enterprise Server\[BIT]and then double-click setup.exe.

Note:
[BIT] = x64 or x86
- Select the language and then click OK.

- If any missing requirements are detected, click Install. Otherwise, go to Step 6.

Note: For more information about system requirements, reference Dell Security Management Server Front-End / Dell Data Protection Front-End Server System Requirements.
- Click Next.

- Select I accept the terms in the license agreement and then click Next.

- Click Next.

Note: The product key is autopopulated (Step 2).
- Optionally Change the install directory and then click Next.

- Select Complete, check Front End, and then click Next.

- In the Front End Configuration menu:
- From Settings for this server, populate the Security Server Externally resolved host with the front-end external DNS.
- From Back end settings used by this server, populate the Security Server, Core Server, Compatibility Server, and Message Broker host with the back-end internal DNS.
- Optionally edit ports.
- Click Next.

Note:
- It is highly recommended to only change ports when there is a conflict in your environment.
- Due to the complexity of the software, ports can only be modified during the installation process.
- The hostname used must match the server name referenced in the certificate (Step 12).
- The hostnames in the screenshot examples will differ in your environment.
- Select either:
- Import an existing certificate and then go to Step 13.
- Create a self-signed certificate and import it to key store and then go to Step 14.

Note:
- This certificate is used to securely communicate data from the front-end server to the back-end server.
- Dell Technologies recommends a third-party certificate.
- Browse to the path of the certificate to import and populate the Password of the certificate. Once finished, click Next. Go to Step 15.

Note:
- The certificate path and name will differ in your environment.
- For more information, reference How to Create a Domain or Third-Party Certificate for Dell Data Security / Dell Data Protection Server.
- In the Set up a Certificate Authority (CA) menu:
- Confirm the Fully-qualified Computer Name.
- Populate the Organization.
- Populate the Organizational Unit.
- Populate the City.
- Populate the State.
- Populate the Country as a two-letter abbreviation.
- Click Next and then go to Step 15.

Note: All fields populated in the example above may differ in your environment.
- Click Install.

- Click Finish.

- Right-click and Extract the server software.

Note: For more information about how to download the server software, reference How to Download Dell Security Management Server.
- Copy EnterpriseServerInstallKey.ini to C:\Windows.

Note:
- To obtain EnterpriseServerInstallKey.ini, call Dell Data Protection ProSupport. For more information, reference Dell Data Security International Support Phone Numbers.
- Optionally, the product key may be populated manually in Step 8.
- Go to
Enterprise Server\[BIT]and then double-click setup.exe.

Note:
[BIT] = x64 or x86
- Select the language and then click OK.

- If any missing requirements are detected, click Install. Otherwise, go to Step 6.

Note: For more information about system requirements, reference Dell Security Management Server Front-End / Dell Data Protection Front-End Server System Requirements.
- Click Next.

- Select I accept the terms in the license agreement and then click Next.

- Click Next.

Note: The product key is autopopulated (Step 2).
- Optionally Change the install directory and then click Next.

- Select Complete, check Front End, and then click Next.

- In the Front End Configuration menu:
- From Settings for this server, populate the Security Server Externally resolved host with the front-end external DNS.
- From Back end settings used by this server, populate the Security Server, Core Server, Compatibility Server, and Message Broker host with the back-end internal DNS.
- Optionally edit ports.
- Click Next.

Note:
- It is highly recommended to only change ports when there is a conflict in your environment.
- Due to the complexity of the software, ports can only be modified during the installation process.
- The hostname used must match the server name referenced in the certificate (Step 12).
- The hostnames in the screenshot examples will differ in your environment.
- Select either:
- Import an existing certificate and then go to Step 13.
- Create a self-signed certificate and import it to key store and then go to Step 14.

Note:
- This certificate is used to securely communicate data from the front-end server to the back-end server.
- Dell Technologies recommends a third-party certificate.
- Browse to the path of the certificate to import and populate the Password of the certificate. Once finished, click Next. Go to Step 15.

Note:
- The certificate path and name will differ in your environment.
- For more information, reference How to Create a Domain or Third-Party Certificate for Dell Data Security / Dell Data Protection Server.
- In the Set up a Certificate Authority (CA) menu:
- Confirm the Fully-qualified Computer Name.
- Populate the Organization.
- Populate the Organizational Unit.
- Populate the City.
- Populate the State.
- Populate the Country as a two-letter abbreviation.
- Click Next and then go to Step 15.

Note: All fields populated in the example above may differ in your environment.
- Click Install.

- Click Finish.

- Right-click and Extract the server software.

Note: For more information about how to download the server software, reference How to Download Dell Security Management Server.
- Copy EnterpriseServerInstallKey.ini to C:\Windows.

Note:
- To obtain EnterpriseServerInstallKey.ini, call Dell Data Protection ProSupport. For more information, reference Dell Data Security International Support Phone Numbers.
- Optionally, the product key may be populated manually in Step 8.
- Go to
Installers\Enterprise Server\[BIT]and then double-click setup.exe.

Note:
[BIT] = x64 or x86
- Select the language and then click OK.

- If any missing requirements are detected, click Install. Otherwise, go to Step 6.

Note: For more information about system requirements, reference Dell Security Management Server Front-End / Dell Data Protection Front-End Server System Requirements.
- Click Next.

- Select I accept the terms in the license agreement and then click Next.

- Click Next.

Note: The product key is autopopulated (Step 2).
- Optionally Change the install directory and then click Next.

- Select Complete, check Front End, and then click Next.

- In the Front End Configuration menu:
- From Settings for this server, populate the Security Server Externally resolved host with the front-end external DNS.
- From Back end settings used by this server, populate the Security Server, Core Server, Compatibility Server, and Message Broker host with the back-end internal DNS.
- Optionally edit ports.
- Click Next.

Note:
- It is highly recommended to only change ports when there is a conflict in your environment.
- Due to the complexity of the software, ports can only be modified during the installation process.
- The hostname used must match the server name referenced in the certificate (Step 12).
- The hostnames in the screenshot examples will differ in your environment.
- Select either:
- Import an existing certificate and then go to Step 13.
- Create a self-signed certificate and import it to key store and then go to Step 14.

Note:
- This certificate is used to securely communicate data from the front-end server to the back-end server.
- Dell Technologies recommends a third-party certificate.
- Browse to the path of the certificate to import and populate the Password of the certificate. Once finished, click Next. Go to Step 15.

Note:
- The certificate path and name will differ in your environment.
- For more information, reference How to Create a Domain or Third-Party Certificate for Dell Data Security / Dell Data Protection Server.
- In the Set up a Certificate Authority (CA):
- Confirm the Fully-qualified Computer Name.
- Populate the Organization.
- Populate the Organizational Unit.
- Populate the City.
- Populate the State.
- Populate the Country as a two-letter abbreviation.
- Click Next and then go to Step 15.

Note: All fields populated in the example above may differ in your environment.
- Click Install.

- Click Finish.

To contact support, reference Dell Data Security International Support Phone Numbers.
Go to TechDirect to generate a technical support request online.
For additional insights and resources, join the Dell Security Community Forum.
Additional Information
Videos
Affected Products
Dell EncryptionArticle Properties
Article Number: 000130572
Article Type: Solution
Last Modified: 28 Apr 2023
Version: 9
Find answers to your questions from other Dell users
Support Services
Check if your device is covered by Support Services.