How to Enable the Citrix XenDesktop Restart Option for Dell Hybrid Client
Summary: This article provides information to enable the Restart feature for published Citrix Desktops.
This article applies to
This article does not apply to
This article is not tied to any specific product.
Not all product versions are identified in this article.
Instructions
This article provides the steps to enable the Restart feature for the published Citrix Desktops (normal and server) so that users get a fresh session every time that they are using same resource. For server desktops, this is a new session that is enabled for users. For normal desktops, it is a system fresh out of system restart.
Affected Products:
- Dell Hybrid Client
Affected Operating Systems:
- Citrix XenDesktop
Affected Versions:
- Citrix Workspace Application version 2211 and later
- Citrix XenDesktop version 2209 and later
Note: Successful implementation of the instructions in this article requires that the user is a Citrix administrator and has information about the Citrix Server configurations.
To configure the server:
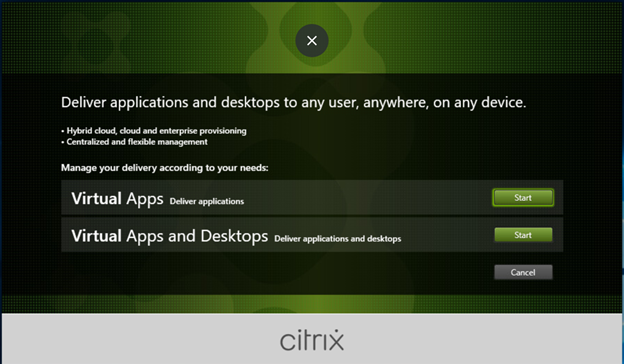
- From the Citrix Server on the opening screen, click the Start button on the Virtual Apps and Desktops.
- On the opening screen of the Citrix Virtual Apps and Desktops installer, click the Start button by Virtual Apps and Desktops.
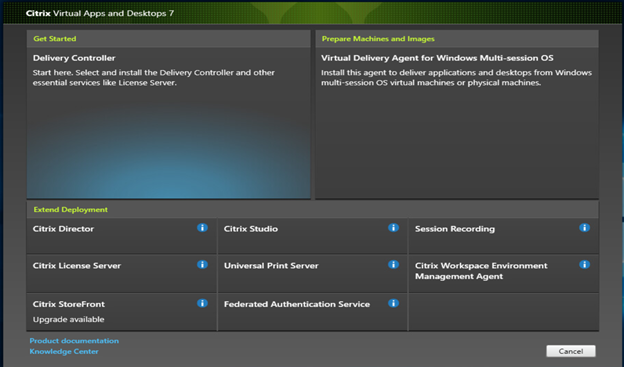
- Click Delivery Controller.
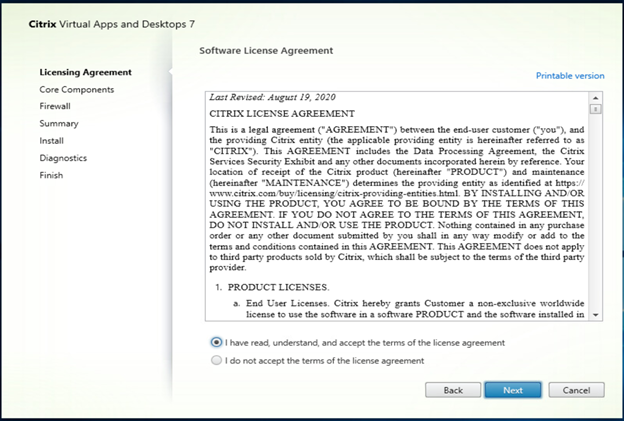
- Accept the license agreement and then click Next.
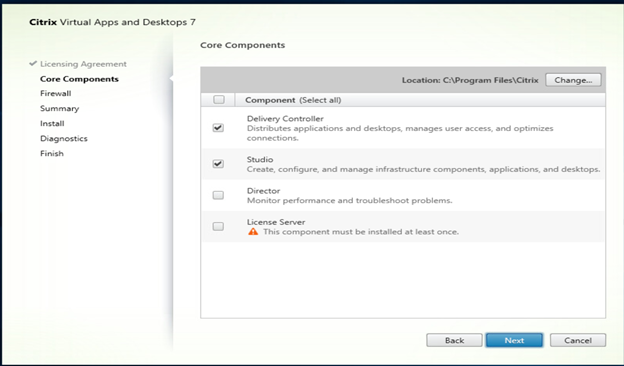
- Select Delivery Controller and Studio, then click Next.
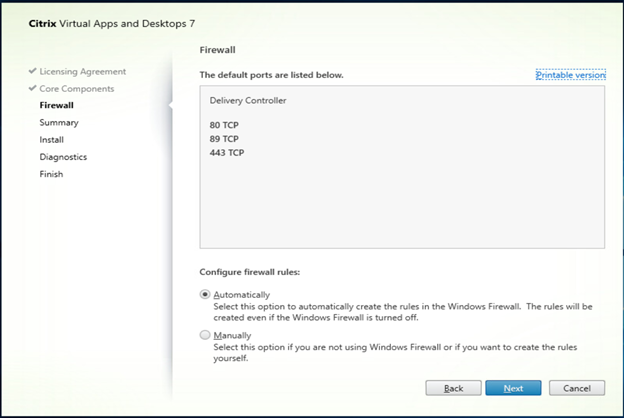
- Configure firewall ports as required and then click Next.
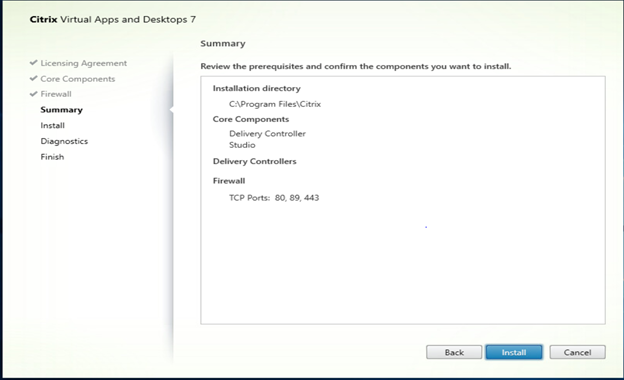
- Review the selected components and then click Next.
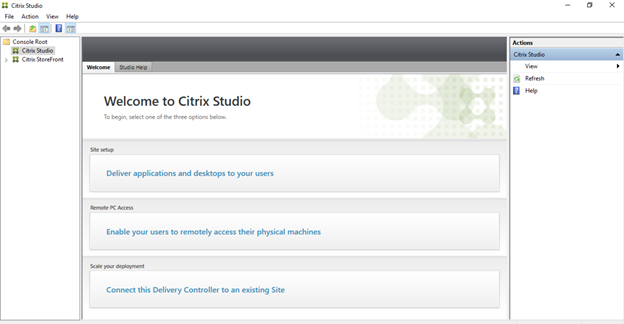
- After installation, open Citrix Studio and then click Deliver applications and desktops to your users.
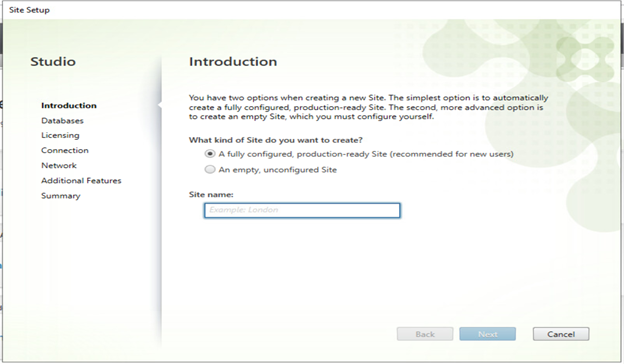
- Select what kind of site to create, populate a Site name, and then click Next.
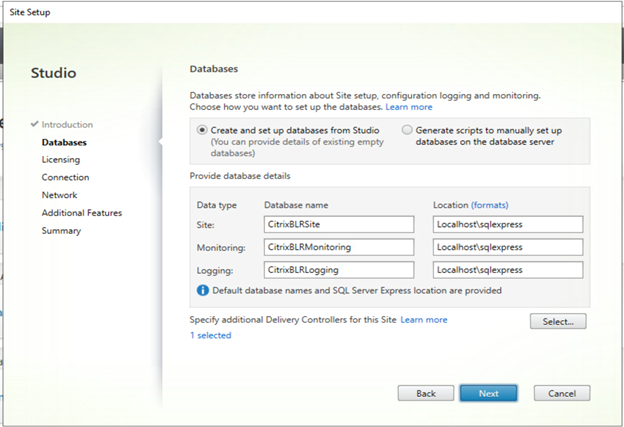
- Select how to set up databases, populate database information, and then click Next.
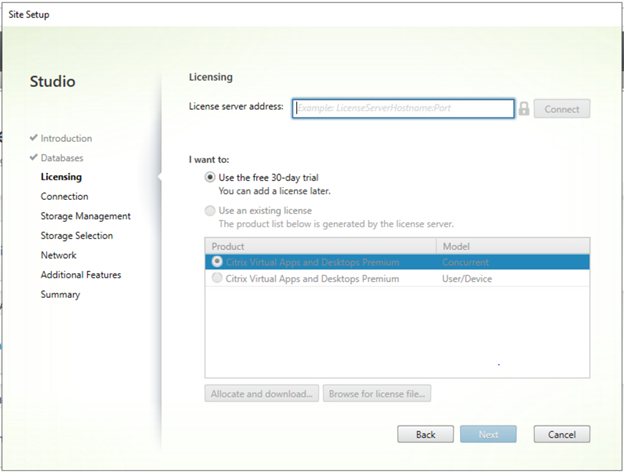
- Enter Citrix license details and then click Next.
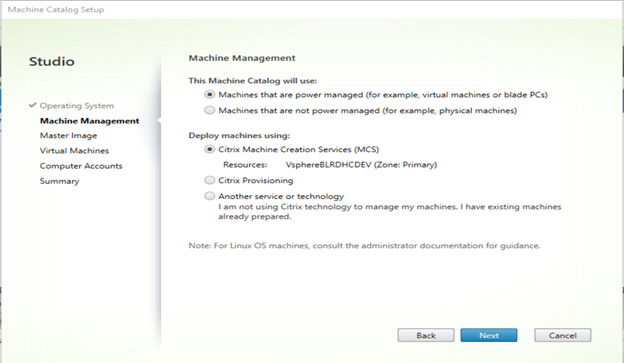
- For enabling power-managed desktops while configuring Citrix Studio in Virtual apps and Desktop, select a Virtual Managed Machine (VMware vSphere, Citrix Hypervisor, and so on).
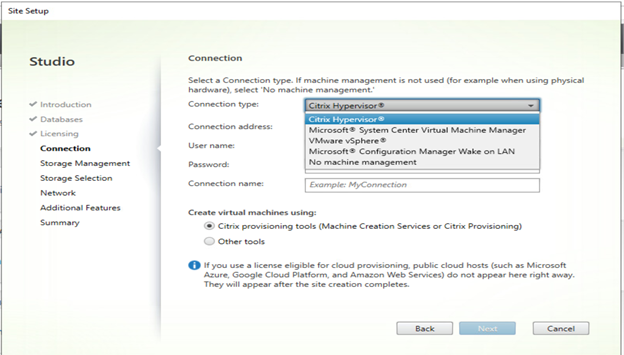
Note: If No machine management is selected from the drop-down, the Restart button is not available in Citrix Workspace for a Windows single-session operating system.
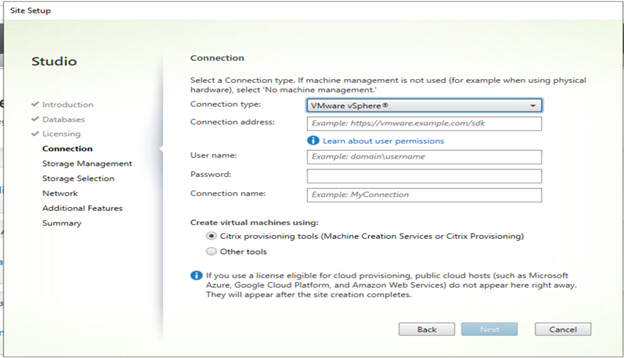
- After selecting the connection type from the drop-down, populate the additional details and credentials, then click Next.
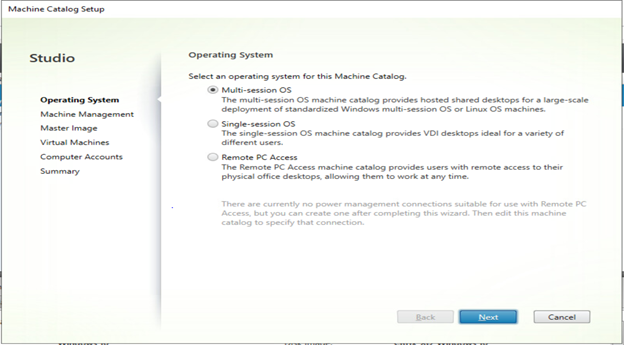
- Select the operating system type as either Single-session OS or Multi-Session OS as required and then click Next.
- Select Machines that are power managed, select Citrix Machine Creation Services (MCS), and then click Next.
Note:
- Enabling the Power-Managed client enables the restart button in Citrix Workspace for a Windows single-session OS.
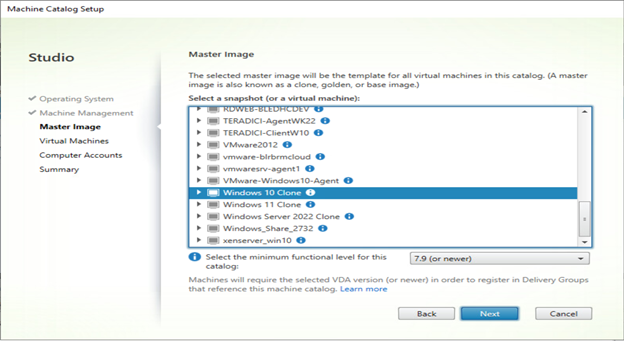
- Before creating the Machine Catalogue, you must create a Required Desktop with Citrix VDA installed in your Virtual Managed machine for cloning. For more information, reference Citrix - Install VDAs
.
- Select the master image for cloning, and then click Next.
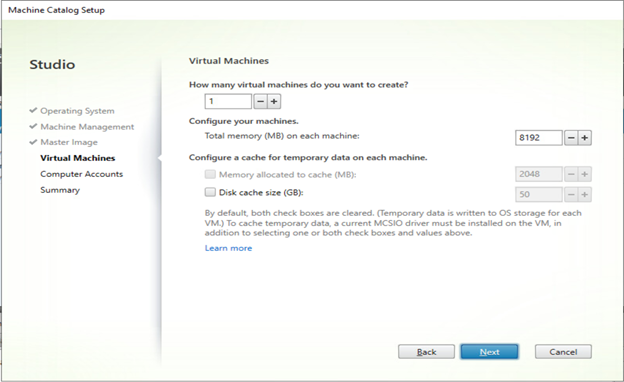
- Select the number of virtual machines, select the total memory for each machine, and then click Next.
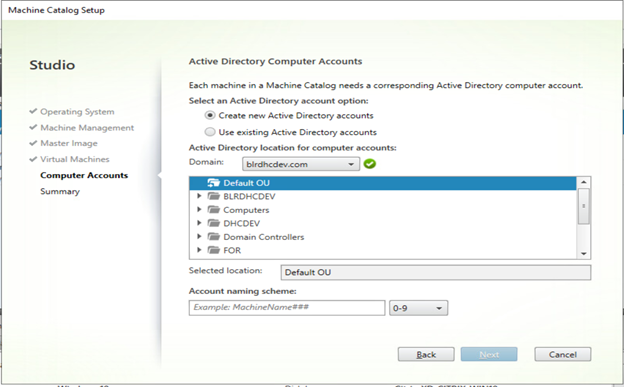
- Select domain details, provide the computer naming scheme for VDAs, and then click Next.
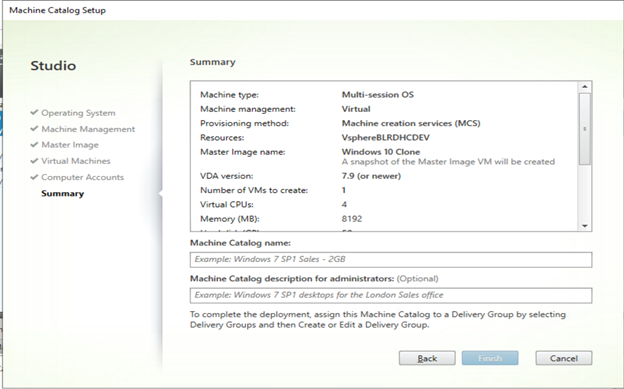
- Populate the Machine Catalog name and then click Finish so it can create VDAs from the clone image.
- After creating machine catalog, create the Delivery Group, create the Application Group, and then assign the users as required.
Note: For more information about creating Delivery groups, Application groups, and StoreFront, reference Citrix documentation.
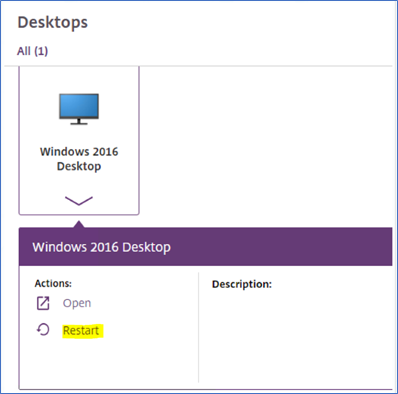
- Check Citrix Workspace and verify that the Windows single-session desktops have the Restart button enabled.
Affected Products
Dell Hybrid ClientArticle Properties
Article Number: 000209750
Article Type: How To
Last Modified: 16 Feb 2023
Version: 1
Find answers to your questions from other Dell users
Support Services
Check if your device is covered by Support Services.