Avamar : How to install hotfix on avamar proxy using AUI
Summary: The goal of this KB Article is to provide instructions to install the Hotfix on the Avamar Proxy using Avamar User Interface (AUI) in Avamar 19.1 or higher versions.
Instructions
Avamar Version 19.1 introduced a new tab in AUI for Proxy Management which helps in deploying proxy and also manage patches. with new Proxy management, we upload the Hotfix and Install it on all the available proxies from Avamar AUI.
Note: No backup or restore should be running on Avamar while upgrading the proxy.
- Login to Avamar user interface (AUI).
AUI can be accessed by typing https://avamar_server/aui, where avamar_server is IP or Hostname of the Avamar server.
- Select >> to expand the left pane, select Proxy Management under Administration.
- Once the Proxy Management is selected, On the right, we see Proxy Deployment and Proxy Patches

- Under the Available Patches option, we can upload the Hotfix, in case of Rollup no need to extract we can directly upload the tgz file.
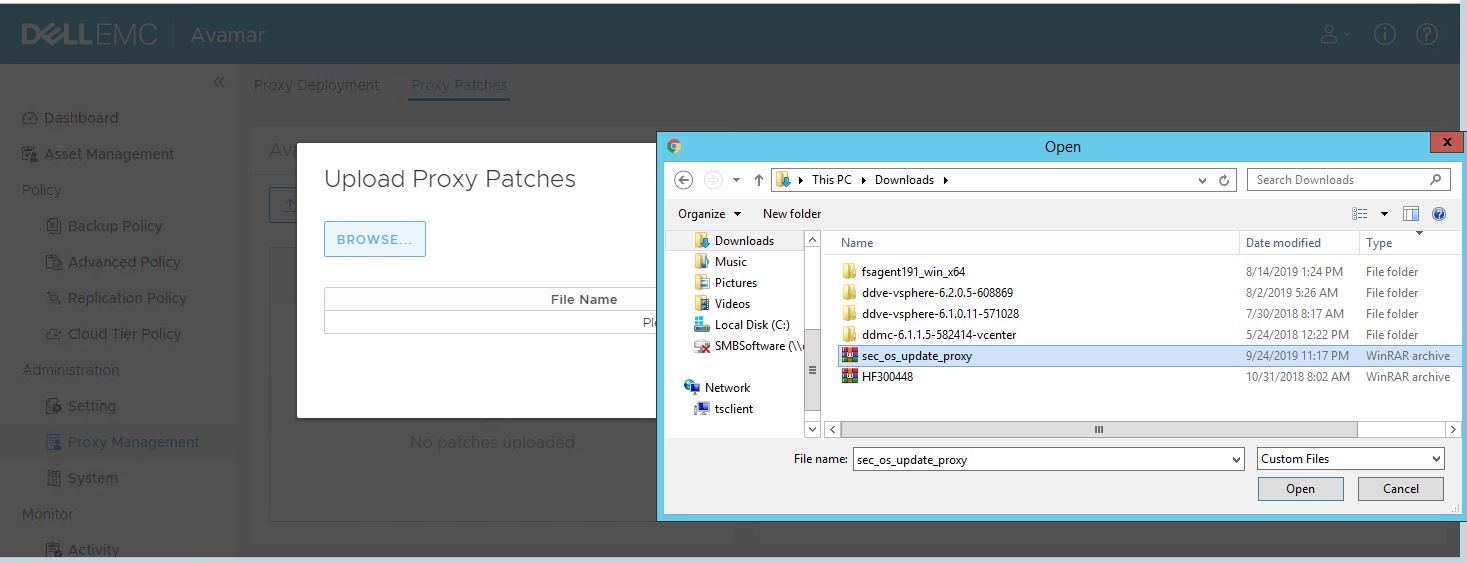
- Required RPM file is selected to upload, Select Upload

- Once the package is uploaded it would be available for installation on the right window.

Select the appropriate proxy and hit INSTALL PATCH.
Note: Pictures used in the KB are for representation purposes, Hotfix and file names might change based on the version and nature of the Hotfix.
Note: No backup or restore should be running on Avamar while upgrading the proxy.
- Login to Avamar user interface (AUI).
AUI can be accessed by typing https://avamar_server/aui, where avamar_server is IP or Hostname of the Avamar server.
- Select >> to expand the left pane, select Proxy Management under Administration.
- Once the Proxy Management is selected, On the right, we see Proxy Deployment and Proxy Patches
- Under the Available Patches option, we can upload the Hotfix, in case of Rollup no need to extract we can directly upload the tgz file.
- Required RPM file is selected to upload, Select Upload
- Once the package is uploaded it would be available for installation on the right window.
Select the appropriate proxy and hit INSTALL PATCH.
Note: Pictures used in the KB are for representation purposes, Hotfix and file names might change based on the version and nature of the Hotfix.