Article Number: 000194945
Re-imaging ThinOS on a Latitude 3440, Latitude 5440, and OptiPlex 7410 AIO
Summary: Wyse ThinOS may be reinstalled using a USB drive that is supplied by Dell support.
Article Content
Instructions
Affected Platforms:
- Latitude 3440
- Latitude 5440
- OptiPlex 7410 All-in-One
Affected Operating Systems:
- Wyse ThinOS
Note: For system board replacement service scenario, the ThinOS Recovery USB Key is dispatched with the replacement system board.
- Insert the Thin OS Recovery USB Key into a USB port of the device.
- Power on the device, press F2 to enter BIOS setup.
Note: The BIOS admin password is
Fireport.
- Go to Boot Configuration and check that Secure Boot is Disabled.
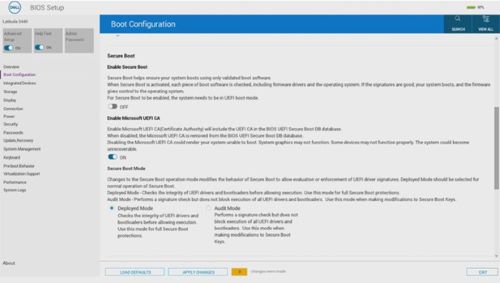
Figure 1: (English Only) Check that Secure Boot is disabled
- Go to Integrated Devices and Enable USB boot support.
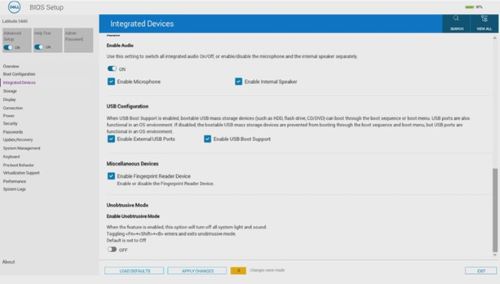
Figure 2: (English Only) Enable USB boot support
- Go to Storage, SATA/NVMe Operations and select ACHI/NVMe.
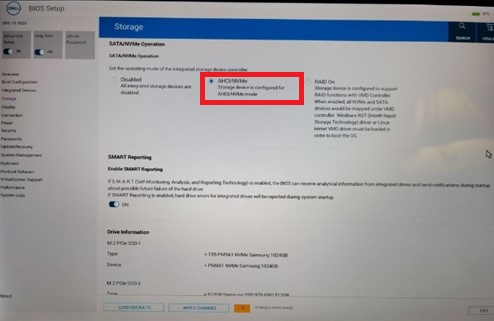
Figure 3: (English Only) Select ACHI/NVMe
- Save the settings and Exit.
- When the Thin Client reboots, press F12 to trigger the Boot Menu and select the bootable ThinOS Recovery USB drive and Press Enter.
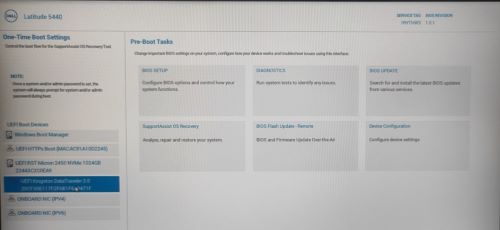
Figure 4: (English Only) Select the bootable Thin operating system Recovery USB drive
- Select OK at the screen below.
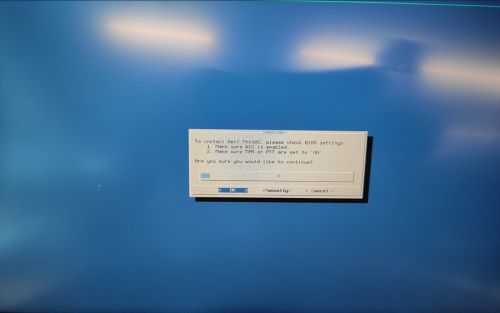
Figure 5: (English Only) Click OK
- Once the installation is completed, the EULA screen is displayed. Select Click here to accept all EULA's checkbox and click on Accept.
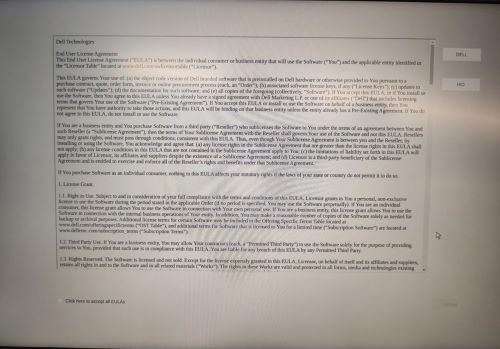
Figure 6: (English Only) Check Click here to accept all EULAs and click Accept
- Click on the next arrow at the Welcome screen.
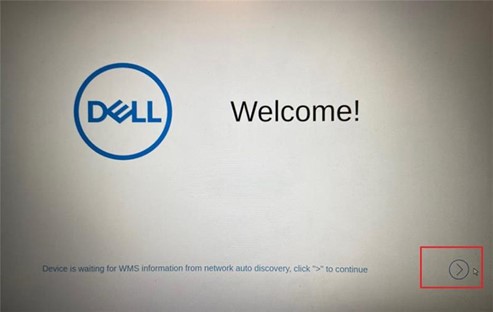
Figure 7: (English Only) Click Next
- Press Ctrl + Esc to bypass the Out of Box Experience (OOBE) Setup at the Language Selection screen.
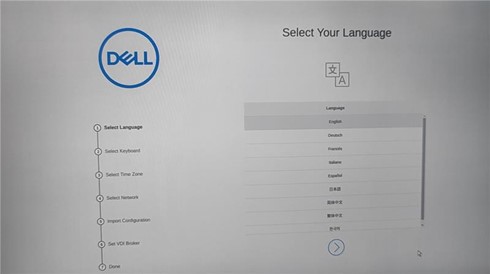
Figure 8: (English Only) Bypass the OOBE
- At the ThinOS desktop, select the option Reset the system setting to factory default and Shutdown the device.
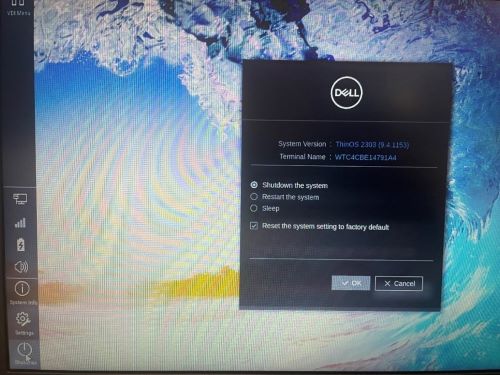
Figure 9: (English Only) Select Reset the system setting to factory default and Shutdown the device
Article Properties
Affected Product
Latitude 3440, Latitude 5440, OptiPlex All-In-One 7410, Wyse ThinOS
Last Published Date
03 Jan 2024
Version
7
Article Type
How To