Dell Data Securityサーバーの管理対象レポートをスケジュールする方法
Summary: 管理対象レポートは、次の手順に従ってDell Data Securityサーバーでスケジュール設定できます。
This article applies to
This article does not apply to
This article is not tied to any specific product.
Not all product versions are identified in this article.
Symptoms
管理者は、Dell Data Securityサーバー(Dell Security Management ServerまたはDell Security Management Server Virtual)のEメール受信者のリストに管理対象レポートを送信するようにスケジュール設定できます。
対象製品:
- Dell Security Management Server
- Dell Security Management Server Virtual
影響を受けるバージョン:
- v10.1.0以降
Cause
該当なし
Resolution
新規または既存の管理対象レポートは、1つ以上のメール アドレスに送信するようにスケジュール設定できます。詳細については、該当するタスクをクリックしてください。
注:
- Eメール通知では、Dell Data SecurityサーバーでSMTPを設定する必要があります。
- 詳細については、「Dell Data Security ServersでSMTP設定を構成する方法(英語)」を参照してください。
新規
- Dell Data Security管理コンソールにサイン インします。

注:詳細については、「 Dell Data Security Server管理コンソールへのアクセス方法 」を参照してください。
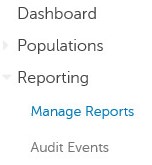
- 左側のメニュー ペインで、[Reporting]、[Manage Reports]の順にクリックします。
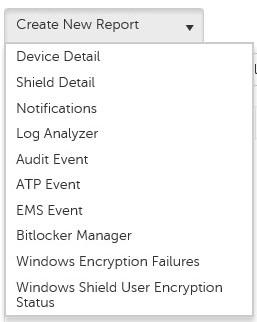
- [Create New Report]ドロップダウンをクリックして、適切なレポートを選択します。
- デフォルトのレポート フィルターに変更を加えます。完了したら、[Save As]をクリックします。

- [Report - Save As]メニューで、次の手順を実行します。
- [Report Name]にレポート名を入力します。
- [説明]を入力します。
- 必要に応じて[Private]をオンにします。
- 「Save(保存)」をクリックします。
![[Report - Save As]メニュー](https://supportkb.dell.com/img/ka06P000000sm9aQAA/ka06P000000sm9aQAA_ja_5.jpeg)
注:所有者とレポート管理者のみがプライベート レポートを表示できます。
- [Schedule](スケジュール)をクリックします。
![[Schedule]ボタン](https://supportkb.dell.com/img/ka06P000000sm9aQAA/ka06P000000sm9aQAA_ja_6.jpeg)
- [Add Schedule]をクリックします。

- [Add Schedule]メニューで、次の手順を実行します。
- レポートを受信するには、Eメールを入力します。
- レポートを実行するスケジュールを選択します。
- 実行時刻を選択します。
- ロケールを選択します。
- 「Save(保存)」をクリックします。
![[Add Schedule]メニュー](https://supportkb.dell.com/img/ka06P000000sm9aQAA/ka06P000000sm9aQAA_ja_8.jpeg)
注:複数のEメール アドレスはコンマで区切って指定できます。
既存
- Dell Data Security管理コンソールにサイン インします。
注:詳細については、「 Dell Data Security Server管理コンソールへのアクセス方法 」を参照してください。
- 左側のメニュー ペインで、[Reporting]、[Manage Reports]の順にクリックします。

- スケジュールするレポートを選択します。

注:レポート情報(名前、説明、レポート タイプ)は、環境によって異なる場合があります。
- [Schedule](スケジュール)をクリックします。
![[Schedule]ボタン](https://supportkb.dell.com/img/ka06P000000sm9aQAA/ka06P000000sm9aQAA_ja_12.jpeg)
- [Add Schedule]をクリックします。

- [Add Schedule]メニューで、次の手順を実行します。
- レポートを受信するには、Eメールを入力します。
- レポートを実行するスケジュールを選択します。
- 実行時刻を選択します。
- ロケールを選択します。
- 「Save(保存)」をクリックします。
![[Add Schedule]メニュー](https://supportkb.dell.com/img/ka06P000000sm9aQAA/ka06P000000sm9aQAA_ja_14.jpeg)
注:複数のEメール アドレスはコンマで区切って指定できます。
サポートに問い合わせるには、「Dell Data Securityのインターナショナル サポート電話番号」を参照してください。
TechDirectにアクセスして、テクニカル サポート リクエストをオンラインで生成します。
さらに詳しい情報やリソースについては、「デル セキュリティ コミュニティー フォーラム」に参加してください。
Affected Products
Dell EncryptionArticle Properties
Article Number: 000125166
Article Type: Solution
Last Modified: 23 Oct 2023
Version: 8
Find answers to your questions from other Dell users
Support Services
Check if your device is covered by Support Services.