

Unsolved
11 Legend
•
16.1K Posts
•
65.9K Points
2
108517
November 30th, 2023 07:54

Creating a Windows Bootable USB on Ubuntu
How Do I Prepare Windows Installation Media on Linux?
This tutorial will look at preparing a Windows 11 Bootable USB on Ubuntu with the Intel Rapid Storage Technology Driver also known historically as F6 Preinstallation Drivers. In order to show up as a Boot Device on all supported systems, a FAT32 Boot Partition and a NTFS Install Partition need to be setup.
System Information
Open up All Apps and select Settings:


Then select About. This will give the Ubuntu Version and details about the Hardware Model (in this case XPS 13 9305) and Processor Generation (in this case 11th Generation):
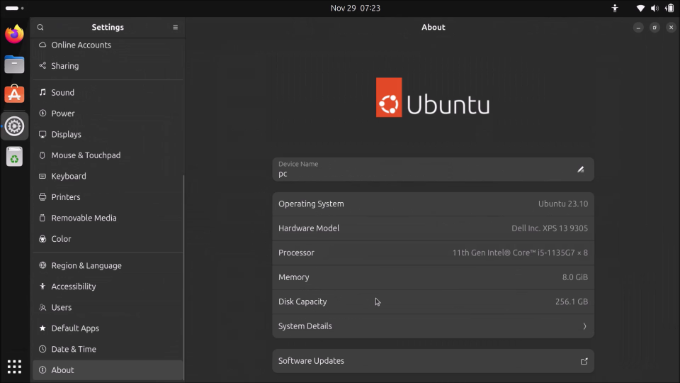

This tutorial assumes a modern Ubuntu Version (Ubuntu 23.04+). There may be difficulties reproducing this tutorial on an old Linux Version as the old Linux Kernel lacked a functional NTFS driver.
Downloading a Windows ISO
Windows Installation Media can be downloaded from Microsoft:
It is recommended to use Windows 11 (Mainstream) for a system with an 8th Generation Processor and Newer and to use Windows 10 (Mainstream) for a system with a 4th-7th Generation Processor.
Select the last link on the page to download the ISO. The Media Creation Tool and Upgrade Assistant are Windows Applications which cannot be run on Linux:


Select the multi-edition ISO for x64 devices:


Then select Download Now:


Select the Language. Note English International is English (UK):


Select 64 Bit Download:


Wait for the ISO to Download:


Checking ISO Checksums
Open the Downloads folder. Right click it and select Open in Terminal:


Right click the ISO file and select Rename:


Copy the File name using Ctrl + c:


To compute the sha256 checksum input the following command (using the name of your downloaded ISO):
sha256sum Win11_23H2_EnglishInternational_x64.isoTo paste in the Terminal use Ctrl + Shift + v:


To copy the checksum use Ctrl + Shift + c:


On the Software Download Page, select Verify your Download:


Press Ctrl + f and then Ctrl + c to paste in your ISO checksum. The checksum should match Microsoft's listing otherwise the download is corrupt and you will need to redownload:


Mounting the ISO
The ISO can be right clicked and mounted to view its contents:


Partitioning the USB Flash Drive
Insert a 16+ GB USB Flash Drive:


To partition it, GParted will have to be installed. Open the Ubuntu software store and search for GParted.
Note that Ubuntu uses Snap packages by default but is a Debian based distribution so also has access to Debian packages. Snap packages are usually more secure and recommended when available. GParted is a system utility and needs more access so is only available as a Debian package:


Select GParted Partition Editor:


Select Install:


Installation will require authentication. Input your password to proceed:


Launch GParted from the All Apps screen:


Use of GParted will require authentication. Input your password to proceed:


Your OS Boot drive will be selected by default:

Change it to the USB Flash Drive:


Right click any partition on the USB flash drive and select Unmount:


Select Device → Create Partition Table:


Select GPT and then Apply:

 Right click the USB flash drive and select New:
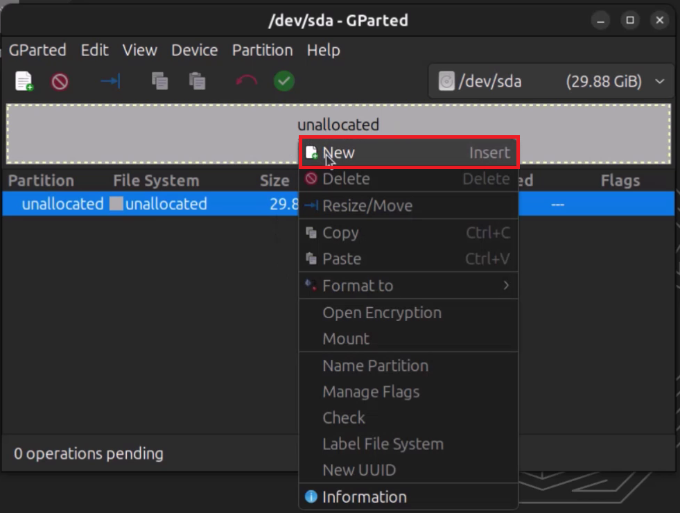
 Set the New size to 1024, the File System to FAT32 and the Label to BOOT:


Right click the remaining unallocated space on the USB flash drive and select New:


Set the New size to the default (spanning the rest of the drive) the File System to NTFS and the Label to INSTALL:


Select Apply:


Select Apply:


When the Operations are complete select Close:


Then close GParted:
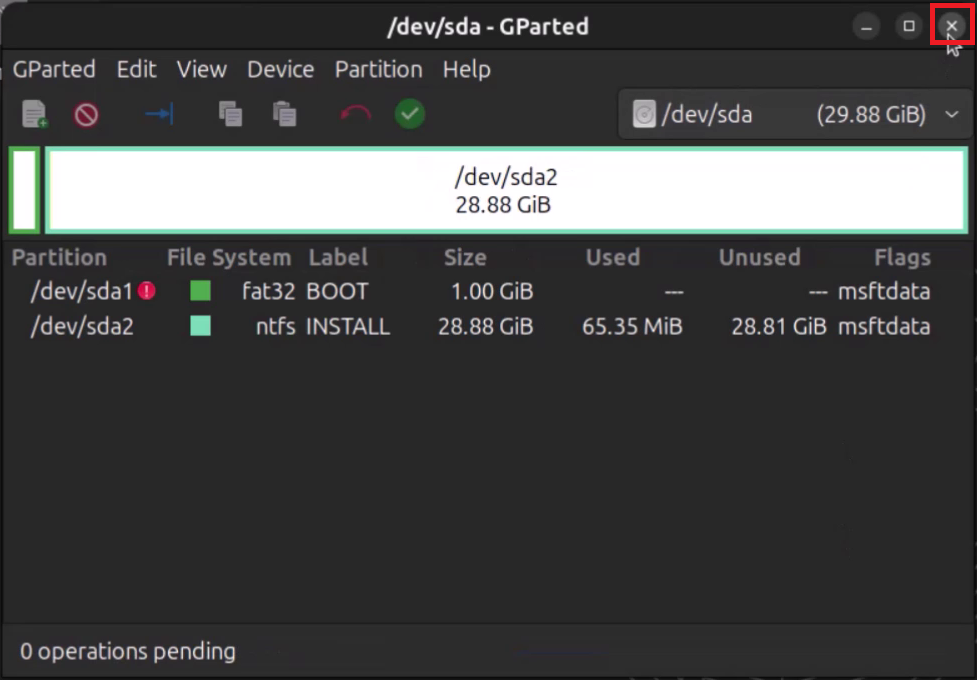

The drive is now partitioned and each partition will be mounted by Ubuntu:


Copying Files
Copy all the files from the Mounted ISO except Sources to the BOOT Partition:


These are large files so open the side menu and examine the progress:


Wait for the copying operation to proceed:


Right click the Boot partition and select New Folder:


Call it sources:


Open both sources folders:


Copy the boot.wim from the ISO sources to sources:


Copy all the files from the mounted ISO to the INSTALL Partition:


These are a number of large files, particularly the install.wim. Once again monitor the progress and make sure all the files are copied across:


Intel Rapid Storage Technology Driver
The Intel Rapid Storage Technology Driver from Intel does not extract properly on Linux so it is recommended to use the Dell Update Package.
Go to:
Select Browse All products:


Select your Model, in my case an XPS 13 9305:


For Operating System select Windows and for category select Storage:


Look for Intel Rapid Storage technology and select Download:


The Dell Update Package is a Windows Application. However it can be treated as an archive on Linux:


To extract it P7zip needs to be installed Open up the Ubuntu software store and search for P7Zip. This is available as a Snap package. Select Install:

Installation will require authentication. Input your password to proceed:


Open All Apps and select P7Zip:


Select the Downloads folder:


Select the Intel Rapid Storage Technology Driver .exe and then select Extract:


append /IntelRST to the file path and select OK:


Then close P7Zip:


The driver is now extracted:


Open the extracted folder:


And open the next folder:


Until you find a Windows10 (this shows up for the Windows 11 driver) folder:


And a Windows 10 build (this means this built + newer builds, including Windows 11):


Finally you will get to the extracted drivers:


In this folder is a folder containing the driver for each storage controller operation:


On this system VMD should be used and more details are given in the Storage section of this systems UEFI BIOS Setup:


The Windows setup needs to load the driver using the iaStorVD.inf file:


Go to the Drivers folder and select Copy:


Then paste it in the INSTALL partition:


The Windows 11 Installation Media is now ready:


Dell UEFI BIOS Setup
Power up the Dell PC and press F2 to enter the UEFI BIOS setup.
The overview will give details about the processor, including the generation, memory, video controller, wireless device, and drives:


Old Boot Entries should be deleted from Boot Configuration:


Ubuntu and most other mainstream Linux distributions now support Secure Boot so this setting should be enabled by default. Secure Boot is required for Windows 11 and recommended for Windows 10:


The Storage Controller Operation has to be AHCI/NVMe to run Linux as there is no Linux Kernel VMD Driver:


For Windows, this Storage Operation will result in a performance loss and RAID On should be Enabled. For this system the RAID functions with a VMD Controller:


Windows 11 also requires TPM 2.0 Security to be enabled:


Dell Data Wipe can optionally be enabled to wipe the systems internal drives before Windows installation. Dell Data Wipe is found under a Maintenance tab opposed to a Security tab in some Dell Models.
Note: Dell Data Wipe will take about a minute to wipe a fast NVMe SSD which wipes its bits in parallel however Dell Data Wipe will take several hours to wipe a slow HDD which wipes its bits sequentially.


The settings can be applied:


Select Exit:


Your Computer will restart and the Dell Security Manager will display the Data Wipe Operation. Select Continue:


Select Erase:


Booting from a Windows USB
Power up the Dell PC and press F12 to enter the Boot Menu. On this system the BOOT FAT32 Partition displays as UEFI Samsung Flash Drive and the INSTALL NTFS partition displays as UEFI Samsung Flash Drive 2 and the Windows setup will begin if either partition is selected. On some other systems only the BOOT FAT32 Partition will display as a Boot Entry:

The Windows setup, doesn't have the Storage Controller for this system and therefore no system drive is listed. Select Browse:


Select the INSTALL (D:) partition, then the Drivers folder and then either the VMD, RAID or AHCI folder. In this case the VMD folder should be selected to match the setting in the Dell UEFI BIOS Setup:

Highlight all the drivers listed and select Next:


Once the Storage Controller is loaded, the Windows setup the system drive should populate:

