文章編號: 000130800
如何下载 Dell Encryption Enterprise/Dell Encryption Personal 恢复包
摘要: 下载 LSA 恢复包以与 Dell Encryption Enterprise 和 Dell Encryption Personal 配合使用。
文章內容
症狀
本地安全管理员 (LSA) 恢复包用于重新获得对 Dell Encryption Enterprise(以前称为 Dell Data Protection | Enterprise Edition)或 Dell Encryption Personal(以前称为 Dell Data Protection | Personal Edition)数据的访问权限。本文介绍如何下载 LSA 恢复包。
受影响的产品:
Dell Encryption Enterprise
Dell Data Protection | Enterprise Edition
Dell Data Protection | Server Edition
Dell Encryption Personal
Dell Data Protection | Personal Edition
受影响的操作系统:
Windows
原因
不适用。
解析度
各产品的此过程有所不同:
- Dell Encryption Enterprise
- Dell Encryption Personal
单击相应的产品以了解更多信息。
单击相应的 Dell Data Security(以前称为 Dell Data Protection)服务器版本以了解版本信息。有关详细信息,请参阅如何确定 Dell Data Security/Dell Data Protection 服务器版本。
要下载恢复文件,请执行以下操作:
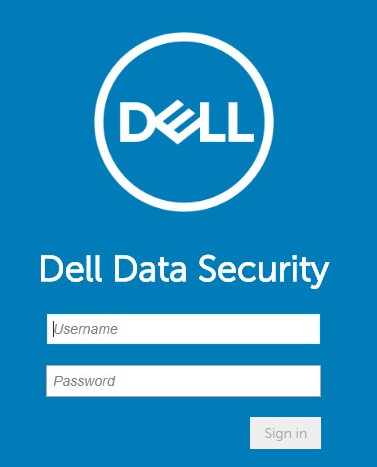
- 从网页浏览器通过 https://servername.company.com:8443/webui 转到 Dell Data Security 管理控制台。
提醒:
- 示例 servername.company.com 可能与您的环境中的服务器 DNS 有所不同。
- 端口 8443 可能与环境中的远程管理控制台端口不同。
- 登录到 Dell Data Security 管理控制台。
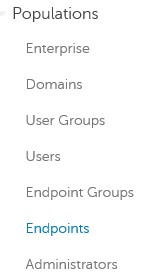
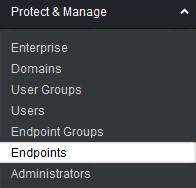
- 从左侧菜单窗格中,展开 Populations 选项卡,然后单击 Endpoints。

- 从端点:
- 在 Search 字段中填充端点名称。
- 单击搜索图标。
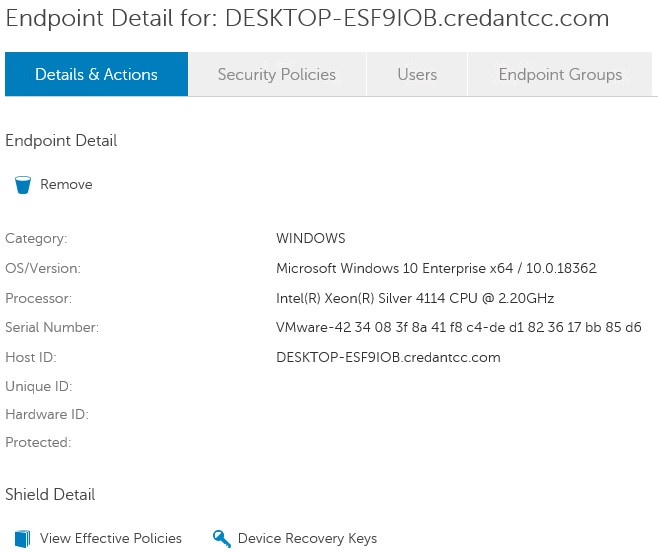
- 单击相应的主机名。

提醒:
- 在搜索时可以使用通配符 (*)。
- 您环境中的端点主机名和操作系统/版本可能有所不同。
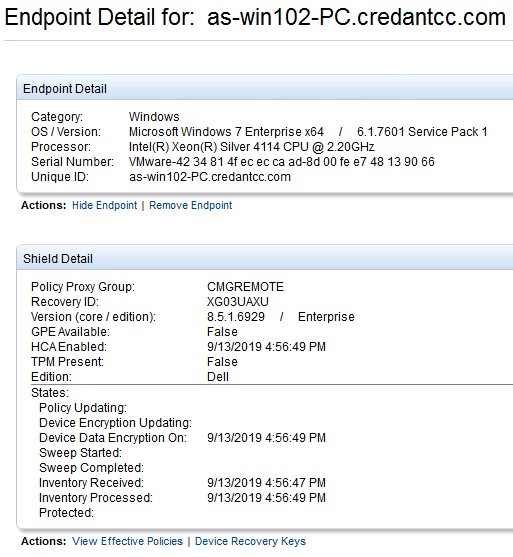
- 单击 Device Recovery Keys。

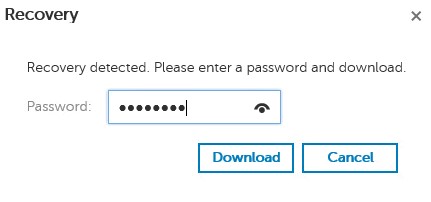
- 填充密码,然后单击 Download 或 Downloadx64。
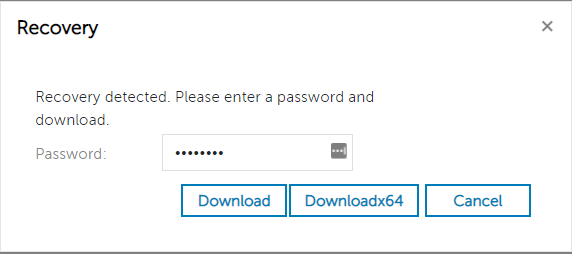
提醒:
- 如果使用 x64 恢复环境,则应选择 Downloadx64。
- 如果使用 x32 恢复环境,则应选择 Download。
- UEFI 可启动环境和 Non-Volatile Memory Express (NVMe) 需要 x64 恢复环境。
- 有关创建恢复环境的更多信息,请参阅如何为 Dell Encryption Enterprise/Dell Encryption Personal 创建可启动 WinPE USB。
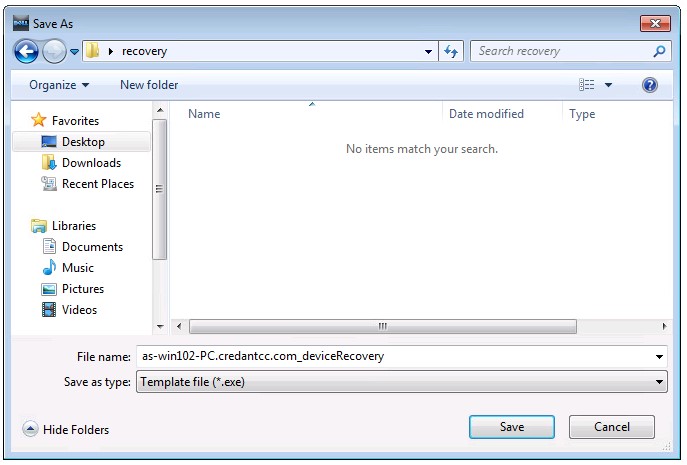
- 保存恢复密钥。

提醒:您环境中的浏览器 UI 和恢复密钥文件名可能有所不同。
要下载恢复文件,请执行以下操作:
- 从网页浏览器通过 https://servername.company.com:8443/webui 转到 Dell Data Security 管理控制台。
提醒:
- 示例 servername.company.com 可能与您的环境中的服务器 DNS 有所不同。
- 端口 8443 可能与环境中的远程管理控制台端口不同。
- 登录到 Dell Data Security 管理控制台。

- 从左侧菜单窗格中,展开 Populations 选项卡,然后单击 Endpoints。
- 从端点:
- 在 Search 字段中填充端点名称。
- 单击搜索图标。
- 单击相应的主机名。

提醒:
- 在搜索时可以使用通配符 (*)。
- 您环境中的端点主机名和操作系统/版本可能有所不同。
- 单击 Device Recovery Keys。
- 填充密码,然后单击 Download。
- 保存恢复密钥。

提醒:您环境中的浏览器 UI 和恢复密钥文件名可能有所不同。
要下载恢复文件,请执行以下操作:
- 在 Windows 资源管理器中,转至 C:\Program Files\Dell\Enterprise Edition\Console\,然后双击 Credant.Console.exe。

- 提交凭据以登录到远程管理控制台。

- 在左侧窗格中,单击 Endpoints。
- 在“Endpoint Search”中:
- 填充主机名。
- 单击 Search。
- 单击 Details 图标。

提醒:
- 在搜索时可以使用通配符 (*)。
- 您环境中的端点主机名和操作系统/版本可能有所不同。
- 单击 Device Recovery Keys。
- 填充恢复密码,然后单击 Save。
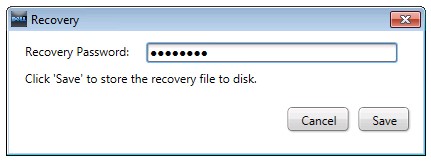
- 保存恢复密钥。
单击相应的 Dell Encryption Personal 了解版本信息。有关详细信息,请参阅如何确定 Dell Encryption Enterprise 或 Dell Encryption Personal 版本。
要下载恢复文件,请执行以下操作:
- 登录 Windows 计算机。
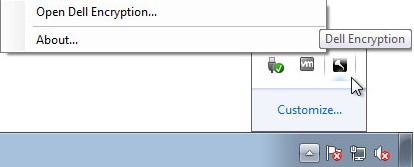
- 在 Windows 系统托盘中,右键单击 Dell Encryption 图标,然后选择 Open Dell Encryption。
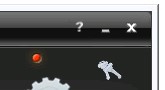
- 在本地管理控制台的右上角,单击 keys 图标。
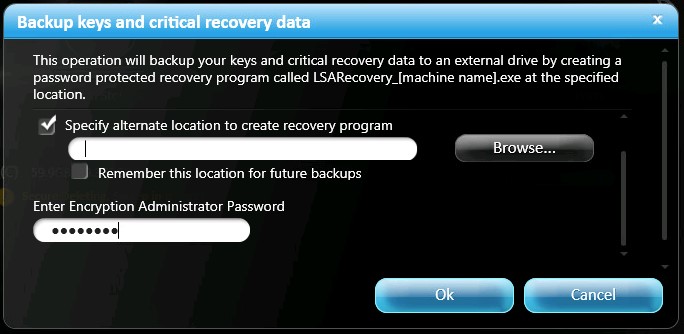
- 从“Backup keys and critical recovery data”菜单中:
- 选中 Specify an alternate location to create the recovery bundle。
- 浏览至某个位置。
- (可选)单击 Remember this location for future backups。
- 填充加密管理员密码。
- 单击 OK。
- 选中 Specify an alternate location to create the recovery bundle。

提醒:该位置必须是外部存储(网络位置或 USB)。
要下载恢复文件,请执行以下操作:
- 登录 Windows 计算机。
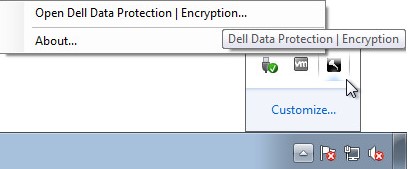
- 在 Windows 系统托盘中,右键单击 Dell Data Protection | Encryption 图标,然后选择 Open Dell Data Protection | Encryption。
- 在本地管理控制台的右上角,单击 keys 图标。

- 从“Backup keys and critical recovery data”菜单中:
- 选中 Specify an alternate location to create the recovery bundle。
- 浏览至某个位置。
- (可选)单击 Remember this location for future backups。
- 填充加密管理员密码。
- 单击 OK。
- 选中 Specify an alternate location to create the recovery bundle。
提醒:该位置必须是外部存储(网络位置或 USB)。
要联系支持部门,请参阅 Dell Data Security 国际支持电话号码。
转至 TechDirect,在线生成技术支持请求。
要获得更多见解和资源,请加入戴尔安全社区论坛。
其他資訊
影片
文章屬性
受影響的產品
Dell Encryption
上次發佈日期
19 12月 2022
版本
12
文章類型
Solution