文章編號: 000126740
如何收集 Dell Security Management Server Virtual 的日志
摘要: 可以按照以下说明收集 Dell Security Management Server Virtual 或 Dell Data Protection Virtual Edition 的日志。
文章內容
症狀
本文介绍如何收集 Dell Security Management Server Virtual(以前称为 Dell Data Protection | Virtual Edition)的日志。
受影响的产品:
- Dell Security Management Server Virtual
- Dell Data Protection | Virtual Edition
受影响的操作系统:
- Linux
原因
不适用
解析度
Dell Security Management Server Virtual 的日志收集过程因版本而异。有关详细信息,请选择 v9.11.0 和 更高版本或 v8.2.0 至 9.10.1 的 相应说明。有关版本信息,请参阅如何确定 Dell Data Security/Dell Data Protection Server 版本。
v9.11.0 及更高版本
Dell Security Management Server Virtual 要求管理员在收集日志之前捕获日志。选择相应的操作以了解更多信息。
要捕获日志:
- 使用默认管理员 (
delluser) 凭据登录 Dell Security Management Server Virtual 管理控制台。

提醒:
- Dell Data Protection Enterprise Server Virtual Edition 的默认凭据为:
- 用户名:
delluser - 密码:
delluser
- 用户名:
- 管理员可以更改产品的虚拟设备菜单中的默认密码。
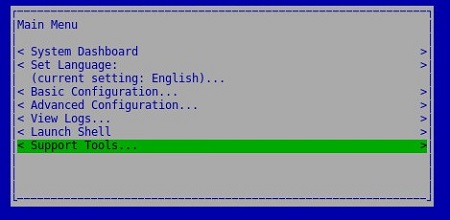
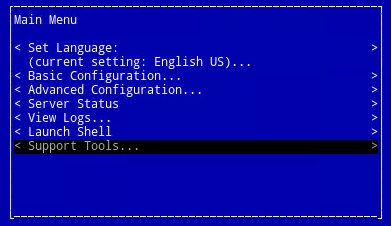
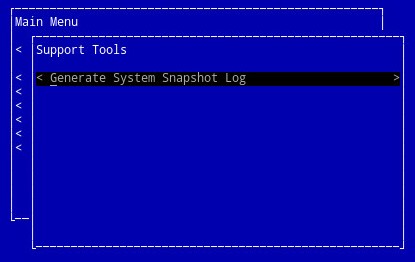
- 在主菜单中,选择 Support Tools,然后按 Enter 键。
提醒:
- 鼠标在 Linux 虚拟设备中不起作用。请使用箭头键来导航设备。
- 虚拟设备限制鼠标和键盘访问外部窗口。要释放鼠标和键盘锁定,请按 CTRL+ALT。
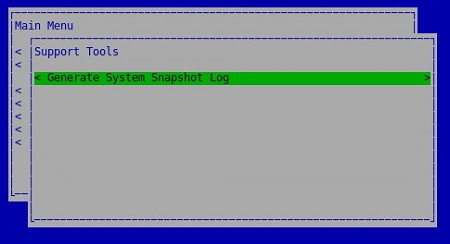
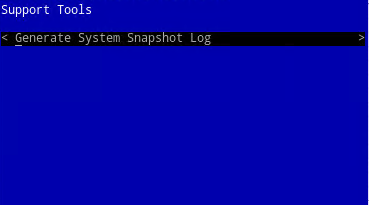
- 选择 Generate System Snapshot Log,然后按 Enter 键。

- 成功收集日志后,选择 OK,然后按 Enter 键。
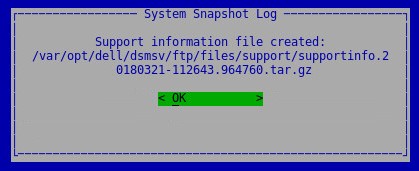
提醒:记下文件名(基于时间戳)。
- 按 ESC 键返回主菜单。
要收集日志:
要成功获取日志,Dell Security Management Server Virtual 需要:
- 第三方 FTP(文件传输协议)客户端
- FTP 客户端的示例包括(但不限于):
- Filezilla
- WinSCP
- CuteFTP
- FTP 客户端的示例包括(但不限于):
- 存储设备(除 Dell Security Management Server Virtual 之外)
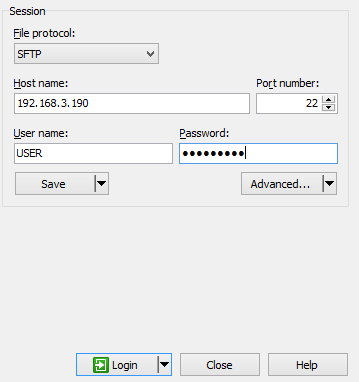
- 在 FTP 客户端中,使用 FTP 用户登录 Dell Security Management Server Virtual

提醒:
- 必须在 Dell Security Management Server 中创建 FTP 用户。有关详细信息,请参阅如何在 Dell Security Management Server Virtual/Dell Data Protection Virtual Edition 中创建 FTP 用户。
- 戴尔既不认可也不支持任何列出的第三方产品。列出的客户端是客户可以使用的潜在产品的示例。有关设置、配置和管理的信息,请与产品的制造商联系。
- 您的 FTP 客户端 UI 可能与屏幕截图示例不同。
- SFTP 的默认端口是 22。如果连接失败,请确保防火墙未阻止端口 22。
- 转至捕获的日志 (
/var/opt/dell/dsmsv/ftp/files/support),然后在本地保存日志包。
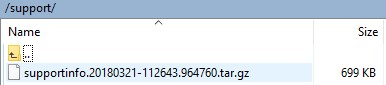
提醒:您需要使用文件归档程序(如 WinZip、WinRAR、7-Zip)来读取 .tar 日志包。
v8.2.0 至 v9.10.1
Dell Security Management Server Virtual 要求管理员在收集日志之前捕获日志。选择相应的操作以了解更多信息。
要捕获日志:
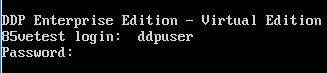
- 使用默认管理员 (
ddpuser) 凭据登录 Dell Enterprise Server Virtual 管理控制台。
提醒:
- Dell Data Protection Enterprise Server Virtual Edition 的默认凭据为:
- 用户名:
ddpuser - 密码:
ddpuser
- 用户名:
- 管理员可以更改产品的虚拟设备菜单中的默认密码。
- 在主菜单中,选择 Support Tools,然后按 Enter 键。
提醒:
- 鼠标在 Linux 虚拟设备中不起作用。请使用箭头键来导航设备。
- 虚拟设备限制鼠标和键盘访问外部窗口。要释放鼠标和键盘锁定,请按 CTRL+ALT。
- 选择 Generate System Snapshot Log,然后按 Enter 键。
- 成功收集日志后,选择 OK,然后按 Enter 键。
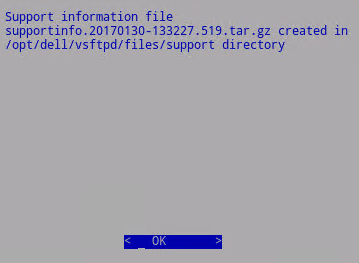
提醒:记下文件名(基于时间戳)。
- 按 ESC 键
要收集日志:
要成功获取日志,Dell Security Management Server Virtual 需要:
- 第三方 FTP(文件传输协议)客户端
- FTP 客户端的示例包括(但不限于):
- Filezilla
- WinSCP
- CuteFTP
- FTP 客户端的示例包括(但不限于):
- 存储设备(除 Dell Security Management Server Virtual 之外)
- 在 FTP 客户端中,使用 FTP 用户登录 Dell Security Management Server Virtual
提醒:
- 必须在 Dell Security Management Server 中创建 FTP 用户。有关详细信息,请参阅如何在 Dell Security Management Server Virtual/Dell Data Protection Virtual Edition 中创建 FTP 用户。
- 戴尔既不认可也不支持任何列出的第三方产品。列出的客户端是客户可以使用的潜在产品的示例。有关设置、配置和管理的信息,请与产品的制造商联系。
- 您的 FTP 客户端 UI 可能与屏幕截图示例不同。
- SFTP 的默认端口是 22。如果连接失败,请确保防火墙未阻止端口 22。
- 转至捕获的日志 (
/opt/dell/vsftpd/files/support),然后在本地保存日志包。

提醒:您需要使用文件归档程序(如 WinZip、WinRAR、7-Zip)来读取 .tar 日志包。
要联系支持部门,请参阅 Dell Data Security 国际支持电话号码。
转至 TechDirect,在线生成技术支持请求。
要获得更多见解和资源,请加入戴尔安全社区论坛。
其他資訊
影片
文章屬性
受影響的產品
Dell Encryption
上次發佈日期
11 4月 2023
版本
15
文章類型
Solution