How to Place Images in the OS Image Repository of Wyse Management Suite
摘要: Learn how to place images for Windows Embedded Standard, ThinLinux, ThinOS, and Teradici in the OS image repository of Wyse Management Suite.
本文章適用於
本文章不適用於
本文無關於任何特定產品。
本文未識別所有產品版本。
說明
Uploading images to the OS image repository of Wyse Management Suite is the first step to performing upgrades and more.
Affected Products:
- Wyse Management Suite
Affected Versions:
- v1.0 and Later
Wyse Management Suite has different steps for uploading images for Windows Embedded Standard (WES) or ThinLinux, ThinOS, and Teradici. Click the appropriate method for more information.
Note: For information about downloading the images, reference How to Download Firmware for Dell Wyse Thin Clients.
Windows Embedded Standard (WES) or ThinLinux
- Sign in to Wyse Management Suite.
 Note: For information about accessing the Wyse Management Suite administration console, reference How to Access the Wyse Management Suite Administration Console.
 - Click Apps & Data.

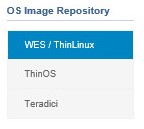
- Under OS Image Repository, click WES/ThinLinux.

- From Windows Explorer, move the zipped image to
C:\WMS\LocalRepo\repository\osImages\zipped.
 Note: This path may differ if Wyse Management Suite has been installed to a custom directory.
 - The zipped image is extracted to
C:\WMS\LocalRepo\repository\osImages\valid.
 Note: This path may differ if Wyse Management Suite has been installed to a custom directory.
ThinOS
The method to upload the firmware for ThinOS varies based on the version of Wyse Management Suite. For more information, reference How to Identify the Version of Wyse Management Suite.
- Sign in to Wyse Management Suite.
 Note: For information about accessing the Wyse Management Suite administration console, reference How to Access the Wyse Management Suite Administration Console.
 - Click Apps & Data.

- Under OS Image Repository, click ThinOS.
 Note: Do not upload a firmware image to ThinOS 9.x.
 - Click Add Firmware file.

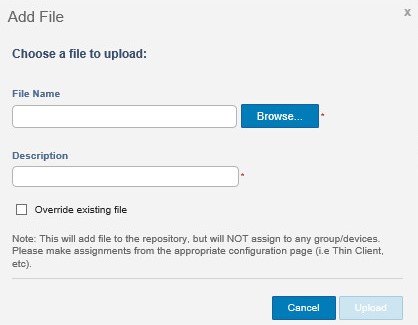
- From the Add File menu:
- Click Browse.
- Go to the file to upload and then double-click it.
- Populate a Description.
- Optionally, select Override existing file.
- Click Upload.
 Note: If the file is over 100 MB, extract the .zip of the image and browse to the file with
wnosin the filename instead.
- Sign in to Wyse Management Suite.
 Note: For information about accessing the Wyse Management Suite administration console, reference How to Access the Wyse Management Suite Administration Console.
 - Click Apps & Data.

- Under OS Image Repository, click ThinOS.

- Click Add Firmware file.

- From the Add File menu:
- Click Browse.
- Go to the file to upload and then double-click it.
- Populate a Description.
- Optionally, select Override existing file.
- Click Upload.
 Note: If the file is over 100 MB, extract the .zip of the image and browse to the file with
wnosin the filename instead.
Teradici
Note: Only Wyse Management Suite Private Cloud can manage Teradici. The Teradici End-User Management Software Development Kit (EM SDK) must be installed for this option to be available. For more information, reference How to Install Wyse Management Suite (Private Cloud).
- Sign in to Wyse Management Suite.
 Note: For information about accessing the Wyse Management Suite administration console, reference How to Access the Wyse Management Suite Administration Console.
 - Click Apps & Data.

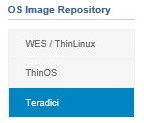
- Under OS Image Repository, click Teradici.

- Click Add Firmware file.

- From the Add File menu:
- Click Browse.
- Go to the file to upload and then double-click it.
- Populate a Description.
- Optionally, select Override existing file.
- Click Upload.

受影響的產品
Wyse Management Suite文章屬性
文章編號: 000126020
文章類型: How To
上次修改時間: 29 7月 2024
版本: 6
向其他 Dell 使用者尋求您問題的答案
支援服務
檢查您的裝置是否在支援服務的涵蓋範圍內。