Windows 10: Unable to Add or Use the Hello PIN Sign-In Option
摘要: Troubleshoot Windows Hello PIN issues on Windows 10. Learn how to change, reset, or set up your Microsoft PIN to resolve sign-in problems and resolve error messages.
本文适用于
本文不适用于
本文并非针对某种特定的产品。
本文并非包含所有产品版本。
症状
Affected Operating Systems:
- Windows 10
Windows 10 Hello PIN option is not working or giving error messages?
The Windows 10 operating system allows you to use a Personal Identification Number (PIN) code as an alternative sign-in option. You can set a PIN and use it in place of passwords. Use of a PIN makes it easier to sign in to your Windows devices and connect to apps and other online services such as social networks.
When trying to change or add a PIN log in for Windows 10, you may encounter issues such as:
- Error Message Something went wrong (code: 0x8009002d). Restart your device to see if that fixes the problem. When trying to Sign in using Pin.
- Error Message Something went wrong. Try again later when trying to Add or modify the PIN.
- Unable to configure Windows Hello because of PIN-related issues.
- Clicking on the Add PIN option does nothing.
- PIN incorrect error even as you verify that the correct PIN was entered.
- Add PIN option does not show under Sign-In options.
原因
Not Applicable
解决方案
Troubleshooting Guide
Follow the guide below to resolve these issues on your computer:
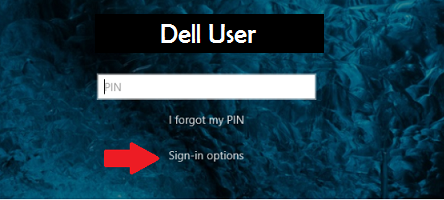
Figure 1: (English Only) Windows Log in Screen
PIN setup, but does not work:
-
If you are unable to Sign in to Windows using the PIN because of error messages, then click the Sign-In Options link on the Windows log-in screen and select the option Microsoft Account Password to sign in to the computer for further troubleshooting.
- You can remove the existing PIN and add a new PIN from inside the operating system
- Open the Start Menu and select Settings
- Click Accounts
- Choose Sign-in Options from the left side menu
- Then click the Add button under the PIN option in the right side on the screen
Note: If the issue persists after removing and configuring the PIN again in the settings, then deleting everything from the NGC folder should resolve it - however this will usually require administrator rights on your computer and is done at your own risk, as with any time you delete something - there is a risk involved if it is not carried out correctly.
Sign-in options and settings are not working:
- Deleting the contents of the NGC folder:
- Open up your File Explorer and enter this URL C:\Windows\ServiceProfiles\LocalService\AppData\Local\Microsoft
- Right-click the NGC folder and choose Properties from the menu that appears
- Go to the Security tab and click the Advanced button
- Locate the Owner section at the top of the window and click the Change link
- In the Enter the object name to select enter field you must type the username of your account on that device (which should be an administrator level account), and click Check Names
- When it finds your account, select OK
- Your account should now show against Owner
- Check the checkbox next to Replace owner on subcontainers and objects and click Apply and OK
- Now you can enter the NGC folder
- Once you have opened the NGC folder, select All files and folders in it and delete them
- Once the files and folders are deleted from the NGC folder, go back to step 1 to add a new PIN
受影响的产品
Alienware, Inspiron, OptiPlex, Vostro, XPS, G Series, G Series, Alienware, Inspiron, Latitude, Vostro, XPS, Fixed Workstations, Mobile Workstations文章属性
文章编号: 000143725
文章类型: Solution
上次修改时间: 28 5月 2024
版本: 4
从其他戴尔用户那里查找问题的答案
支持服务
检查您的设备是否在支持服务涵盖的范围内。