Installing a PCIe Card in Windows: A Comprehensive Guide
摘要: Learn to install a PCIe card in a Windows system. Find tips on PCIe slots, adapter options, and easy, step-by-step installation instructions
本文适用于
本文不适用于
本文并非针对某种特定的产品。
本文并非包含所有产品版本。
说明
If you want to add a PCIe card in your Dell system, follow the below steps to complete the installation.
- Remove your side cover. If you do not know how to remove it, see the Dell Support page to get your system document.
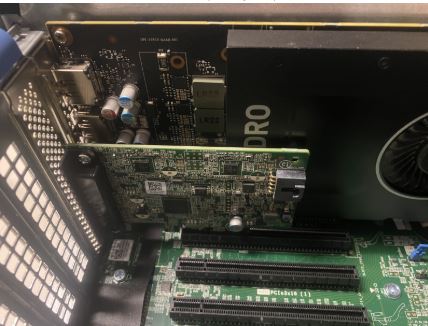
- A PCIe card is added to the PCIe Slot. (See Figure 1)

(Figure 1 - PCIe Slot)
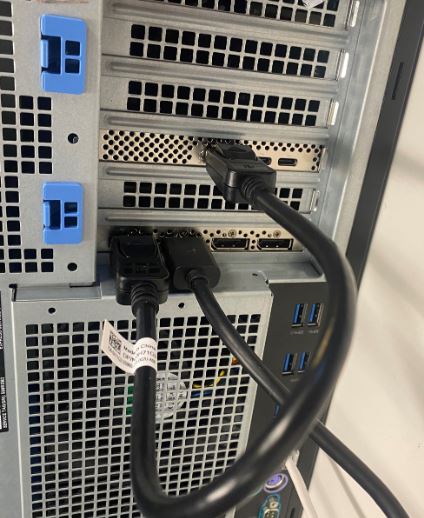
- Once the PCIe card ID is added. You need a Display Port to Display Port cable to plug in from the PCIe Card Display Port to the Graphics Card Display Port. (See Figure.2)

(Figure 2 - DP to DP Cable)
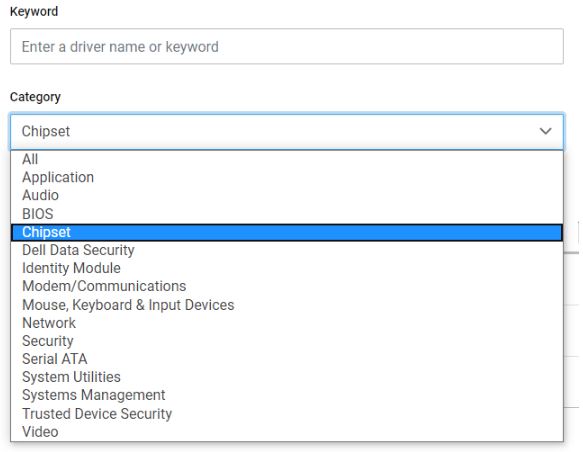
- Once the card has been installed, if it is a Thunderbolt PCIe card you must update the latest Thunderbolt Controller Driver. Go to our Drivers Site to search for the matching driver for your system. Thunderbolt Controller Driver can be found under "Chipset." (See Figure 3)

(Figure 3 - Dell Driver Category)
After completion of this driver installation and a reboot of the system, PCIe card functionality should now be capable of using the PCIe slot.
受影响的产品
OptiPlex, Fixed Workstations文章属性
文章编号: 000126038
文章类型: How To
上次修改时间: 09 12月 2024
版本: 9
从其他戴尔用户那里查找问题的答案
支持服务
检查您的设备是否在支持服务涵盖的范围内。