How to Collect Logs for the Dell Data Security Pre-Boot Authentication Environment
Zhrnutie: Logs may be collected for the Dell Data Security and Dell Data Protection preboot authentication (PBA) environment by following these instructions.
Tento článok sa vzťahuje na
Tento článok sa nevzťahuje na
Tento článok nie je viazaný na žiadny konkrétny produkt.
V tomto článku nie sú uvedené všetky verzie produktov.
Pokyny
This article discusses the methods for collecting logs for Dell Data Security (formerly Dell Data Protection) preboot authentication environments.
Affected Products:
- Dell Encryption Enterprise Self-Encrypting Drive Manager
- Dell Data Protection Self-Encrypting Drive Manager
- Dell Full Disk Encryption
- Dell Data Protection Hardware Crypto-Accelerator
Affected Versions:
- v8.0 and Later
Affected Operating Systems:
- Windows
Dell Data Security products that use preboot authentication (PBA) environments may require troubleshooting the preboot authentication. Logs may be required to troubleshoot the issue.
Instances when preboot authentication log files may be required for troubleshooting:
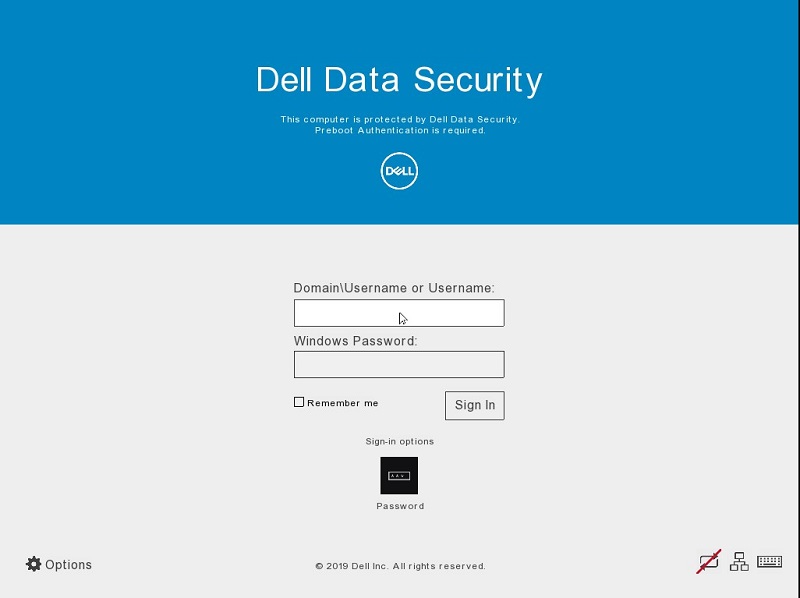
- The network connection icon has a red line through it, but there is network connectivity.
- The log file contains DHCP information to track down the issue.

- The server connection icon has a red line through it.
- The log file contains information to help diagnose server connectivity issues.

- Authentication fails when entering correct credentials.
- The log file and the server logs can help diagnose the issue.
Select either UEFI or Legacy BIOS mode for information about the log collection process.
Note: To identify which BIOS mode is in use, reference How to check in Windows if you are using UEFI
 .
.
 .
.
- Format a USB flash drive with FAT32.
Warning: Formatting a USB flash drive erases all files on the drive. For more information, reference How to Format a Flash Drive on Windows 10 (Official Dell Tech Support)
 .
.
 .
.
- From Windows Explorer, go to the formatted USB flash drive.
- Enable File name extensions.

Note: The process to enable file name extensions differs by Windows version.
- Windows 10 and Windows 8: From the Windows Explorer toolbar, click the View tab and then select File Name Extensions.
- Windows 7 and Windows Vista: From the Windows Explorer toolbar, click Organize, and then select Folder and search options. Click the View tab, clear Hide extensions for known file types, and then click OK.
- Windows XP: From the Windows Explorer toolbar, click Tools and then select Folder Options. Click the View tab, clear Hide extensions for known file types, and then click OK.
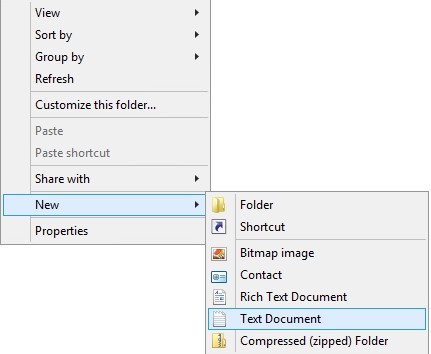
- Right-click in Windows Explorer, select New, and then click Text Document.

- Name the new text document
PBAErr.log.

Note:
- The file name is case-sensitive.
- The file must be stored on the root of the USB drive.
- Power down the affected computer.
- Insert the USB flash drive.
- Power on the affected computer and load into the preboot authentication.

- Reproduce the issue.
- Leave the USB flash drive connected for fifteen seconds.
- Remove the USB flash drive and bring it to a computer booted into Windows.
Note: The
PBAErr.log file is now populated with logs from the preboot authentication.
- From a computer booted into Windows, insert a USB flash drive.
- From Windows Explorer, go to the USB flash drive.
- Right-click in Windows Explorer, select New, and then click Folder.
- Name the new folder
CredantSED.
Note:
- The folder name is case-sensitive.
- The folder must be stored on the root of the USB drive.
- Double-click the
CredantSEDfolder. - Right-click in Windows Explorer, select New, and then click Text Document.
- Name the new file
actions.txt.
Note:
- The file name is case-sensitive.
- The file must be stored in the
CredantSEDfolder.
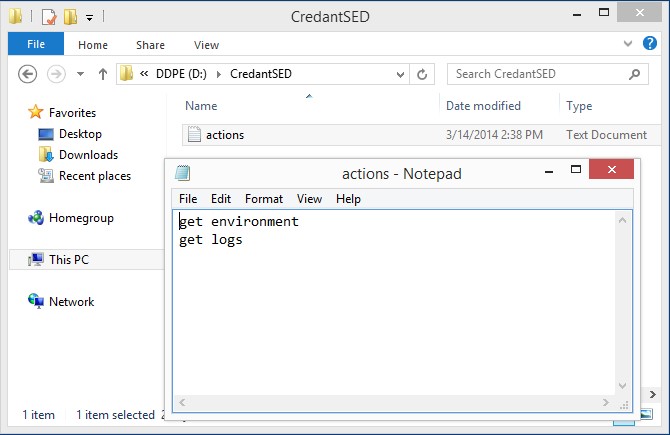
- Double-click
actions.txt. - Type:
get environment
get logs

Note:
- The actions
get environmentandget logsmust be on two separate lines in the .txt file. - The lines are case-sensitive.
- Save and then exit the file.
- Power on the affected computer and load into the preboot authentication.

- Reproduce the issue.
- Insert the prepared USB flash drive into the affected computer and leave it connected for thirty seconds.
- Remove the USB flash drive and bring it to a computer booted into Windows.
Note:
- A
credpbaenv.tgzlog bundle is created in the CredantSED folder. - The
.tgzlog bundle is readable using file archival programs (for example, WinZip, WinRAR, and 7Zip).
To contact support, reference Dell Data Security International Support Phone Numbers.
Go to TechDirect to generate a technical support request online.
For additional insights and resources, join the Dell Security Community Forum.
Ďalšie informácie
Videá
Dotknuté produkty
Dell EncryptionVlastnosti článku
Číslo článku: 000186553
Typ článku: How To
Dátum poslednej úpravy: 28 apr 2023
Verzia: 5
Nájdite odpovede na svoje otázky od ostatných používateľov spoločnosti Dell
Služby podpory
Skontrolujte, či sa na vaše zariadenie vzťahujú služby podpory.