Advanced Driver Restore Using Dell Command Update
Resumo: This article explains how to initiate an Advanced Driver Restore in the Dell Command Update tool. Advanced Driver Restore provides a one-click installation of drivers. It allows all drivers to be installed following Reinstallation of Windows. Also, it can be used for reinstalling system drivers to fix driver corruption issues. ...
Este artigo aplica-se a
Este artigo não se aplica a
Este artigo não está vinculado a nenhum produto específico.
Nem todas as versões do produto estão identificadas neste artigo.
Instruções
How to use Advanced Driver Restore in Dell Command Update:
- Open up the Dell Command Update application.
- If the settings are enabled to allow the Advance Driver Restore (ADR), you see a section-called Advanced Driver Restore for Windows Reinstallation on the main screen (Figure 1 [English Only]).
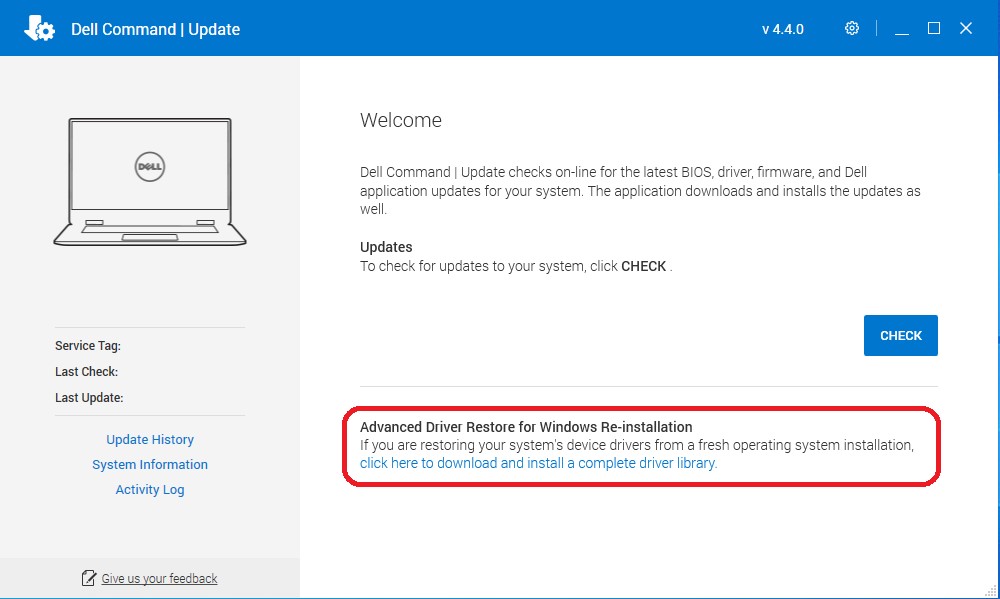
Figure 1: ADR Main Screen - Click the "click here to download and install a complete driver library."
Note: If it is missing from the menu screen, then follow the section-called Settings to Enable, shown below.
- After the installation is complete, the system must be restarted.
Settings to Enable:
- In Dell Command Update, select Settings by clicking the gear icon in the upper right corner.
- Select "Advanced Driver Restore" in the left pane.
- Click the slider button "Enable" to ensure that ADR is enabled in the application.
- Dell Technical Support recommends "Download driver library from Dell Support Site (Recommended)" (Figure 2 [English only]).
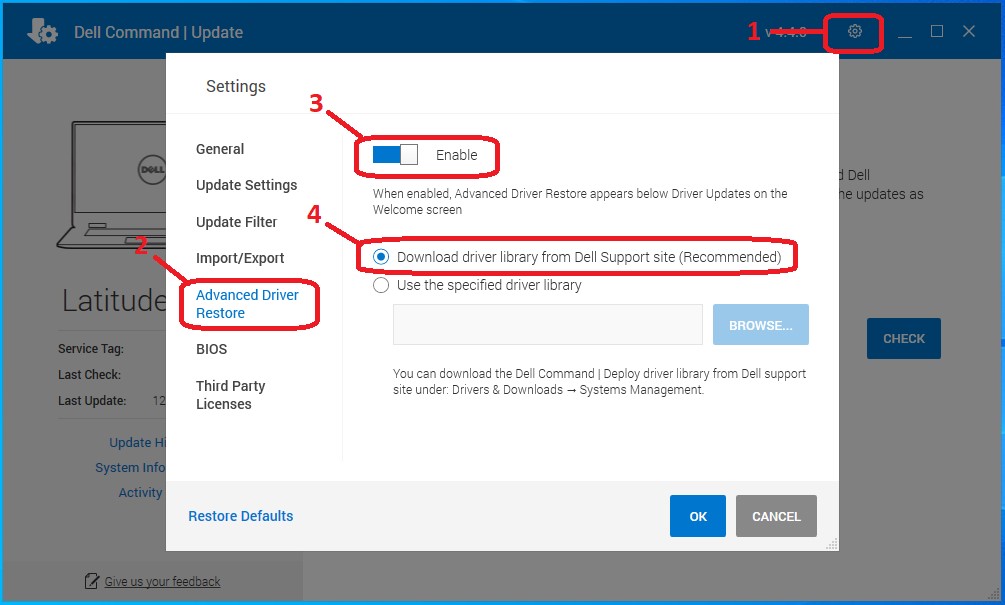
Figure 2: Driver Library - Press OK. The option should now be visible as shown in the top of the article.
If these steps do not correct the problem, contact Dell Technical Support.
See these Dell Knowledge Base articles for related information:
Produtos afetados
OptiPlex, Dell Pro Plus, Latitude, Dell Pro Rugged, XPS, Fixed Workstations, Mobile Workstations, Dell Command | UpdatePropriedades do artigo
Número do artigo: 000177525
Tipo de artigo: How To
Último modificado: 14 fev. 2025
Versão: 13
Encontre as respostas de outros usuários da Dell para suas perguntas.
Serviços de suporte
Verifique se o dispositivo está coberto pelos serviços de suporte.