Advanced Driver Restore Using Dell Command Update
Samenvatting: This article explains how to initiate an Advanced Driver Restore in the Dell Command Update tool. Advanced Driver Restore provides a one-click installation of drivers. It allows all drivers to be installed following Reinstallation of Windows. Also, it can be used for reinstalling system drivers to fix driver corruption issues. ...
Dit artikel is van toepassing op
Dit artikel is niet van toepassing op
Dit artikel is niet gebonden aan een specifiek product.
Niet alle productversies worden in dit artikel vermeld.
Instructies
How to use Advanced Driver Restore in Dell Command Update:
- Open up the Dell Command Update application.
- If the settings are enabled to allow the Advance Driver Restore (ADR), you see a section-called Advanced Driver Restore for Windows Reinstallation on the main screen (Figure 1 [English Only]).
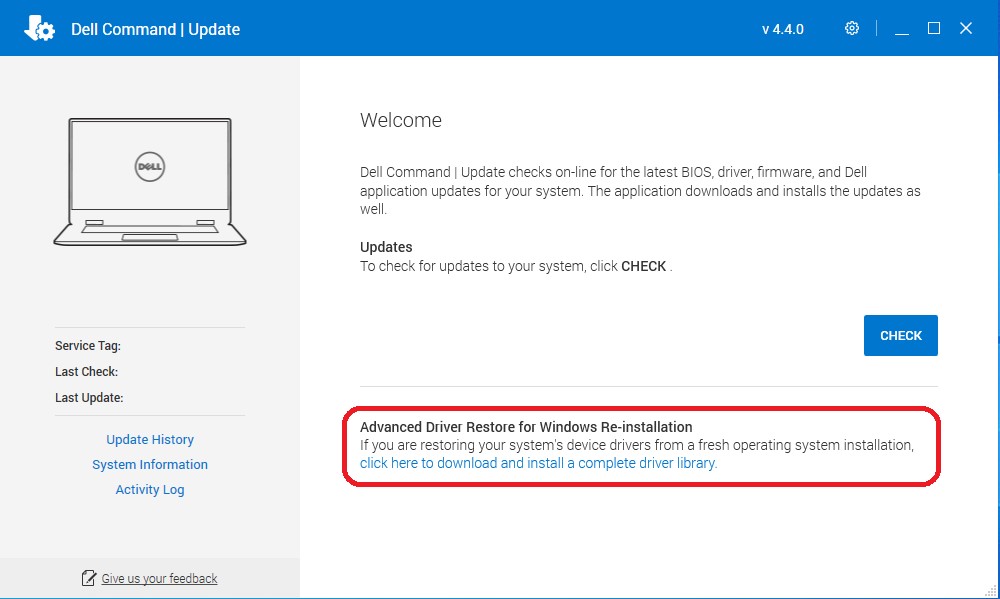
Figure 1: ADR Main Screen - Click the "click here to download and install a complete driver library."
Note: If it is missing from the menu screen, then follow the section-called Settings to Enable, shown below.
- After the installation is complete, the system must be restarted.
Settings to Enable:
- In Dell Command Update, select Settings by clicking the gear icon in the upper right corner.
- Select "Advanced Driver Restore" in the left pane.
- Click the slider button "Enable" to ensure that ADR is enabled in the application.
- Dell Technical Support recommends "Download driver library from Dell Support Site (Recommended)" (Figure 2 [English only]).
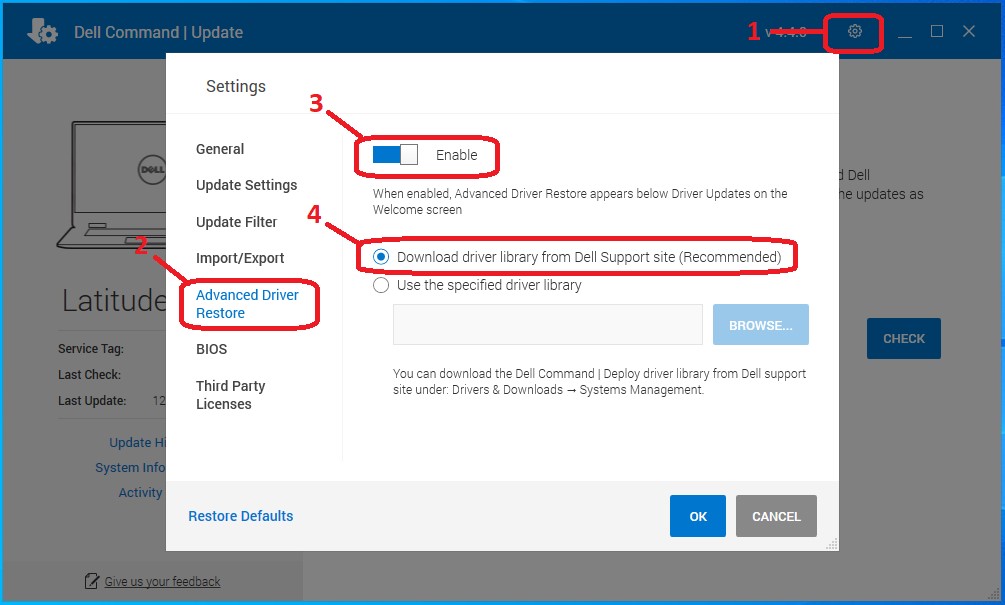
Figure 2: Driver Library - Press OK. The option should now be visible as shown in the top of the article.
If these steps do not correct the problem, contact Dell Technical Support.
See these Dell Knowledge Base articles for related information:
Getroffen producten
OptiPlex, Dell Pro Plus, Latitude, Dell Pro Rugged, XPS, Fixed Workstations, Mobile Workstations, Dell Command | UpdateArtikeleigenschappen
Artikelnummer: 000177525
Artikeltype: How To
Laatst aangepast: 14 feb. 2025
Versie: 13
Vind antwoorden op uw vragen via andere Dell gebruikers
Support Services
Controleer of uw apparaat wordt gedekt door Support Services.