First time setup of TeraDici 2400 PCoIP 4 port card
Samenvatting: Steps for initial setup of your TeraDici 2400 PCoIP 4 port card.
Dit artikel is van toepassing op
Dit artikel is niet van toepassing op
Dit artikel is niet gebonden aan een specifiek product.
Niet alle productversies worden in dit artikel vermeld.
Symptomen
none
Oorzaak
none
Oplossing
This article provides information on how to setup the TeraDici 2400 PCoIP 4 port card for the first time.
Card installed but not configured.
First time setup of TeraDici 2400 PCoIP 4 port card.
If the card is functioning (but not configured), you will see two additional "Standard" USB Controllers in Device Manager (Figure 1):
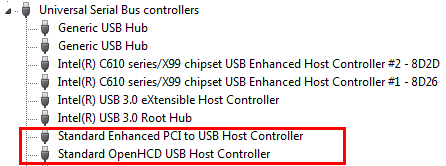
Figure 1: Standard USB controllers in Device Manager
Configuration Process.
Configure the Teradici 2400 PCoIP 4 port card using the following steps:
- Open a browser of choice (Internet Explorer, Chrome, Firefox etc.) on the URL line Log in to the Teradici host card by typing the URL 192.168.1.100 (unless a DHCP server is present) the press the Enter Key.
 NOTE: If a DHCP server is present, Determine the IP address assigned to the Teradici card based on the MAC address of the card (The MAC address is on a sticker on the card) then log in to the assigned MAC address. Once done, you can manually assign a IP address to the card outside the DHCP range.
- The PCoIP configuration page should appear. Click on Configuration, then click Initial Setup (Figure 2):
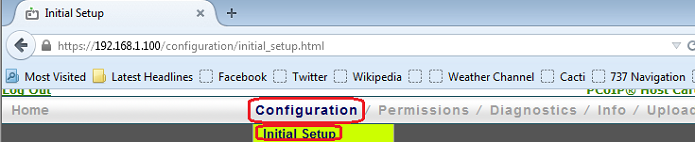
Figure 2: Go to Initial Setup on PCoIP configuration page
- Check the box next to Enable HD Audio, Click Apply.
- Next, under the Network section, turn off Dynamic Host Configuration Protocol (DHCP)by un-checking the box next to Enable DHCP and select a proper Static IP address for the network. (This information must be provided from the network in use.) Click Apply (Figure 3):

Figure 3:Choose the Static IP address for the network
- In the Host Driver Function section, Check the check box to Enable the Host Driver Function, Click Apply (Figure 4):
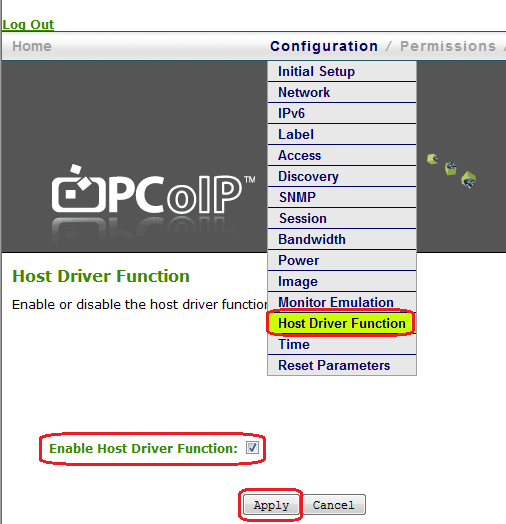
Figure 4:Enable the Host Driver Function
- In the Diagnostics menu, under PCoIP Processor, Schedule the PCoIP card to reset at the next system reboot. Restart the system (Figure 5):
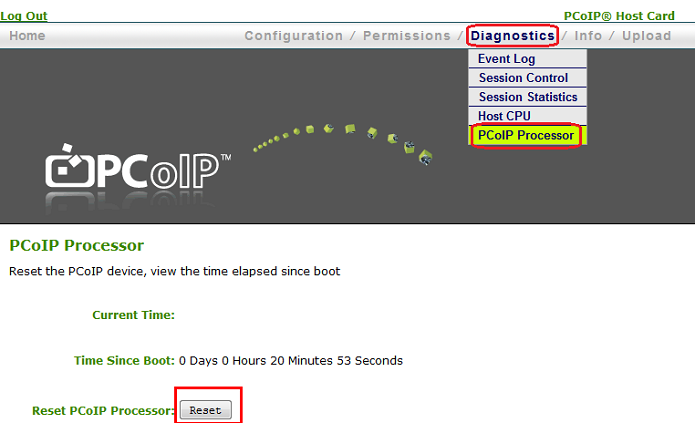
Figure 5: Schedule the PCoIP card to reset at next system boot
- After a reboot, two additional PCI Devices will appear in Device Manager (Figure 6):
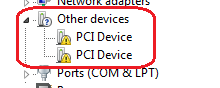
Figure 6: PCI Devices showing in Device Manager after reboot
- Install the latest PCoIP drivers (Figure 7):
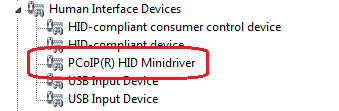
Figure 7: Install the latest drivers for the PCoIP
Optional: You may need to configure Monitor Emulation if you are not receiving an image on the remote device (Figure 8):
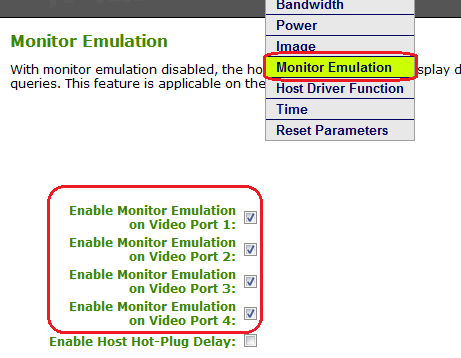
Figure 8: Configure Monitor Emulation if no image appears on remote device
Artikeleigenschappen
Artikelnummer: 000125428
Artikeltype: Solution
Laatst aangepast: 20 feb. 2024
Versie: 4
Vind antwoorden op uw vragen via andere Dell gebruikers
Support Services
Controleer of uw apparaat wordt gedekt door Support Services.