文書番号: 000146119
Windows 10 Command Line Driver Install for Dell Media Missing NVMe Driver
概要: Steps on how to use the command line feature to install Windows 10 drivers.
文書の内容
現象
Win10 Command Line Driver Install
Dell is currently working on an issue with our installation media for Windows 10 as our media does not include drivers for NVMe drives. This is compounded due to the new layout of our installation media for Windows 10 which does not have the drive selection screen where drivers can be loaded before the OS to initialize drives.
A symptom of this is that the system may freeze at 16% or 17% during the installation process whether you select to "Back up Files" or "Remove Everything". This can be remedied by loading the NVMe drivers.
Dell media does include basic drivers for RAID controllers, so if a RAID is deleted and partitions are cleared, the installation media will recreate partitions and install Windows 10 without the need for additional driver installations.
There may be confusion due to the layout of Dell media, as the only options when booting to the Windows 10 media are "Reset your PC" and "Recover from a drive." The instructions for using the Windows 10 media can be found in the following article ( How to install Windows 10 from the Dell ISO ) as the Recover option takes place of the old Install options. This is exactly the same if using a USB that has been created from the ISO on our website.
A article to note if NVMe drives are in a RAID array:
- To Install Windows 10 via Dell media when NVMe AND SATA drive present: Windows 10 install with NVMe SSD and SATA drives
Manual Driver Load from PE Command Prompt
 Note: Before starting the installation of the driver, use a utility like 7zip to extract the installation files from the .exe driver file downloaded from the Dell support site. Extract to a folder on a USB stick separate from the Windows 10 install media and ensure the USB is plugged in to the system needing drivers.
Using the IRST driver in images below for this example.
- Boot to Dell Windows 10 media and select languages to get to the home screen (Figure 1, English only).
Windows 10 media option screen

Figure 1
- Select Troubleshoot > Advanced Options > Command Prompt (Figure 2, English only).
Windows 10 advanced options
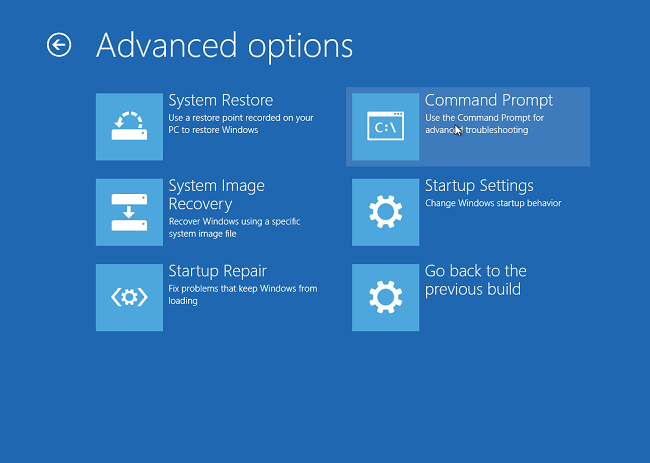
Figure 2
- Navigate to the drive that contains the driver needed, using the "dir" command to view the drive contents (Figure 3, English only).
Usually the D:, E:, or F: drive.
Windows 10 Command Line
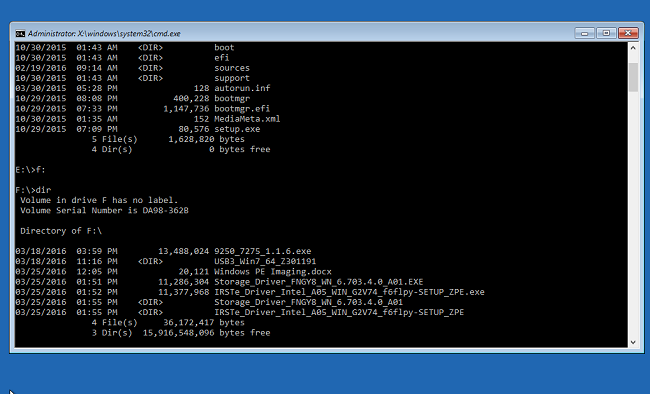
Figure 3
- Use the "cd" command to navigate through folders to the *.inf driver location. Use "dir" as necessary to see the contents of each folder (Figure 4, English only).
Windows 10 CD Command in Command line
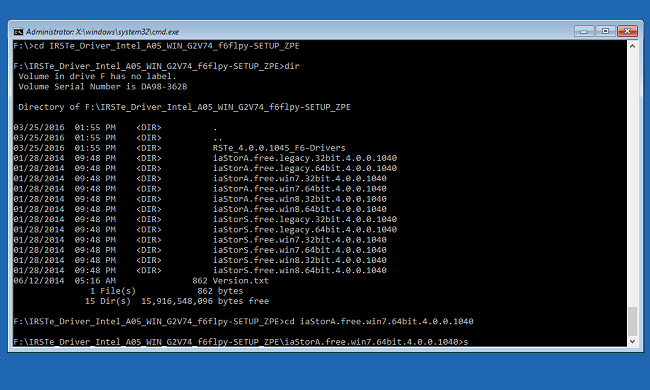
Figure 4
- Find the .inf file needed for the device being installed in order to load Windows (Figure 5, English Only).
Windows 10 Command Line
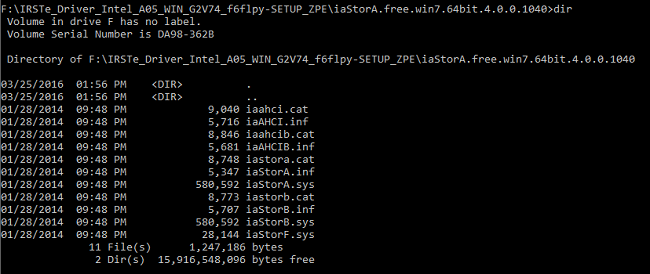
Figure 5
- Use the following command to load the appropriate driver needed to the system and hit Enter:
- Drvload.exe [.inf path/filename] (Figure 6, English only)
Windows 10 Command Line
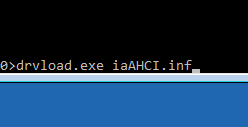
Figure 6
- The Command Prompt should acknowledge when the driver has successfully loaded to the system (Figure 7, English only).
Windows 10 Command Line

Figure 7
- Exit the Command Prompt and install Windows 10 using the steps provided in How to install Windows 10 from the Dell ISO.
If you have further questions about this solution, please contact Dell Technical Support.
文書のプロパティ
最後に公開された日付
21 2月 2021
バージョン
4
文書の種類
Solution