文書番号: 000129172
Ubuntu OS compatibility with Dell EMC PERC10 RAID Controllers H740p and H840
概要: How to install Ubuntu 16.04 on a Dell PowerEdge server when running a PERC10 (H840P or H740P) using HWE option.
文書の内容
現象
Table of Contents
Description
You can find which specific version is supported on a particular server by consulting our OS Support Matrix. Ubuntu LTS 16.04 did not support Dell EMC PERC10 RAID Controllers H740p and H840 on it is initial release.
 Note: You can find which PERC card is installed in your system by following the instructions in this article.
When installing Ubuntu LTS 16.04 on a system with a PERC10 RAID Controller, the storage partition that is created on the RAID Controller will be missing or will not be displayed.
Support for these optional components was made available in the 16.04.4 HWE kernel release.
For PowerEdge servers which support the Dell EMC PERC10 RAID Controllers H740p and/or H840 should use the Ubuntu version 16.04.4 (minimum required version) or later release as defined by Ubuntu and/or the OS support Matrix.
原因
Storage Configuration
Configure the storage options as required. Full instructions can be found at this link.
解決方法
To install Ubuntu Version 16.04.4 HWE kernel, please follow the procedure as detailed below:
1. On startup, press F11 to enter the boot option interface.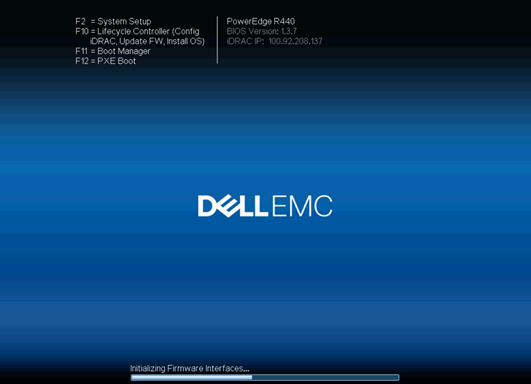
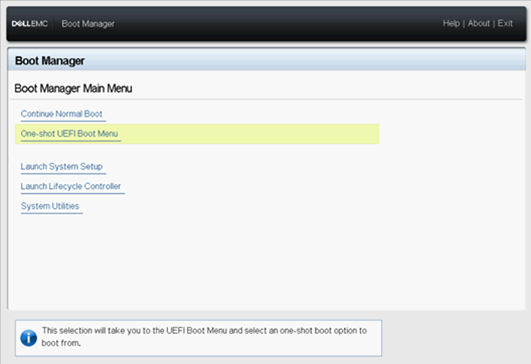
3. Select boot options according to the installation media being used, e.g., IDRAC Virtual Media, Support CD, USB, network card etc.
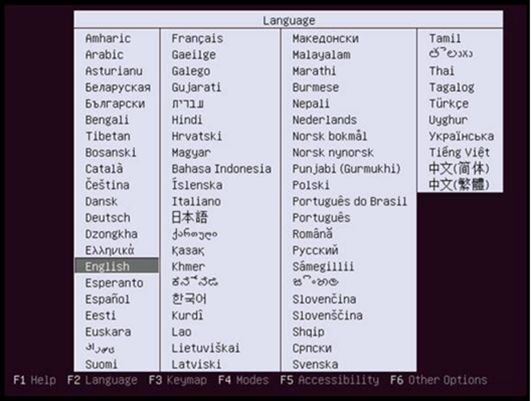
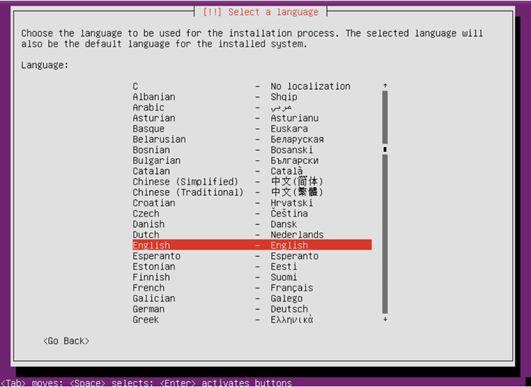
4. Select the language of the operating system.
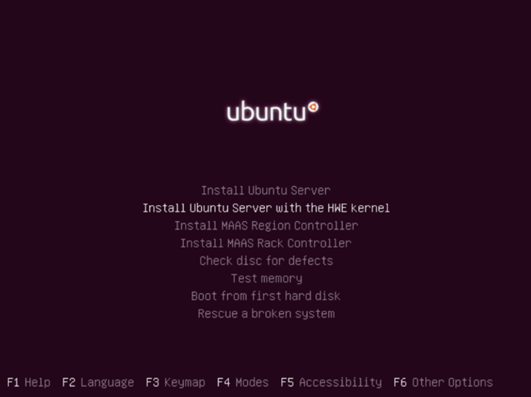
5. Choose the second option, "Install Ubuntu Server with the HWE Kernel" to install. HWE means Hardware Enablement and will support the Dell EMC PERC10 RAID Controllers H740p or H840.
Note: If you choose Install Ubuntu Server incorrectly here, the PERC10 card and functions may not be recognized later.
6. Select the display language of the installation process, which can be selected according to the situation.
7. Select "Yes" to continue installation.
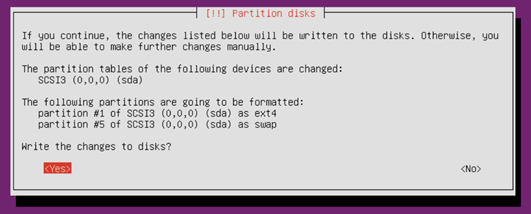
8. Choose your region as needed.

9. Detect keyboard layout, select "No" to continue.

10. Select the country of the keyboard layout desired.
11. Detect virtual drive disks from hardware manufacturers. If no additional loading is required, select " No" to continue.
12. Prompt loading additional components, waiting until 100% complete.
13. Enter the network configuration interface, and select the primary network port.
14. If the selected network port is not connected correctly, a prompt appears. Click " Continue " and select " Do not set the network. "
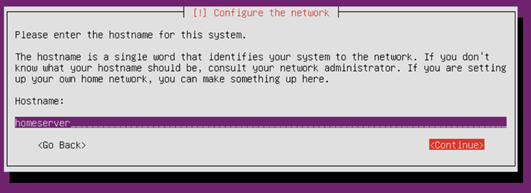
15. Enter the host name of the system.
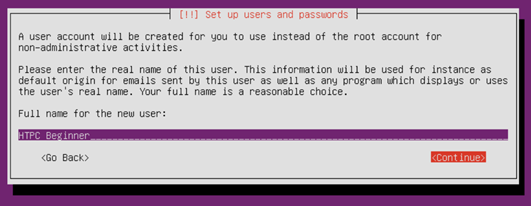
16. Fill in the full name of the user.
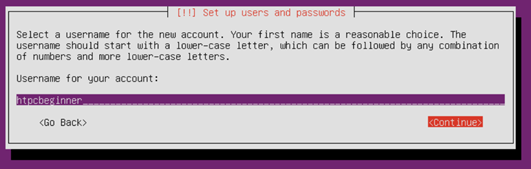
17. Fill in the username, the username must start with a lowercase letter, followed by a combination of any number and other lowercase letters.
18. Enter the password for the username. A secure password should be a combination of letters, numbers, and punctuation.
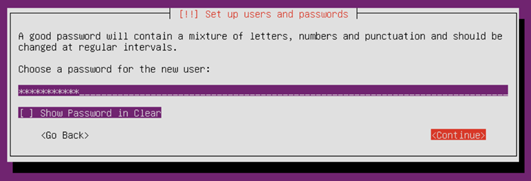
19. Enter your password again to confirm.
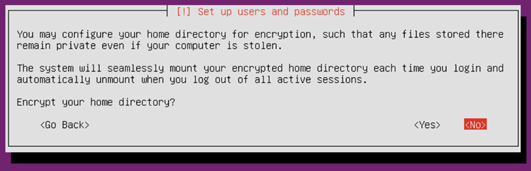
20. After the password setting is completed, the installer will ask whether to encrypt the home directory. Select as needed to continue.
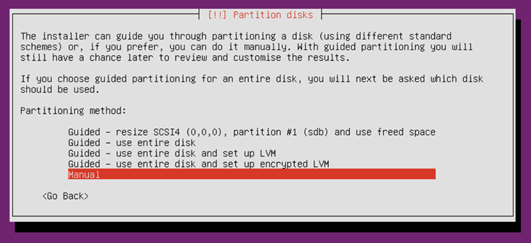
21. Enter the disk partition, you can manually configure (suitable for users who are familiar with the partition configuration) or use the entire disk according to the wizard (recommended), use the entire disk for the new host without data or do not need to retain the hard disk data.
22. Select the disk where you want to install the system to partition, follow the prompts, and keep the default.
23. Partitioning is critical. You are asked one more time to confirm before partitions will be written to the hard disk.
24. If Ubuntu detects that the host is connected to other systems, the following prompt pops up. If the original system is no longer needed, select " Yes" to continue.
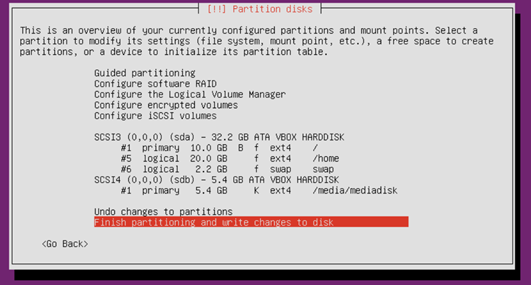
25. Confirm the configured partition and mount point information and select "Partition ends and write modifications to disk" to continue. If you have questions, you can choose "Undo changes to partitions set".
26. Select " Yes" to start installing the system.
27. Configure the package manager, add HTTP proxy information as needed.

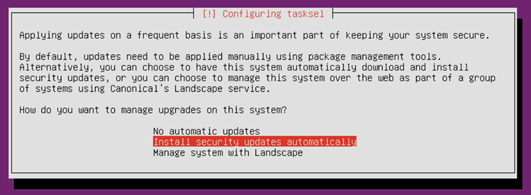
28. Choose how to manage updates on your system, please select as needed.
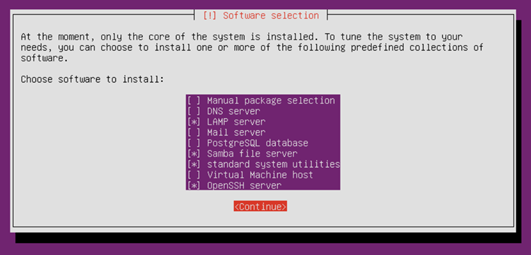
29. Select the components to be installed as needed, use the space bar to select, and press Enter to continue.
30. Allow installation to finish.

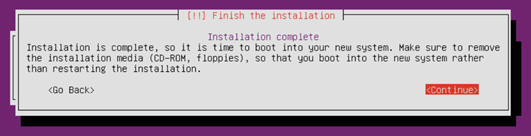
31. End the installation process, remove the installation media and press "Continue" to restart.
32. After rebooting, enter the system and enter the username and password you created earlier to log in.

文書のプロパティ
影響を受ける製品
PowerEdge R415, PowerEdge R440, PowerEdge R540, PowerEdge R640, PowerEdge R6415, PowerEdge R740, PowerEdge R740XD, PowerEdge R940, PowerEdge RAID Controller H740P, PowerEdge RAID Controller H840, PowerEdge T640
最後に公開された日付
28 9月 2021
バージョン
4
文書の種類
Solution