How to Configure Dell Encryption Enterprise to Authenticate with Windows Hello
Riepilogo: Windows Hello may be configured to work with Dell Encryption Enterprise by following these instructions.
Istruzioni
This article outlines how to configure Azure and the Dell Security Management Server or Dell Security Management Server Virtual to support Windows Hello Authentication. This configuration can be used with Dell Encryption Enterprise.
Affected Products:
- Dell Security Management Server
- Dell Security Management Server Virtual
- Dell Encryption Enterprise
Affected Versions:
- v11.0 and later
Affected Operating Systems:
- Windows
- Linux
Starting with Dell Encryption Enterprise version 11.0, Policy-Based Encryption clients can now activate with Windows Hello based credentials. These include Windows Hello PIN, Windows Hello Facial Recognition, Windows Hello Fingerprint, and several other mechanisms for these token-based authentication methods.
Authentication is configured in two steps:
- Generating an application registration within Azure Active Directory. This requires that the on-premises Active Directory environment is being synced. For more information, reference Integrate on-premises AD domains with Azure AD (https://docs.microsoft.com/en-us/azure/architecture/reference-architectures/identity/azure-ad
)
- Configuring the Dell Security Management Server.
Click the appropriate configuration for more information.
This configuration process allows the Dell Security Management Server or Dell Management Security Server Virtual to validate Windows Hello tokens.
To configure Azure Active Directory:
- Log in to the Azure web portal at https://portal.azure.com
with an account that has Application Administrator or higher privileges.
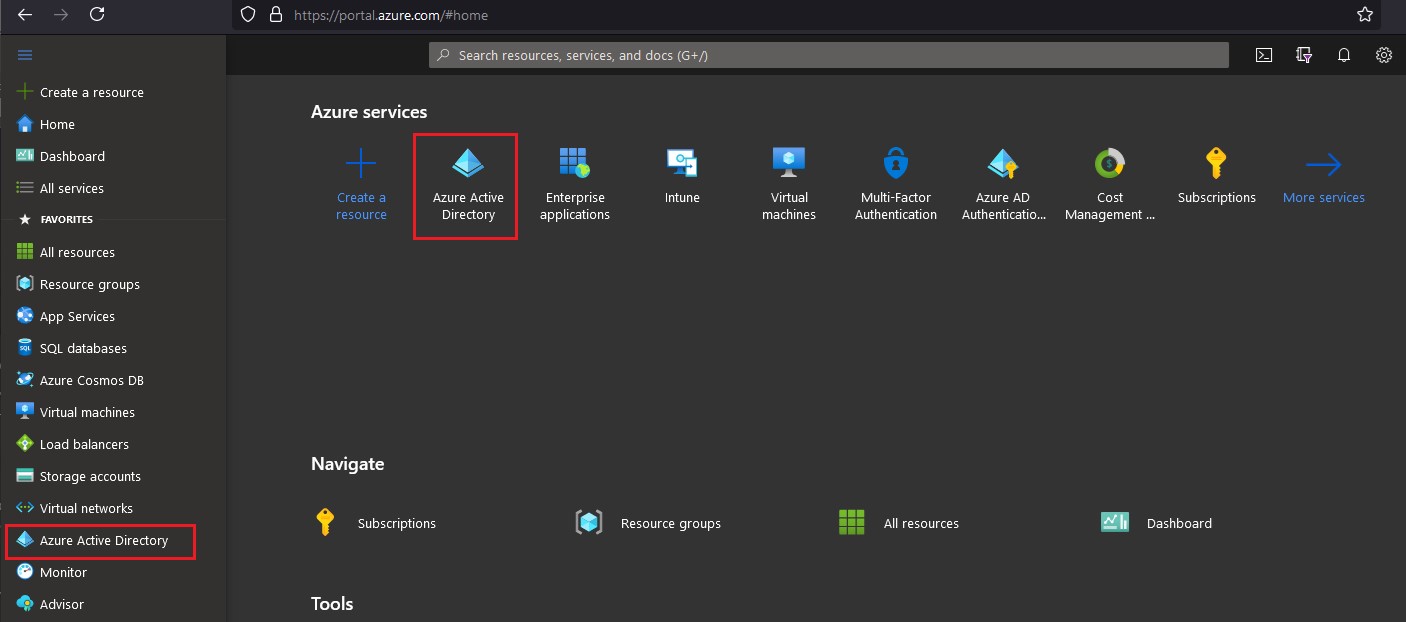
- Go to the Azure Active Directory configuration page.
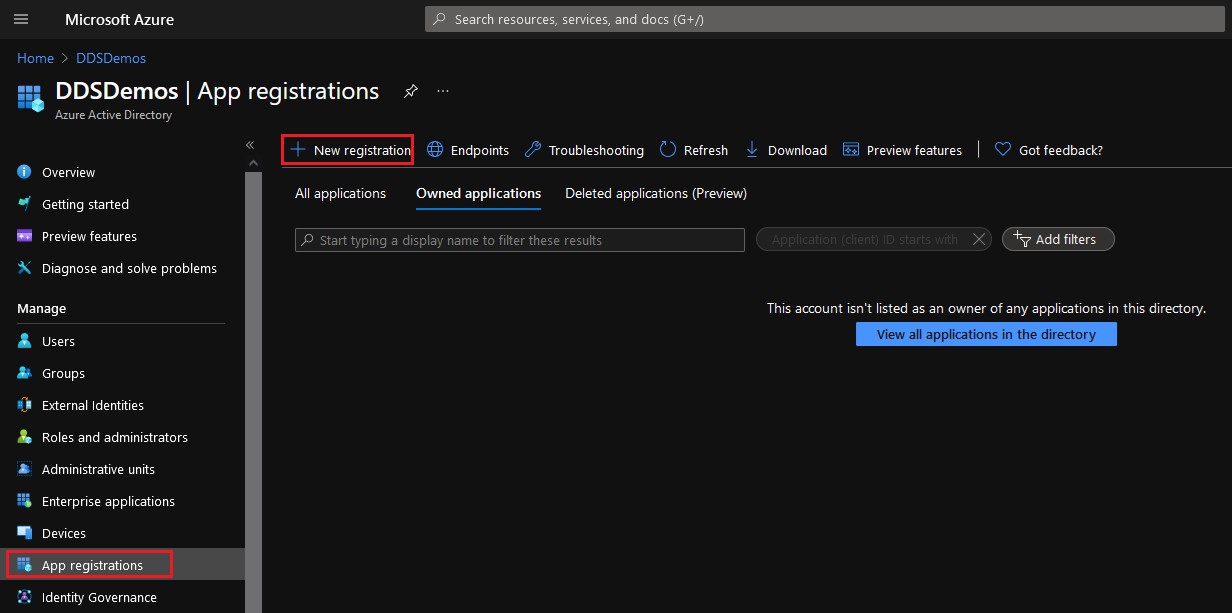
- Select App Registrations from the left pane, and then click New Registration from the right pane.
- Populate a Name for the application.
- The application in the example image has been given the name DellEncryption-WindowsHello. This may differ in your environment.
- The application name cannot match another app registration.

- Select the appropriate account type for your environment.

- Set the Redirect URI platform to Public client/native (mobile & desktop). The Redirect URI may be any address with a prefix of https://.
- This value is used later within the "Redirect URI" setting in the Dell Security Management Server.
- The redirect URI is required for password less authentication with Dell Encryption Enterprise.

- Click Register.

- From the overview of the App Registration, record the values for Application (client) ID and Directory (tenant) ID.

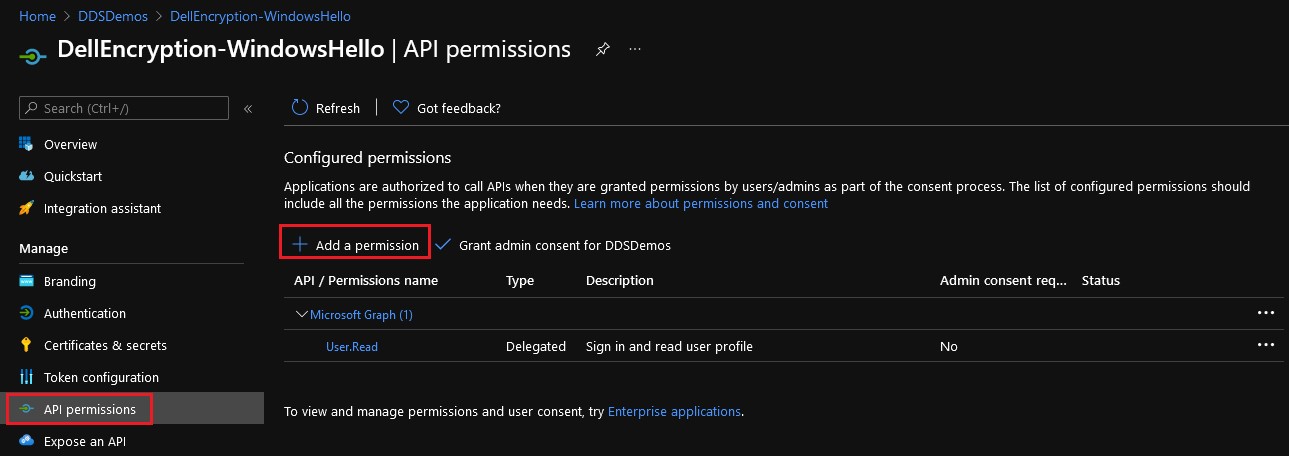
- Select API permissions from the left pane, and then click Add a permission from the right pane.
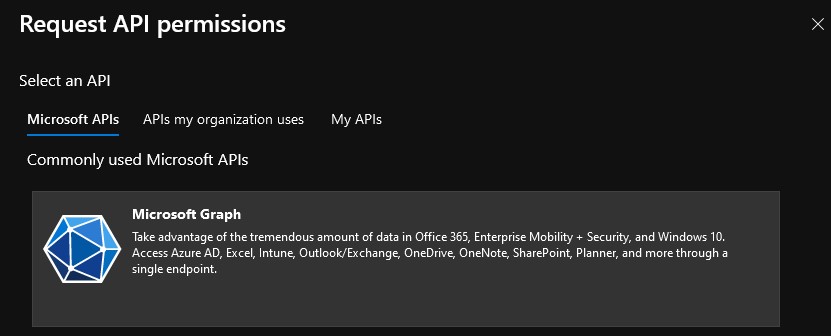
- From the pane that appears on the right, select Microsoft Graph from the Microsoft APIs.
- Click Delegated permissions.

- Select
offline_access,openid, andprofile, then click Add permissions.
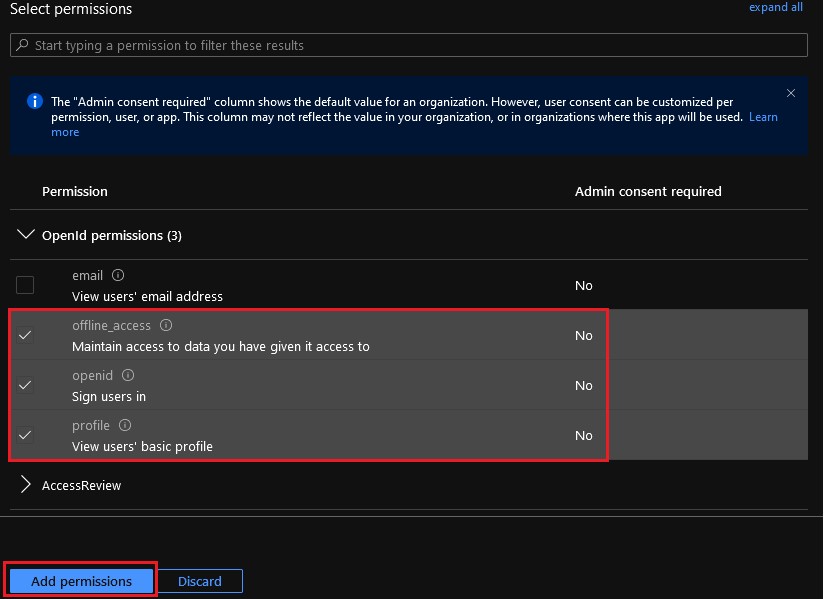
- Select Grant admin consent for [ORGANIZATION].
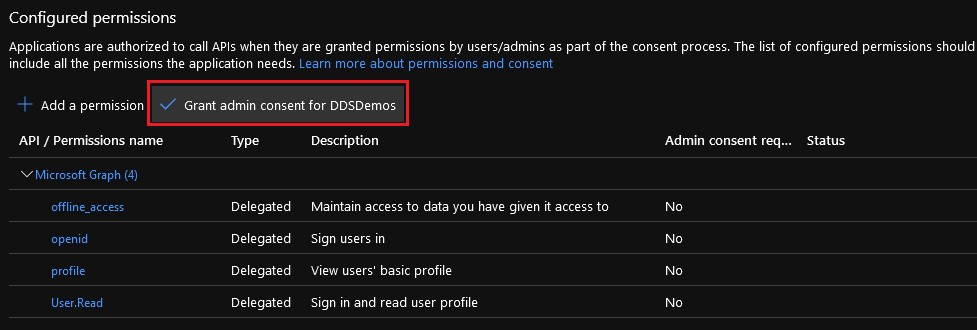
- Click Yes.
- The permission changes are made organization-wide.
- When granted, the permissions show a green checkmark in the status column.

The configured application registration within Azure Active Directory is used to configure Password less Authentication within the Dell Security Management Server.
To configure the Dell Security Management Server:
- Sign in to the Dell Data Security administration console.
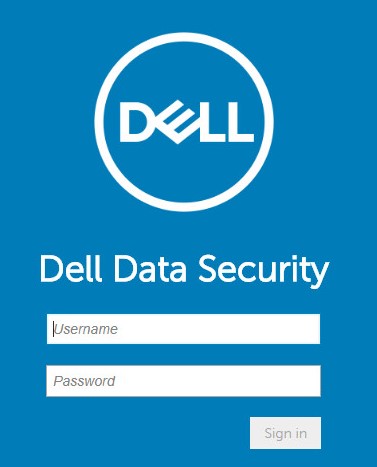
- From the left menu pane, click Populations, and then Domains.
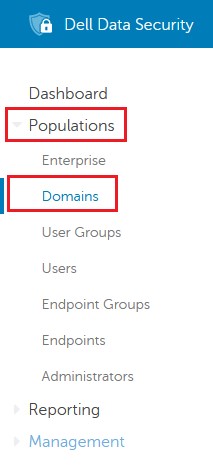
- Select your domain.
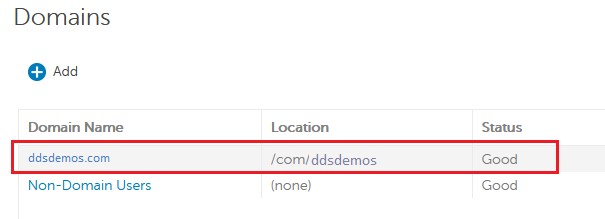
- Click Settings.

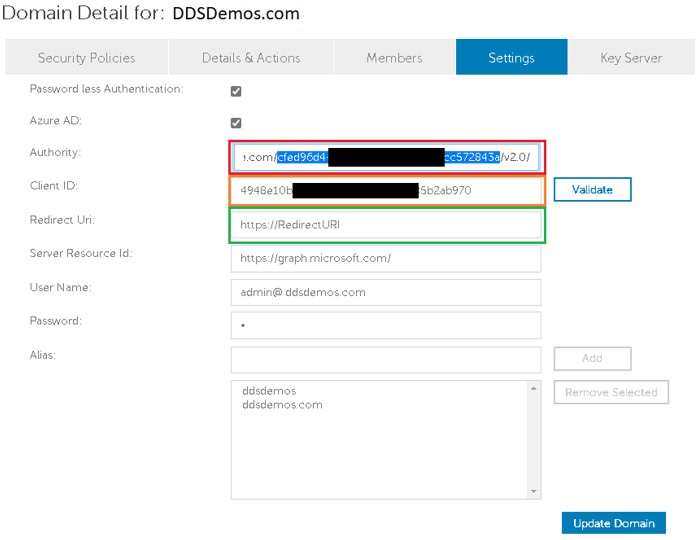
- From the domain detail settings:
- Select Password less Authentication.
- Select Azure AD.
- Populate Authority with https://login.microsoftonline.com/[DIRECTORYTENANTID]/v2.0/. This field is highlighted red in the example image.
- Populate Client ID with the Application (client) ID in GUID format from the configured Azure Active Directory environment. This field is highlighted orange in the example image.
- Populate Redirect Uri with the created URL. This field is highlighted green in the example image.
- Populate Server Resource Id with the site used to process the authentication token. This is paired with Authority and Client ID to ensure that the proper method is used during registration.
- Populate the User Name and Password of the configured domain administrator.
- Click Update Domain.
- [DIRECTORYTENANTID] = The Directory (tenant) ID from the Azure Active Directory configuration information (Step 8)
- The Authority field uses the leveraged URI to begin the communication for attempting to resolve the token during the user’s activation attempt. The "Authority" is the primary server (URL) that we must connect to. This contains the validation mechanism for the users that we are requesting to validate against that service.
- The Client ID should be populated with the Application (client) ID from the Azure Active Directory configuration information (Step 8).
- The ClientID field directs us to communicate with a specific application on the tenant that we have defined.
- The Redirect Uri should be populated with the created URL from the Azure Active Directory configuration information (Step 6).
- This is a specific resource that we host to show how we want to relogin to the application if there are login errors.
- The Server Resource Id should be populated with https://graph.microsoft.com/ when using Azure Active Directory.
- This is the primary point on the target authority where the native app communicates to for us to get information about the users. With Azure, this is going to be on the Azure back-end to ensure that we are conferring with the Azure authentication mechanisms.
Endpoints running Dell Encryption Enterprise’s Policy-Based Encryption are now able to authenticate using Windows Hello credentials on supported Dell Encryption Enterprise releases.
To contact support, reference Dell Data Security International Support Phone Numbers.
Go to TechDirect to generate a technical support request online.
For additional insights and resources, join the Dell Security Community Forum.