Windows에서 PCIe 카드 설치: 종합 가이드
Résumé: Windows 시스템에서 PCIe 카드를 설치하는 방법에 대해 알아봅니다. PCIe 슬롯, 어댑터 옵션 및 간편한 단계별 설치 지침에 대한 팁 찾기
Cet article concerne
Cet article ne concerne pas
Cet article n’est associé à aucun produit spécifique.
Toutes les versions du produit ne sont pas identifiées dans cet article.
Instructions
Dell 시스템에 PCIe 카드를 추가하려면 아래 단계에 따라 설치를 완료합니다.
- 측면 커버를 제거합니다. 제거 방법을 모르는 경우 Dell 지원 페이지를 참조하여 시스템 설명서를 받으십시오.
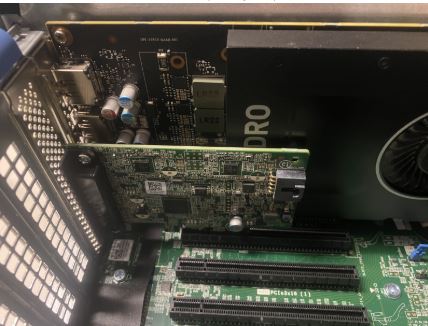
- PCIe 카드가 PCIe 슬롯에 추가됩니다. (그림 1 참조)

(그림 1 - PCIe 슬롯)
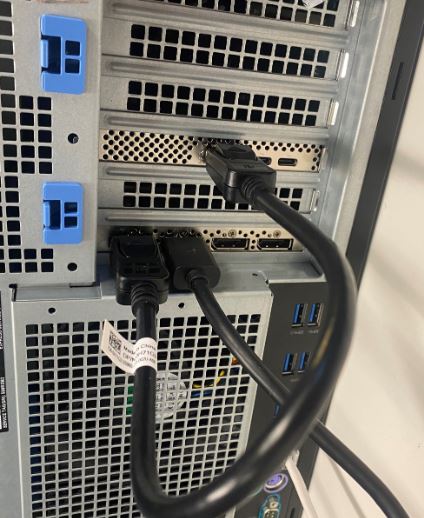
- PCIe 카드 ID가 추가되면. PCIe 카드 디스플레이 포트에서 그래픽 카드 디스플레이 포트로 연결하려면 디스플레이 포트-디스플레이 포트 케이블이 필요합니다. (그림 2 참조)

(그림 2 - DP-DP 케이블)
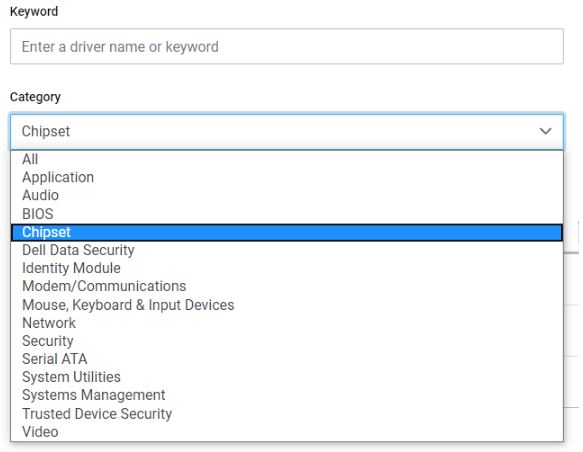
- 카드가 설치된 후 Thunderbolt PCIe 카드이면 최신 Thunderbolt 컨트롤러 드라이버를 업데이트해야 합니다. 드라이버 사이트로 이동하여 시스템에 맞는 드라이버를 검색하십시오. Thunderbolt 컨트롤러 드라이버는 "칩셋"에서 찾을 수 있습니다. (그림 3 참조)

(그림 3 - Dell 드라이버 범주)
이 드라이버 설치가 완료되고 시스템이 재부팅되면 이제 PCIe 카드 기능에서 PCIe 슬롯을 사용할 수 있습니다.
Informations supplémentaires
권장 문서
다음은 사용자가 관심 있을 만한, 이 주제와 관련된 몇 가지 권장 문서입니다.
Propriétés de l’article
Numéro d’article: 000126038
Type d’article: How To
Dernière modification: 03 Apr 2024
Version: 8
Trouvez des réponses à vos questions auprès d’autres utilisateurs Dell
Services de support
Vérifiez si votre appareil est couvert par les services de support.