Bienvenue
Bienvenue dans l’univers Dell
Mon compte
- Passer des commandes rapidement et facilement
- Afficher les commandes et suivre l’état de votre expédition
- Créez et accédez à une liste de vos produits
- Gérer vos sites, vos produits et vos contacts au niveau des produits Dell EMC à l’aide de la rubrique Gestion des informations de l’entreprise.
Numéro d’article: 000177797
Assign and Unassign hot spare in system setup in PowerEdge RAID Controller 10
Résumé: This article provides the information of how to assign or unassign a global dedicated hot spare for a physical disk drive.
Contenu de l’article
Symptômes
This article provides the information of how to assign or unassign a global dedicated hot spare for a physical disk drive.
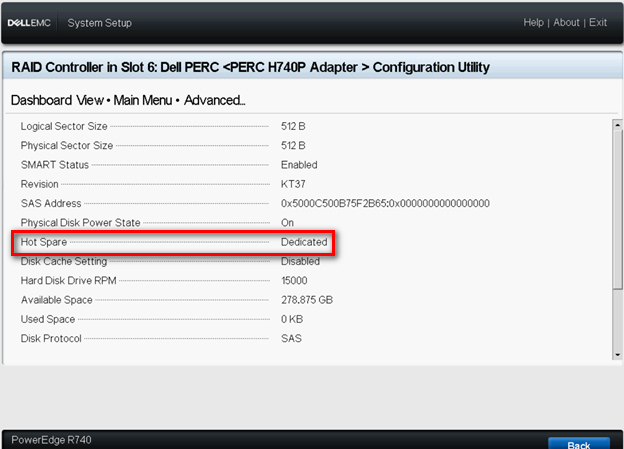
- A dedicated hot spare is assigned to only one virtual disk on the controller.
- A Global hot spare is assigned to all virtual disks on the controller.
Dell PowerEdge RAID Controller 10 (PERC H740P, PERC H745P MX, PERC H840) supports this feature.
See the Dell PowerEdge RAID Controller manual for more information.
Table of Contents
1.Navigating to the Dell PERC 10 configuration utility
Perform the following steps to boot to the HII configuration utility:- Turn on the system.
- While the system startup, press F2 to enter System Setup.

- Click Device Settings, all RAID controllers in the system list in the Device Settings screen.
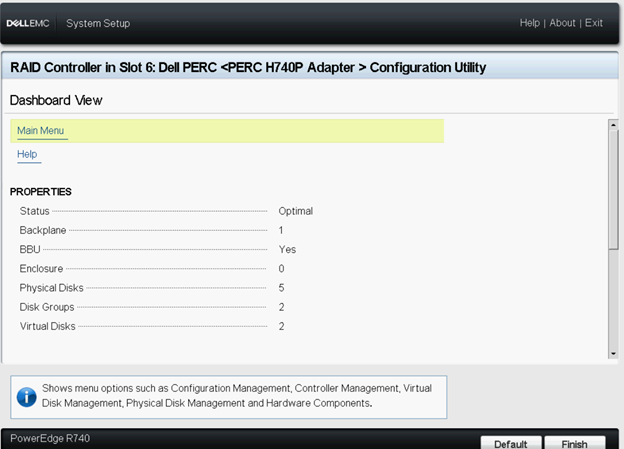
To access the main menu for the controller, use the arrow keys or the mouse.
 |
|
 Note: For more information in all the options, click Help that is available on the upper right corner of the browser screen. Help information for individual option menus can also be viewed by scrolling down on each option.
2.Assign a global hot spare
To assign a global hot spare from the HII Configuration Utility, perform the following steps:
 Note: The utility allows only disks of the same disk technology and of equal or greater size to be selected as dedicated hot spare.
- Enter the Dell PERC 10 Configuration Utility. See Going to Dell PERC 10 configuration utility.
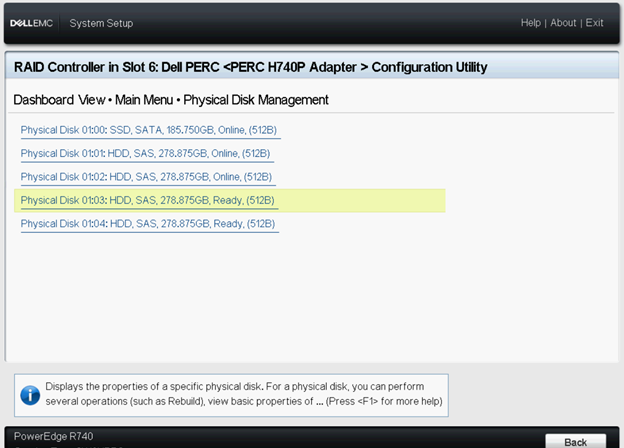
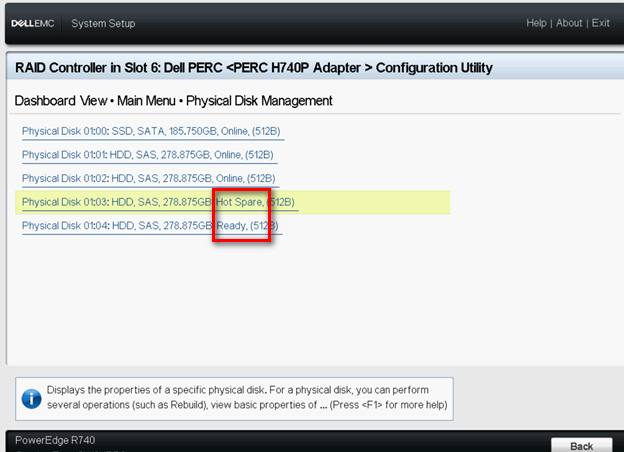
- Click Main Menu > Physical Disk Management. The list of physical disks is displayed.

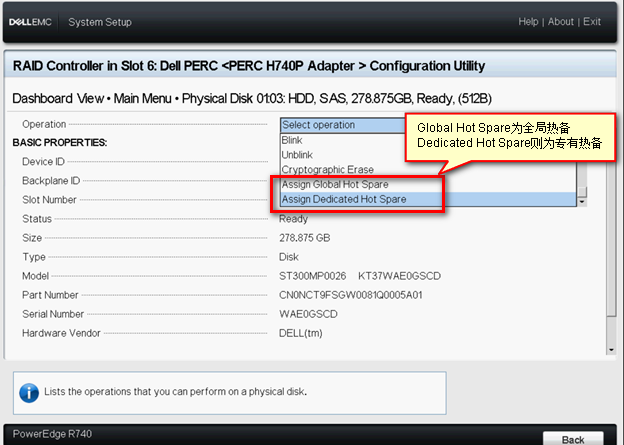
- Select the physical disk.

- From the Operations drop-down menu, select Assign Global Hot Spare.
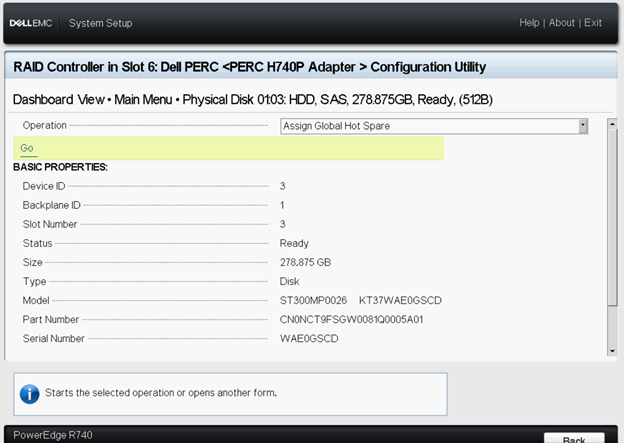
- Click Go. A screen is displayed asking if you are sure you want to perform the operation.
- Select the Confirm option.
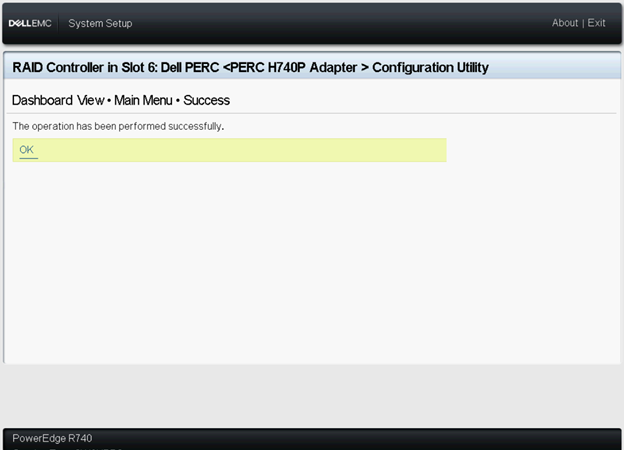
- Click Yes. The global hot spare disk is created successfully.
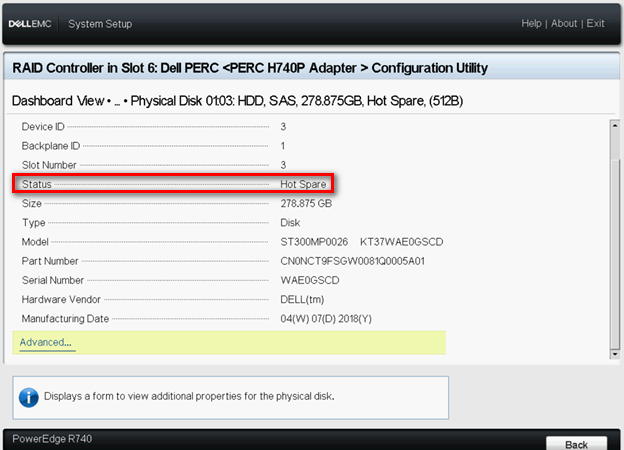
- You can check the status of the physical disk.
3.Assigning dedicated hot spare
To assign a dedicated hot spare from the HII Configuration Utility, perform the following steps:
 Note: The utility allows only disks of the same disk technology and of equal or greater size to be selected as dedicated hot spare.
- Enter the Dell PERC 10 Configuration Utility. See Going to Dell PERC 10 configuration utility.
- Click Main Menu > Physical Disk Management. The list of physical disks is displayed.

- Select the physical disk.
- From the Operations drop-down menu, select Assign Dedicated Hot Spare.

- Click Go. Select the associate virtual to the dedicated hot spare.

- Select the Confirm option.
- Click Yes. The dedicated hot spare disk is created successfully.

- You can check the status of the physical disk.
4.Unassign a hot spare
To unassign a hot spare from the HII Configuration Utility, perform the following steps:
-
Enter the Dell PERC 10 Configuration Utility. See Going to Dell PERC 10 configuration utility.
- Click Main Menu > Physical Disk Management, and the list of physical disks is displayed.

- Select the hot spare you want to unassign.
- From the Operations drop-down menu, select Unassign Hot Spare.
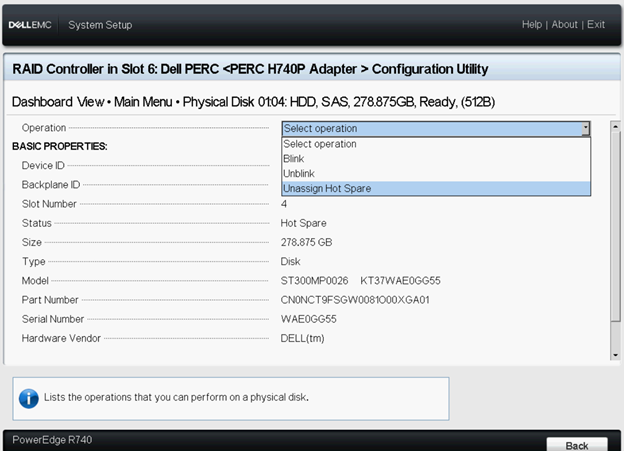
- Select the Confirm option.
- Click Yes. The hot spare disk is unassigned successfully.

- You can check the status of the physical disk.
 Note: Try to use physical disks of the same capacity in a specific virtual disk. If you use physical disks with different capacities in a virtual disk, all physical disks in the virtual disk are treated as if they have the capacity of the smallest physical disk.
Cause
See above
Résolution
See above
Informations supplémentaires
Related Resources
Here are some recommended resources related to this topic that might be of interest:
Video Link: What is a hot spare drive and how to configure it on a PowerEdge server?
Here are some recommended resources related to this topic that might be of interest:
Video Link: What is a hot spare drive and how to configure it on a PowerEdge server?
Propriétés de l’article
Produit concerné
PowerEdge, Rack Servers, Tower Servers, Fixed Workstations, Storage Spaces Direct R740xd Ready Node, Storage Spaces Direct R740xd2 Ready node, OEMR R340, OEMR R440, OEMR R540, OEMR R640, OEMR XL R640, OEMR R740, OEMR XL R740, OEMR R740xd
, OEMR R740xd2, OEMR R840, OEMR R940, OEMR R940xa, OEMR XL R240, PowerEdge R440, PowerEdge R840, PowerEdge R940, PowerEdge R940xa, PowerEdge RAID Controller H740P, PowerEdge RAID Controller H840, VxFlex Ready Node R640
...
Dernière date de publication
05 avr. 2024
Version
8
Type d’article
Solution