How to Create Netskope API-Enabled Protection Instances
Resumen: A Netskope API-enabled protection instance can be created by following these instructions.
Síntomas
This article provides steps for creating an API-enabled protection instance in Netskope.
Affected Products:
Netskope Admin Platform
Causa
Not applicable.
Resolución
To create an Introspection Instance:
- In a web browser, go to the Netskope web console:
- United States Datacenter: https://[TENANT].goskope.com/
- European Union Datacenter: https://[TENANT].eu.goskope.com/
- Frankfurt Datacenter: https://[TENANT].de.goskope.com/
- Log in to the Netskope web console.
- From the Netskope home screen, click Settings.

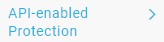
- From the Settings page, click API-enabled Protection.
- From the API-enabled Protection page, click SaaS.

- Select the provider that you want to configure, and then click Setup Instance.
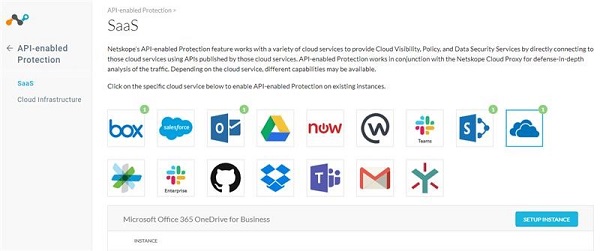
For more information about API-enabled protection instances to be configured, click the appropriate option.
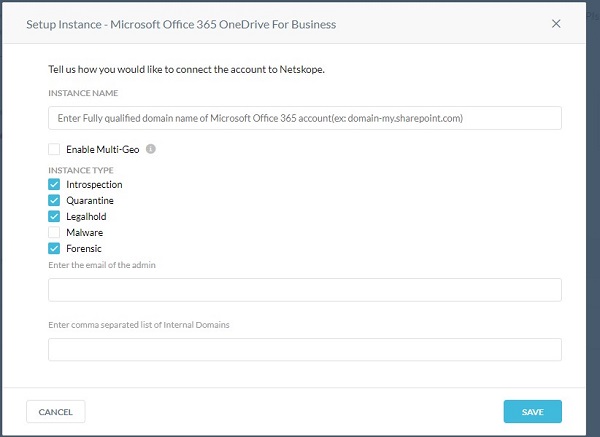
- From the Setup Instance menu:
- Populate the fully qualified domain name (FQDN) of your Microsoft Office 365 account.
- Optionally, if your organization supports Microsoft Office 365 multi-geo, click to Enable Multi-Geo.
- Select all wanted Instance Types.
- Populate an Office 365 administrator email address.
- Optionally, populate a comma-separated list of internal domains.
- Click Save.
- To find the fully qualified domain name (FQDN) of your Microsoft Office 365 account, log in to your Microsoft Office 365 account and then go to Microsoft 365 admin center, Home, and then Domains.
- Any files that are shared across internal domains are treated as internally shared.
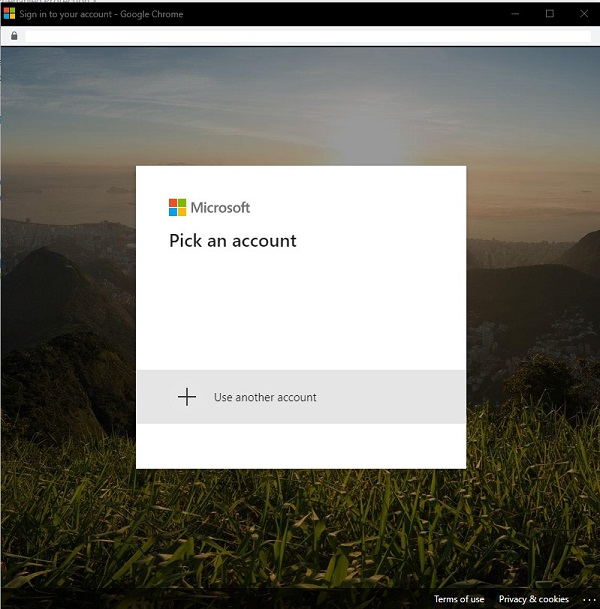
- Click Grant Access.

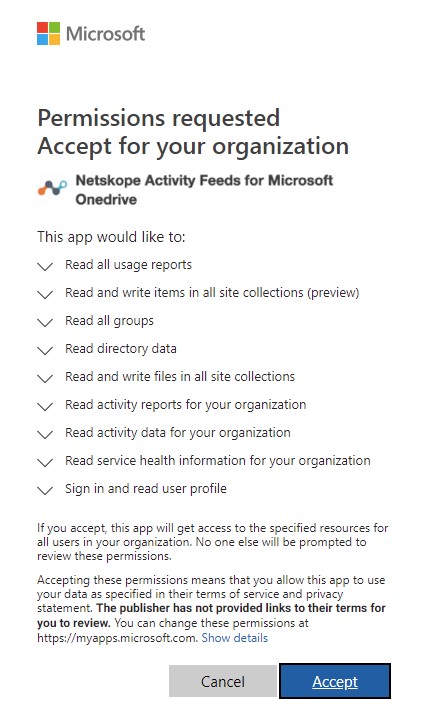
- Log in with your global administrator username and password.
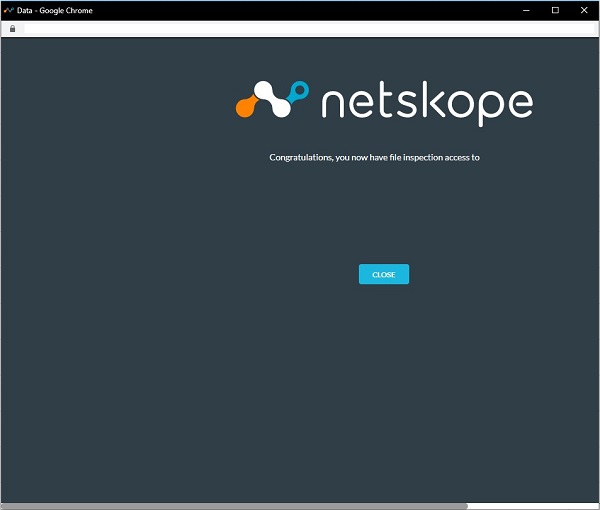
- Accept the permissions.
- Click Close.
Presently, Dell does not have step-by-step instructions for all available API-enabled protection instance options. An account with any cloud service selected is required. If further assistance is required to configure an API-enabled protection instance, reference How to Get Support for Netskope.
To contact support, reference Dell Data Security International Support Phone Numbers.
Go to TechDirect to generate a technical support request online.
For additional insights and resources, join the Dell Security Community Forum.