如何检查戴尔数据安全的策略更新
Resumen: 了解如何按照以下说明检查 Dell Data Security 或 Dell Data Protection 软件的政策更新。
Este artículo se aplica a:
Este artículo no se aplica a:
Este artículo no está vinculado a ningún producto específico.
En este artículo no se identifican todas las versiones de los productos.
Síntomas
提醒:
- 从 2021 年 2 月起,Dell Encryption Enterprise for Mac 停止维护。戴尔不再更新本产品及其文章。
- 从 2022 年 5 月起,Dell Endpoint Security Suite Enterprise 停止维护。戴尔不再更新本产品及其文章。
- 从 2019 年 1 月起,Dell Endpoint Security Suite Pro 停止维护。戴尔不再更新本产品及其文章。
- 有关详细信息,请参阅 戴尔数据安全产品生命周期(支持终止和停售)政策。如果您对其他文章有任何疑问,请联系您的销售团队或联系 endpointsecurity@dell.com。
- 请参阅端点安全性,了解有关当前产品的其他信息。
本文介绍如何使用 Dell Data Security(以前称为 Dell Data Protection)检查策略更新。
受影响的产品:
- Dell Encryption Enterprise
- Dell Data Protection | Enterprise Edition
- Dell Encryption Enterprise for Mac
- Dell Data Protection | Enterprise Edition(Mac 版)
- Dell Encryption Enterprise Self-Encrypting Drive Manager
- Dell Data Protection | Self-Encrypting Drive Manager
- Dell Encryption External Media
- Dell Data Protection | External Media Edition
- Dell BitLocker Manager
- Dell Data Protection | BitLocker Manager
- Dell Endpoint Security Suite Pro
- Dell Data Protection | Endpoint Security Suite
- Dell Endpoint Security Suite Enterprise
- Dell Data Protection | Endpoint Security Suite Enterprise
- Dell Full Disk Encryption
受影响的操作系统:
- Windows
- Mac
Causa
不适用
Resolución
检查策略更新会因正在使用的产品的操作系统而异。单击 Windows 或 Mac 以 了解更多信息。
Windows
策略更新在以下两个方面有所不同:
护罩
- Dell Encryption Enterprise
- Dell Data Protection | Enterprise Edition
- Dell Encryption External Media
- Dell Data Protection | External Media Edition
加密管理代理 (EMAgent)
- Dell Encryption Enterprise Self-Encrypting Drive Manager
- Dell Data Protection | Self-Encrypting Drive Manager
- Dell BitLocker Manager
- Dell Data Protection | BitLocker Manager
- Dell Endpoint Security Suite Pro
- Dell Data Protection | Endpoint Security Suite
- Dell Endpoint Security Suite Enterprise
- Dell Data Protection | Endpoint Security Suite Enterprise
- Dell Full Disk Encryption
护罩
可以使用 UI 或注册表检查策略更新。选择相应的选项以了解更多信息。
提醒:仅当端点策略包括已设置为“True”的“Display Local Encryption Processing Control”时,此选项才可用。
- 登录 到 Windows 计算机。
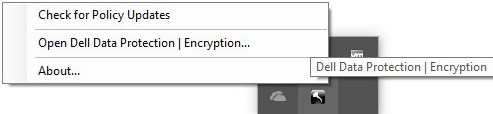
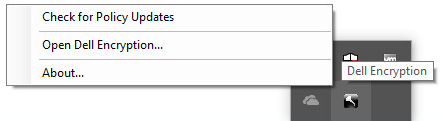
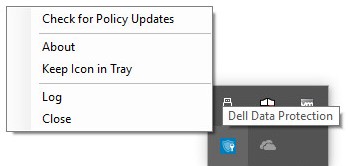
- 在 Windows 系统托盘中,右键单击 Dell Encryption(以前称为 Dell Data Protection | Encryption)图标,然后选择 Check for Policy Updates。
| v8.0.0 至 v8.13.0 | v8.15.0 及更高版本 |
|---|---|
|
|
|
提醒:为了防止出现性能问题,策略更新检查通信限制为一分钟。
- 右键单击 Windows 的“开始”菜单,然后单击运行。
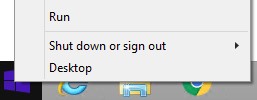
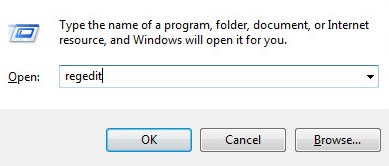
- 在“运行”用户界面 (UI) 中,键入
regedit,然后按确定。这将打开 Registry Editor。
- 在注册表编辑器中,转至
HKEY_LOCAL_MACHINE\Software\Credant\CMGShield\Notify。 - 右键单击 Notify 文件夹,选择新建,然后单击 DWORD(32 位)值。

- 将 DWORD 命名为
PingProxy。

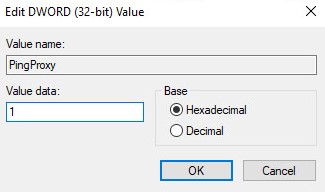
- 双击
PingProxy。
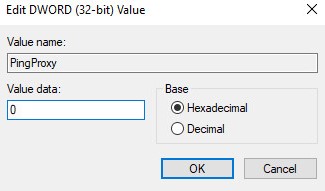
- 使用
1填充值数据,然后单击确定。
提醒:端点查询服务器后,
PingProxy 值数据将恢复为 0。
EMAgent
- 登录 到 Windows 计算机。
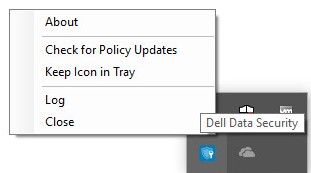
- 在 Windows 系统托盘中,右键单击 Dell Data Security(以前称为 Dell Data Protection)图标,然后选择 Check for Policy Updates。
| v8.0.1 至 v8.13.0 | v8.15.0 及更高版本 |
|---|---|
|
|
|
Mac
- 登录 到 Mac 计算机。
- 单击 System Preferences。

- 双击 Dell Encryption Enterprise(以前称为 Dell Data Protection)。
| v8.0.0 至 8.13.2 | v8.15.0 及更高版本 |
|---|---|
|
|
|


- 单击 Policies。

- 单击窗口底部附近的 刷新按钮 。
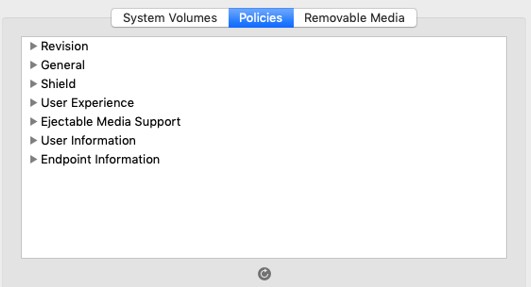
提醒:为了防止出现性能问题,策略更新检查通信限制为一分钟。
要联系支持部门,请参阅 Dell Data Security 国际支持电话号码。
转至 TechDirect,在线生成技术支持请求。
要获得更多见解和资源,请加入戴尔安全社区论坛。
Información adicional
Vídeos
Productos afectados
Dell EncryptionPropiedades del artículo
Número de artículo: 000126722
Tipo de artículo: Solution
Última modificación: 24 oct 2023
Versión: 10
Encuentra las respuestas que necesitas con la ayuda de otros usuarios de Dell
Servicios de asistencia
Comprueba si tu dispositivo está cubierto por los servicios de asistencia.