Article Number: 000209812
Chromebook 3110 and 3110 2-in-1 RMA Shim Process
Summary: Steps for using the Chrome RMA Shim tool when a system board is replaced on the Chromebook 3110 and 3110 2-in-1.
Article Content
Symptoms
No symptom information.
Cause
No cause information.
Resolution
Chromebook RMA Shim
In the event of a system board replacement, run the RMA Shim. The RMA Shim USB Key will be dispatched with a service replacement system board.
Note: The following pictures are of the Chromebook 3110, but the same process is valid for the Chromebook 3110 2-in-1 version.
Disabling Write-Protect
In order to perform an RMA Shim procedure, the Chromebook’s Write Protect function must first be disabled.
Note: If you are running the RMA Shim after replacing the system board, you do not have to follow the steps below to disable Write Protect. Replacement system boards are shipped with Write Protect disabled by default.
To disable Write Protect:
- Power the Chromebook off.
- Disconnect the power adapter from the Chromebook (Figure 1).
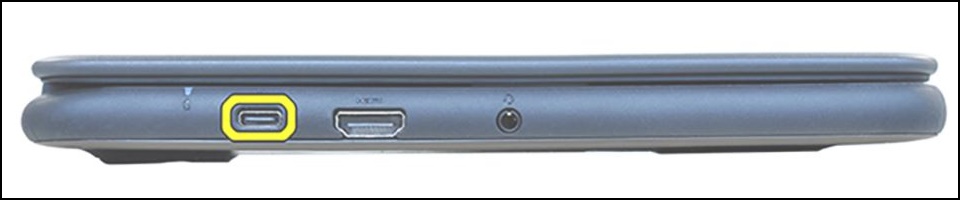
Figure 1 - Remove the base cover from the Chromebook. Refer to the User Guide (Chromebook 3110 and Chromebook 3110 2-in-1) for instructions on removing the base cover.
- Disconnect the battery cable from the system board (Figure 2).
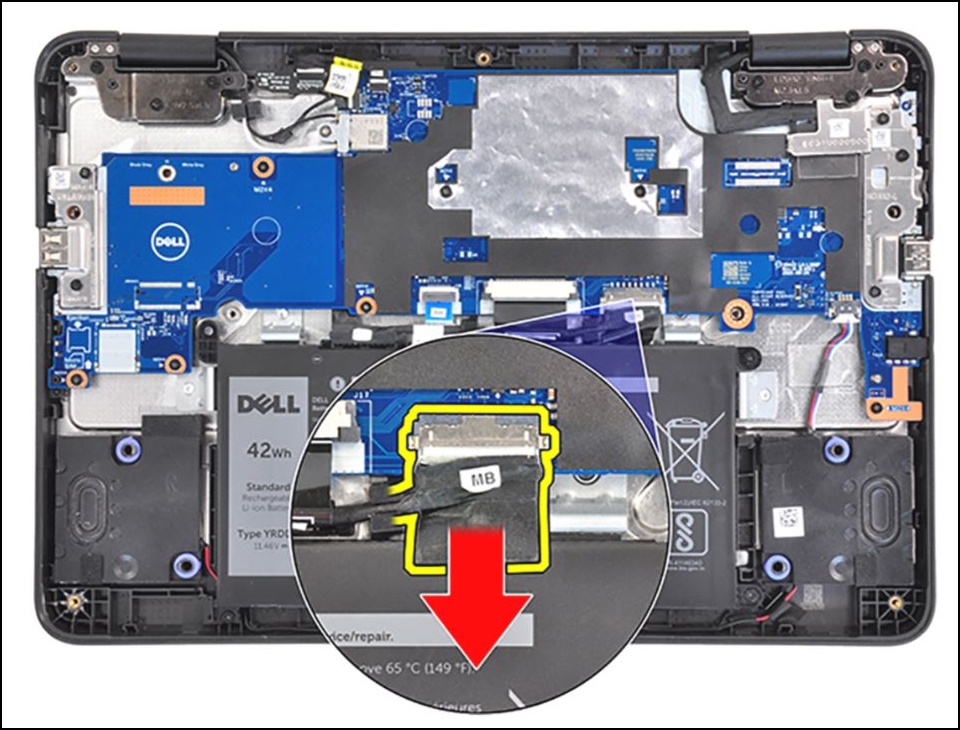
Figure 2 - Remove the single M2x4 screw securing the display cable bracket in place, and then remove the bracket.
Caution: Both the power adapter and battery cable MUST be disconnected before you proceed with this step. Failure to disconnect both may cause the Chromebook to short circuit.
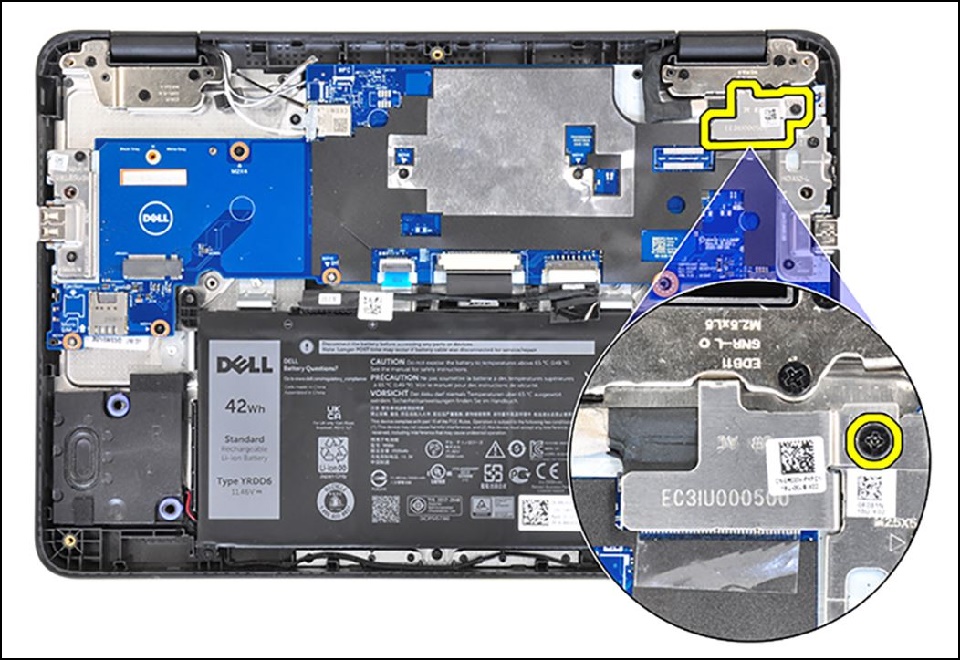
Figure 3 - Remove the single M2.5x5 screw (shown in red below) and single M2x4 screw (shown in yellow below) securing the left IO bracket in place, and then remove the bracket (Figure 4).
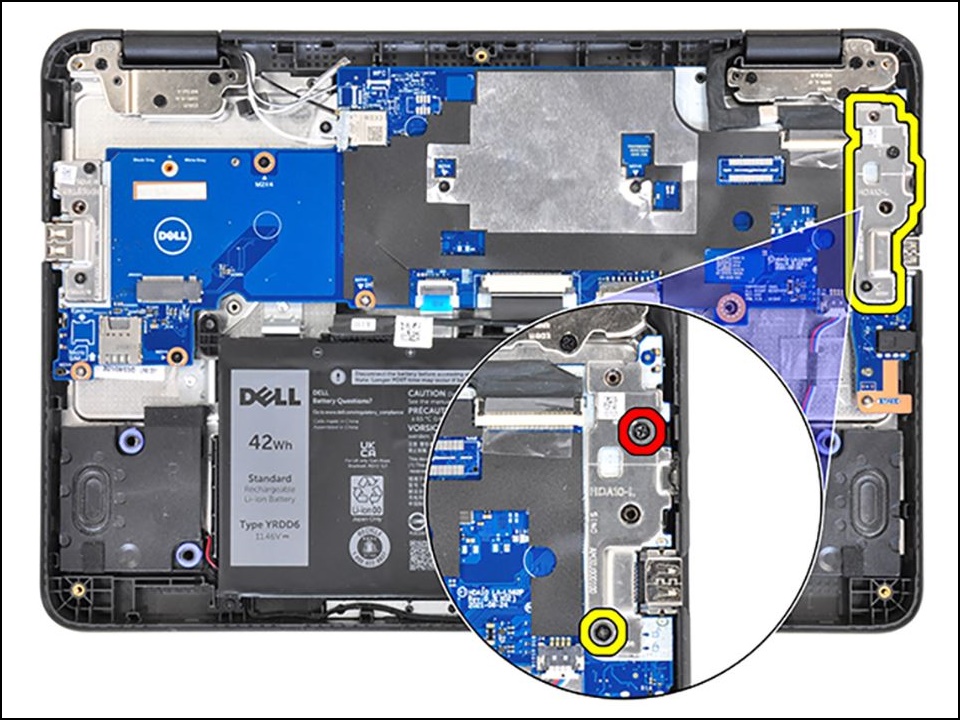
Figure 4 - Secure the single M2x4 screw onto the Write Protect screw hole on the system board (Figure 5).
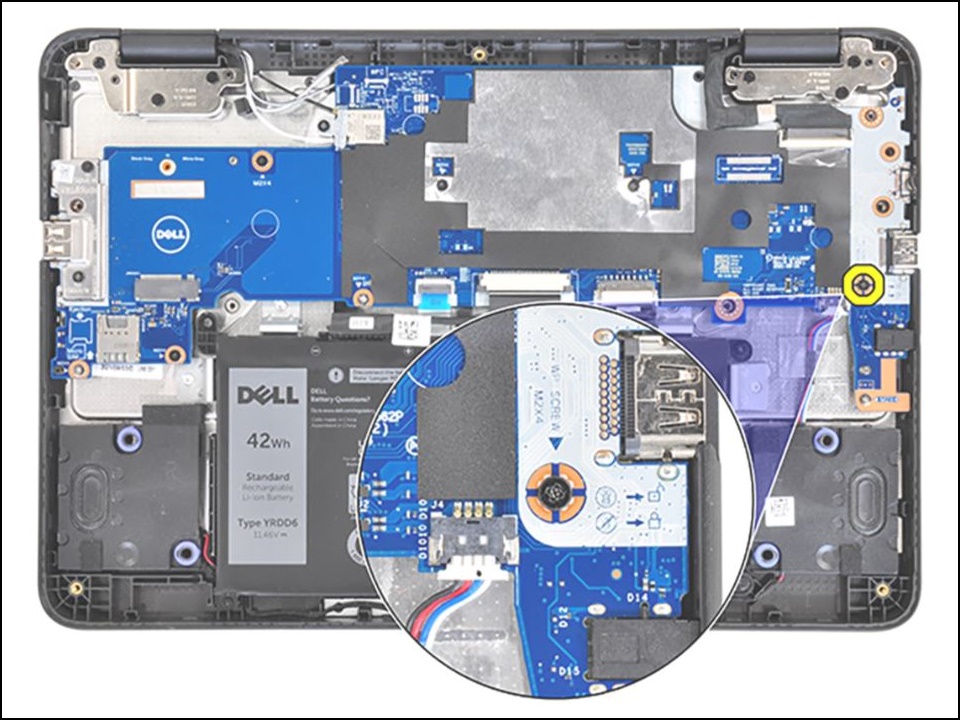
Figure 5 - Re-connect the battery cable to the system board (Figure 6).
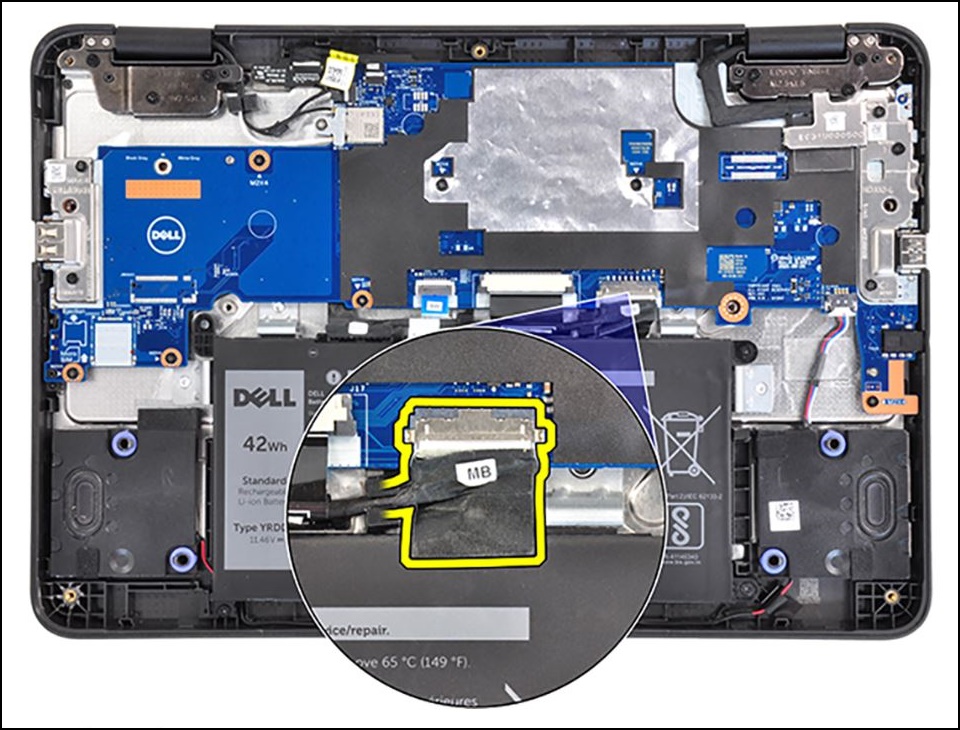
Figure 6 - Connect the power adapter to the Chromebook (Figure 7).

Figure 7 - Proceed with the RMA shim procedures.
Transition to Developer Mode
- Insert the RMA Shim USB Key into the USB port.
- Connect the power adapter to the Chromebook.
- Press and hold <Esc> + <Refresh> + <Power> for approximately 2 seconds.
Note: Some replacement system boards are shipped in Developer Mode and with Write Protect (WP) disabled. Instead of displaying the Recovery Screen, the Chromebook will boot from the RMA Shim USB key and load the CrOS Factory Shim setup menu. If you see the CrOS Factory Shim setup menu, then proceed to Installing the RMA Shim.
- The Chromebook will boot up and display the message below, press <Ctrl> + <D> (Figure 8).
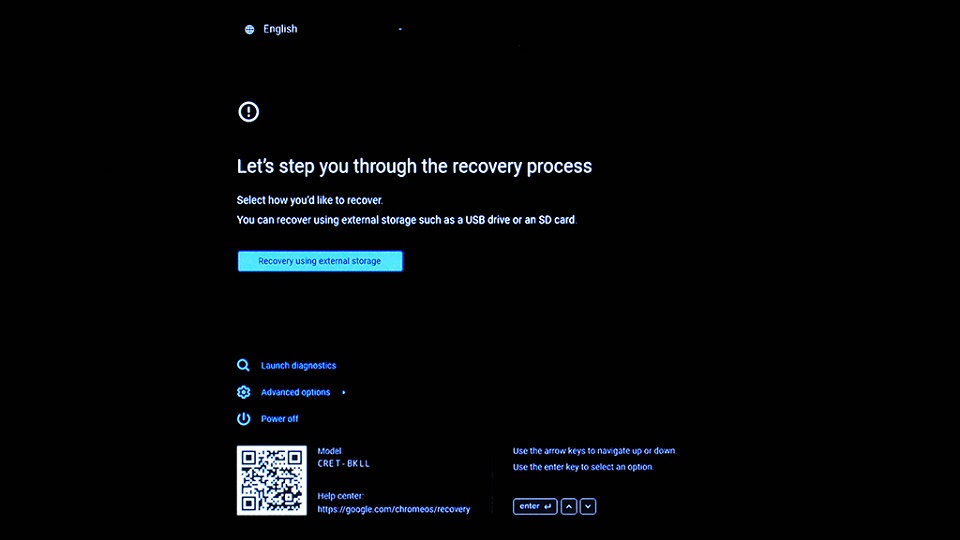
Figure 8 - In the confirmation screen select Confirm and press <Enter> to prepare the Chromebook to enter Developer Mode. The Chromebook will reboot (Figure 9).
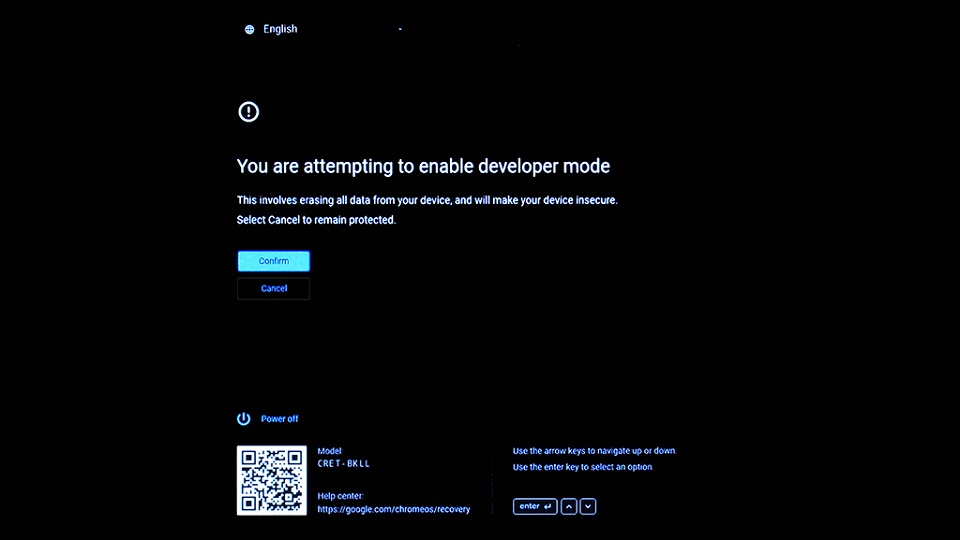
Figure 9 - Once you see the developer mode screen, press and hold the <Esc> + <Refresh> + <Power> keys for approximately 2 seconds in order for the Chromebook to boot from the RMA Shim USB key (Figure 10).
Note: If you do not press and hold the <Esc> + <Refresh> + <Power> keys within 30 seconds of seeing the screen (and before you hear 2 beeps), the Chromebook will take longer (2 – 3 minutes) before proceeding to boot from the RMA Shim USB key.
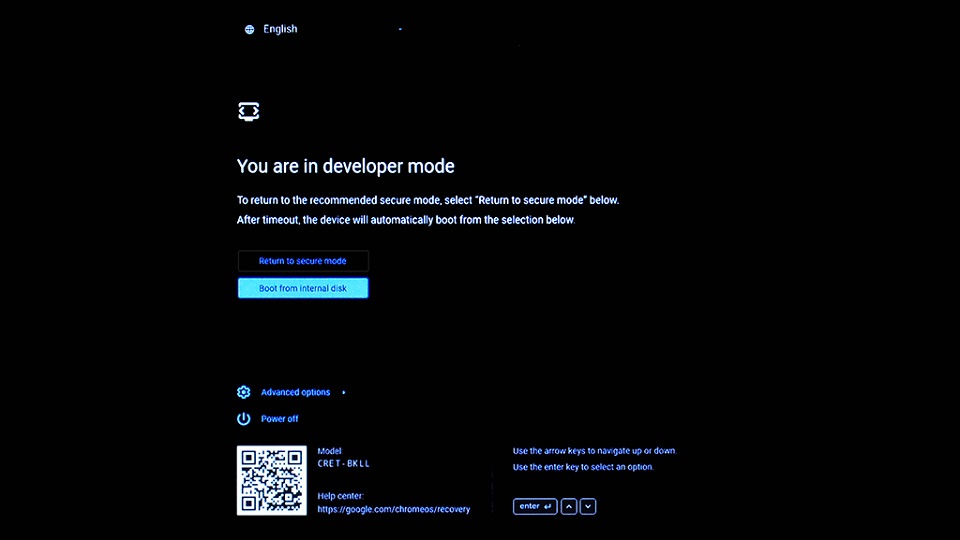
Figure 10
Installing the RMA Shim
Before you begin, take note and record the SKU info shown on the label inside the base cover, as this information is required when running the RMA Shim (Figure 11).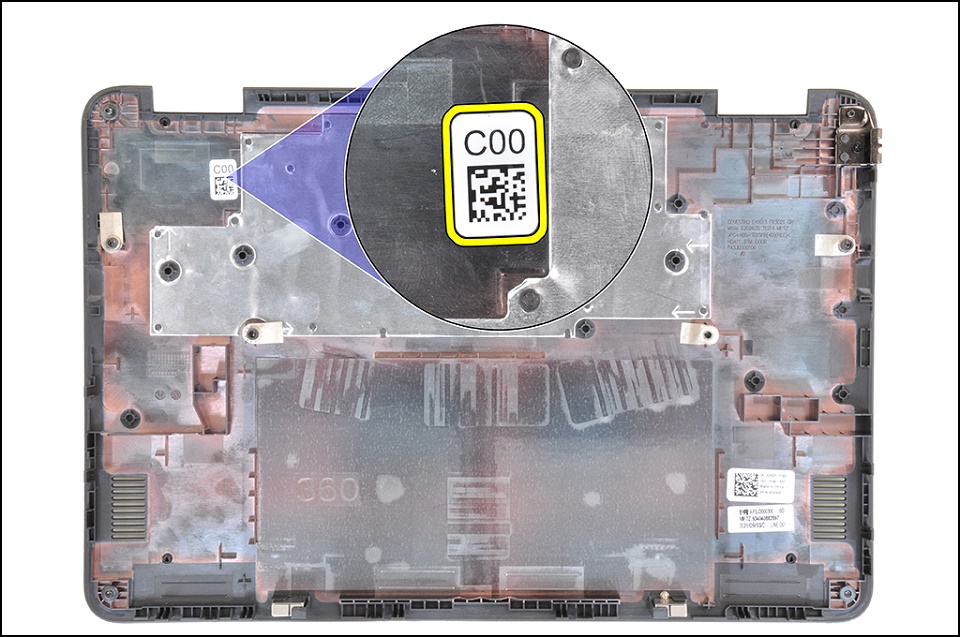
Figure 11
Note: If your access panel does not have a label, the label has been defaced, or removed? You can follow these steps to identify what it is:
- Go to the Dell Support Site.
- Enter your Service Tag.
- Click on View Product specs.
- The label is listed along with the label letter. (example. LBL, SKU ID 0X01, X, computer model.)
- The RMA Shim will begin loading. Upon reaching the screen below, press <i> and then press <Enter> to start installing the RMA Shim file (Figure 12).

Figure 12 - The RMA Shim USB Key will then load all the necessary files to start the RMA Shim process. This will take approximately 7 minutes to complete. When the installation process is completed, press <Enter> to restart the Chromebook, this process will take approximately 2 minutes (Figure 13).
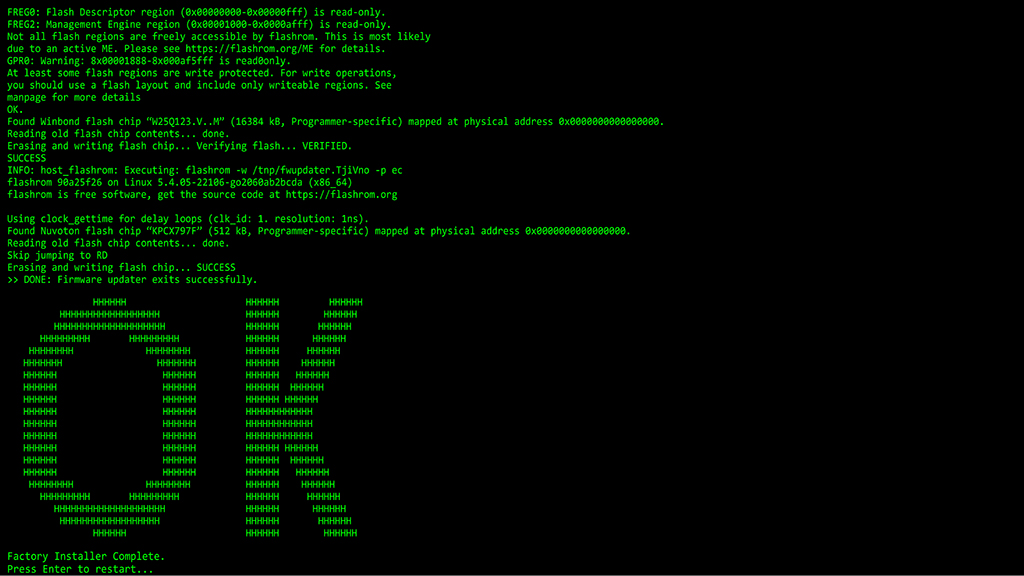
Figure 13 - While the Chromebook restarts, remove the RMA Shim USB Key from the USB port.
Running the RMA Shim
- When the RMA Shim screen appears press <Space> to begin the RMA Shim process. The RMA Shim will read the Chromebook data (Figure 14).
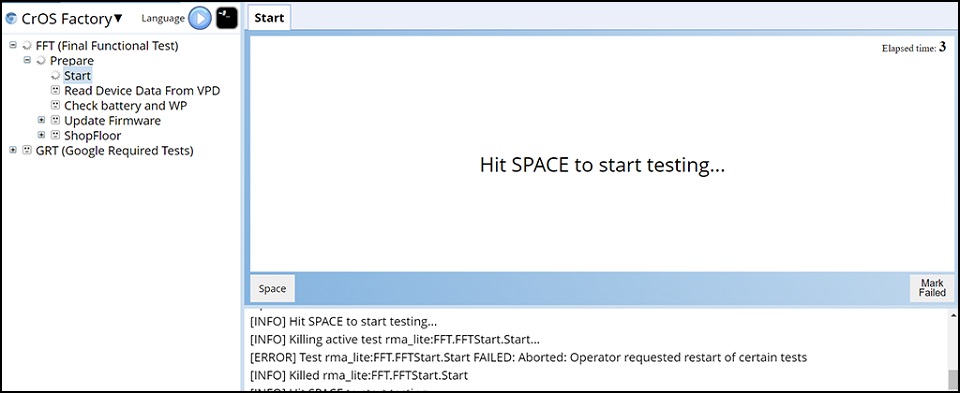
Figure 14 - When the Shutdown Test screen appears press <Space> to shut down the Chromebook (Figure 15 and 16).
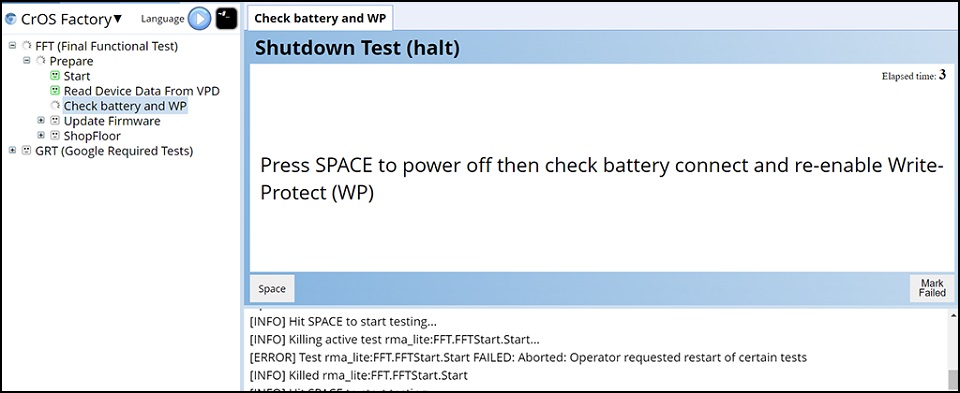
Figure 15
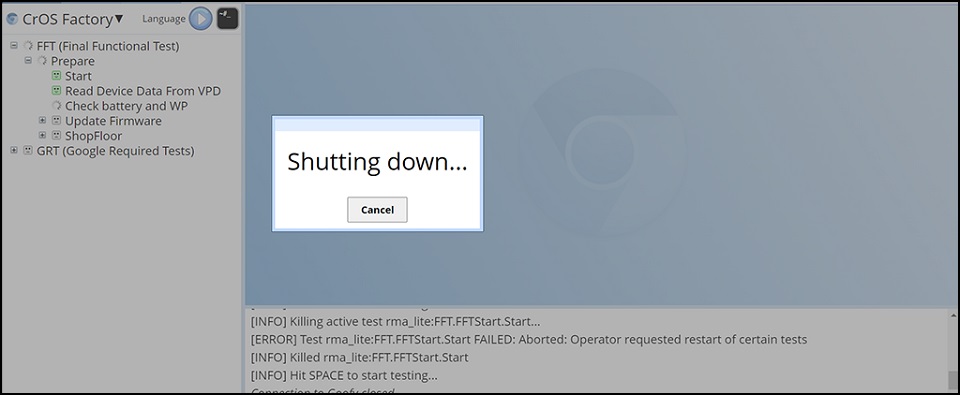
Figure 16 - After restarting, the RMA Shim will read the Chromebook data and then start with updating the firmware. The firmware update takes about 3 minutes after which the Chromebook will automatically restart (Figure 16 and 17).
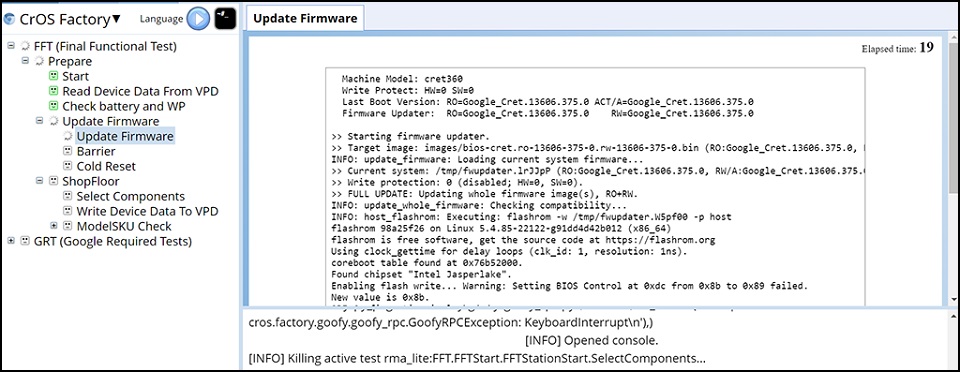
Figure 17
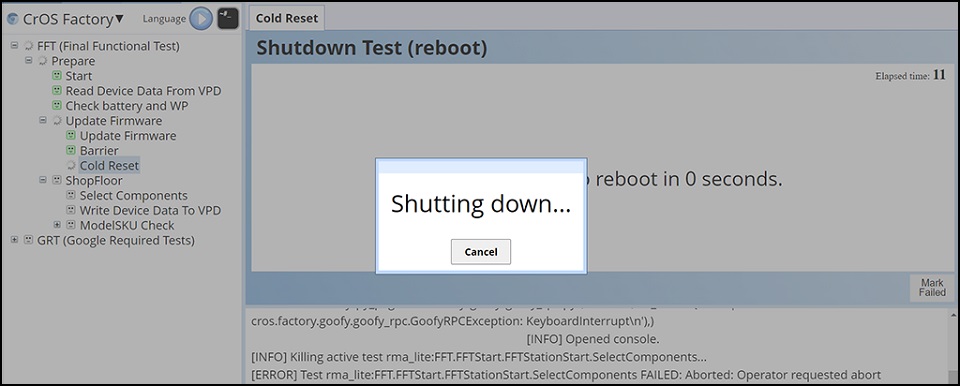
Figure 18 - After the Chromebook restarts, the RMA Shim will enter the Shop Floor (Figure 19). The Shop Floor section will allow you to customize the unique system fields. For Service Tag, enter the valid Service Tag from the label on the base cover (Figure 20).

Figure 19
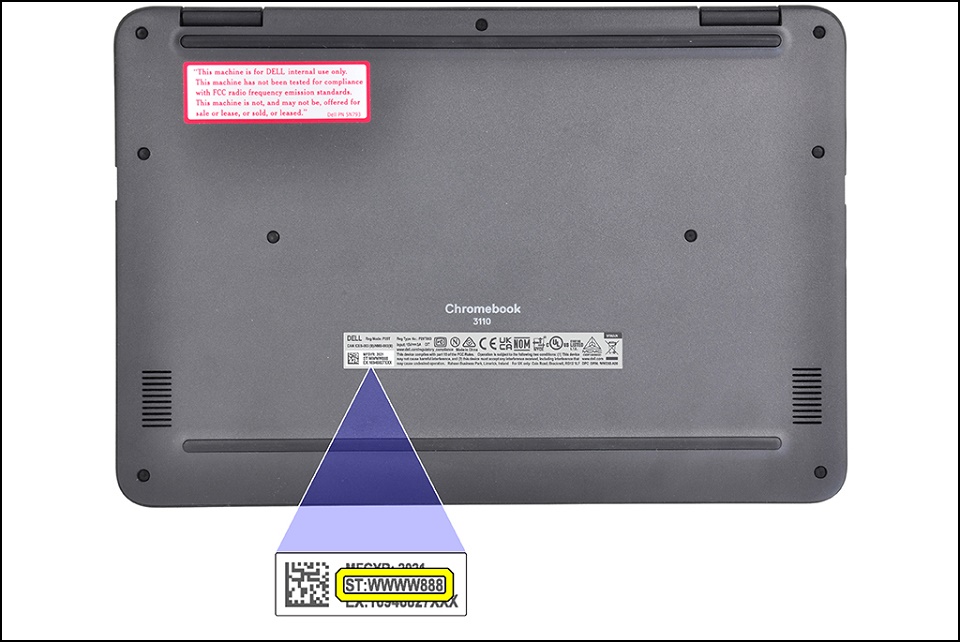
Figure 20 - Select the correct model name and press <Enter> (Figure 21).
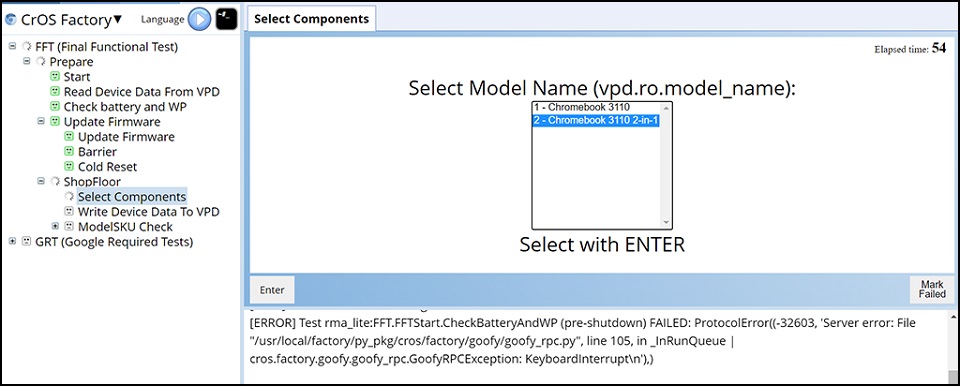
Figure 21
Note: The image below is for reference only, select the correct model name based on the actual base cover or work order ticket of the Chromebook running the RMA Shim (Figure 22).
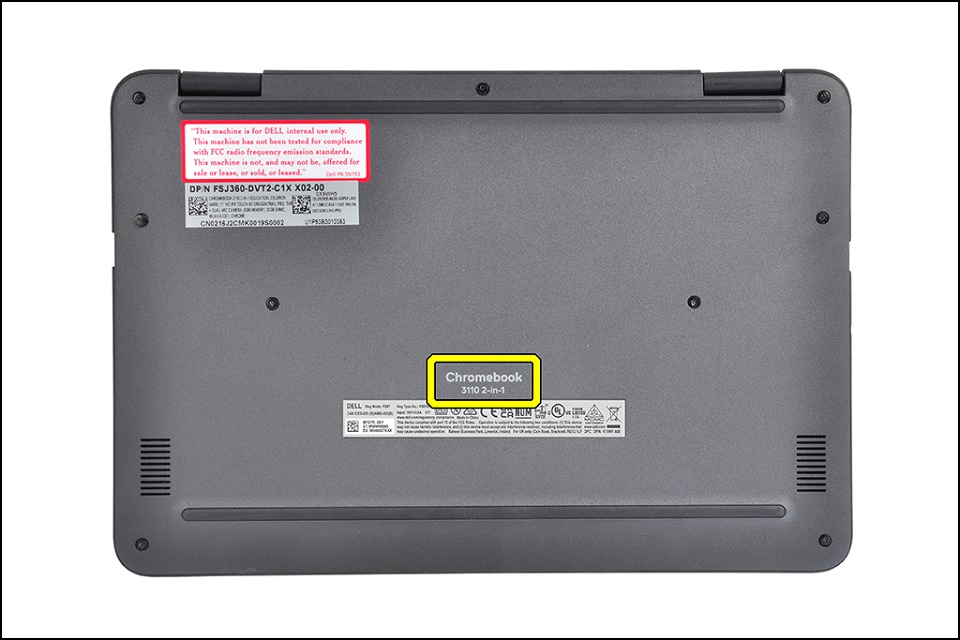
Figure 22 - Select your region and keyboard layout and then press <Enter> (Figure 23).
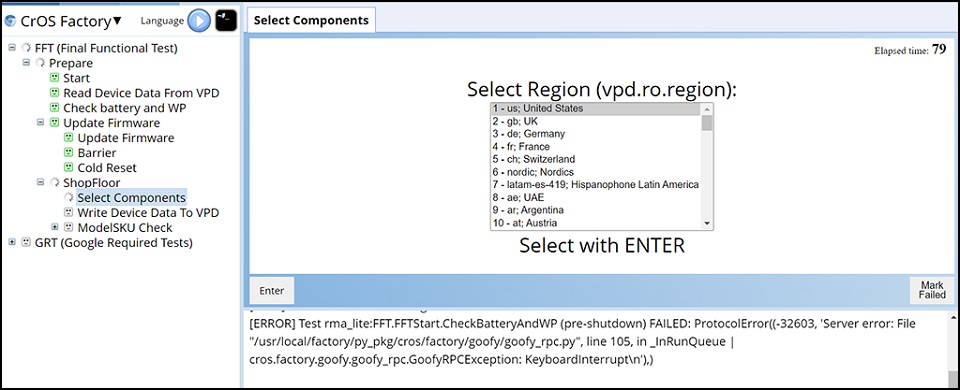
Figure 23 - For D-door SKU info (Figure 11), select the base cover SKU shown on the label inside the base cover and then press <Enter>. The Chromebook will begin updating the Chromebook information (Figure 24).
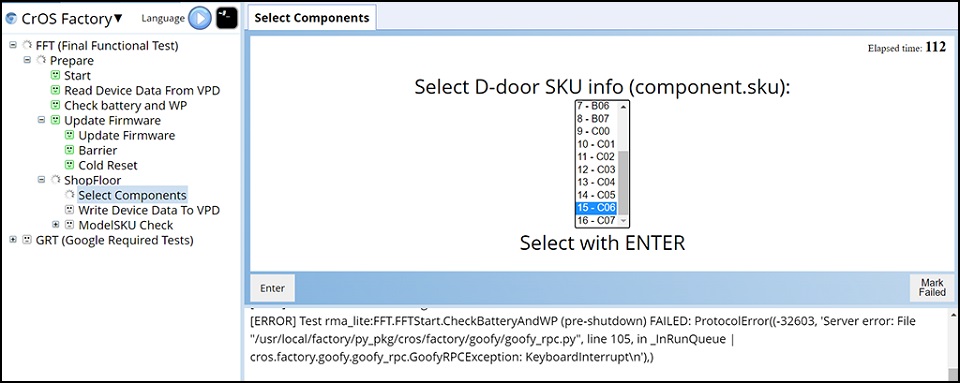
Figure 24 - After the RMA Shim updates the Chromebook information, the Chromebook will reboot automatically and then re-enter the RMA Shim process (Figure 25).
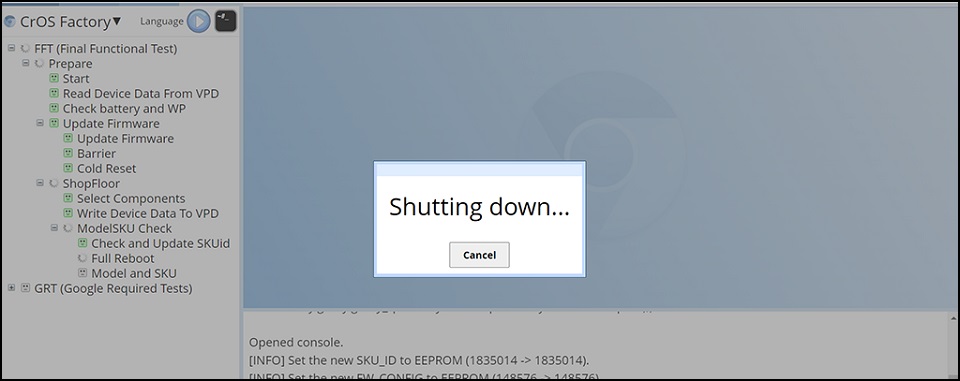
Figure 25
Google Required Tests
- After the RMA Shim enters Google Required Tests, the Chromebook will reboot automatically to finish the process (Figure 26 - 28).
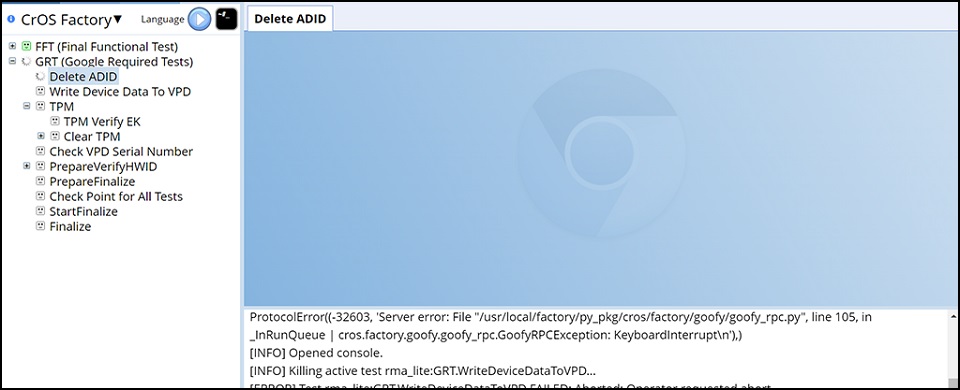
Figure 26
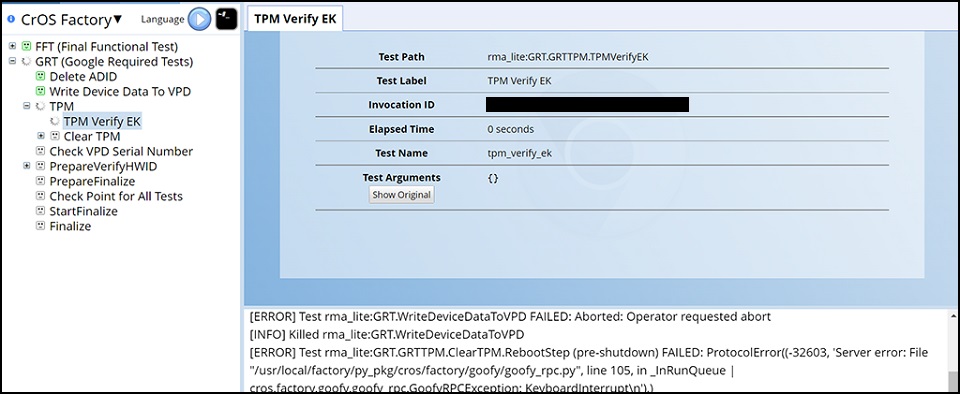
Figure 27
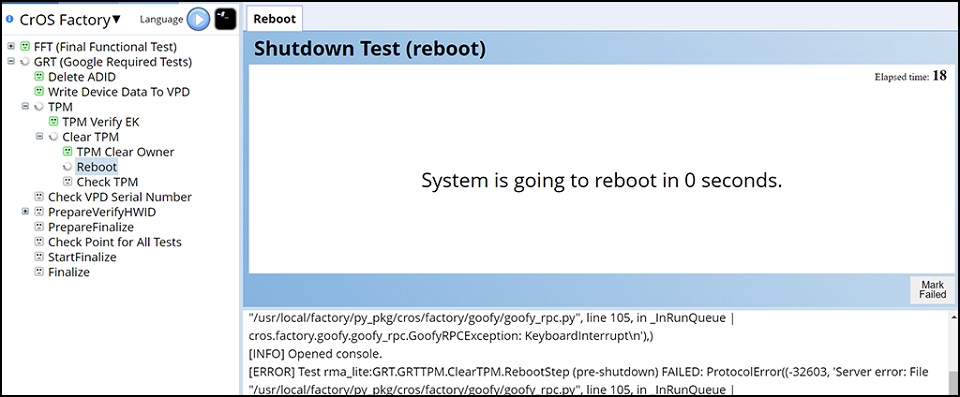
Figure 28 - When the Chromebook powers back on, Google Required Tests will verify the hardware status and then prepare the Chromebook to enter the Finalize phase. This process will take approximately 3 minutes (Figure 29 and 30).

Figure 29
Figure 30 - Before entering the Finalize phase, Google Required Tests will check the completion of all tests previously finished (Figure 31).
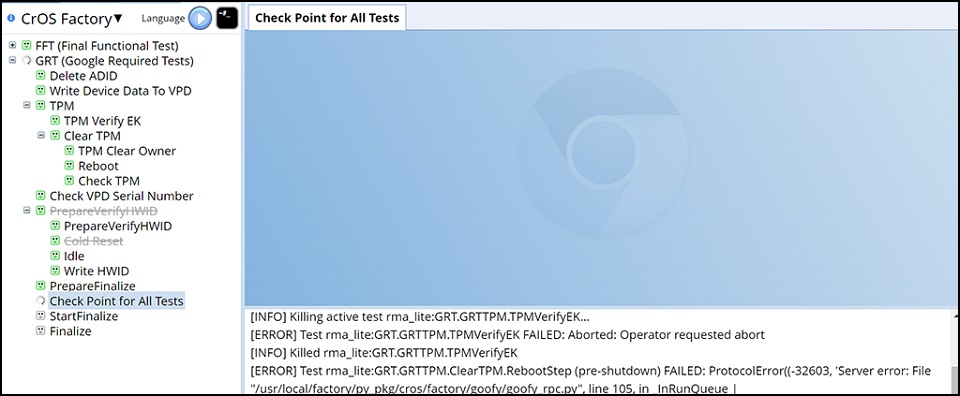
Figure 31 - Press <Space> to begin the finalization process (Figure 32).
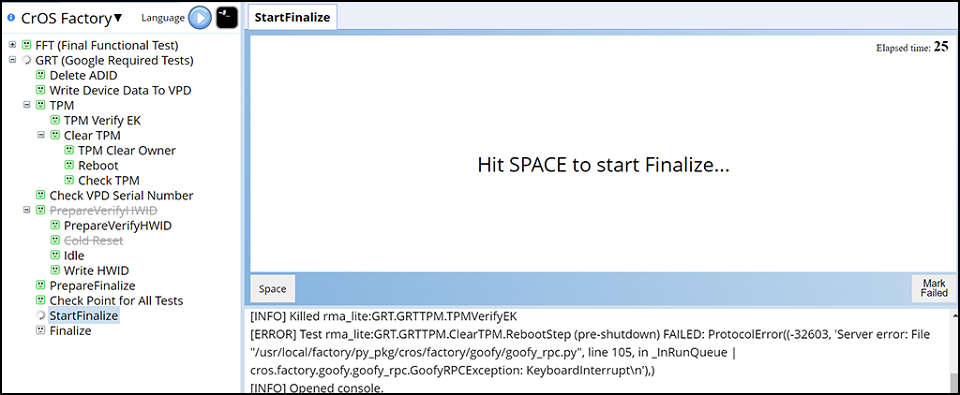
Figure 32 - Google Required Tests is in the Finalize phase and the RMA Shim is wiping all the test logs from the Chromebook. This process will take approximately 2 minutes (Figure 33).
Note: DO NOT shut down or restart the Chromebook or press any keys and buttons on the Chromebook when Google Required Tests is in the Finalize phase. Improper operation will cause unexpected errors in the Chromebook.
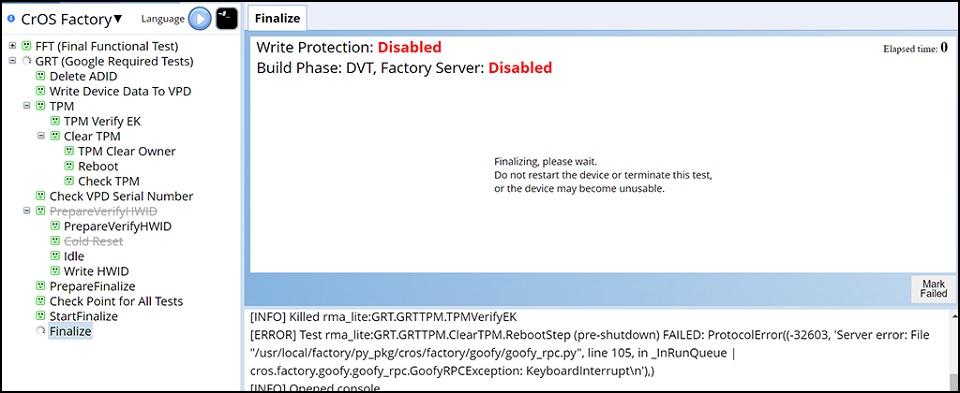
Figure 33 - The Chromebook will reboot again after the Finalize phase and start the wiping process (Figure 34).
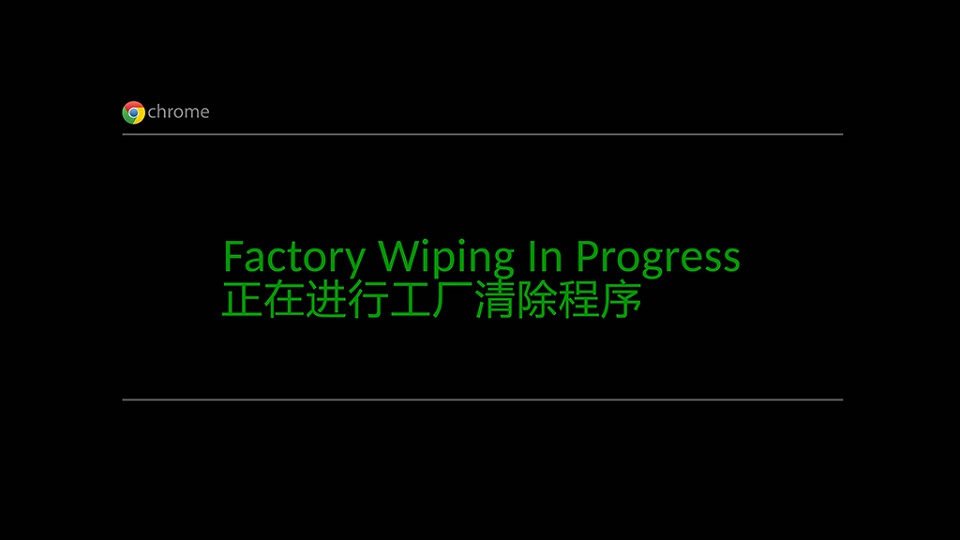
Figure 34 - Upon the completion of the RMA Shim, the last step will put the Chromebook in shipping mode. Remove the power adapter when prompted (Figure 35).
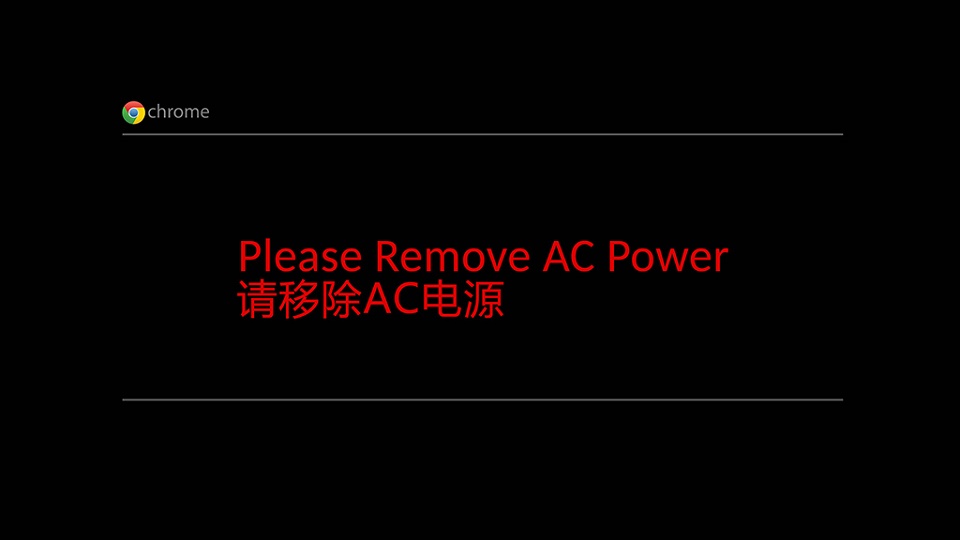
Figure 35
Note: DO NOT close the lid immediately. Wait for the Chromebook to complete transition to "Shipping Mode" Closing the lid immediately will cause an interruption and thus corrupt the Operating System. - The battery is locked in the last step. This means the Chromebook is put into "Shipping Mode" The Chromebook will require the AC power to be connected the next time the Chomebook needs to be turned on. It will not turn on without the power supply even if the battery is fully charged (Figure 36).
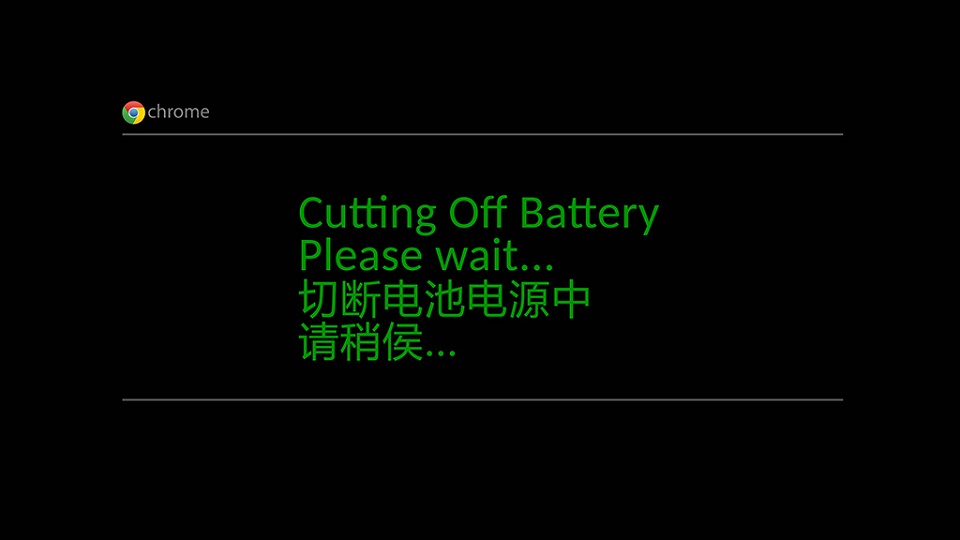
Figure 36
Note: Connect the AC power, and power on the Chromebook. The Chromebook should display the Google OS welcome screen.
Article Properties
Affected Product
Chromebook 3110 2-in-1, Chromebook 3110
Last Published Date
20 Feb 2023
Version
1
Article Type
Solution