How to Update D7523QT OTA Software
Summary: This article provides information about the D7523QT monitor OTA software update steps.
This article applies to
This article does not apply to
This article is not tied to any specific product.
Not all product versions are identified in this article.
Instructions
Table of Contents:
- Checking for D7523QT Software Update
- D7523QT OTA Software Download and Update
- DisplayNote Montage APK OTA Update
- DisplayNote Broadcast APK OTA Update
- Network Requirements
Checking for D7523QT Software Update
- Power on the display and connect to the Internet.
- Click
 to open Settings.
 - Click
 ->
-> 
- If you find a new Software version, Show "Found new software version FBXX XX, download now?" And a red dot appears next to the System update until the computer is updated. (See Figure 1)

Figure.1 Software update
D7523QT OTA Software Download and Update
After confirming you have a new software version to be updated, you can continue to do the next steps:
- Click "OK" to download new Software. (See Figure 2)
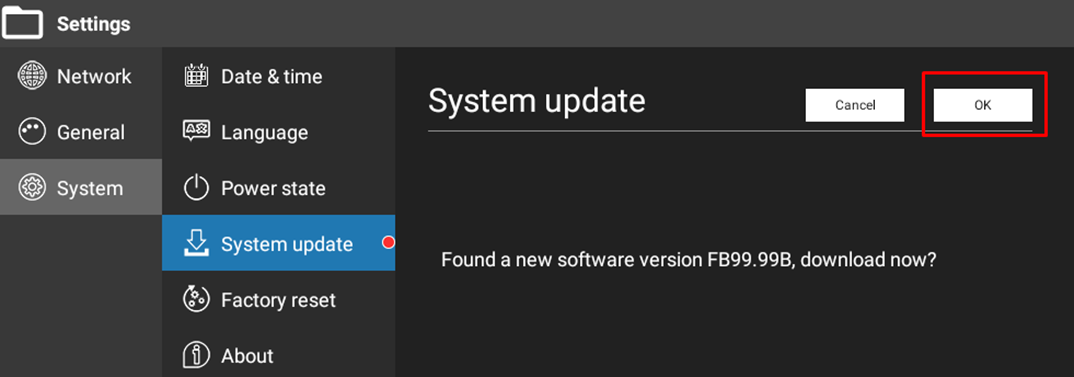
Figure.2 Download new version - Waiting for download completed. (See Figure 3)
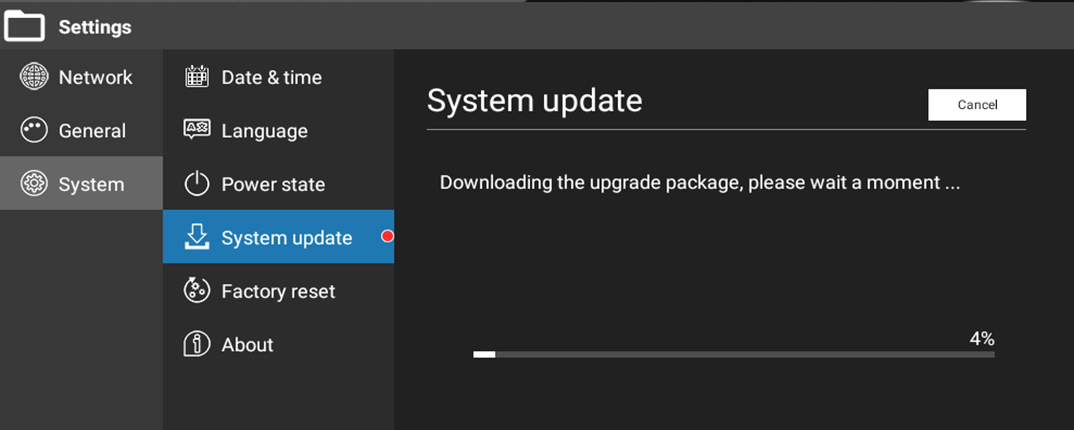
Figure.3 Software downloading - Click "OK" to install new Software. (See Figure 4)
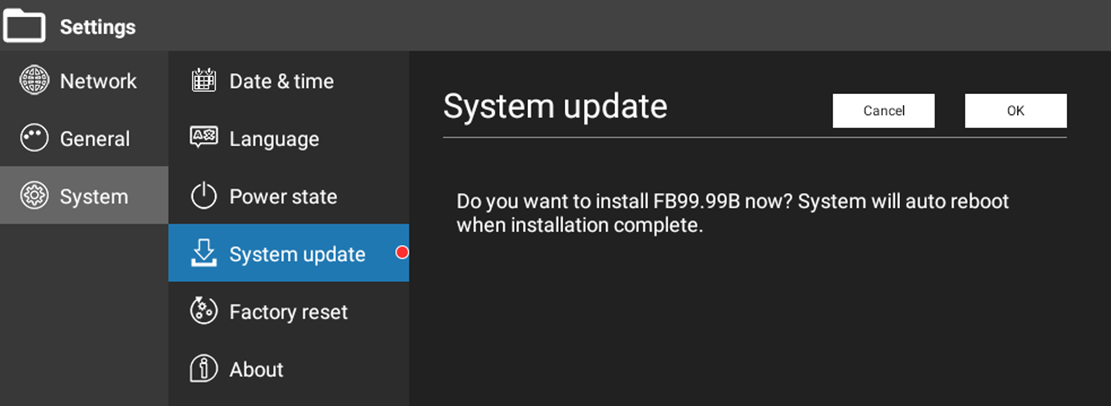
Figure.4 System update - System will auto reboot after install completed. (See Figure 5)
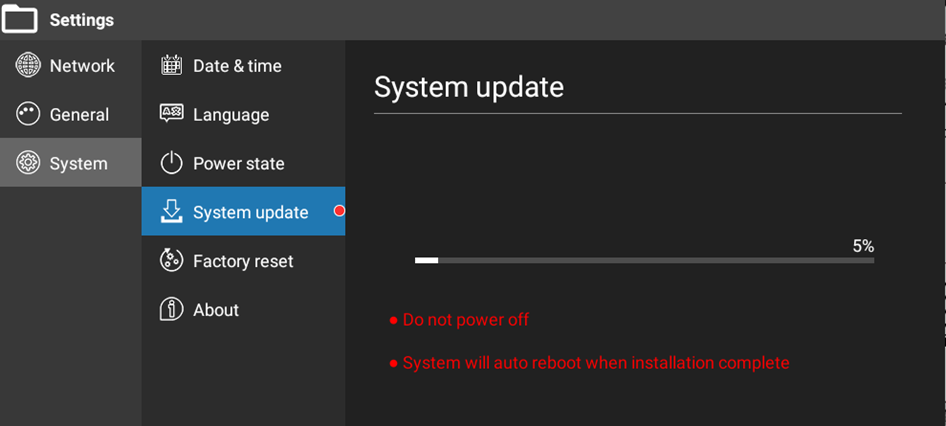
Figure.5 Update completed - After reboot, open "System" -> "System update" to check that Software is up to date. (See Figure 6)
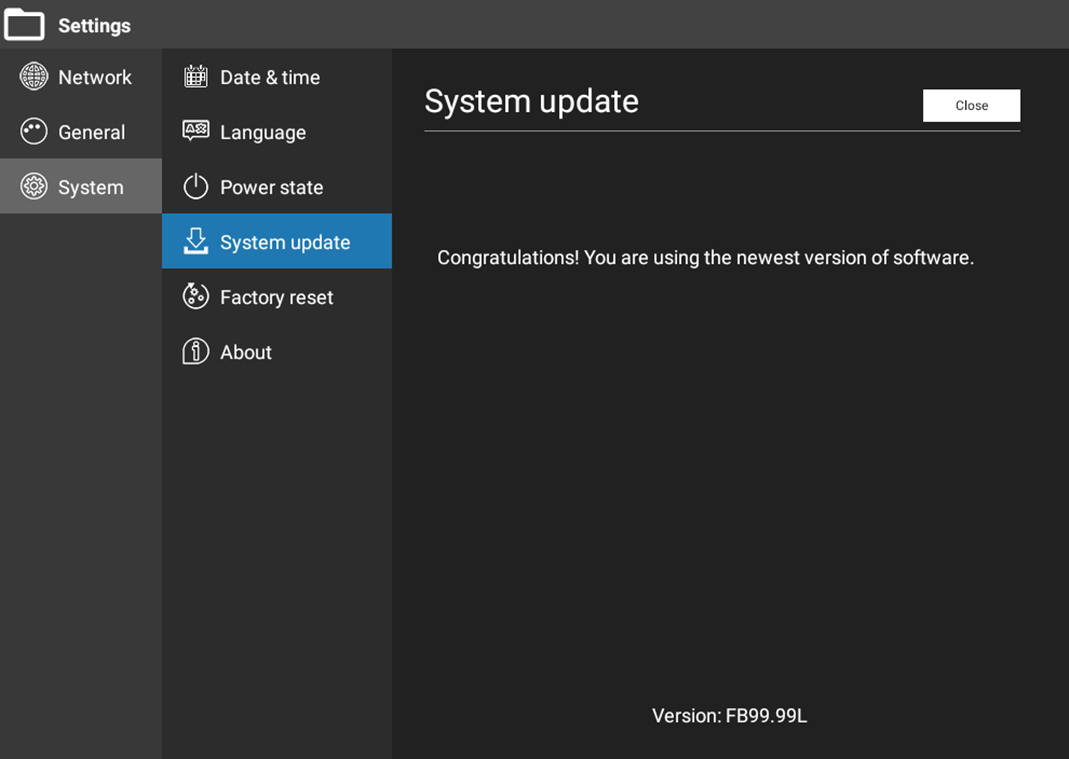
Figure.6 Check update version - If update failed, please check the network connection then click "Retry" to restart OTA process. (See Figure 7)
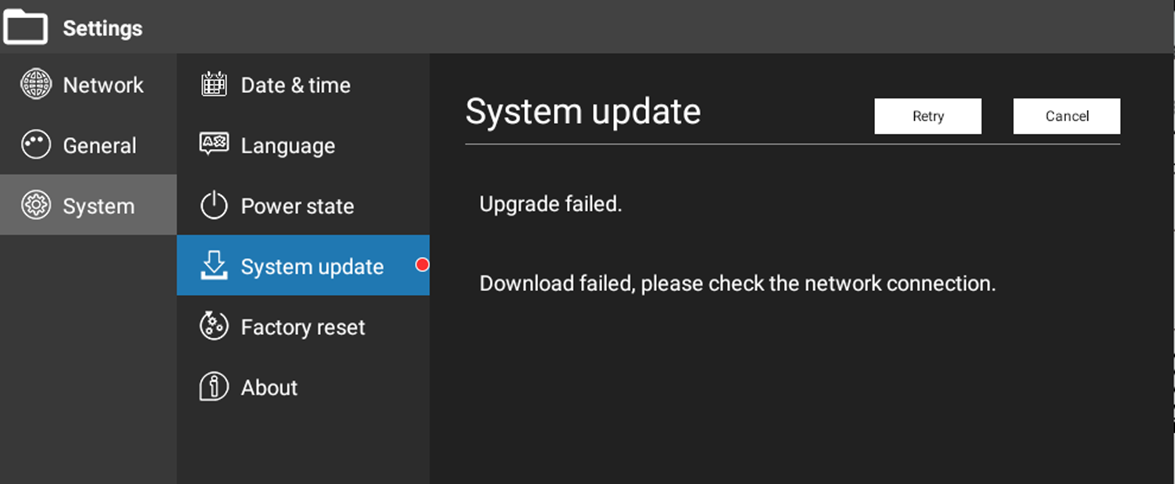
Figure.7 Update retry
DisplayNote Montage APK OTA Update
OTA Process for Android
- When an update is ready, you see an on-screen prompt telling them a new version is now available to install. To begin the update process, press the Install update button. If they do nothing a session begins in 30 s on the current version.
Note: The device time needs to sync to current time when using the montage. (See Figure 8)Figure.8 Montage view version

- To proceed with the update, you need to confirm the install update process. (See Figure 9)
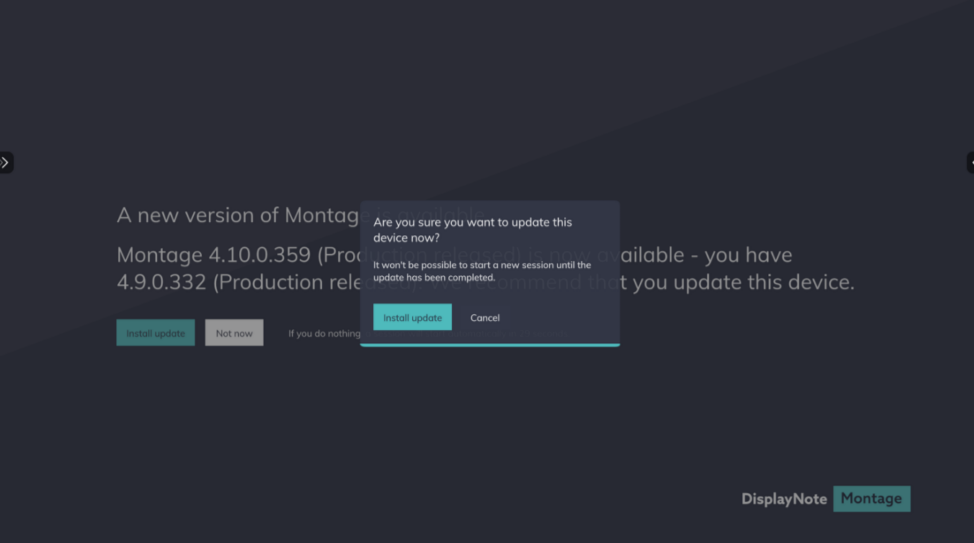
Figure.9 Confirm install process - If a user chooses not to update at this time, an on-screen prompt will remain on screen. (See Figure 10)
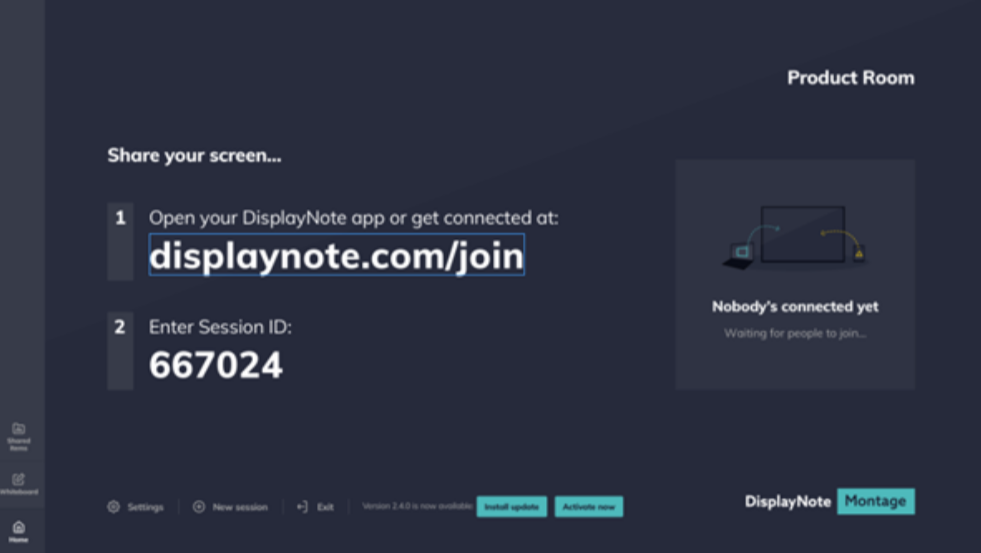
Figure.10 Onscreen prompt - If a user chooses to update at this time, an onscreen prompt show the downloading progress. While start downloading, the montage permission prompt will shown. (See Figure 11 and Figure 12)
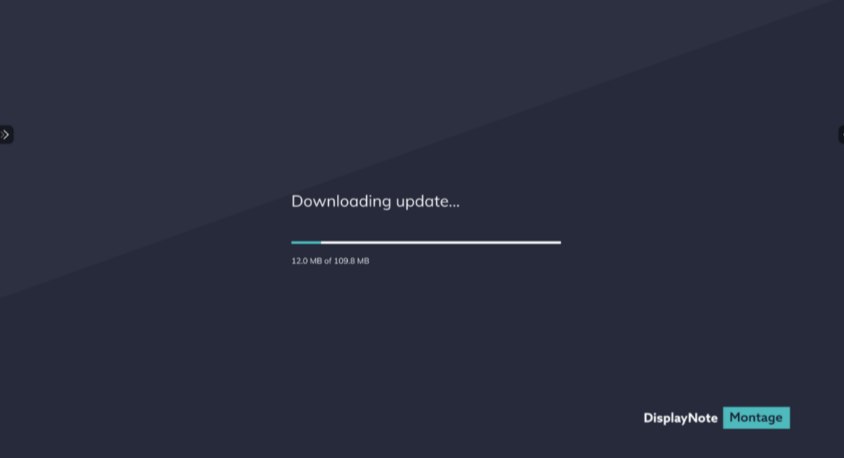
Figure.11 Downloading update
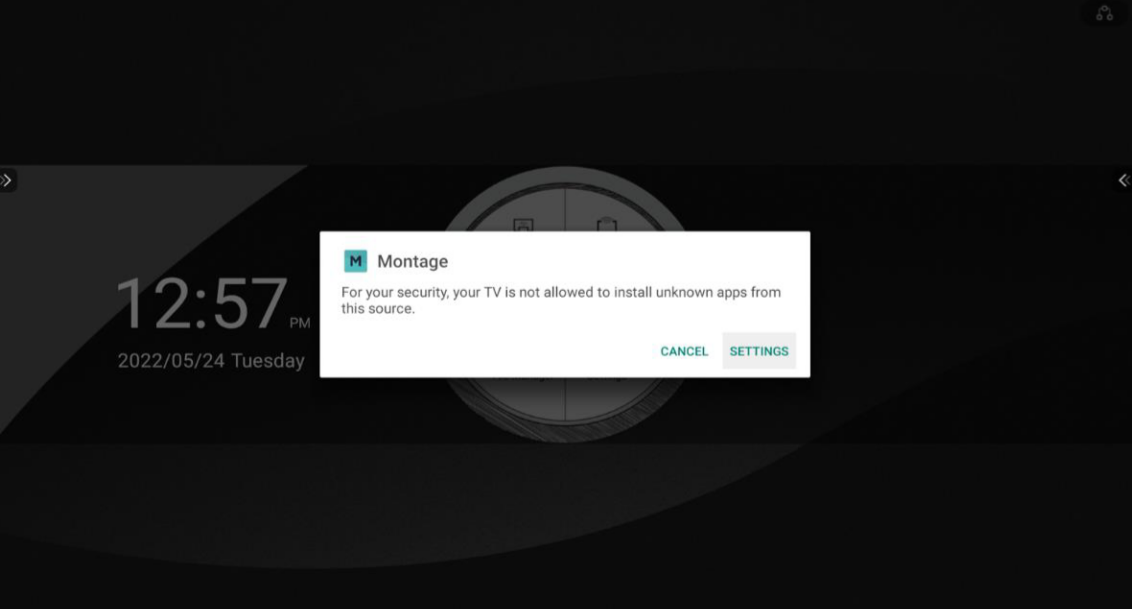
Figure. 12 Montage - Enable the Montage permission for app installation. (See Figure 13)
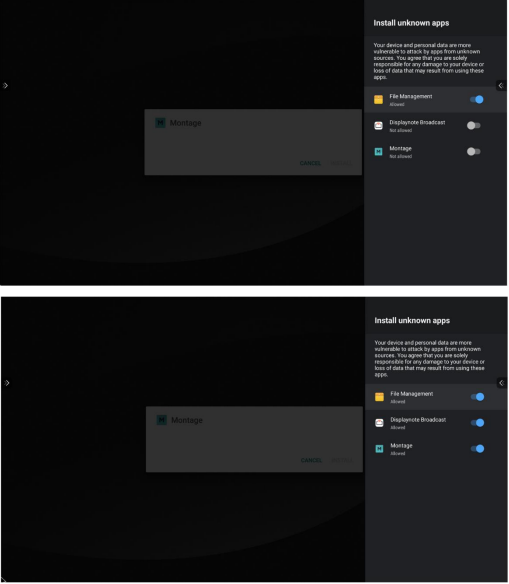
Figure.13 Enable the Montage permission - Select side bar "back"
 button. Active the Montage in control
  panel. Then go to the next step to install the Montage app.
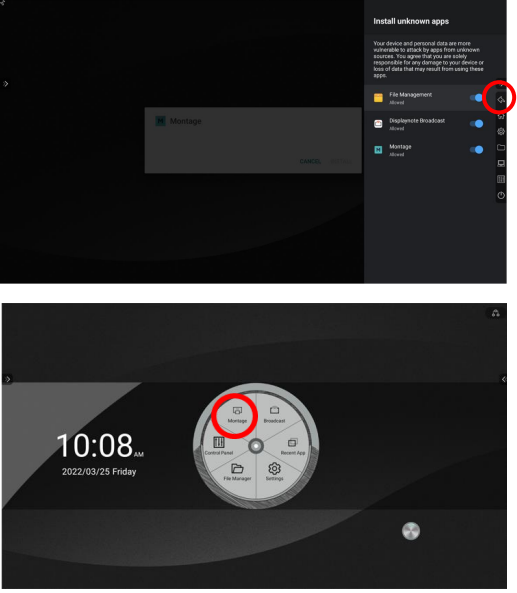
Figure.14 Active Montage - Install the Montage update. The downloading prompt will shown the uploading progress.
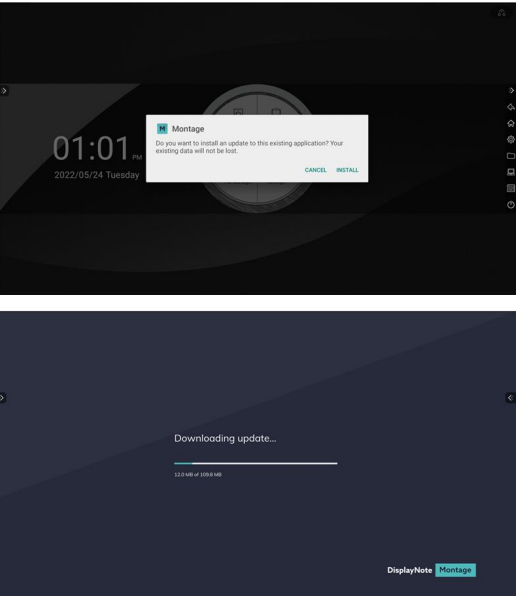
Figure.15 Install update - Once the apps finished install, an app installed prompt will shown. The user will see the home screen and can join a session.
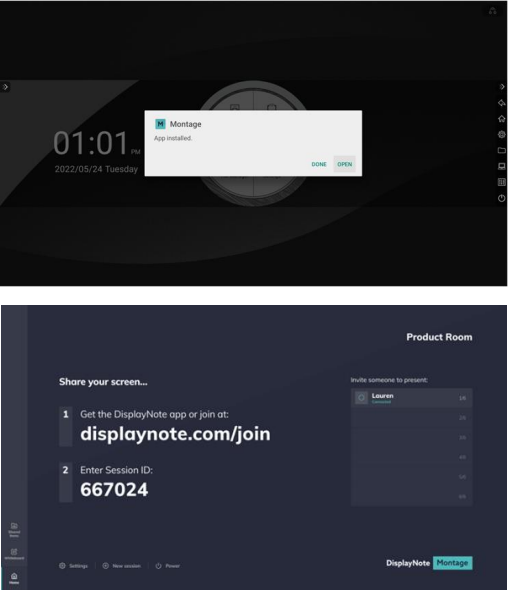
Figure.16 Install completed
Note:
If the user loses connection during the update process, the update will stop and the user will see the relevant error message. Once connection is re-established, the user will, once again, see an onscreen prompt.
The device time need to sync to current time when using the montage.

Figure.17 Problem prompt
If the user loses connection during the update process, the update will stop and the user will see the relevant error message. Once connection is re-established, the user will, once again, see an onscreen prompt.
The device time need to sync to current time when using the montage.

Figure.17 Problem prompt
DisplayNote Broadcast APK OTA Update
- When an update is available, the next time users open Broadcast they will see a notification that an update is ready. The broadcast prepares the version to be installed. (See Figure.18)
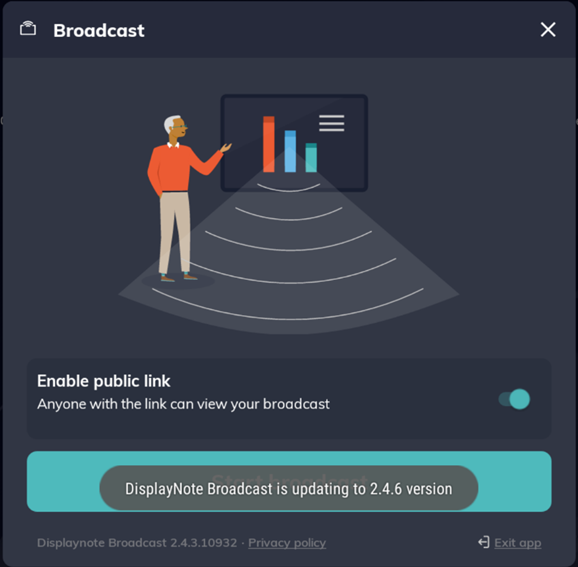
Figure.18 Enable public link - Once the update is ready to be installed, the user is prompted to start the installation.
If a user would like to install the update, they should select 'Install'. If the user presses cancel, they will be prompted to install the next time they open the Broadcast app. (See Figure.19)
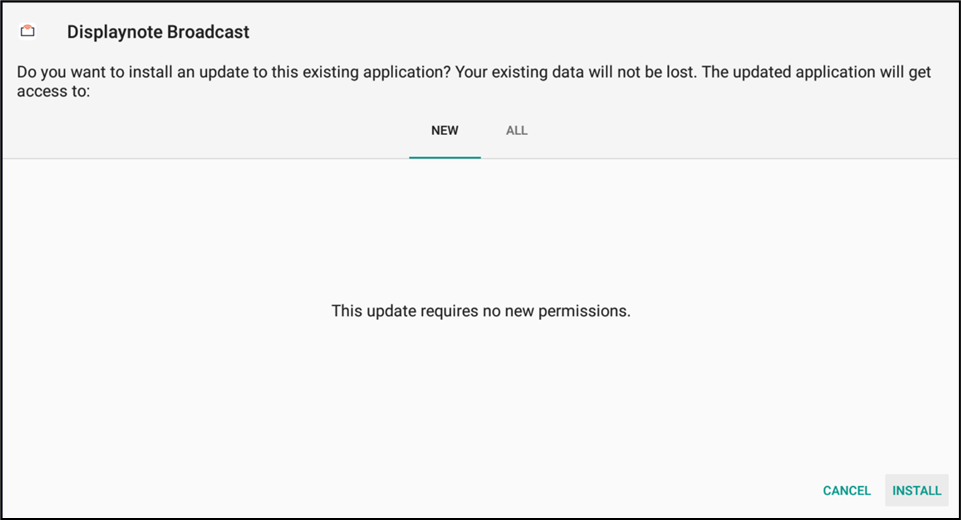
Figure.19 Display Broadcast - The user sees a progress indicator as the version is installed. (See Figure.20)
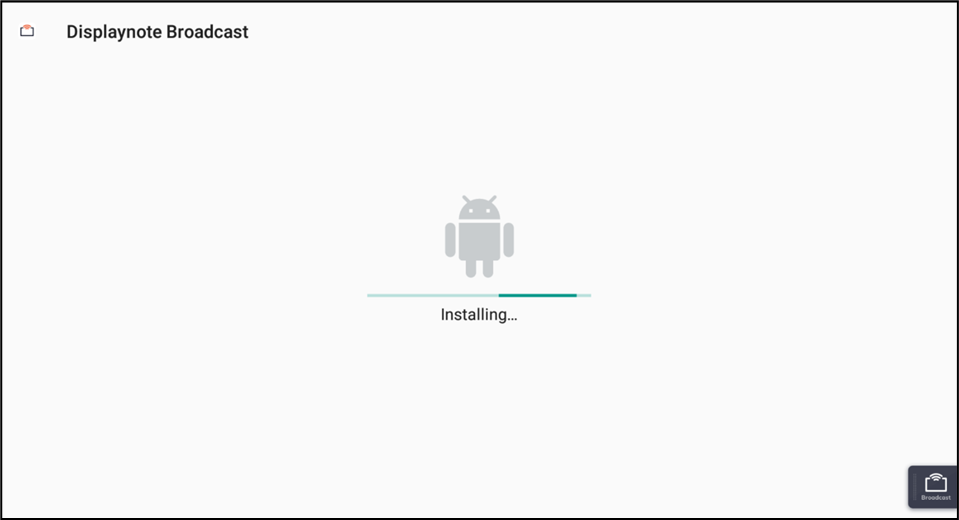
Figure.20 Displaynote broadcast - On successful installation you see a message that the update was installed. Simply press open, to open the Broadcast app. (See Figure.21)
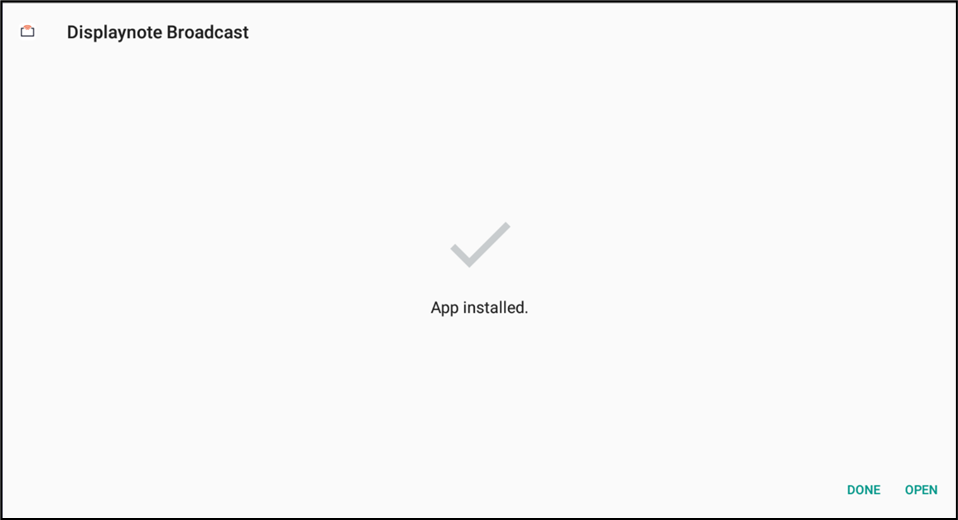
Figure.21 APP installed - Broadcast should now open and be on the latest version. (See Figure 22)
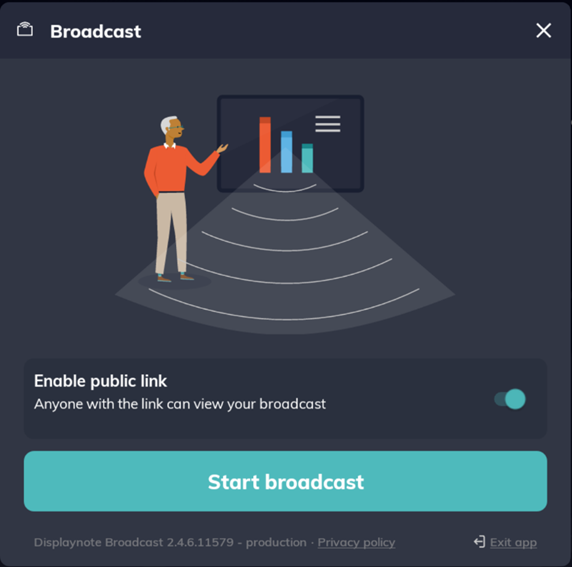
Figure.22 Start boardcast
Network Requirements
- For the system OTA connection, the monitor need to be able to access the website:
http://ota.tpvstore.com - For remote connections, the receiver and clients need to be able to access the internet through these ports:
- TCP 80
- TCP 443
- UDP 53
- For local connections (i.e., clients on the same network the following ports are used:)
- TCP 1-65535 (It will be selected from available ones)
- UDP 1025 – 65535
- TCP 4700, 7000, 7100 (For Airplay connections)
- If there is Layer 7 filtering or proxy with protocol filtering on these ports, then the following protocols will need to be allowed:
- HTTP
- HTTPS
- DTLS
- XMPP
- Bonjour protocols
- SRTP
- DNS
- STUN
- TURN
- ICE
- SaaS provides services at the following fully qualified domain name (FQDNs):
- netcheck.joinmontage.com
- montage.displaynote.com
- xmpp.displaynote.com
- stunturn-prod-ireland.displaynote.com
- stunturn-prod-mumbai.displaynote.com
- stunturn-prod-singapore.displaynote.com
- stunturn-prod-virginia.displaynote.com
- stunturn-prod-california.displaynote.com
- netcheck.joinmontage.com
Note: this domain is only for system OTA, you may have no access this website by browser. Just make sure that IT keep the domain in whitelist.
Affected Products
Dell D7523QTArticle Properties
Article Number: 000200193
Article Type: How To
Last Modified: 01 Oct 2024
Version: 10
Find answers to your questions from other Dell users
Support Services
Check if your device is covered by Support Services.
