How to Configure Single Sign On Through Azure Active Directory with VMware Carbon Black Cloud
Summary: This article walks through the configuration steps that are required to enable Single sign on (SSO) to the VMware Carbon Black Cloud through Security Assertion Markup Language (SAML) integration with Azure Active Directory (AAD). ...
This article applies to
This article does not apply to
This article is not tied to any specific product.
Not all product versions are identified in this article.
Instructions
Affected Products:
- VMware Carbon Black Cloud
SSO can be enabled within the Carbon Black Cloud console to allow administrators to sign on through existing Azure AD configurations.
VMware Carbon Black Cloud leverages a service provider (SP) initiated login for SSO. Before starting SSO configuration, ensure that you have access to Azure as an Application Administrator, and VMware Carbon Black Cloud as a System Administrator or an administrator with permissions to modify the SAML configuration.
- In a web browser, go to the appropriate login page for your region and login with your administrator account.
Note: The regional login pages are as follows.
- Americas = https://defense-prod05.conferdeploy.net/
- Europe = https://defense-eu.conferdeploy.net/
- Asia Pacific = https://defense-prodnrt.conferdeploy.net/
- Australia and New Zealand = https://defense-prodsyd.conferdeploy.net
- Americas = https://defense-prod05.conferdeploy.net/
- Expand Settings.

- Select Users.

- Select Enabled under SAML Config to collect the information needed for SSO from your Carbon Black Environment.
- Copy the green highlighted pieces of information as they are required during the Azure configuration.
- The orange highlighted pieces of information are required from Azure and are collected in the Azure section below.
Note:
- This information varies depending on the Carbon Black instance to which an environment is registered.
- No changes are made to the environment until the Single sign-on URL (HTTP-redirect binding) and the X509 certificate are populated and saved.

- The orange highlighted pieces of information are required from Azure and are collected in the Azure section below.
- Log in to your Azure portal at https://portal.azure.com
using an account that has Application Administrator or higher privileges.
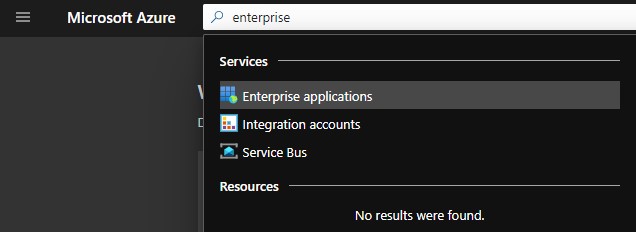
- Go to Enterprise applications by searching within the top bar.
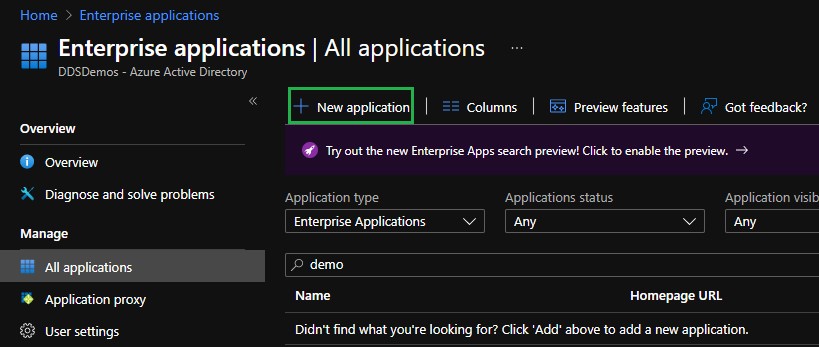
- On the Enterprise Applications screen click All applications from the left Manage menu, then click the New Application option.
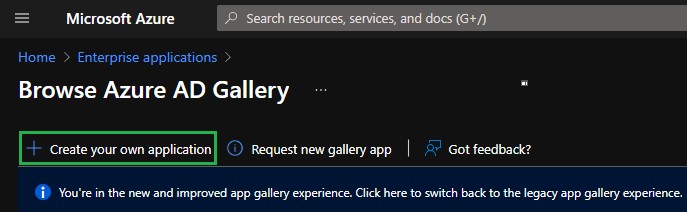
- Select the Create your own application option.
- In the Create your own application pane provide a name for the application, select the Integrate any other application that you don't find in the gallery (Non-gallery) radio button, then click Create.
 Note: This may take several moments to create.
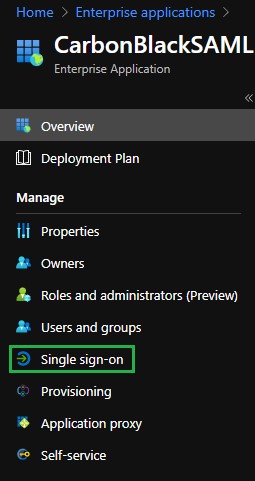
 - From the application you created, select Single sign-on from the left Manage menu.
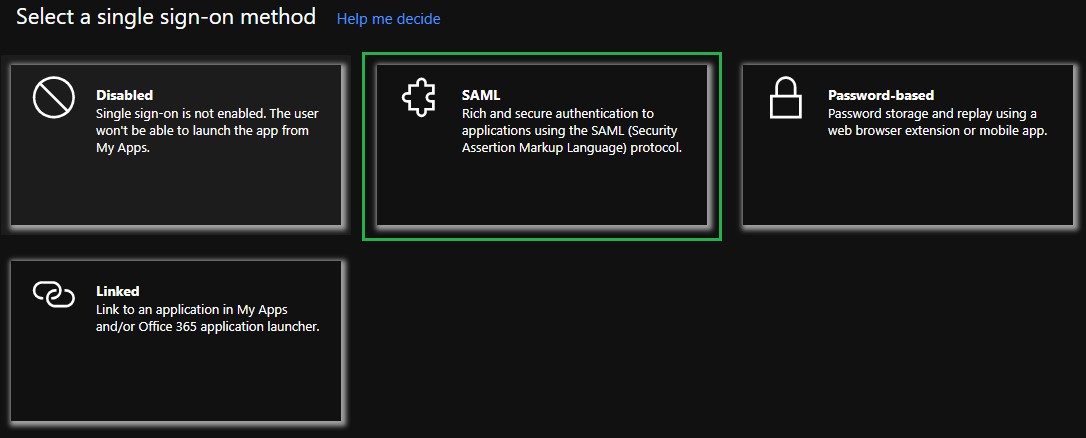
- Within the Select a single sign-on method pane, choose SAML as the single sign-on method.
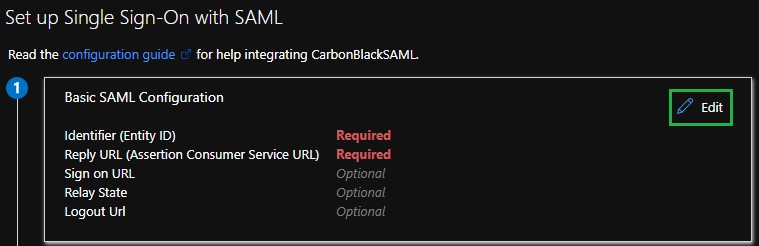
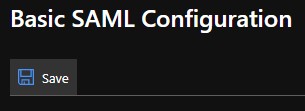
- Click the Edit icon in the upper right of the Basic SAML Configuration section.
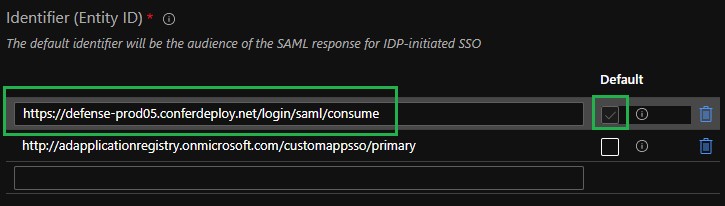
- Paste the Audience URL from the VMware Carbon Black Cloud console into the Identifier (Entity ID) field and set it as default.
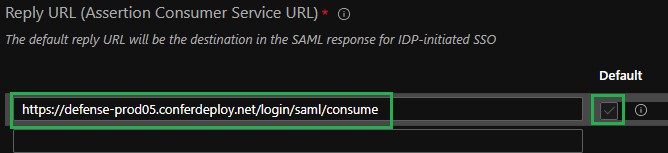
- Paste the ACS (Consumer) URL from the VMware Carbon Black Cloud console into the Reply URL (Assertion Consumer Service URL) field and set it as default.
- Click the Save icon in the upper left of the Basic SAML Configuration pane.
- Click the Edit icon in the upper right of the User Attributes & Claims section.
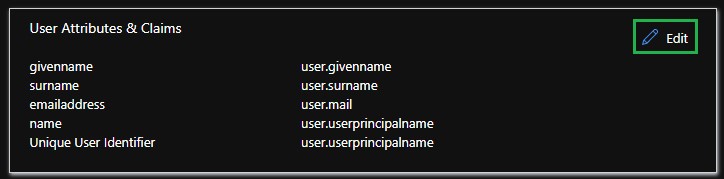
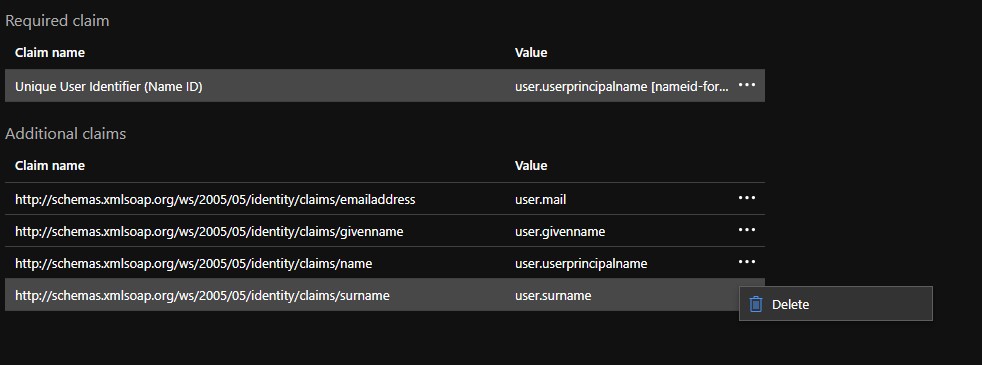
- Click the three dots for the Additional Claims of
user.surname,user.userprincipalname,user.givennameand delete those options. This leavesuser.mailas the only claim in the Additional Claims section.
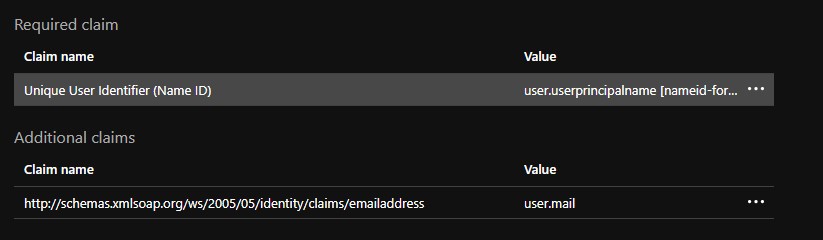
- Click Unique User Identifier in the Required Claim section to modify the claim.
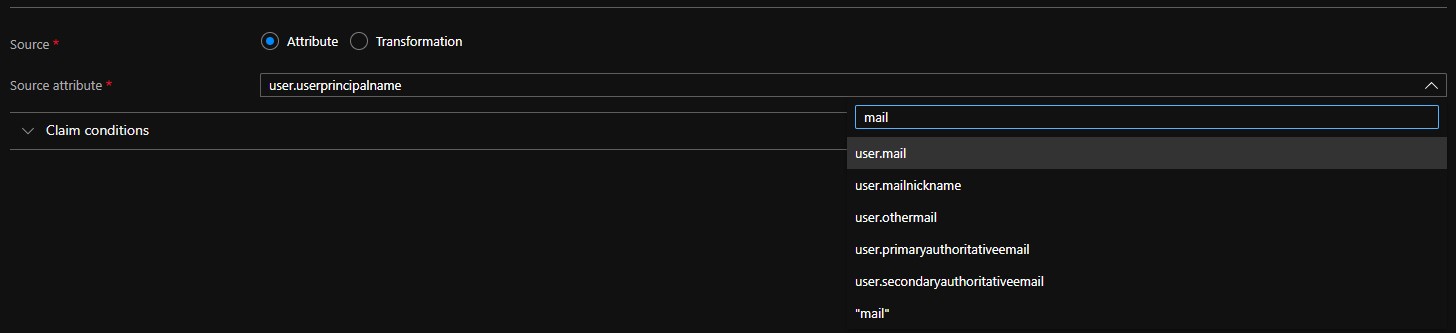
- Modify the Source Attribute from
user.userprincipalnametouser.mail.
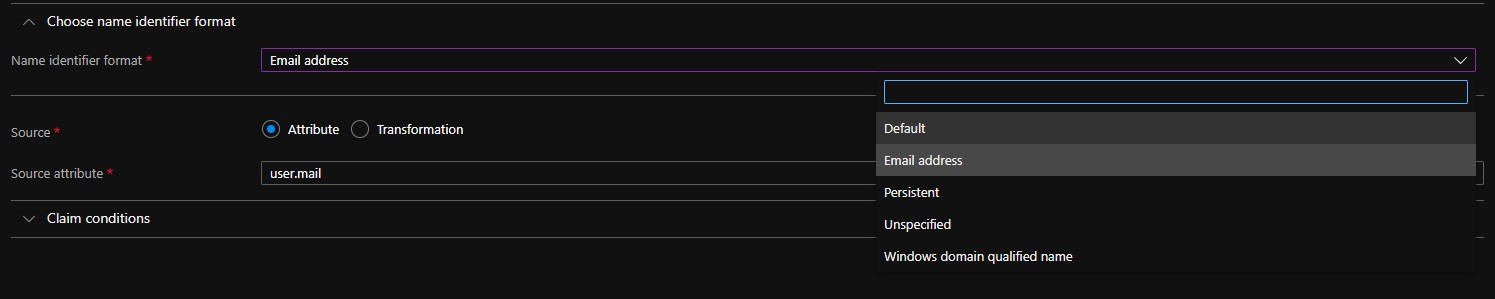
- Expand Choose name identifier format.

- Modify the Name identifier format to Default.
- Click the Save icon in the upper left.
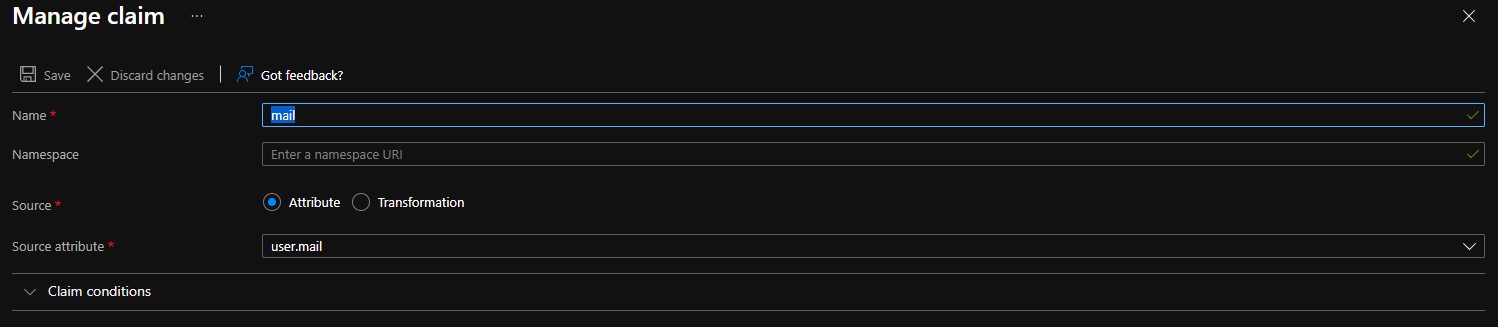
- Select the Claim name under the Additional Claims heading.
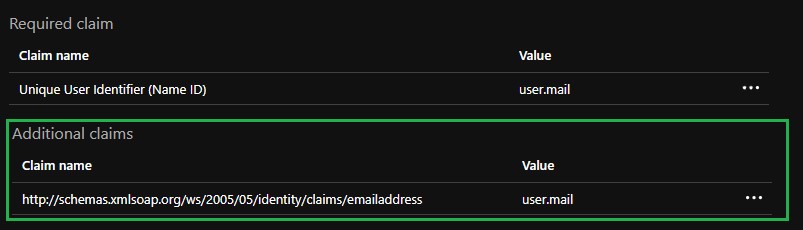
- Modify the Name to mail.
Note:
- Not setting the Name results in
INVALID_ASSERTIONfailures. - Ensure that the Namespace is cleared. Any entries in this field results in
INVALID_ASSERTIONfailures.
- Not setting the Name results in
- Save the changes, then close the User Attributes & Claims pane.
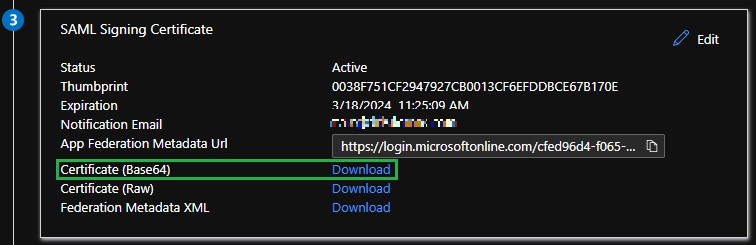
- In the SAML Signing Certificate section, click Download next to the Certificate (Base64) option and save the certificate file. This is used when configuring the Carbon Black Cloud console.
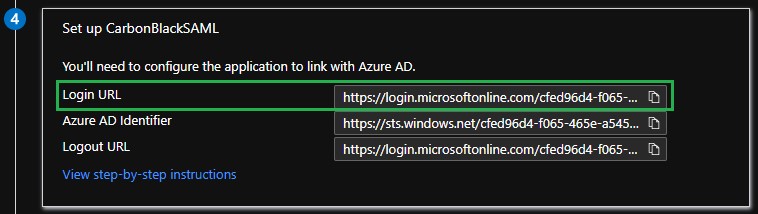
- Copy the Login URL from the Set up <Application Name> section. This is used when configuring the Carbon Black Cloud console.
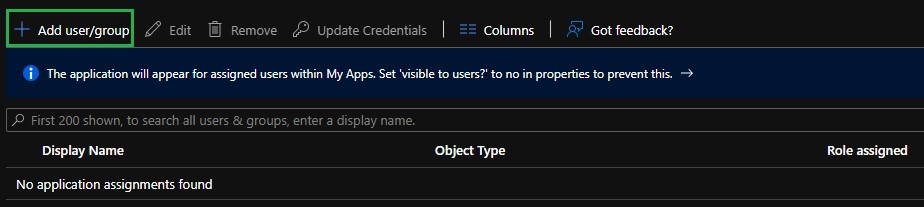
- Users must be added to the application to allow them to log in. Select Users and groups from the left Manage menu.

- Select the Add user/group option.
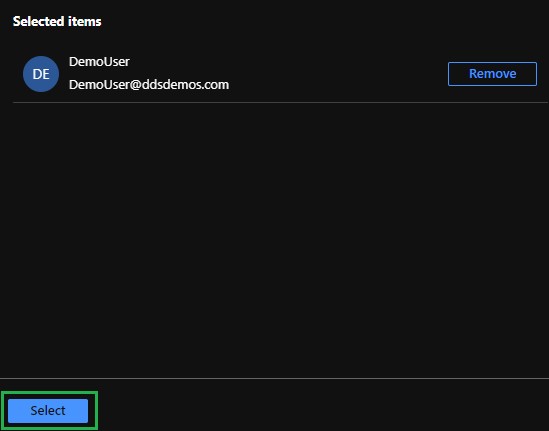
- Click None Selected to add a user.
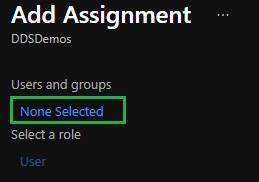
- Assign the appropriate users and groups then click Select.
Note: Any users who are assigned must be added to and have an appropriate role set in the VMware Carbon Black Cloud console manually. For more information about roles, reference How to Add VMware Carbon Black Cloud Administrators.
- Once the users that have been added, click Assign at the bottom left.


Have the SAML Signing Certificate and the Login URL available from the steps within the Azure Configuration section.
- In a web browser, go to the appropriate login page for your region and login with your administrator account.
Note: The regional login pages are as follows.
- Americas = https://defense-prod05.conferdeploy.net/
- Europe = https://defense-eu.conferdeploy.net/
- Asia Pacific = https://defense-prodnrt.conferdeploy.net/
- Australia and New Zealand = https://defense-prodsyd.conferdeploy.net
- Americas = https://defense-prod05.conferdeploy.net/
- Expand Settings.

- Select Users.

- Select Enabled under SAML Config to update the SAML configuration for SSO.
- Paste the Login URL from the Azure Configuration section into the Single sign-on URL (HTTP-redirect binding) field.

- Right-click the SAML Signing Certificate that you previously downloaded from Azure and select
Open with….

- Choose Notepad, or your preferred text editor, from the list to open the .cer file.

- Copy the content of the Certificate file and paste it in the X509 certificate field.

 Note: This field automatically truncates line-returns, and the header and footer text.


- Click Save. A message appears at the top of the screen confirming that the SAML configuration was updated.

- In a web browser, go to the appropriate login page for your region and select the Sign in via SSO option.
Note: The regional login pages are as follows.
- Americas = https://defense-prod05.conferdeploy.net/
- Europe = https://defense-eu.conferdeploy.net/
- Asia Pacific = https://defense-prodnrt.conferdeploy.net/
- Australia and New Zealand = https://defense-prodsyd.conferdeploy.net

- Americas = https://defense-prod05.conferdeploy.net/
- Enter the email address of a user that was assigned to the Azure application then select Sign In.

- Sign into Azure then accept the End User Agreement to proceed into the Carbon Black Cloud console (if this has not already been accepted for this user account).

The VMware Carbon Black Cloud loads as expected.

To contact support, reference Dell Data Security International Support Phone Numbers.
Go to TechDirect to generate a technical support request online.
For additional insights and resources, join the Dell Security Community Forum.
Affected Products
VMware Carbon BlackArticle Properties
Article Number: 000193536
Article Type: How To
Last Modified: 04 Nov 2024
Version: 6
Find answers to your questions from other Dell users
Support Services
Check if your device is covered by Support Services.