Office 365でのドメインの追加
Summary: この記事は、Office 365でドメインを追加するためのガイドとしての役割を果たします。
This article applies to
This article does not apply to
This article is not tied to any specific product.
Not all product versions are identified in this article.
Instructions
はじめに
ドメインの追加は簡単です。ドメインを追加するには、次の手順を実行します。
- Microsoftオンライン ポータルにログインします。
- ランディング ページから[セットアップに移動]を選択します。
-
[セットアップに移動]をクリックできない場合は、[管理]>[ドメイン]>[ドメインの追加]に移動して手動セットアップを開始します。
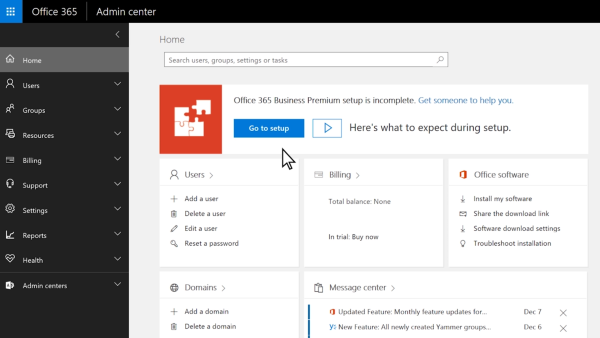
図1:Office 365管理センター -
所有および使用するバニティー ドメイン名を入力します。
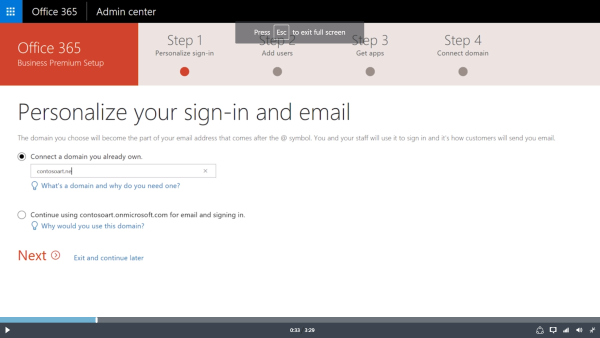
図2:Office 365のドメインへの接続 - [次へ]を選択して確定します。
メモ: ドメインのネームサーバーがGoDaddyを指している(つまり、GoDaddyがユーザーのドメインのDNSホストである)場合、Office 365は、GoDaddyのユーザー向けのOffice 365サービス(ドメインの検証を含む)のDNSレコードを自動的に設定することができます。GoDaddyドメインを持っている場合、これが最も簡単なオプションですが、手動で(ウィザードを使用して)自分でレコードを追加することも選択できます。
その他のリソース:

Affected Products
Microsoft 365 from DellArticle Properties
Article Number: 000184563
Article Type: How To
Last Modified: 30 Jun 2021
Version: 5
Find answers to your questions from other Dell users
Support Services
Check if your device is covered by Support Services.