Article Number: 000184563
Office 365でのドメインの追加
Summary: この記事は、Office 365でドメインを追加するためのガイドとしての役割を果たします。
Article Content
Instructions
はじめに
ドメインの追加は簡単です。ドメインを追加するには、次の手順を実行します。
- Microsoftオンライン ポータルにログインします。
- ランディング ページから[セットアップに移動]を選択します。
-
[セットアップに移動]をクリックできない場合は、[管理]>[ドメイン]>[ドメインの追加]に移動して手動セットアップを開始します。
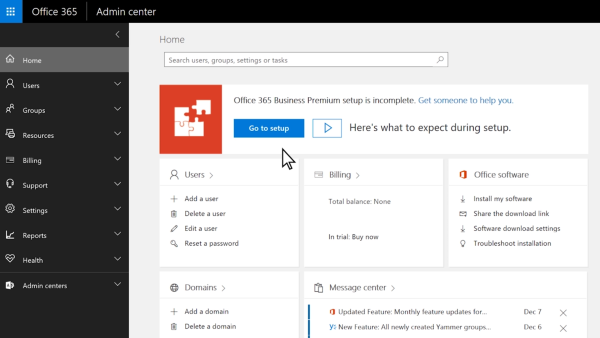
図1:Office 365管理センター -
所有および使用するバニティー ドメイン名を入力します。
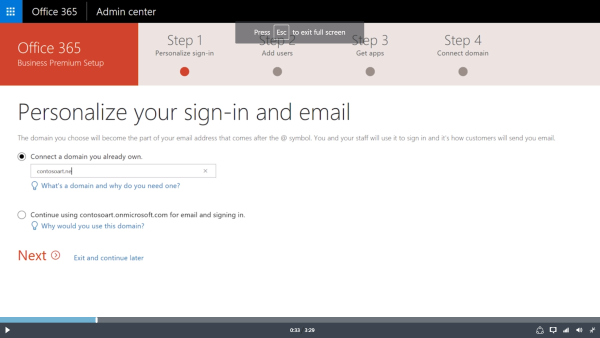
図2:Office 365のドメインへの接続 - [次へ]を選択して確定します。
メモ: ドメインのネームサーバーがGoDaddyを指している(つまり、GoDaddyがユーザーのドメインのDNSホストである)場合、Office 365は、GoDaddyのユーザー向けのOffice 365サービス(ドメインの検証を含む)のDNSレコードを自動的に設定することができます。GoDaddyドメインを持っている場合、これが最も簡単なオプションですが、手動で(ウィザードを使用して)自分でレコードを追加することも選択できます。
その他のリソース:

Article Properties
Affected Product
Microsoft 365 from Dell
Last Published Date
30 Jun 2021
Version
5
Article Type
How To