Intel Optane Unallocated Space Shows Abnormally After Deploying a Reinstall Image on a Dell Computer (Windows Factory Install) with SupportAssist Operating System Recovery
Summary: This article contains information about Intel Optane showing abnormal unallocated space after reimaging a factory Windows 10 (20H1) installation with SupportAssist OS Recovery.
Symptoms
Unallocated space for Intel Optane requirements shows ~1.3 GB instead of ~20 MB.
Cause
This is due to the issue with Intel Optane and the unallocated space creation in the Operating System Recovery version A08 recovery solution.
Resolution
Intel Optane Shows Incorrect Requirments
After deploying an Operating System Recovery image on a Dell computer that has Windows 10 version 20H1 and the SupportAssist OS Recovery Application that is preinstalled from factory.
In the Disk Management screen, the unallocated space for the Intel Optane requirements will show ~1.3 GB instead of ~20 MB.
- Below is an example of a Dell computer having Windows 10 (20H1) and SupportAssist OS Recovery Application that is installed from the factory. In Disk Manager, at the end of hard drive a “DELLSUPPORT” partition exists (Figure 1).
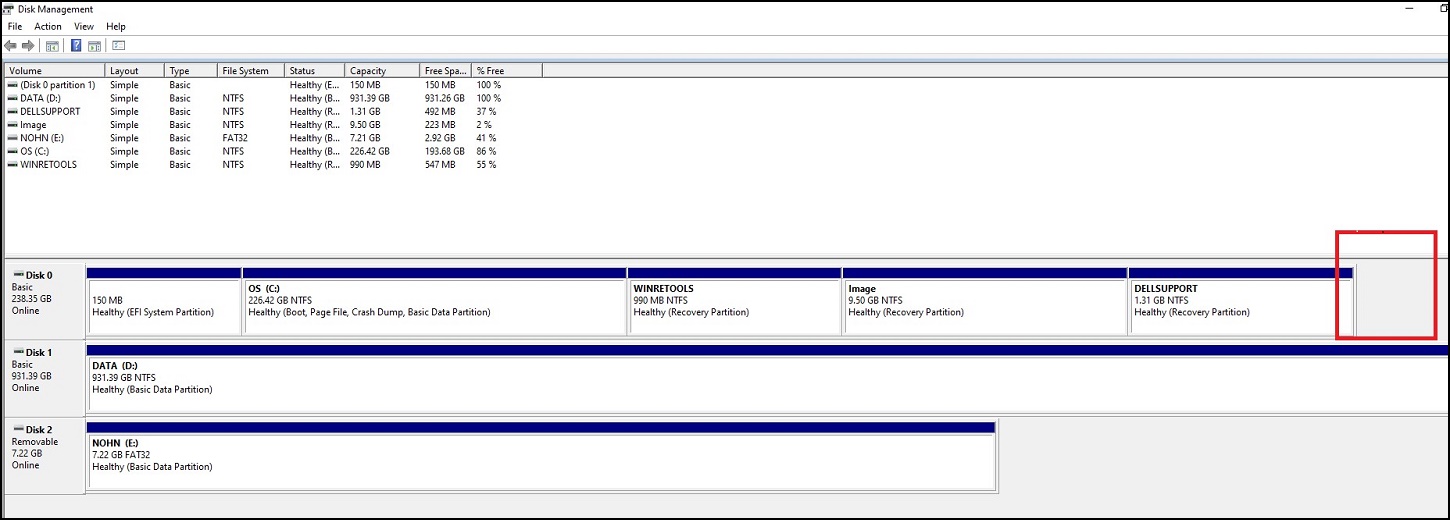
Figure 1 - Dell Computer with Windows 10 (20H1) and SupportAssist OS Recovery pre-installed (before 20H1 OSRI image Recovery Deployment) from the factory
- The Operating System Recovery A08 image that is installed on USB drive is shown on the above Dell computer. In the Disk Management screen, at the end of Hard drive, the Dell Support Partition “DELLSUPPORT” (SupportAssist OS Recovery partition) is deleted.
- As a result, at the end of hard drive, an abnormal ~1.3 GB of unallocated space is created instead of Optane memory storage. Which it requires unallocated space of only ~20 MB according to Intel specifications.
Please refer screen shot below for more details (Figure 2).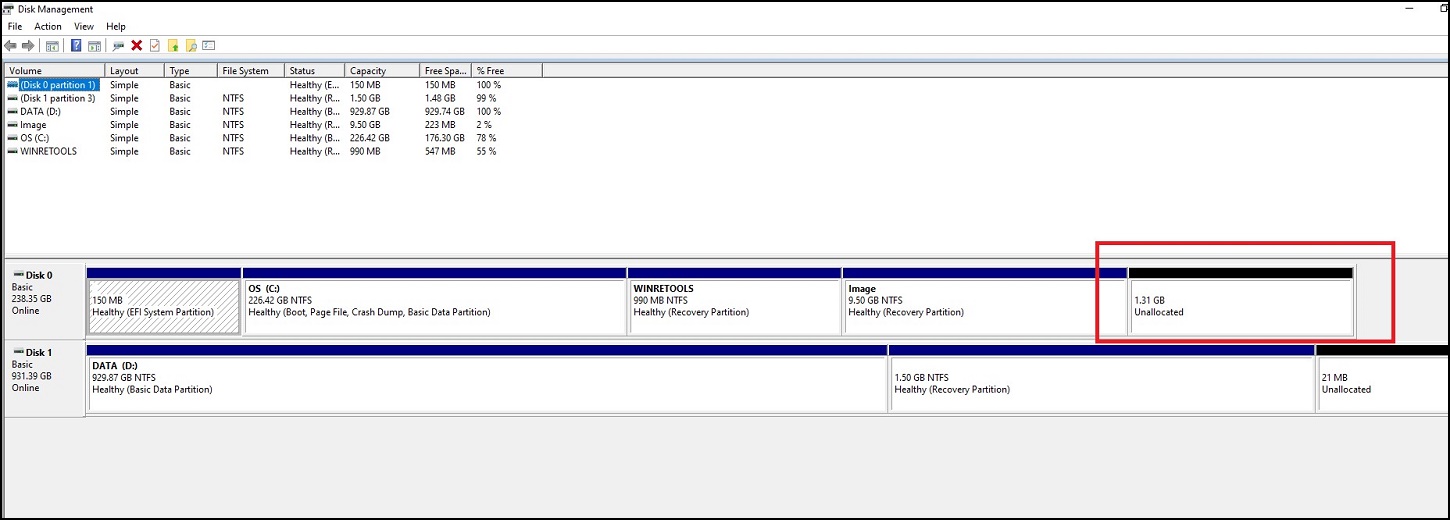
Figure 2 - Dell Computer with Windows 10 (20H1) and SupportAssist OS Recovery after an A08 OSRI Recovery Image Install.
Impacted Areas and Functionalities:
- The A08 version of the Operating System Recovery image on a USB drive can be installed or deployed successfully. The Dell computer can be successfully recovered.
- All the Dell Apps on the Desktop (Dell Update/Dell Command Update, SupportAssist, Dell Digital Delivery Apps) are working fine.
- There is No Data loss to the computer.
- This issue is specific to Dell computers factory installed with Windows 10 (20H1) and SupportAssist OS Recovery Applications only.
- Only the SupportAssist OS Recovery Application feature is removed as the “DELLSUPPORT” partition gets deleted.
- If you require the SupportAssist OS Recovery recovery feature back, you can use an SupportAssist OS Recovery recovery USB drive which facilitates a bare metal restore of the “DELLSUPPORT” partition. The instructions are below in the Recovery Plan and Solution section.
- Overall, you should not notice the larger unallocated memory space (~1.3 GB) or notice the “DELLSUPPORT” partition or SupportAssist OS Recovery is no longer available.
Recovery Plan and Solution
Use the SupportAssist OS Recovery USB Media key to do bare metal restore to bring back the “Dell Support Partition.”
- Create a SupportAssist OS Recovery USB Media drive for the Dell computer (use the computer Service Tag) using the “Dell OS Recovery Tool” in Dell support article 000123667 How-to-download-and-use-the-dell-os-recovery-image-in-microsoft-windows.
- Boot the Dell computer using the SupportAssist OS Recovery USB Media drive with the "F12" boot menu option.
Note: Please ensure that the Dell computer is connected to the Internet.
- After the SupportAssist OS Recovery Service OS loads, select “START RESET” under RESET option (Figure 3).
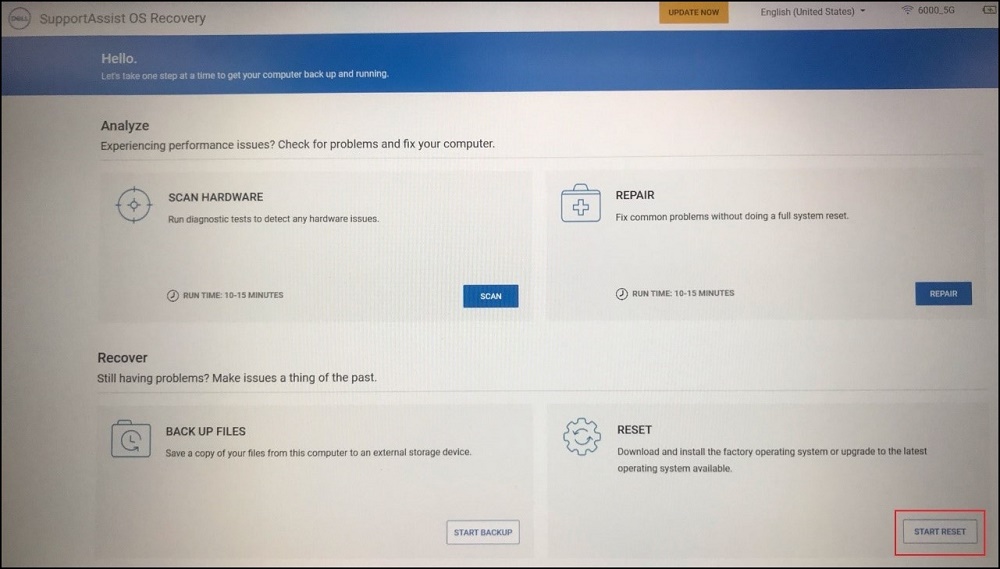
Figure 3
- Select “Reset and Update” and then “Next” (Figure 4)
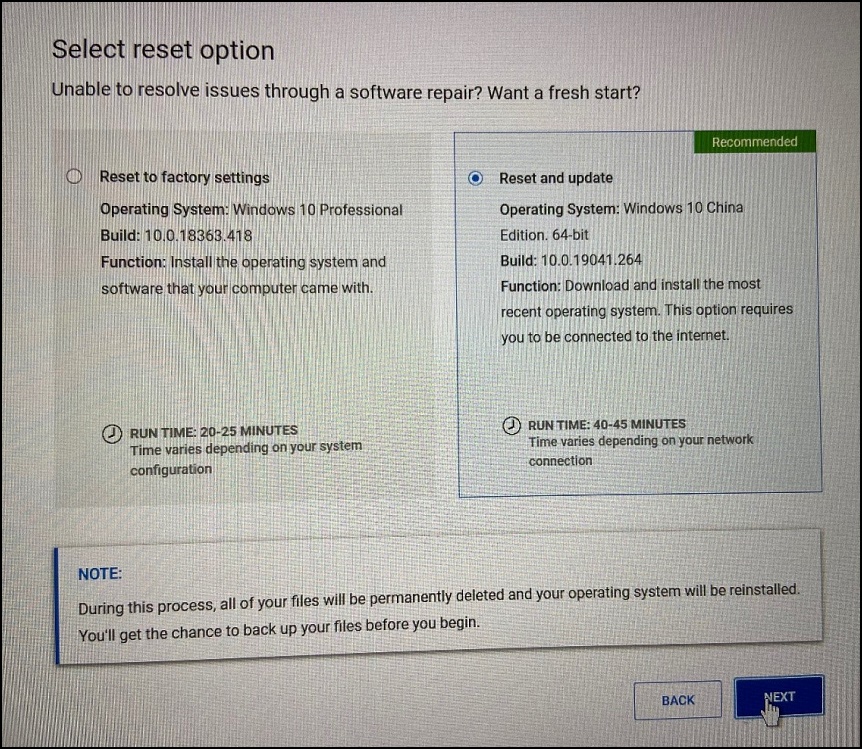
Figure 4
- Either select ‘Yes’ or ‘No’, it depends on your demand (Figure 5).

Figure 5
- Choose the reason why you are resetting your computer and check “I understand that the reset will delete all of my system data and personal files” then “Next” (Figure 6). This will complete the Reset process.
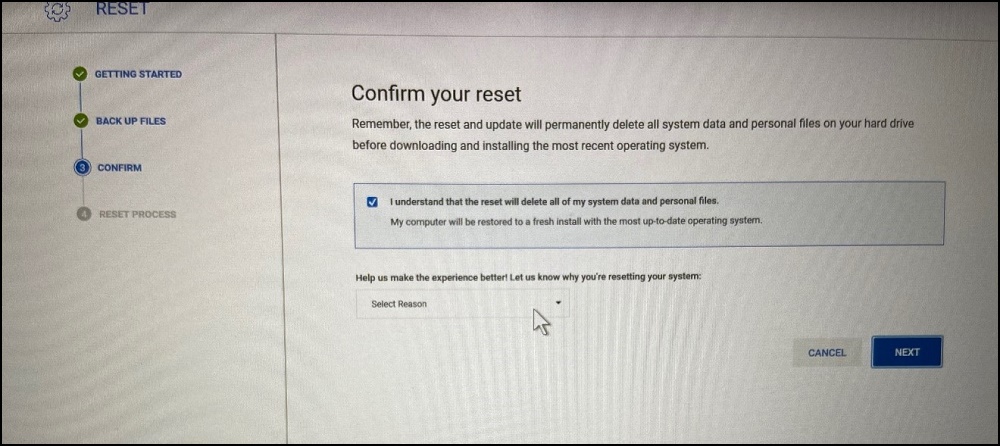
Figure 6
Once the reset process is completed, the Dell computer will boot to Operating System desktop. Inside the Disk Management screen, you could see the Dell Support Partition (DSP) got restored.