How To Install The Optional Paper Tray On The B2360d / B2360dn Dell Laser Printer
Summary: Installing the optional printer tray on the B2360d / B2360dn Dell Laser Printer.
Symptoms
This article provides information on "How To Install The Optional Paper Tray On The B2360d / B2360dn Dell Laser Printer"
1. Installing An Optional Tray
 Caution: A CAUTION indicates a potentially hazardous situation, which, if not avoided, may result in physical injury or death.
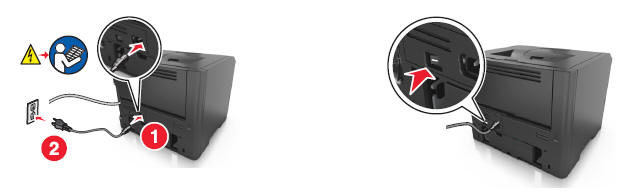
- Turn off the printer using the power switch, and then unplug the power cord from the electrical outlet.

- Unpack the tray, and then remove any packing material.
- Remove the tray from the base.
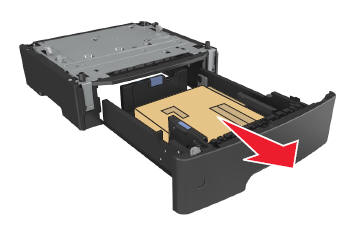
- Remove any packing material from inside the tray.
- Insert the tray into the base.
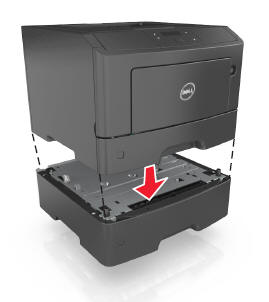
- Place the tray near the printer.
- Align the printer with the tray, and then slowly lower the printer into place.
- Connect the power cord to the printer, then to properly grounded electrical outlet, and then turn on the printer.
 Note: When the printer software and any hardware options are installed, you may need to manually add the options in the printer driver to make them available for print jobs.
To uninstall the optional tray, slide the latch on the right side of the tray toward the front of the tray until it clicks into place.
If these steps do not correct the problem, please contact Dell Technical Support.

More information can be found in the User Guide for your model printer, or visit our Printer Support site for additional information, troubleshooting articles and videos.
Purchase Toner and other Dell Laser Printer Supplies
Dell Recycling
 It is recommended that only Dell Branded toner, drums, transfer rollers or other consumables are used in our laser printers. Dell cannot guarantee compatibility or the print quality of any 3rd party consumables.
Cause
N/A
Resolution
N/A
Affected Products
Dell B2360d Mono Laser Printer, Dell B2360dn Mono Laser PrinterArticle Properties
Article Number: 000135414
Article Type: Solution
Last Modified: 07 Jun 2024
Version: 4
Find answers to your questions from other Dell users
Support Services
Check if your device is covered by Support Services.
Article Properties
Article Number: 000135414
Article Type: Solution
Last Modified: 07 Jun 2024
Version: 4
Find answers to your questions from other Dell users
Support Services
Check if your device is covered by Support Services.