Dell Endpoint Security Smartcard Configuration Guide
Summary: This guide helps an administrator configure their environment and offers guidance to configure SmartCard Authentication.
This article applies to
This article does not apply to
This article is not tied to any specific product.
Not all product versions are identified in this article.
Instructions
Affected Products:
- Dell Encryption Enterprise
- Dell Data Protection | Enterprise Edition
- Dell Security Management Server
- Dell Data Protection | Enterprise Edition
Affected Versions:
- v8.0 and Later
This guide outlines certificate creation and issuance by a trusted administrator, writing the certificates to smartcards leveraged by end users.
An administrator must:
- Setup and Configure Templates
- Complete the Dell Security Management Server Configuration
- Complete Smartcard Enrollment.
There is also an Appendix of information. Select the appropriate section for more information.
To leverage smartcard authentication with the Dell Endpoint Security Pre-Boot Environment, we must configure Active Directory to allow for certificate enrollment and generation.
An Enrollment Agent certificate must be assigned to any users who are attempting to assign certificates to smartcards for other users.
To setup and configure templates, Enable the Certificate Template for the Enrollment Agent, and then Add a New Smartcard User Template.
To enable the certificate template for the enrollment agent:
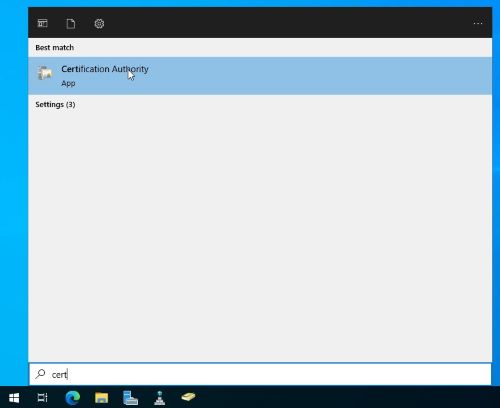
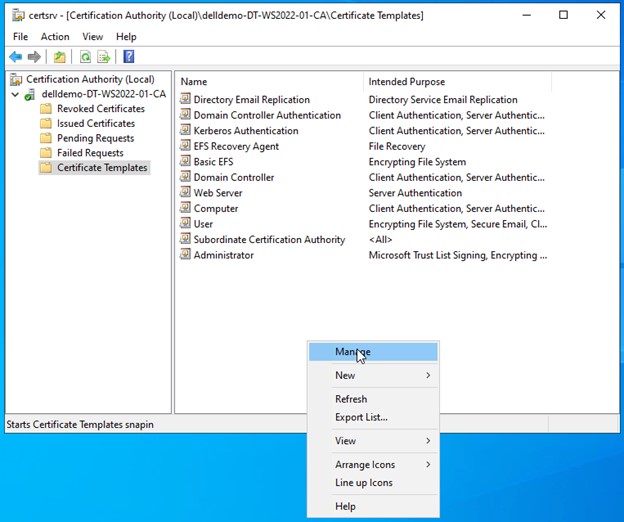
- Open the Certification Authority Microsoft Management Console (MMC).
- Expand to Certificate Templates.
- Right-click the right-pane and then click Manage.
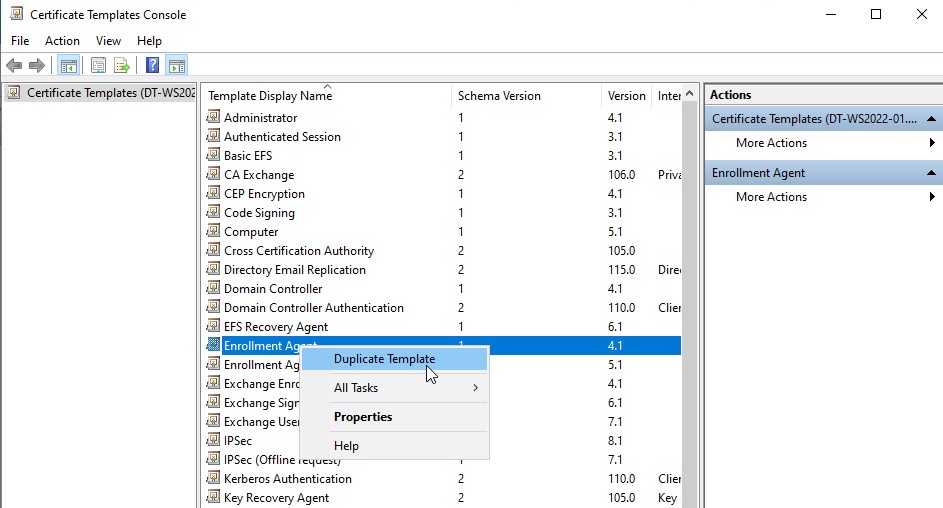
- Right-click Enrollment Agent and then click Duplicate Template.
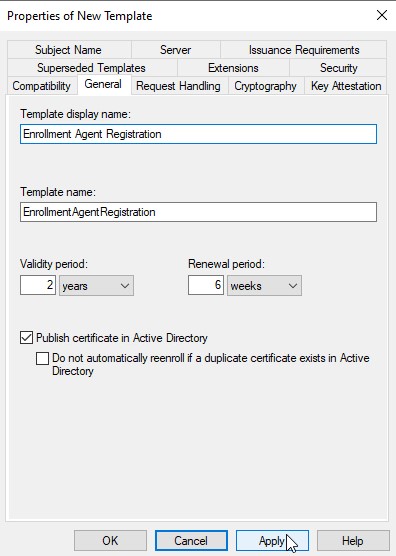
- Go to the General tab.
- Select the option to Publish certificate in Active Directory.
- Optionally, update the Template display name, and Template name.
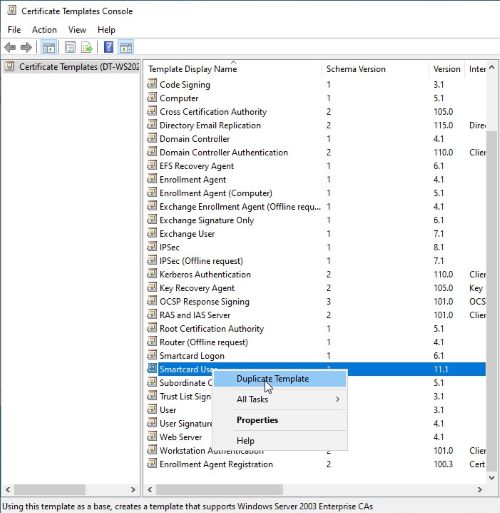
To add a smartcard user template:
- In the Certification Authority’s Certificate Template Console, right-click the Smartcard User template and then click Duplicate Template.
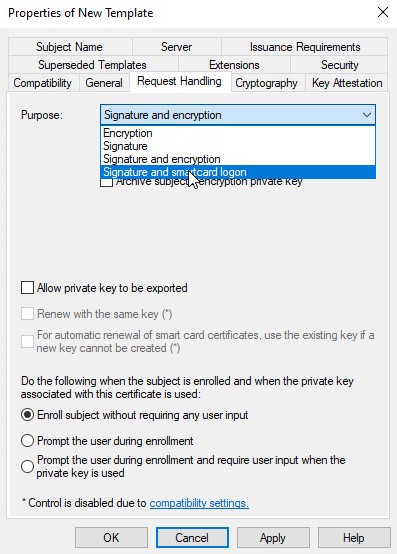
- Under the Request Handling tab, modify the Purpose to Signature and smartcard logon.
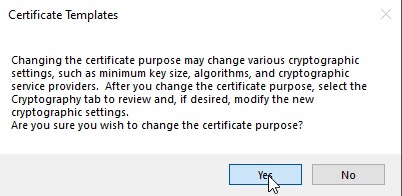
- Accept the resulting prompt.
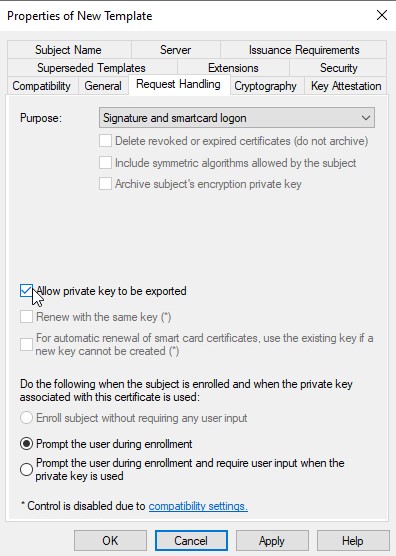
- Ensure that Allow private key to be exported is checked.
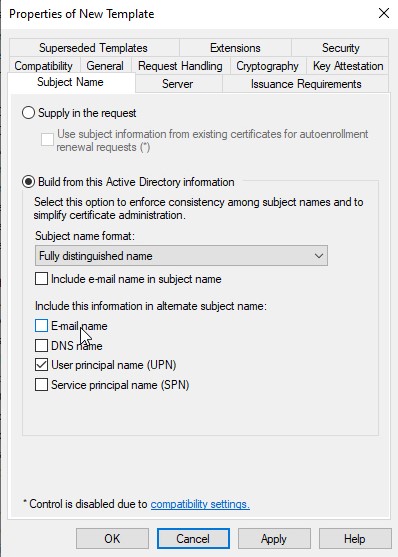
- Within the Subject Name tab, options are present by default to require a defined email address to be used as an alternate validation method. Some environments may want to clear these options to avoid issues with users that may not have Active Directory defined email addresses.
- Clear the checkbox for Include e-mail name in subject name.
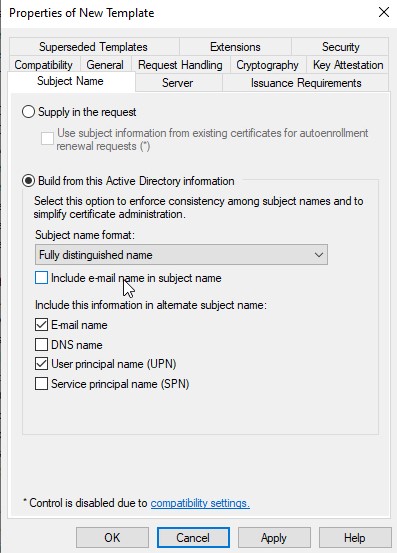
- Clear E-mail name under the Include this information in alternate subject name section.
- Clear the checkbox for Include e-mail name in subject name.
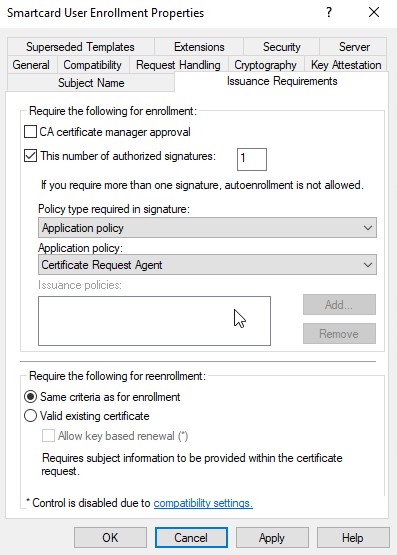
- Under the Issuance Requirements tab, select This Number of authorized signatures box.
- Leave This number of authorized signatures set to 1.
- Leave the Policy Type required in the signature as Application Policy.
- Modify the Application Policy to Certificate Request Agent.
- Click OK to publish this template.
- Allow both templates to be issued by right-clicking Certificate Templates in the Certification Authority MMC, and then clicking Certificate Template to Issue.
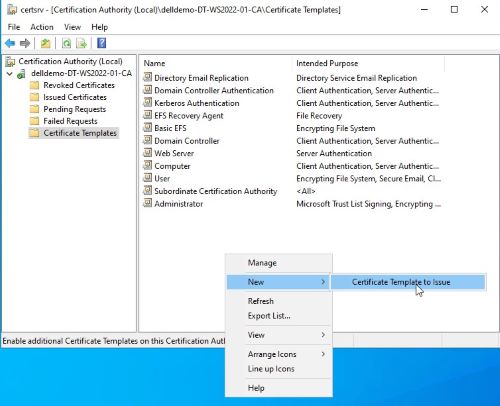
- Select the two new Certificate Templates that you created.
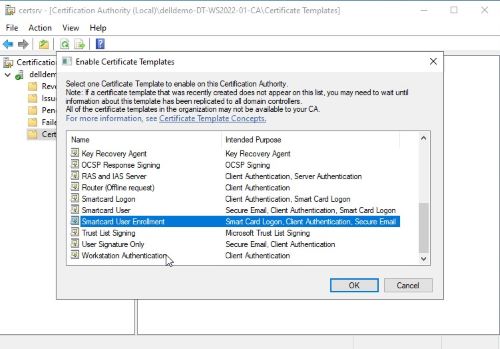
- Click OK.
This section describes the changes necessary to the Dell Security Management Server to allow smartcard functionality in the Pre-Boot Authentication environment.
An administrator must Import the Root CA and Modify Policy. Click the appropriate process for more information.
Import the Root CA
Since the smartcard certificates are signed by the internal certificate authority (CA) in this guide, we must ensure the root CA, and any intermediaries (not shown in this guide) are imported into the certificate chain.
- Export the root Certification Authority’s certificate from the certificate Microsoft Management Console (MMC).
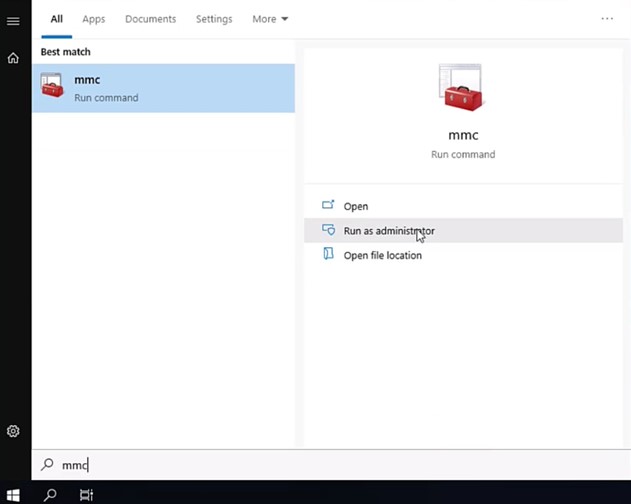
- Launch MMC.
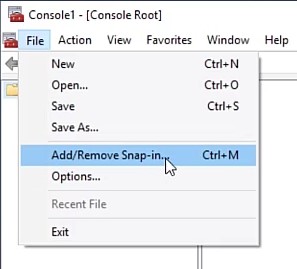
- Click File.
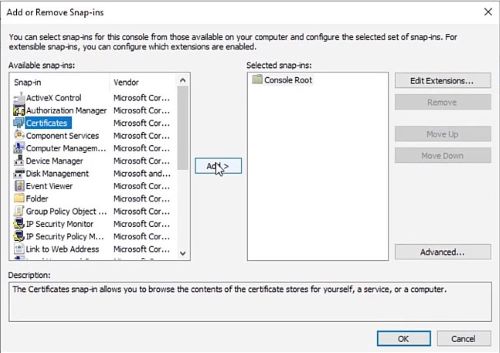
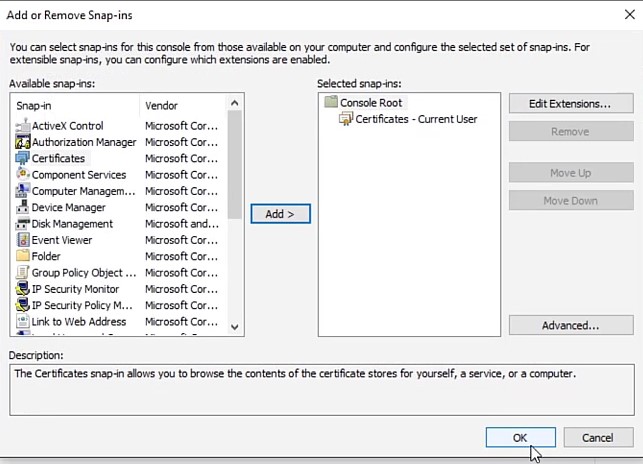
- Click Add/Remove Snap-in.
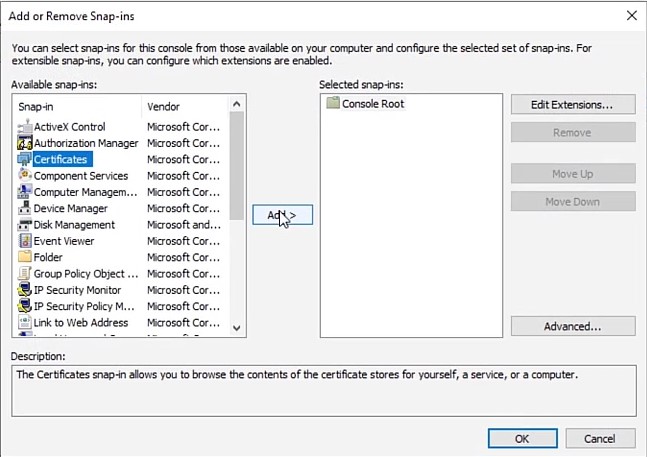
- Select Certificates.
- Click Add.
- Select the Computer account radial.
- Click Finish.
- Click OK.
- Expand the Certificates.
- Expand the Trusted Root Certification Authorities.
- Select Certificates.
- Right-click the certificate issued by your domain’s CA. These are synced with Group Policy.
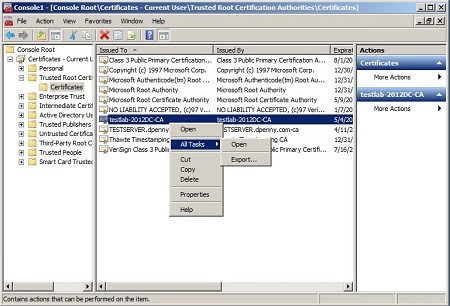
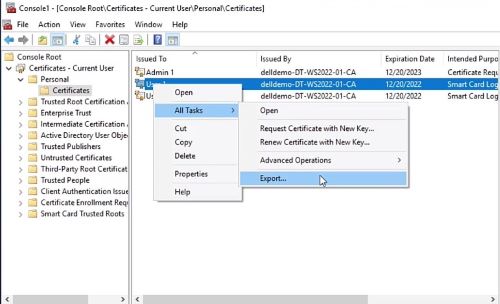
- Select All Tasks and then click Export.
- Export the certificate as
DER encoded binary X.509 (.CER). - Save it and then record the location as it is used shortly.
- Import this certificate into the Trusted Certificates of the Java keystore.
- Open an administrative Command Prompt.
- Modify the path to allow keytool commands to be ran by typing
Set path=%PATH%;"C:\Program Files\Dell\Java Runtime\jre1.8\bin"and then type Enter.Note: For Dell Security Management Server version 9.2 and earlier, typeSet path=%PATH%;"C:\Program Files\Dell\Java Runtime\jre1.7\bin"and then press Enter. - Go to the Security Server’s conf directory by typing
%INSTALLDIR%\Enterprise Edition\Security Server\conf\and then press Enter.
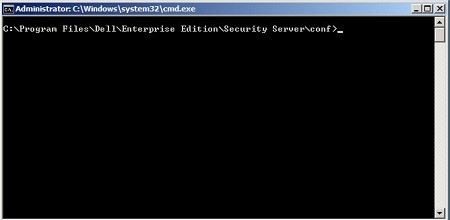
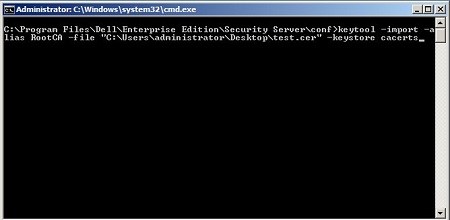
- Import the .cer file that we exported in Step 1 into the Java keystore (cacerts) by typing
Keytool –import –alias RootCA –file C:\exportedroot.cer –keystore cacertsand then press Enter.
- Enter the cacerts file password.
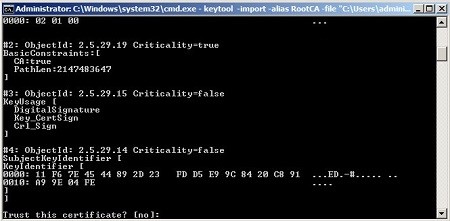
- Accept the prompt to trust the certificate by typing
Y.
- Restart the Security Server to complete the import.
Modify Policy
Click the Dell Data Security server version for appropriate policy configurations. For versioning information, reference How to Identify the Dell Data Security / Dell Data Protection Server Version.
v9.8.0 and Later
To modify the policy to allow smartcards for the PBA authentication mechanism:
- Open the Dell Data Security Administration Console.
Note: For more information, reference How to Access the Dell Data Security / Dell Data Protection Server Administration Console.
- Log in as a user who can modify and commit policy.
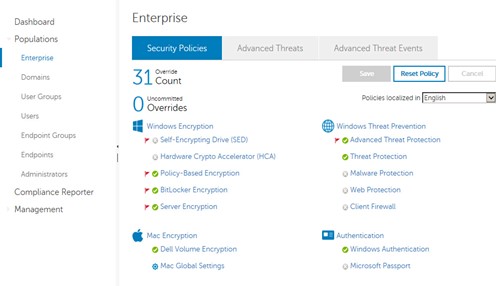
- Go to the population where you want to make the policy change. For example, select Populations and then click Enterprise.
- Select the Security Policies tab.

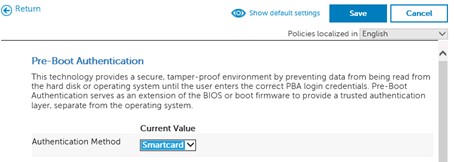
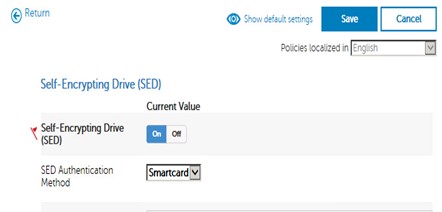
- Select Pre-Boot Authentication.
- Modify the SED Authentication Method from Password to Smartcard.
Note: Ensure that a self-encrypting drive policy is set to on to enable this for the entire enterprise.
- Save and commit policies.
Note: For more information, reference How to Commit Policies for Dell Data Security / Dell Data Protection Servers.
v9.2.0 to 9.7.0
To modify the policy to allow smartcards for the PBA authentication mechanism:
- Open the Dell Data Protection Administration Console.
Note: For more information, reference How to Access the Dell Data Security / Dell Data Protection Server Administration Console.
- Log in as a user who can modify and commit policy.
- Go to the population where you want to make the policy change. For example, select Populations and then click Enterprise.
- Select the Security Policies tab.
- Select Self-Encrypting Drive (SED).
- Modify the SED Authentication Method from Password to Smartcard.
Note: Ensure that a self-encrypting drive policy is set to on to enable this for the entire enterprise.
- Save and commit policies.
Note: For more information, reference How to Commit Policies for Dell Data Security / Dell Data Protection Servers.
v8.0.0 to 9.1.5
To modify the policy to allow smartcards for the PBA authentication mechanism:
- Modify the policy to allow smartcards as the authentication mechanism for PBA.
- Open the Remote Management Console.
Note: For more information, reference How to Access the Dell Data Security / Dell Data Protection Server Administration Console.
- Log in as a user who can modify and commit policy.
- Go to Enterprise.
- Click Security Policies at the top.
- Override (not available in Virtual Edition).
- Modify the Policy Category drop-down to Self-Encrypting Drives.
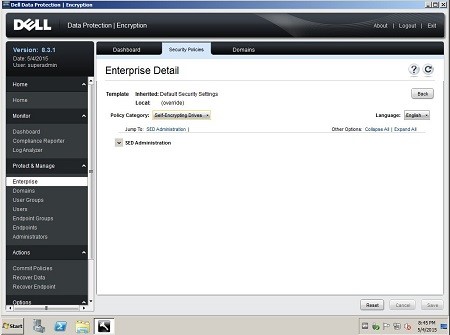
- Expand SED Administration.
- Modify the SED Authentication Method from Password to Smartcard.
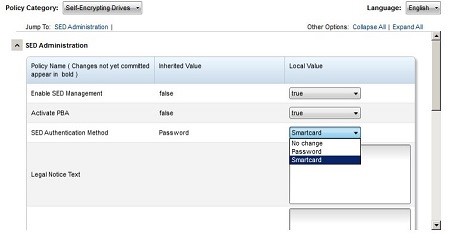 Note: Ensure that Enable SED Management and Activate PBA are set to True to enable this for the entire enterprise.
 - Save this policy.
- Click Commit Policies on the left.
- Click Apply Changes.
- Open the Remote Management Console.
Smartcards are blank by default. Each smartcard must have a certificate that is assigned to it to add a certificate for authentication. Certificates are typically assigned to smartcards through a middleware application. The examples below outline the import through a legacy Charismathics software for enterprise-class smartcards, and VersaSec for personal identity verification (PIV)-based smartcards. An administrator must Enable Single Sign-on to Windows Using Smartcards after assigning the certificate. Select the appropriate process for more information.
Charismathics
To leverage smartcards, we must have an enrollment agent who can assign certificates to the device and a middleware which translates the certificate information coming from the Microsoft Certification Authority into something the card can use.
Most smartcards do not have security tokens preset on them. An administrator must Stage a Security Token on a New Smartcard, Add a Certificate for the Enrollment Agent, and then Enroll Users and Push Certificates. Click the appropriate process for more information.
Stage a Security Token on a New Smartcard
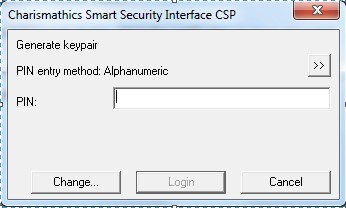
- Open the Cryptographic Service Provider (CSP).
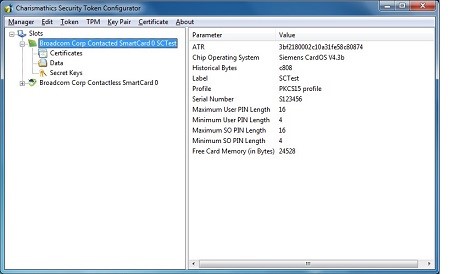
- When we insert a card without an active token, we get basic information.
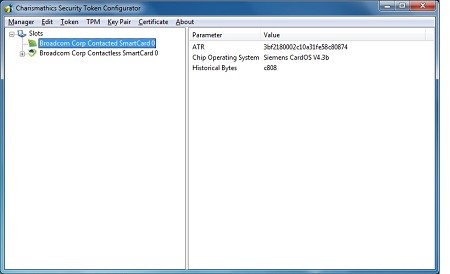
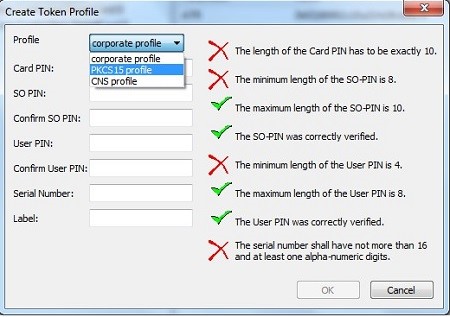
- Once we create a security token, we must ensure it is set for a PKCS15 profile.
- After this is created, we will have many more options, and can import a certificate properly.
Add a Certificate for the Enrollment Agent
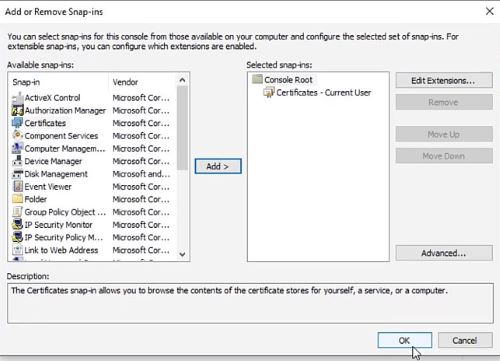
- Open the Microsoft Management Console (MMC).
- Click File.
- Click Add/Remove snap-ins.
- Select Certificates.
- Click Add.
- Select the radial for My user account.
- Click Finish.
- Click OK.
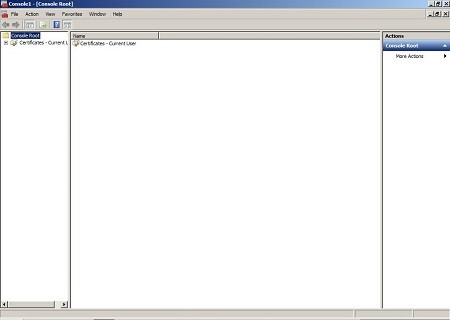
- Expand Certificates - Current User.
- Expand Personal.
- Expand Certificates if it exists.
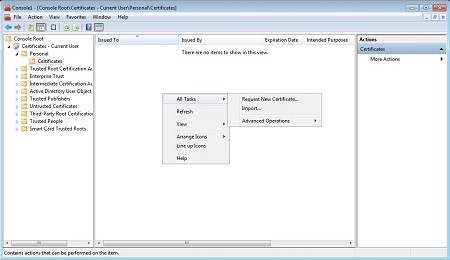
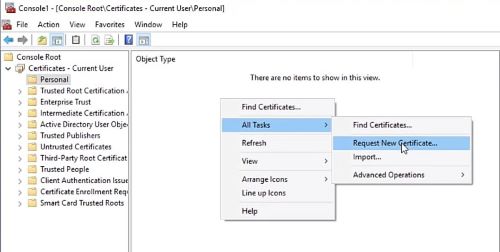
- Right-click in the center pane, select All Tasks, and then Request New Certificate.
- Click Next.
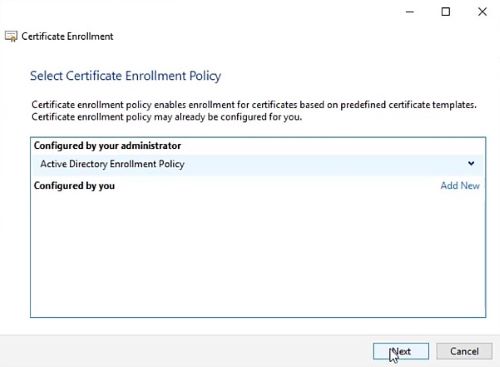
- Leave Active Directory Enrollment Policy selected.
- Click Next.
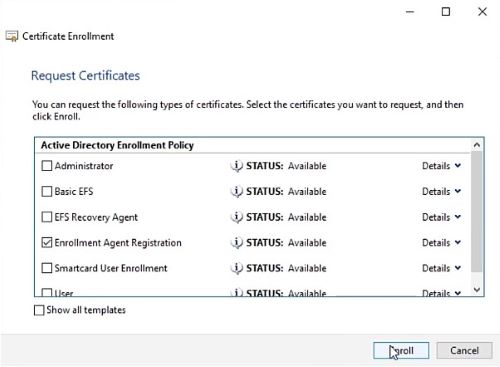
- Select the Enrollment Agent Certificate that we created and published earlier.
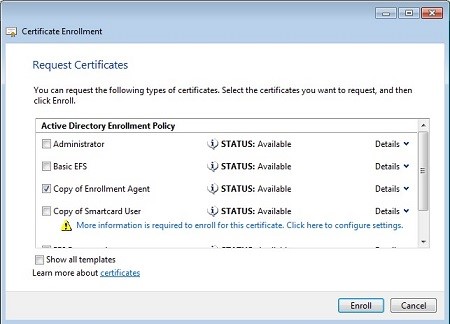
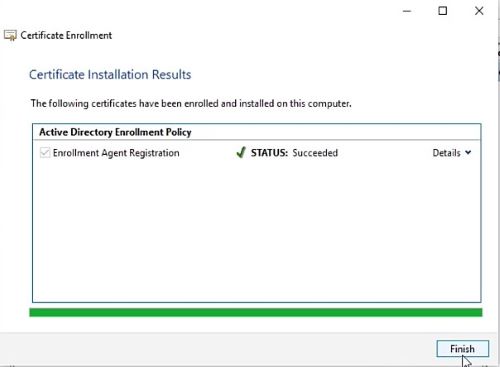
- Click Enroll.
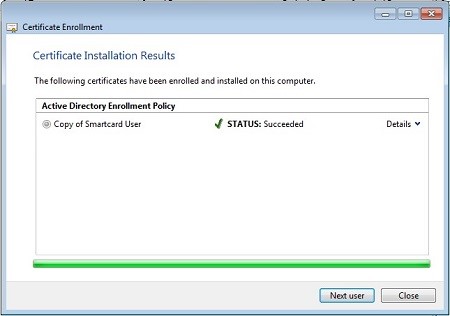
- Click Finish once it is completed.
Enroll Users and Push Certificates
Now we can Enroll users into the smartcard that we generated and push certificates to the card using the certificate MMC.
To enroll users and push certificates:
- Open the Microsoft Management Console (MMC).
- Click File.
- Click Add/Remove snap-ins.
- Select Certificates.
- Click Add.
- Select the radial for My user account.
- Click Finish.
- Click OK.
- Expand Certificates - Current User.
- Expand Personal.
- Expand Certificates if it exists.
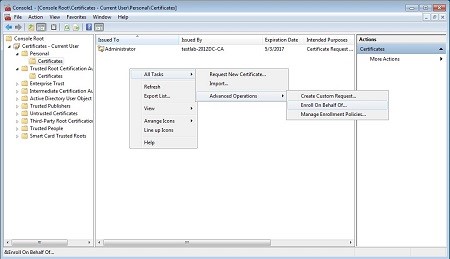
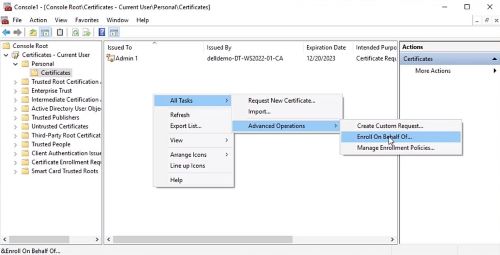
- Right-click in the center pane, select All Tasks, Advanced Operations, and then Enroll on Behalf Of.
- Click Next.
- Leave Active Directory Enrollment Policy selected.
- Click Next.
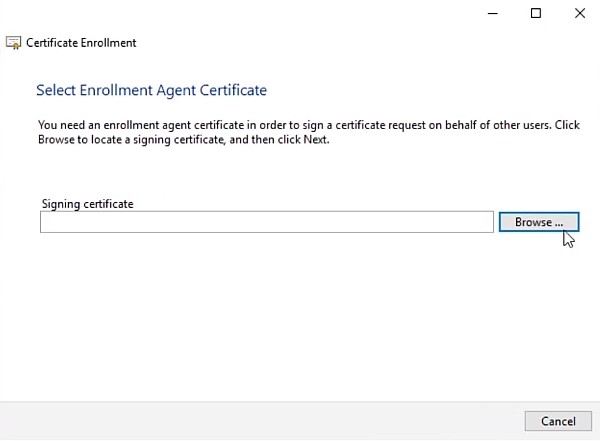
- Click Browse.
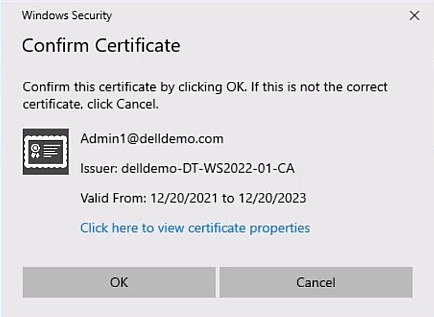
- Select the Enrollment Agent Certificate that we generated earlier and then click OK.
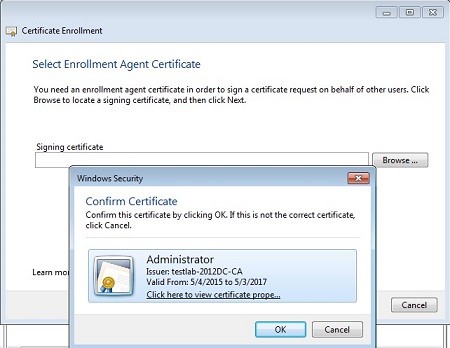
- Click Next.
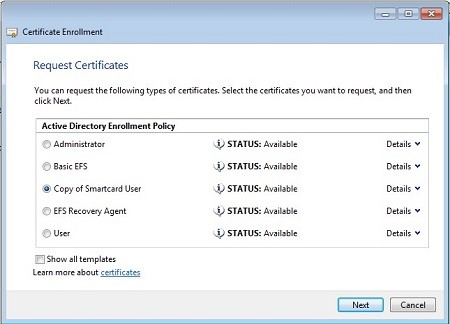
- Select the radial for the Smartcard User Template that we generated earlier.
- Select the Details dropdown and then click Properties.
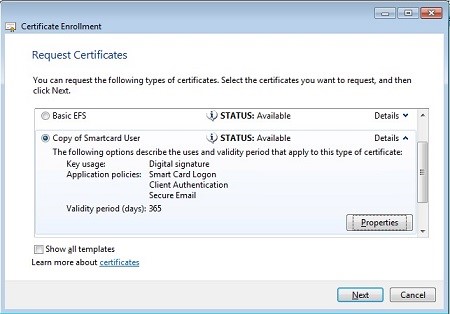
- Modify the Cryptographic Service Provider to the application that you are leveraging. In this case, it is Charismathics.
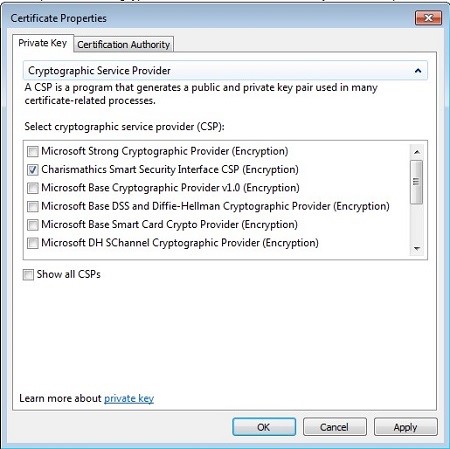
- Click OK.
- Click Next.
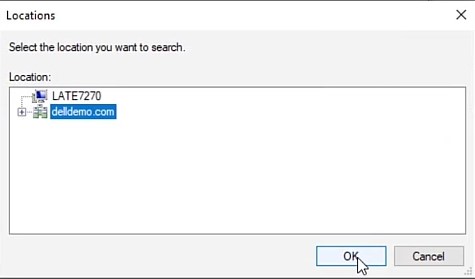
- Click Browse and then modify the Locations to pull from your domain.
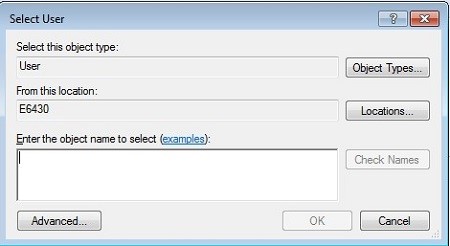
- Enter the username of the user to enroll.
- Click Check Names to validate the user.
- Click OK.
- Click Enroll.
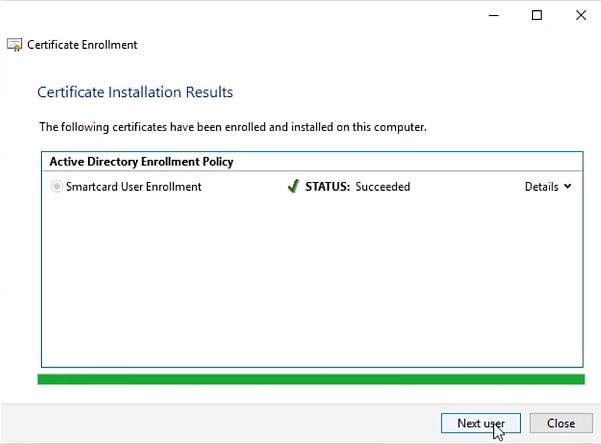
- Follow the prompts.
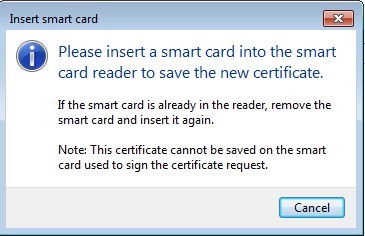
- Either click Next User to enroll further users using the same method or click Close to continue.
Smartcards can now be leveraged for PBA authentication.
VersaSec
VersaSec uses previously generated certificates for new certificate enrolling. This process uses certificate templates that are created through Active Directory to enable an employee to generate log-in certificates for other employees to use during their log-in session. An administrator must complete Certificate Enrollment, Certificate Export, and then Assign a Certificate to a Smartcard. Click the appropriate process for more information.
Certificate Enrollment
To enroll a certificate:
- Open Microsoft Management Console (MMC) as an administrator assigning certificates on a device joined to the domain where certificate templates have been configured.

- Select the option to Add/Remove Snap-in.

- Select Certificates then select Add.
- Ensure that the option for My user account is selected.

- Select OK to load the selected snap-ins.
- Expand the Certificates - Current User pane, right-click the right pane, and then select All Tasks, then Request New Certificate.
- Ensure that the option for Active Directory Enrollment Policy is selected and then click Next.
- Select the certificate template that allows for an Enrollment Agent to be created for the current user, then select Enroll. This example uses the previously created Enrollment Agent Registration template.
- Once the enrollment is completed, click Finish.
- With an Enrollment Agent certificate, generate a smartcard user certificate that is based on a pregenerated template by selecting the Certificates folder in the left pane. Select All Tasks, Advanced Operations, then Enroll On Behalf Of.
- Ensure that the option for Active Directory Enrollment Policy is selected and then click Next.

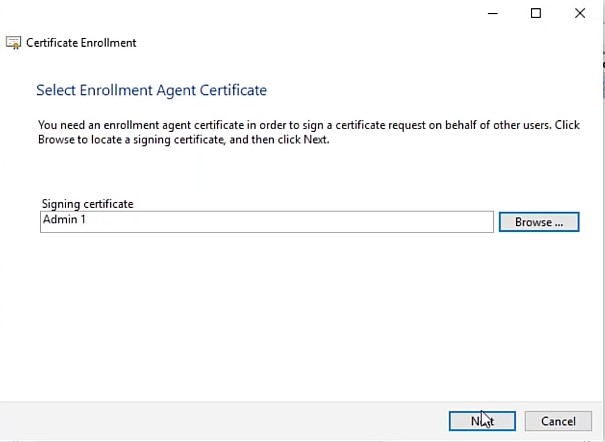
- Select Browse when an Enrollment Agent Certificate is requested.
- Ensure that the appropriate certificate is selected and then click OK.
- Confirm that the appropriate user is defined and then click Next.
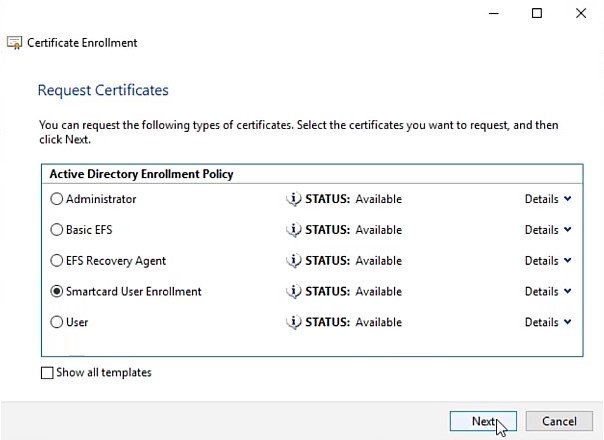
- Select the template that has been precreated for smartcard user enrollment and then click Next. This example leverages a template that is called Smartcard User Enrollment.
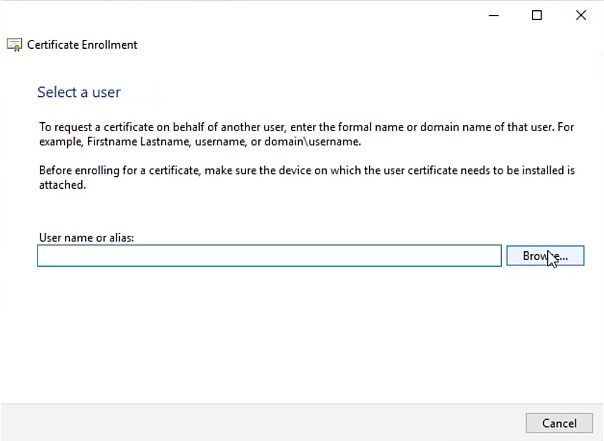
- Select Browse to find the appropriate user.
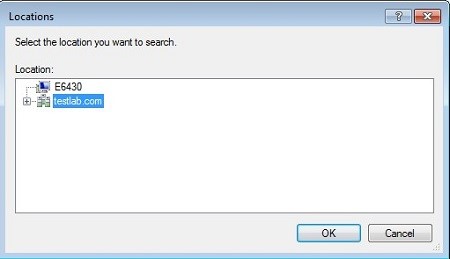
- Modify the location to search the entire directory by clicking Location.
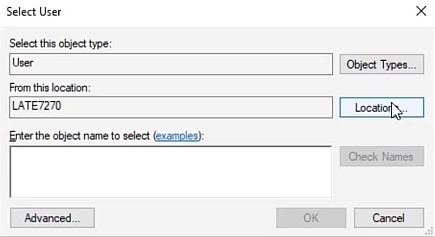
- Select the appropriate domain or organizational unit and then click OK.
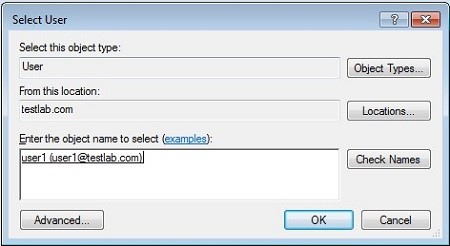
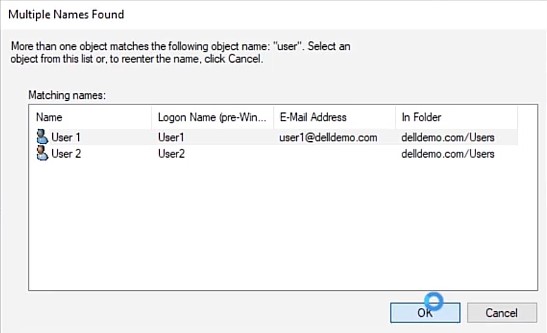
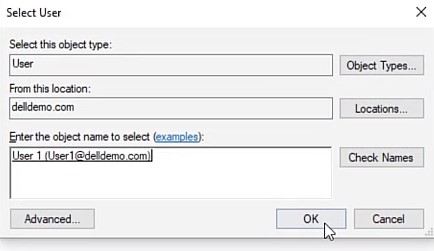
- Enter the user that you want to generate a smartcard certificate for, then select Check Names to validate the user principal name (UPN).

- Confirm the correct user if multiple users are found and then select OK.
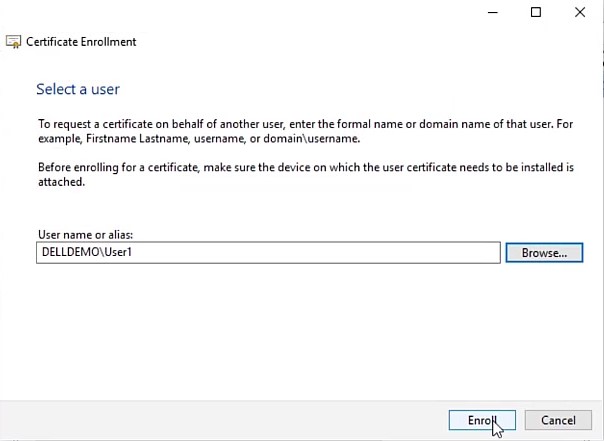
- Confirm the user information and then click OK.
- Confirm the user information again and then click Enroll.
- The enrollment completes quickly. Either select Next User to generate another user certificate, or select Close to complete the certificate generation process. More certificates can be created for additional users at any time in the future.
Certificate Export
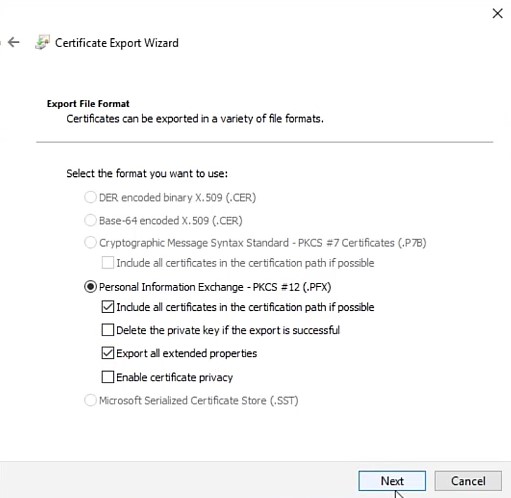
Certificates first be exported in PKCS12 format to be assigned to smartcards. Certificates must include the private key and the full certificate chain.
To export a certificate:
- Open Microsoft Management Console (MMC) as an administrator who is assigning certificates on a device that is joined to the domain where certificate templates are configured.
- Select the option to Add/Remove Snap-in.
- Select Certificates and then select Add.
- Ensure that the option for My user account is selected.
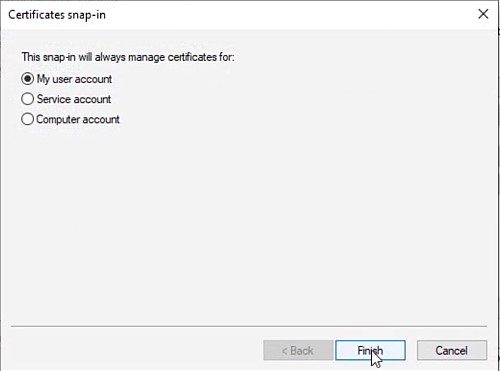
- Select OK to load the selected snap-ins.
- Expand the Certificates - Current User pane, then right-click the user to export. Select All Tasks and then click Export.
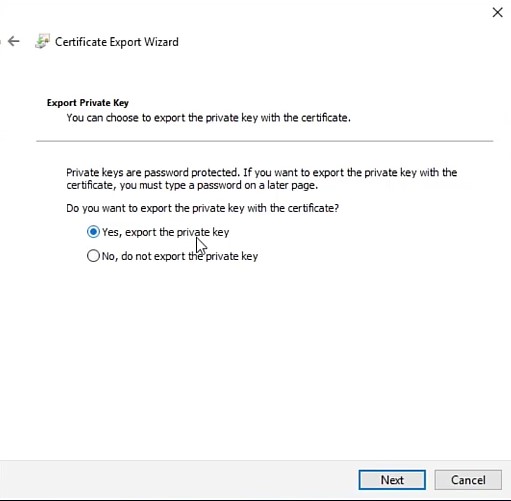
- Select the option Yes, export the private key, and then select Next.
- Clear the option to Enable certificate privacy, select Export all extended properties, and then click Next.
- Select the option for Password, assign a secure password for the certificate, and then select Next.
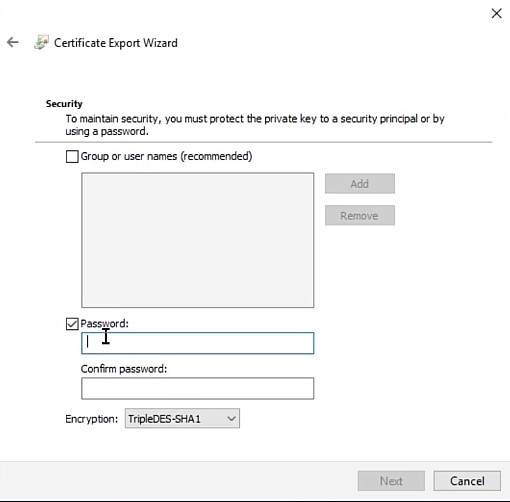 Note: Do not modify the Encryption option.
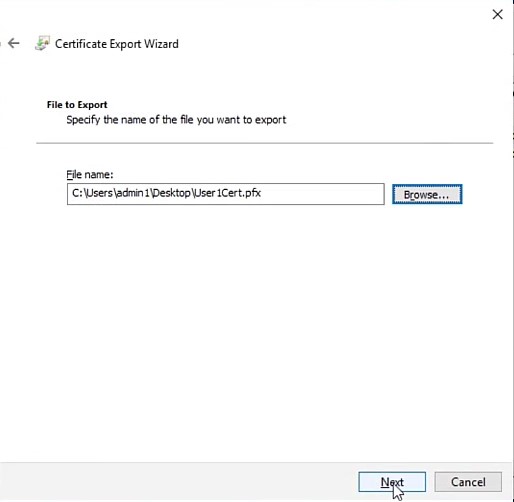
 - Assign a filename and location, then select Next.
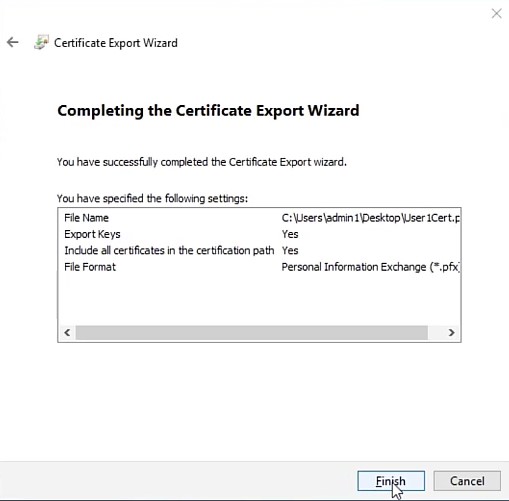
- Confirm the details, then select Finish to complete the export.
Assign a Certificate to a Smartcard
Install and download the VersaSec software and any administrative middleware that may be required for the smartcards that are being provisioned.
To assign a certificate to a smartcard:
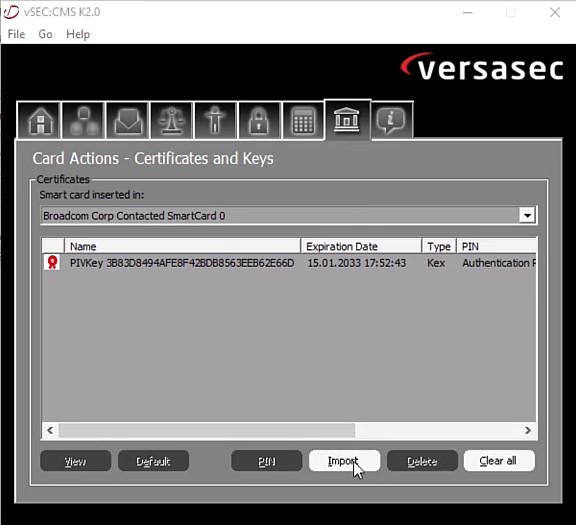
- Launch the VersaSec agent and insert a smartcard.
- Go to Card Actions - Certificates and Keys, then select Import.
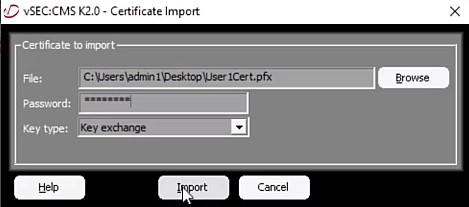
- Browse to and select the exported certificate to bind to the Smartcard. Enter the certificate password within the Password field, then select Import.
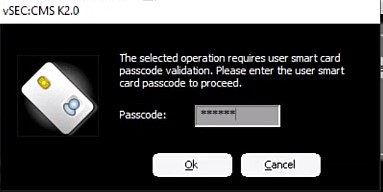
- Enter the user pin when prompted for the Passcode and then select OK.
- Once the certificate is finalized being written, it appears within the list.
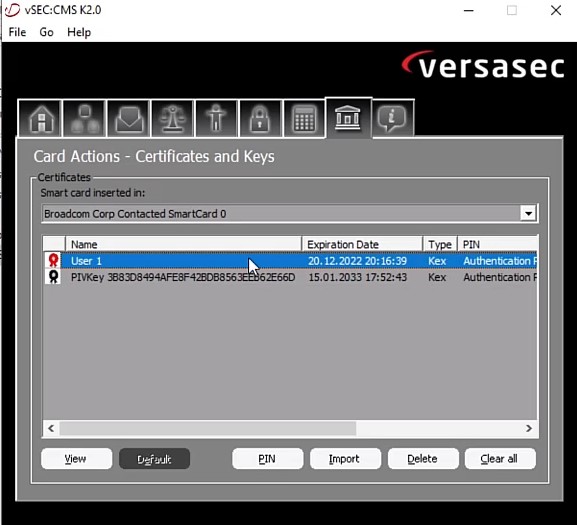
- Once all certificates for all accounts are written to the smartcard, it can be used to log in to Windows or the Dell preboot authentication environment.
Enable Single Sign-on to Windows Using Smartcards
The process to enable single sign-on to Windows using smartcards differs depending on the version of Dell Encryption Enterprise that is in use. Select the appropriate version for more information. For versioning information, reference How to Identify the Dell Encryption Enterprise or Dell Encryption Personal Version.
Dell Encryption Enterprise, v8.18 and Later
No endpoint changes are required. Once the policy has been set through the management console, all endpoint changes occur automatically.
Smartcards themselves may require a middleware. Consult with your smartcard vendor to determine if a middleware solution must be installed on each endpoint to allow for authentication into Windows.
Dell Encryption Enterprise, v8.17.2 and Earlier
Warning: The next step is a Windows Registry edit:
- Back up the Registry before proceeding, reference How to Back Up and Restore the Registry in Windows
 .
. - Editing the Registry can cause the computer to become unresponsive on the next reboot.
- Contact Dell Data Security International Support Phone Numbers for assistance if you have concerns about performing this step.
The client machines will not single sign-on by default. A registry key must be added to allow this to occur.
The registry key is:
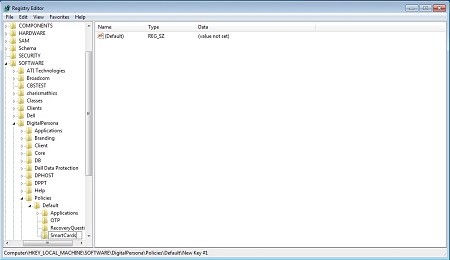
[HKLM\SOFTWARE\DigitalPersona\Policies\Default\Smartcards]
"MSSmartcardSupport"=dword:1
0 or no key = Smart Card Support Off, 1 = Smart Card Support On
- Open Registry Editor
- Expand HKEY Local Machine.
- Expand Software.
- Expand DigitalPersona.
- Expand Policies.
- Expand Default.
- Create a Key and then name it
Smartcards.
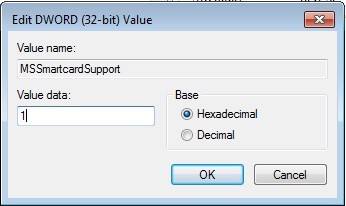
- Create a DWORD and then name it
MSSmartcardSupport.
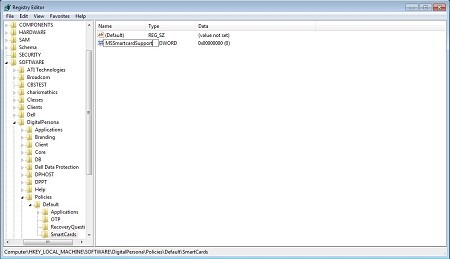
- Set the Value data to 1.
To contact support, reference Dell Data Security International Support Phone Numbers.
Go to TechDirect to generate a technical support request online.
For additional insights and resources, join the Dell Security Community Forum.
Additional Information
Appendix A
Configuring a Microsoft Certificate Authority
https://technet.microsoft.com/library/cc772393%28v=ws.10%29.aspx
Required Role Services:
- Certification Authority
- Certification Authority Web Enrollment
- Online Responder
Appendix B
Failure Scenarios and Resulting Logs
Certificates are not being accepted in the PBA.
PBA logs show:
[2015.04.07 17:53:18] [3C9ADA3BD9] [3061987072] [898]
[E:](CCredPasswordDlg::SmartcardAuthentication()) No smartcard certificate!
Resolution:
Assign a Certificate through the Certificates MMC instead of through the CSP.
Unable to log in to PBA with a valid smartcard that works fine in Windows:
- Security Server’s output (post v8.5) or Security Server’s SED.log files give errors with invalid certificate errors.
Caused by:
java.security.cert.CertPathValidatorException: Path does not chain with any of the trust anchors
2015-05-04 21:06:00,169 ERROR SED [qtp914277914-24] - PBA auth error. Code=InvalidCertificate com.credant.sed.pba.resources.AuthException
2015-05-04 21:06:00,138 INFO SED [qtp914277914-24] - Smartcard auth from agent abbc4a5d-6e6d-4fac-9181-2a1dee1599ee
2015-05-04 21:06:00,169 ERROR SED [qtp914277914-24] - Invalid smartcard cert com.credant.security.x509.InvalidCertificateException: Invalid cert path
at com.credant.security.x509.CertificateVerifier.validate(CertificateVerifier.java:141)
Resolution:
Import the Certification Authority’s root or intermediary certificate into the Java keystore for Security Server and restart the Security Server service.
Affected Products
Dell EncryptionArticle Properties
Article Number: 000126656
Article Type: How To
Last Modified: 19 Apr 2026
Version: 17
Find answers to your questions from other Dell users
Support Services
Check if your device is covered by Support Services.