How to Install Dell Networking OS10 or OS9 on Dell Open Networking (ON) Switches
Summary: Install OS9 and OS10 on Dell ON switch BY ONIE Methods.
This article applies to
This article does not apply to
This article is not tied to any specific product.
Not all product versions are identified in this article.
Instructions
This article explains the steps required to install Dell Networking OS on Dell Open Networking (ON) switches.


Format of OS10:

Steps required for installing OS on Dell Open Networking (ON) switches
NOTE: OS10 downloads are available on the Dell Digital Locker.
NOTE: See the ONIE Quick Start Guide for information about installing using HTTP or TFTP.
- Log in to the ONIE loader on the switch by choosing the menu on the boot process.

- Choose the ONIE loader from the boot menu.

NOTE: This example below already has an FTOS install.
-
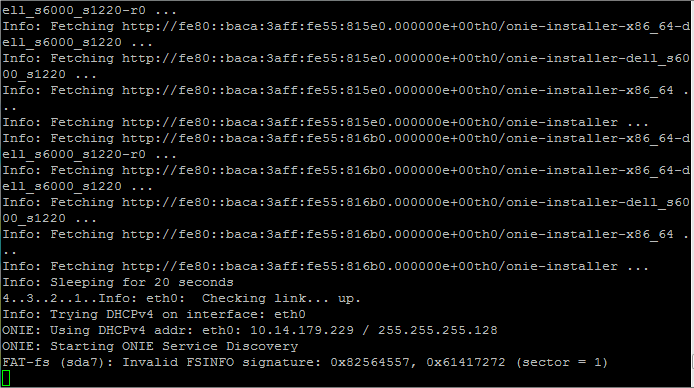
You may see continual messages similar to those seen below. To stop these messages, run the below command twice to be sure the service stops:
onie-discovery-stop

- Run the command fdisk -l to view the current storage locations. This helps determine where the USB is. In this case, the USB is at "/dev/sdb1" For the following steps, ensure to reference the proper location. If you do not see the USB device that means the format is not correct or the USB key has some partitions. The mandatory format required is FAT or FAT32 or EXT4 for Linux.

- (Optional) If required, format the USB by running the command:
mkfs.vfat /dev/sdb1

- If you have already copied the BIN file into the (extract the TAR with 7-zip), go to next steps. If NOT, unplug the key and plug into a laptop and copy the BIN file.
- Create a directory for the USB to mount to:
mkdir /mnt/usb

- Mount the USB to the newly created directory:
mount -t vfat /dev/sdb1 /mnt/usb

- Go to the directory where we just mounted the USB drive:
cd /mnt/usb

- From here, run the ls command. You should see the operating system file listed.
Format for OS9:

Format of OS10:
PKGS_OS10-Enterprise-10.5.4.55- installer-x86_64.bin
- Now the operating system can be installed. Ensure that the correct filename is used (filenames are case-sensitive):
onie-nos-install <name of file.bin>

Affected Products
OS9, PowerSwitch S3048-ON, PowerSwitch S4048-ON, PowerSwitch S4810-ON, PowerSwitch S6000 ON, PowerSwitch Z9100-ON, SmartFabric OS10 SoftwareArticle Properties
Article Number: 000102955
Article Type: How To
Last Modified: 24 Feb 2023
Version: 4
Find answers to your questions from other Dell users
Support Services
Check if your device is covered by Support Services.