Article Number: 000018926
Connectrix:如何使用 PuTTY 会话逐步收集交换机日志文件
Summary: 本文提供了有关如何使用 PuTTY 收集 supportshow 日志的逐步说明。
Article Content
Instructions
本文提供了有关如何使用 PuTTY 收集 supportshow 日志的逐步说明。
- 双击 PuTTY 图标以启动应用程序。
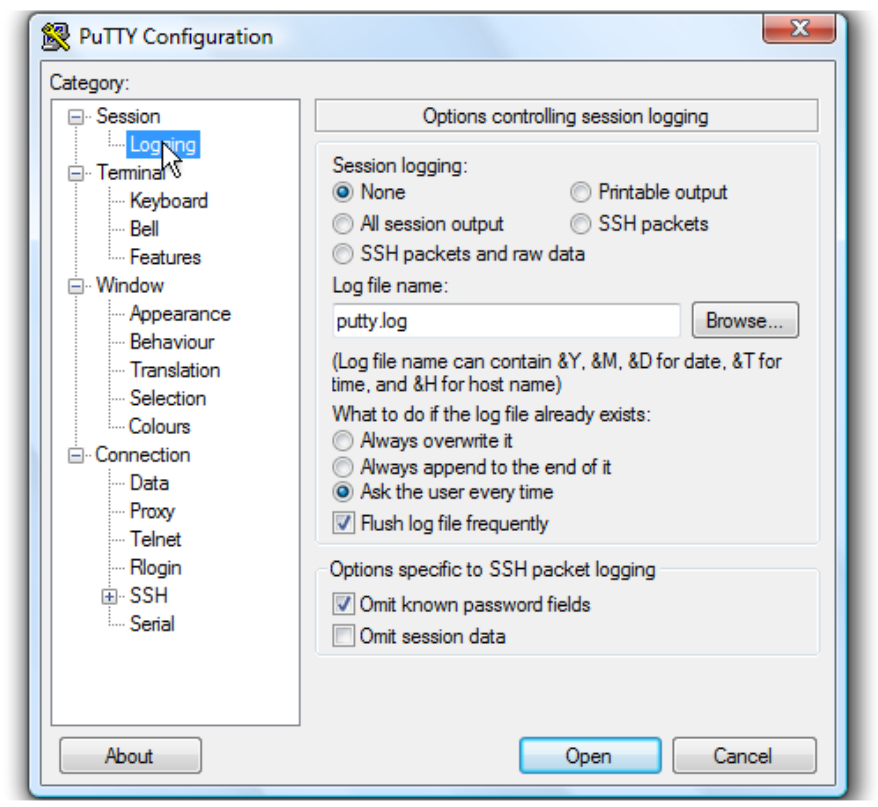
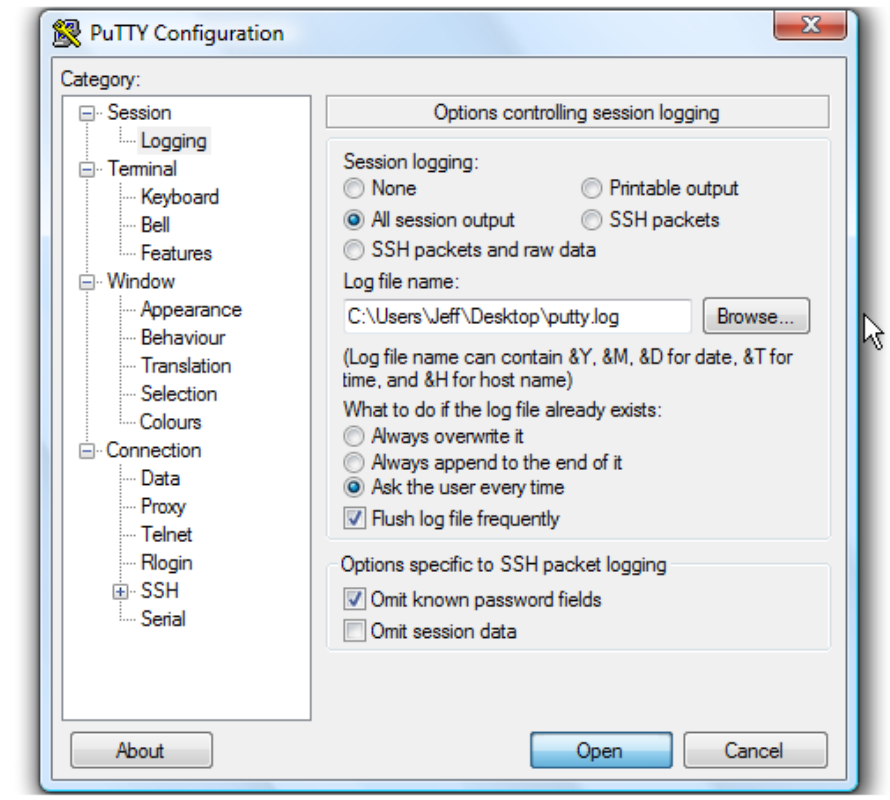
- 单击 Logging。日志记录设置列在右侧。
有关如何将日志文件保存到桌面的说明。
- 单击 All session output。
- 保留 Putty.log作为日志文件名。
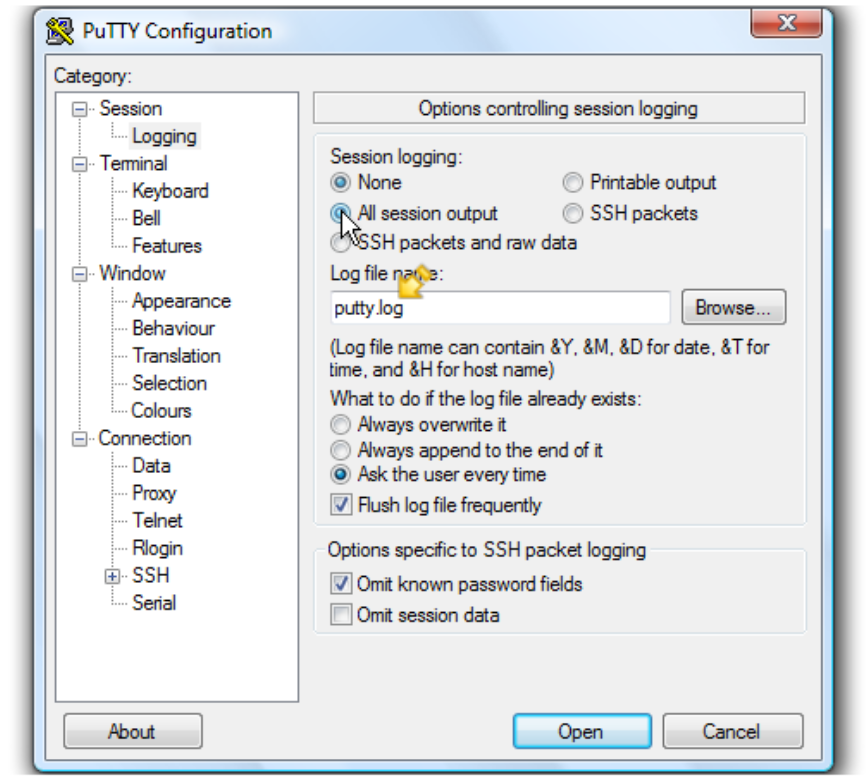
- 单击 浏览 以选择保存位置。
- 确保已在此处选择 Desktop 。
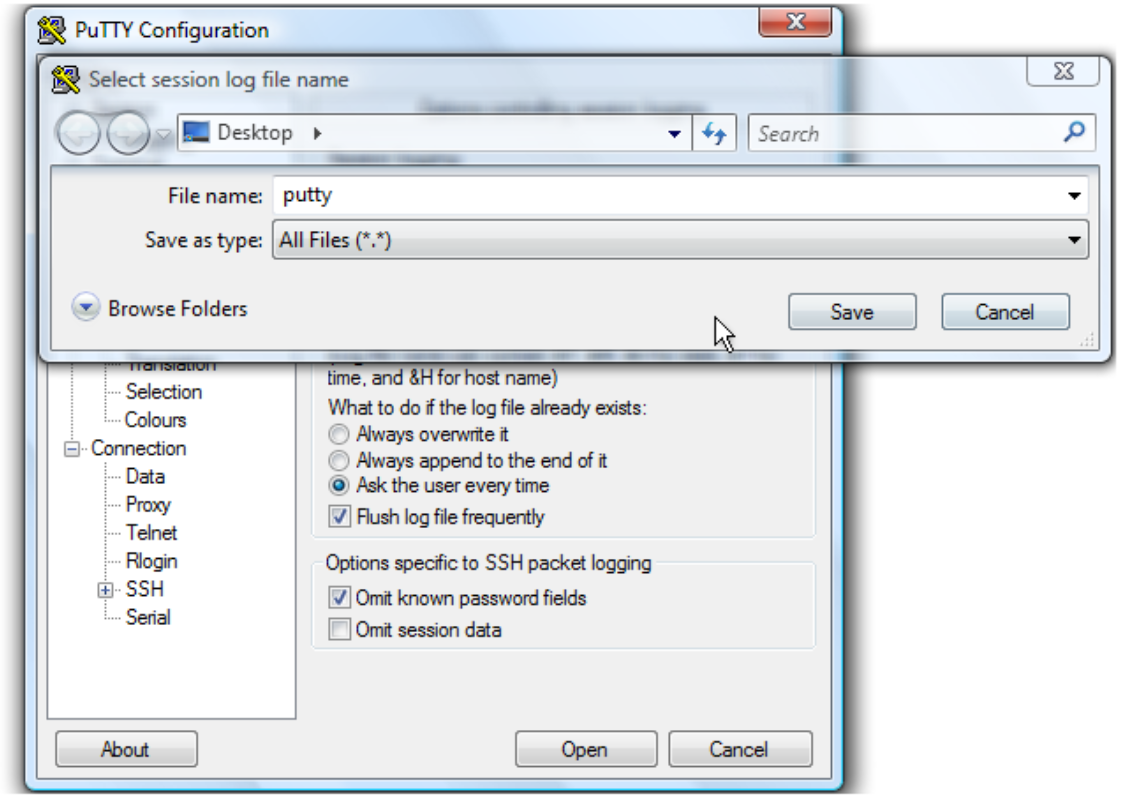
- 单击 Save。
- 确保选中 Ask the user every,然后单击 Open 以开始会话。
- 键入用户名,然后按 <Enter> 键。

- 键入密码,然后按 <Enter> 键。
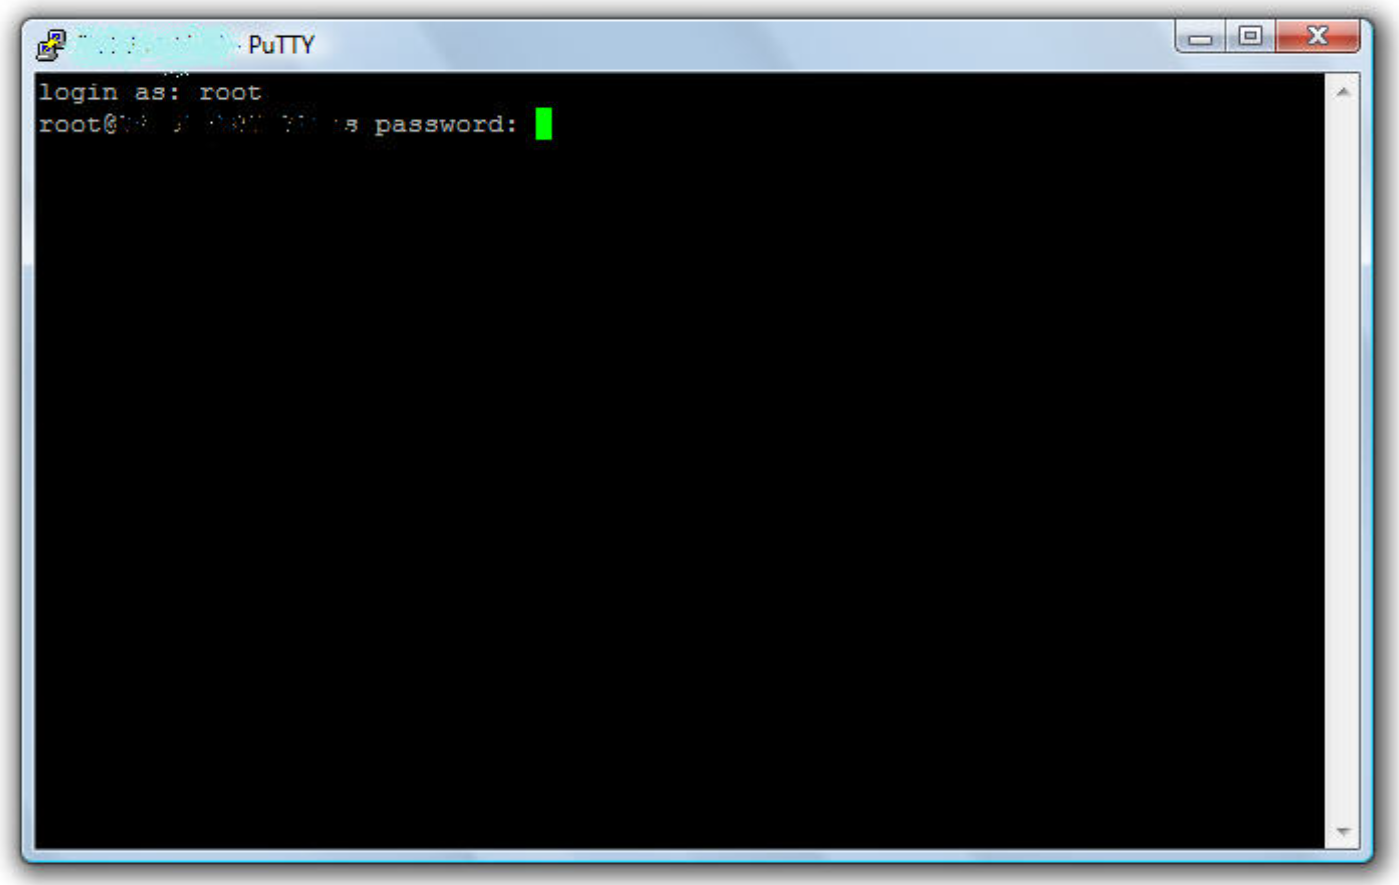
- 对于 Brocade 交换机,请运行 supportshow命令以收集交换机日志。
- 对于 Cisco 交换机,请运行 show tech-support details | no-more命令以收集交换机日志。
- 键入 Exit,然后按 <Enter> 键以关闭 PuTTY。
日志文件现在保存到桌面。
本教程到此结束。您现在知道如何创建 PuTTY 会话的日志文件。
Additional Information
本文已在 DELL EMC 社区网络 (ECN) 上升级为 HVC: https://community.emc.com/docs/DOC-56597
Article Properties
Affected Product
Connectrix MDS-Series
Last Published Date
01 Sep 2023
Version
4
Article Type
How To