Secure Connect Gateway Virtual-Edition (SCG-VE): How to install SCG in a dual-NIC configuration
Summary: This article explains how to install Secure Connect Gateway in a dual NIC configuration.
This article applies to
This article does not apply to
Instructions
If Secure Connect Gateway Virtual Edition Appliance is installed in a DMZ, sometimes its required to have two network interfaces:
Routing:
Since only one IP "default gateway" (router) can be configured, static routes may be required. There are two options:
Name resolution:
The SCG instance must be able to resolve the names of the SCG backend servers at Dell (even if connected using a proxy). If the DNS server is internal only and cannot resolve external domains, add the SCG hostnames and IP addresses to the /etc/hosts file on the SCG VM. See the "Secure Connect Gateway Virtual Edition User’s Guide" section “Network Requirements" for a list of backend servers at Dell.
Installation Procedure:
- The first interface (eth0) is used for "internal" communication to the managed devices (storage arrays, servers, appliances), for example: Customer "management" LAN.
- The second interface (eth1) is used for "external" communication to Dell over the Internet, or communication to an optional HTTP proxy for onward connection to Dell over the Internet.
Routing:
Since only one IP "default gateway" (router) can be configured, static routes may be required. There are two options:
- Configure the default gateway IP to be a router accessible on the "internal" LAN (eth0). Customer internal subnets are accessible, and static routes are required to reach the Dell backend infrastructure directly over the Internet. See below for examples.
If the Internet connection is using a proxy and the proxy is in the same subnet as the eth0 interface no static routes will be required.
- Configure the default gateway IP to be a router accessible on the "external" LAN (eth1). Direct Internet connectivity to the Dell backend will be possible, but you may need static routes to reach additional "internal" subnets.
Name resolution:
The SCG instance must be able to resolve the names of the SCG backend servers at Dell (even if connected using a proxy). If the DNS server is internal only and cannot resolve external domains, add the SCG hostnames and IP addresses to the /etc/hosts file on the SCG VM. See the "Secure Connect Gateway Virtual Edition User’s Guide" section “Network Requirements" for a list of backend servers at Dell.
Installation Procedure:
- Deploy the SCG-VE OVF or VHD image as per the "Secure Connect Gateway User's Guide."
- For VMware:
In the deploy template, configure the network for the "internal" (management) network.
IP, subnet mask, default gateway (if internal), DNS.
Start the deployed VM.
- For Hyper-V:
Start the VM and configure network interface IP, subnet mask, default gateway (if internal), DNS during the first boot process, as per the "Secure Connect Gateway User's Guide."
Complete the first configuration wizard.
- Shut down the VM (Login as root and run "shutdown -h now")
- Manually add a second virtual network interface from the VMware or Hyper-V management application.
- VMware: Recommended interface type "VmxNet3"
- Hyper-V: Recommended interface type "Network Adapter"
- Boot the VM and login to the console as root.
- Set up the second NIC interface:
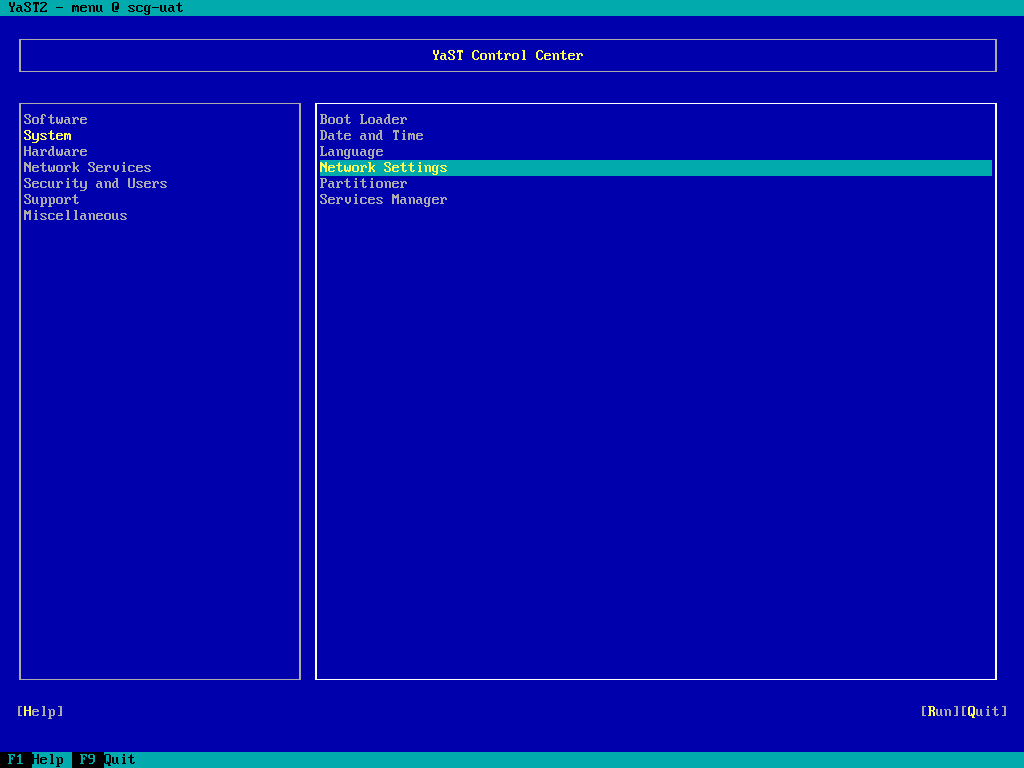
- Type "yast" and press return, to run the yast configuration tool.
- Select System > Network Settings, and press enter:
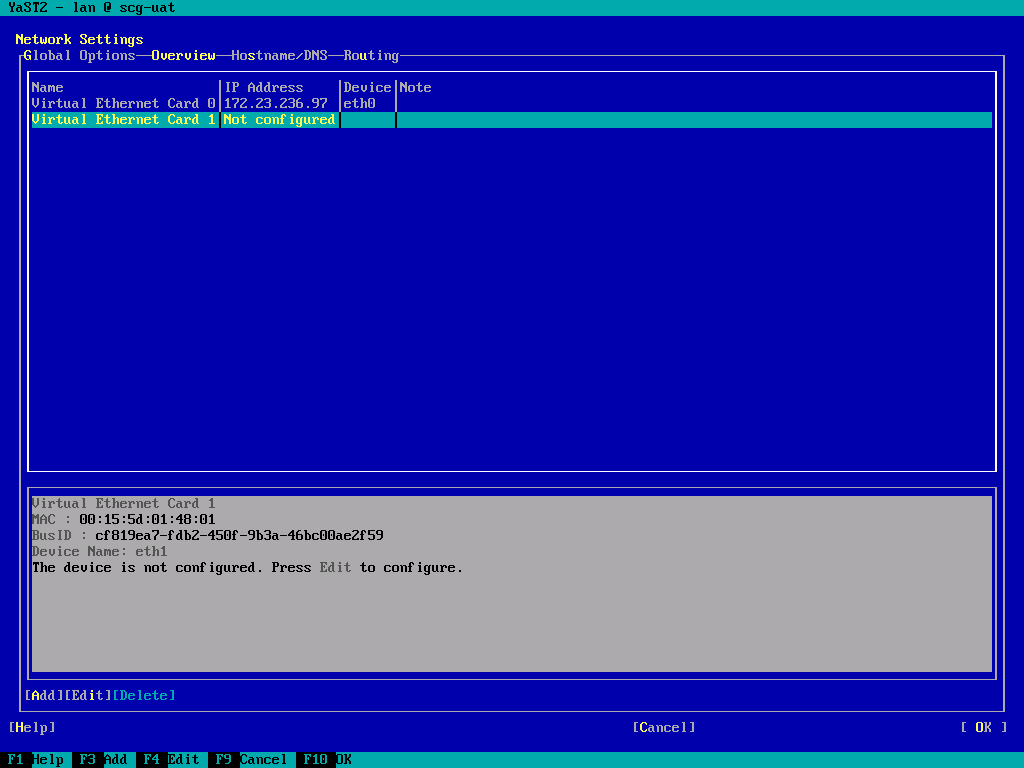
- Tab around to the list of NICs, and highlight the newly added (unconfigured) interface, then tab to "Edit" and press return.
(Screenshot from Hyper-V instance). - Set the IP address and Subnet mask. Leave the hostname blank.
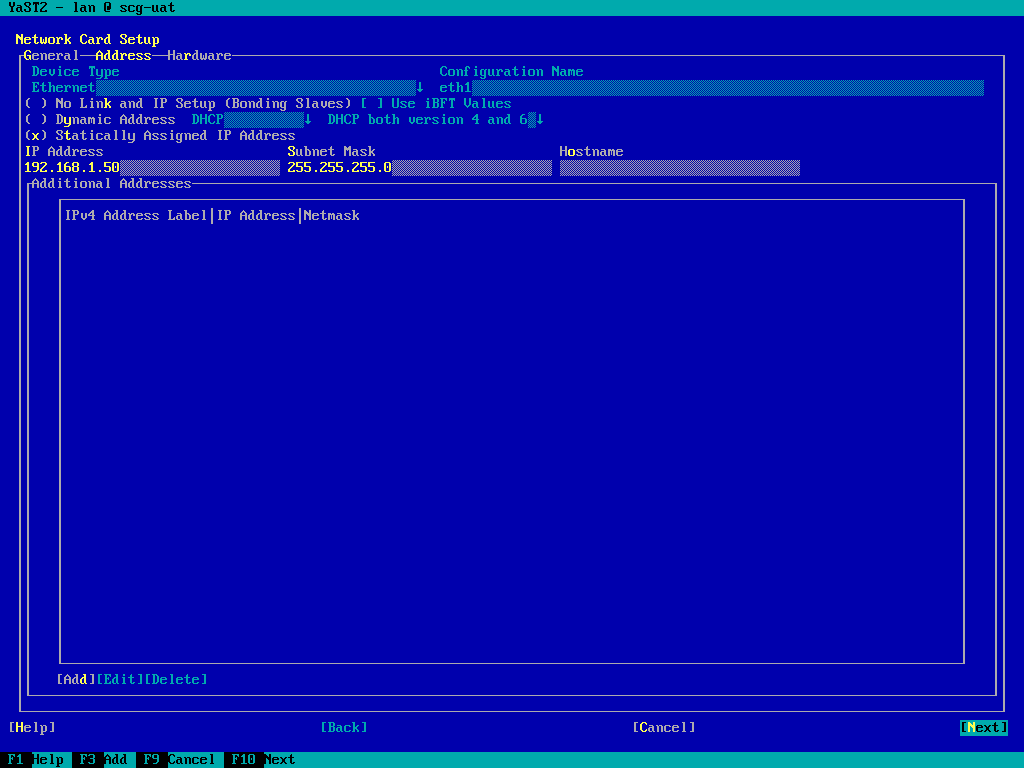
- TAB to "Next" and press return.
- Accept the "Really leave the hostname blank?" Prompt:
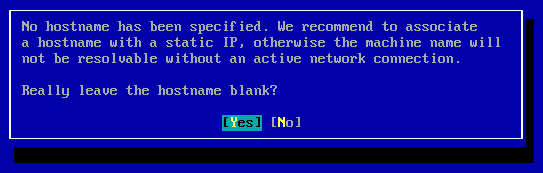
NOTE: The hostname is associated with the management (eth0) interface, and is not required for eth1.
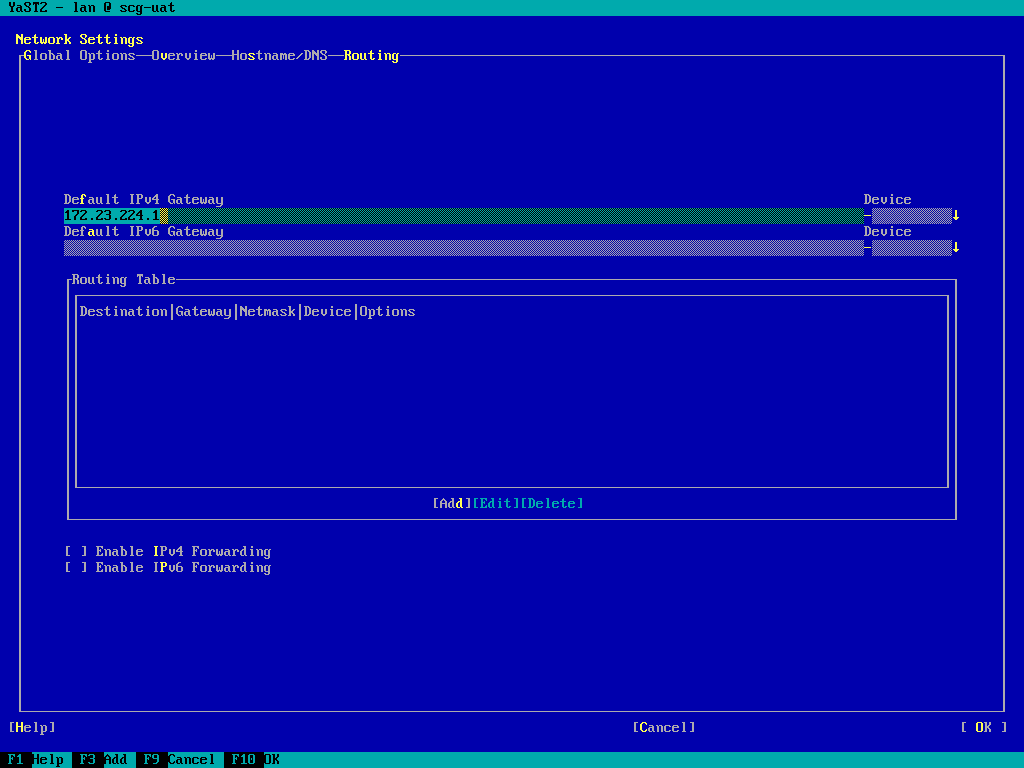
- TAB around to the top row options and right arrow to the "Routing" page:
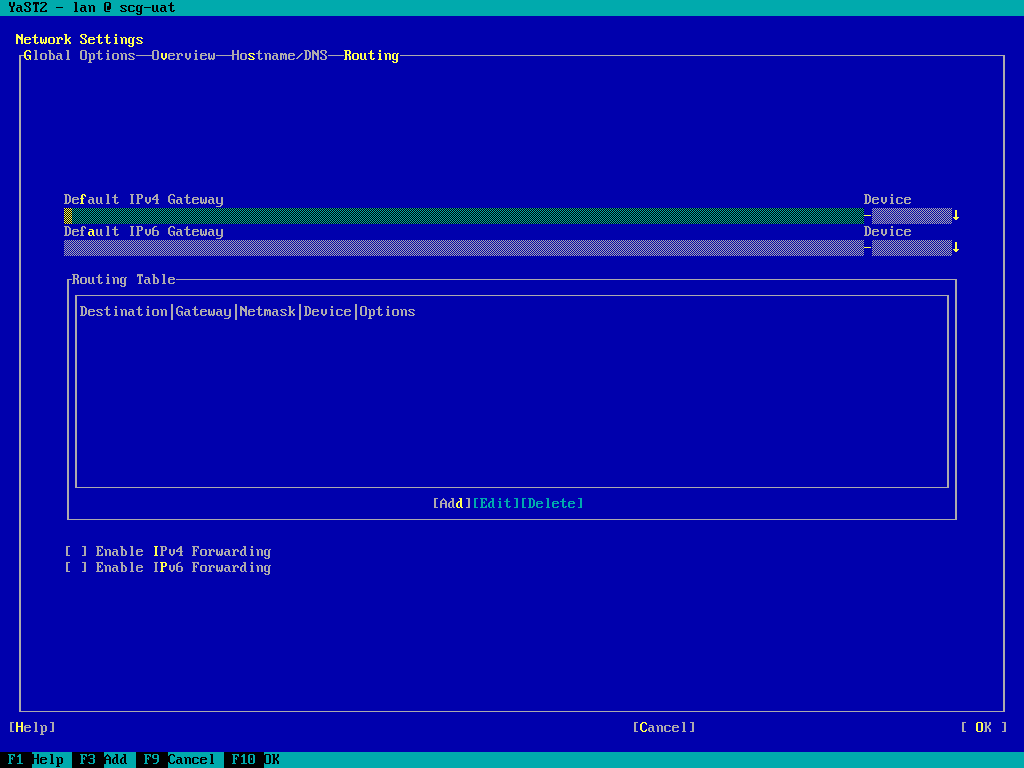
- Add or validate the "Default IPv4 Gateway"
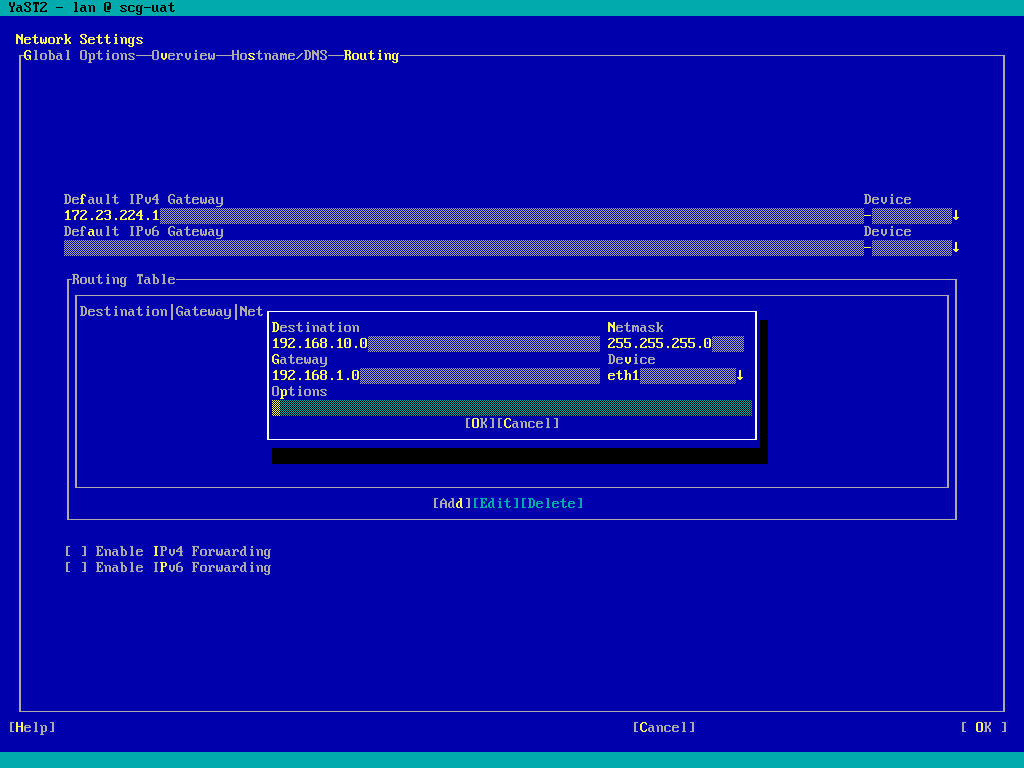
- TAB around to "Add" and press return, add any required static routes:
NOTE: IP forwarding should NOT be enabled.
- If you set the “Default Gateway" to an “internal” router, add static routes for the Dell SCG backend. See the “Additional Information” section below for examples.
- If you set the “Default Gateway” to an “external” router, add static routes for any additional internal subnets containing devices which will be added to SCG.
- TAB to “OK” to complete the network configuration:

- TAB around to “Quit” and press return, or press F9 to exit yast.
- You should now be able to browse to the SCG WebUI on port 5700 and complete the gateway registration.
Additional Information
Dell SCG backend - static route examples:
See the “Secure Connect Gateway Virtual Edition User’s Guide” section “Network Requirements” for a list of backend servers at Dell. Resolving these to their IPv4 addresses a set of static routes can be constructed. These can be implemented as a minimal set of “class B” routes, or a more specific set of “class C” routes.
Example using class B routes:
Example using class C routes:
See the “Secure Connect Gateway Virtual Edition User’s Guide” section “Network Requirements” for a list of backend servers at Dell. Resolving these to their IPv4 addresses a set of static routes can be constructed. These can be implemented as a minimal set of “class B” routes, or a more specific set of “class C” routes.
Example using class B routes:
128.221.0.0/255.255.0.0
137.69.0.0/255.255.0.0
152.62.0.0/255.255.0.0
168.159.0.0/255.255.0.0
Example using class C routes:
128.221.204.0/255.255.255.0
128.221.236.0/255.255.255.0
137.69.120.0/255.255.255.0
152.62.45.0/255.255.255.0
152.62.177.0/255.255.255.0
168.159.209.0/255.255.255.0
168.159.224.0/255.255.255.0