How to Uninstall VMware Carbon Black Cloud Endpoint
Summary: VMware Carbon Black Cloud Endpoint can be uninstalled by following these instructions for Windows, Mac, and Linux.
Symptoms
VMware Carbon Black Cloud Endpoint may be uninstalled to:
- Troubleshoot the product.
- Address operating system incompatibilities.
- Fix licensing discrepancies.
This article covers the steps to uninstall the product.
Affected Products
- VMware Carbon Black Cloud Endpoint
Affected Operating Systems
- Windows
- Mac
- Linux
Cause
Not applicable.
Resolution
VMware Carbon Black Onboarding Part 4: Uninstall and Troubleshooting
Duration: 03:03
Closed captions: Available in multiple languages
Click Windows, Mac, or Linux for the steps to uninstall VMware Carbon Black Cloud Endpoint.
Windows
VMware Carbon Black Cloud Endpoint on Windows can be uninstalled through the:
- User interface (UI)
- Command-line interface (CLI)
- VMware Carbon Black Cloud
Click the preferred method for more information.
To uninstall:
- The UI uninstall method is only available for devices without an uninstall code that is enabled in policy. For more information, reference How to Manage the VMware Carbon Black Cloud Endpoint Uninstall Code .
- For devices using the uninstall code policy, use either the CLI or Cloud method.
- As an administrator, right-click the Windows start menu and then click Run.
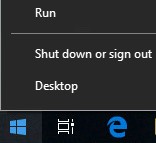
- In the Run UI, type
appwiz.cpland then press OK.
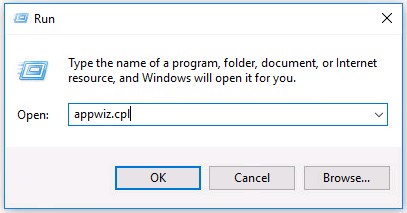
- In Programs and Features, double-click Cb Defense Sensor [BIT].

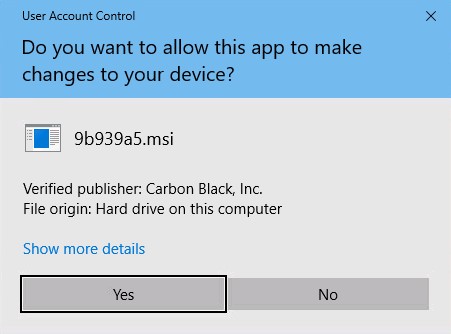
- Click Yes.

- If User Account Control (UAC) is enabled, click Yes.
To uninstall:
- As an administrator, right-click the Windows start menu and then click Run.
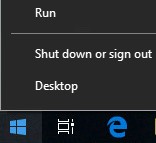
- In the Run UI, type
cmdand then press CTRL+SHIFT+ENTER. This runs Command Prompt as an admin.

- In Command Prompt, type
cd [DIRECTORY]\Conferand then press Enter.

[DIRECTORY]represents the path where the Confer directory resides.- The path in the example image may differ in your environment.
- Type
uninstall.exe /uninstall [UNINSTALL CODE]and then press Enter.

[UNINSTALL CODE]represents the device uninstall code.- If the device uninstall code is disabled, it should be omitted from the command. For more information, reference How to Manage the VMware Carbon Black Cloud Endpoint Uninstall Code .
- The example device uninstall code will differ in your environment.
- Type
exitand then press Enter.

To uninstall:
- In a web browser, go to [REGION].conferdeploy.net.
- Americas = https://defense-prod05.conferdeploy.net/
- Europe = https://defense-eu.conferdeploy.net/
- Asia Pacific = https://defense-prodnrt.conferdeploy.net/
- Australia and New Zealand = https://defense-prodsyd.conferdeploy.net
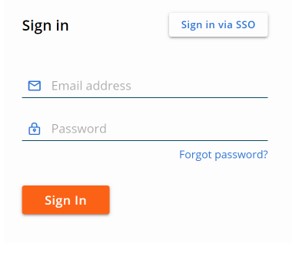
- Sign In to the VMware Carbon Black Cloud.
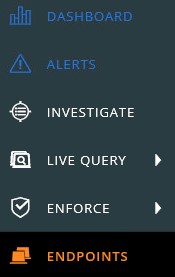
- In the left menu pane, click Endpoints.
- Locate and then check the targeted DEVICE NAME.

- Click Take Action and then select Uninstall.
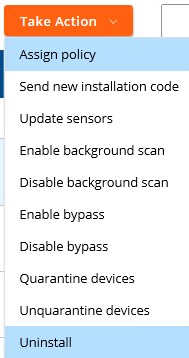
- Click Uninstall.

Mac
VMware Carbon Black Cloud Endpoint can be uninstalled on Mac through the:
- User Interface (UI)
- Terminal
- VMware Carbon Black Cloud Endpoint Cloud
Click the preferred method for more information.
To uninstall:
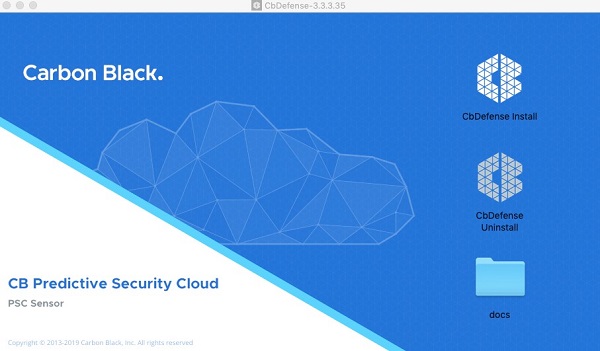
- Double-click
confer_installer_mac-[VERSION].dmg.

[VERSION]is the sensor version. The sensor version may differ from the example image.- To obtain the installer, reference How to Download the VMware Carbon Black Cloud Endpoint Sensor .
- Double-click CbDefense Uninstall.
- If prompted, click Open. Otherwise, go to Step 4.
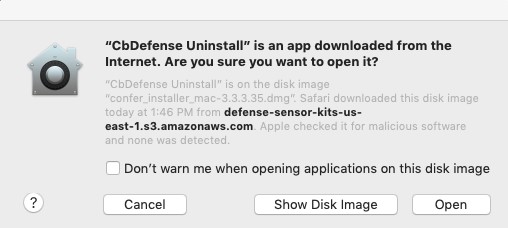
- Click Yes - Uninstall.

- If prompted, populate the uninstall code and then click Confirm. Otherwise, go to Step 6.

- If the endpoint uninstall code is not enabled in your environment, this prompt does not appear. For more information, reference How to Manage the VMware Carbon Black Cloud Endpoint Uninstall Code .
- The endpoint uninstall code in the example image will differ in your environment.
- Populate the User Name and Password. Once populated, click OK.
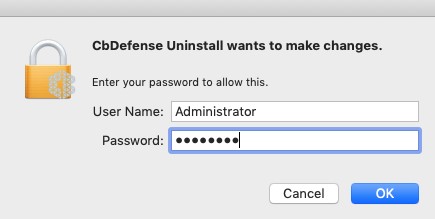
- Click Close.
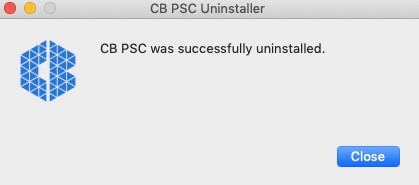
To uninstall:
- From the Apple menu, click Go and then select Utilities.
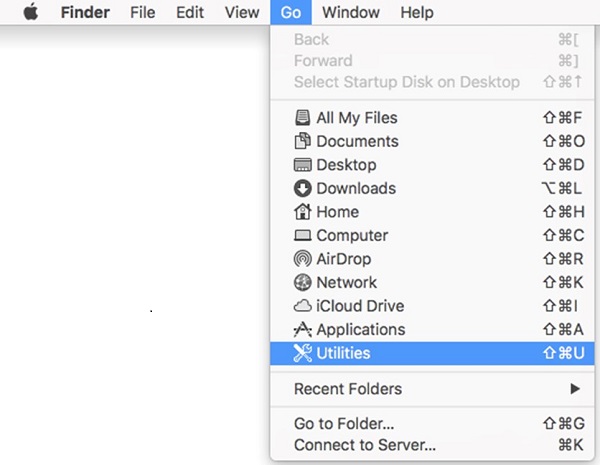
- In the Utilities menu, double-click Terminal.
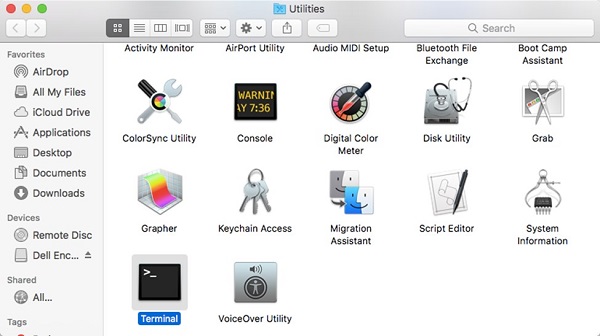
- In terminal, type
sudo /Applications/Confer.app/uninstall -y -c [UNINSTALL CODE]and then press Enter.

[UNINSTALL CODE]represents the device uninstall code.- If the device uninstall code is disabled, it may be omitted from the command. For more information, reference How to Manage the VMware Carbon Black Cloud Endpoint Uninstall Code .
- The endpoint uninstall code in the example image will differ in your environment.
- Populate the Password for the account being used and then press Enter.

- Once uninstallation has completed, type
exitand then press Enter.

To uninstall:
- In a web browser, go to [REGION].conferdeploy.net.
- Americas = https://defense-prod05.conferdeploy.net/
- Europe = https://defense-eu.conferdeploy.net/
- Asia Pacific = https://defense-prodnrt.conferdeploy.net/
- Australia and New Zealand = https://defense-prodsyd.conferdeploy.net
- Sign In to the VMware Carbon Black Cloud.

- In the left menu pane, click Endpoints.
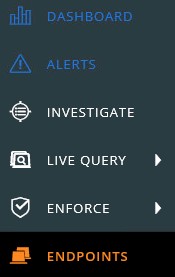
- Locate and then check the targeted DEVICE NAME.

- Click Take Action and then select Uninstall.

- Click Uninstall.

Linux
Click the appropriate operating system for the steps to uninstall VMware Carbon Black Cloud Endpoint.
To uninstall:
- Open Terminal.

- Type
sudo rpm -e cb-psc-sensorand then press Enter.

- Populate the password for the account being used and then press Enter.

- Once uninstallation has completed, type
exitand then press Enter.

To uninstall:
- Open Terminal.

- Type
sudo dpkg –purge cb-psc-sensorand then press Enter.

- Populate the password for the account being used and then press Enter.

- Once uninstallation has completed, type
exitand then press Enter.

To contact support, reference Dell Data Security International Support Phone Numbers.
Go to TechDirect to generate a technical support request online.
For additional insights and resources, join the Dell Security Community Forum.
