如何禁用 Windows 更新并停止 Windows 上的自动安装
Summary: 如何在运行 Windows 10 或 11 的戴尔计算机上停止或暂停 Windows 更新,以及使用集成工具管理更新、驱动程序和 BIOS 设置的分步指南。
Instructions
受影响的操作系统:
- Windows 10
- Windows 11
在 Windows 中,客户可以决定何时以及如何获取最新的更新,以保证其设备平稳、安全地运行。更新后,Windows 将获得最新的修复和安全改进,从而帮助设备高效运行并保持受保护。通常,重新启动设备将完成更新。安装更新时,应插入设备。但是,Windows Update 可能正在自动安装更新,客户可能尚未准备好接受,并希望避免自动更新到计算机。
最佳做法是保持自动更新已启用并运行,以防止计算机出现问题,并确保应用最新的安全更新。禁用自动更新可能会导致计算机易受攻击。
Windows Home
Windows Home 无法完全停止更新。它们有助于确保您的设备安全可靠。无论计算机更新设置如何,最终都必须下载和安装更新。下面介绍如何暂时暂停更新的下载和安装。
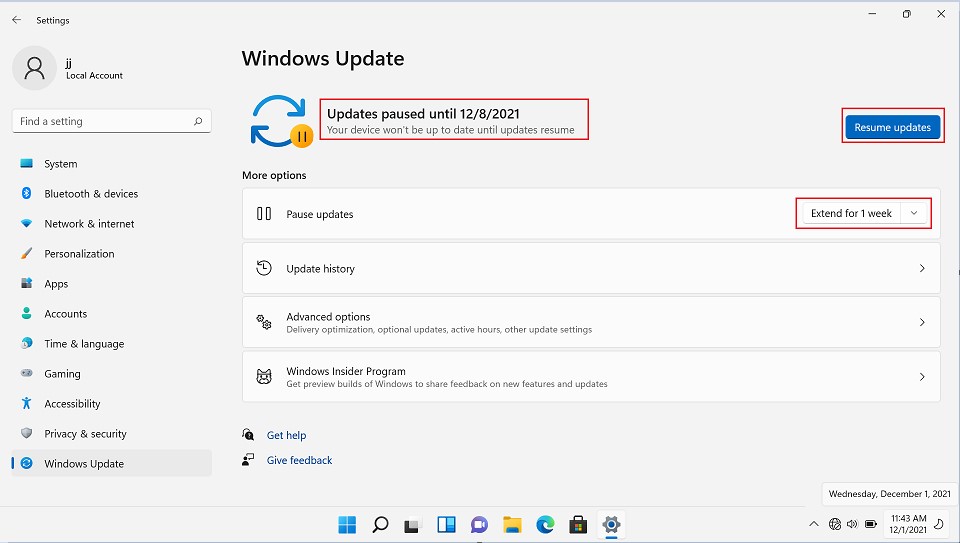
选择 开始>设置>Windows 更新。在 Pause updates 旁边的下拉列表中,选择 Pause for 1 week,然后单击 Pause for 1 week。

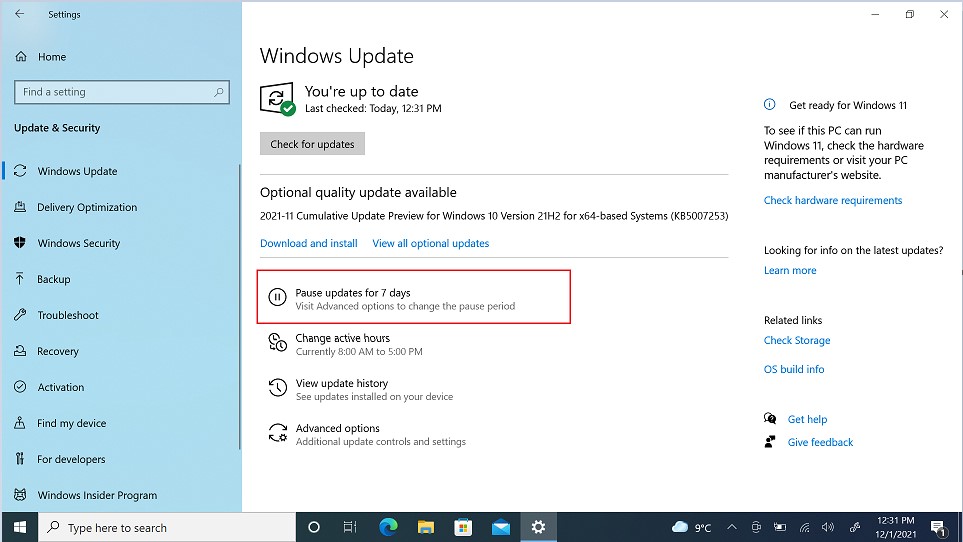
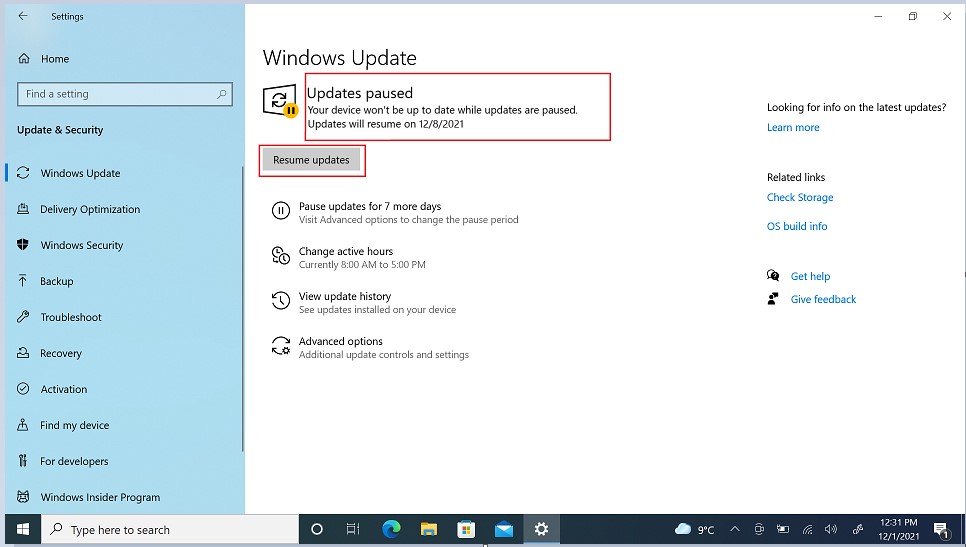
在 Windows 10 2019 年 11 月更新(版本 1909)或更高版本中,或者在适用于 Pro 或 Enterprise 的 Windows 版本 1809 中,选择开始>设置>更新和安全 >Windows 更新。选择 暂停更新 7 天 。
Windows Pro
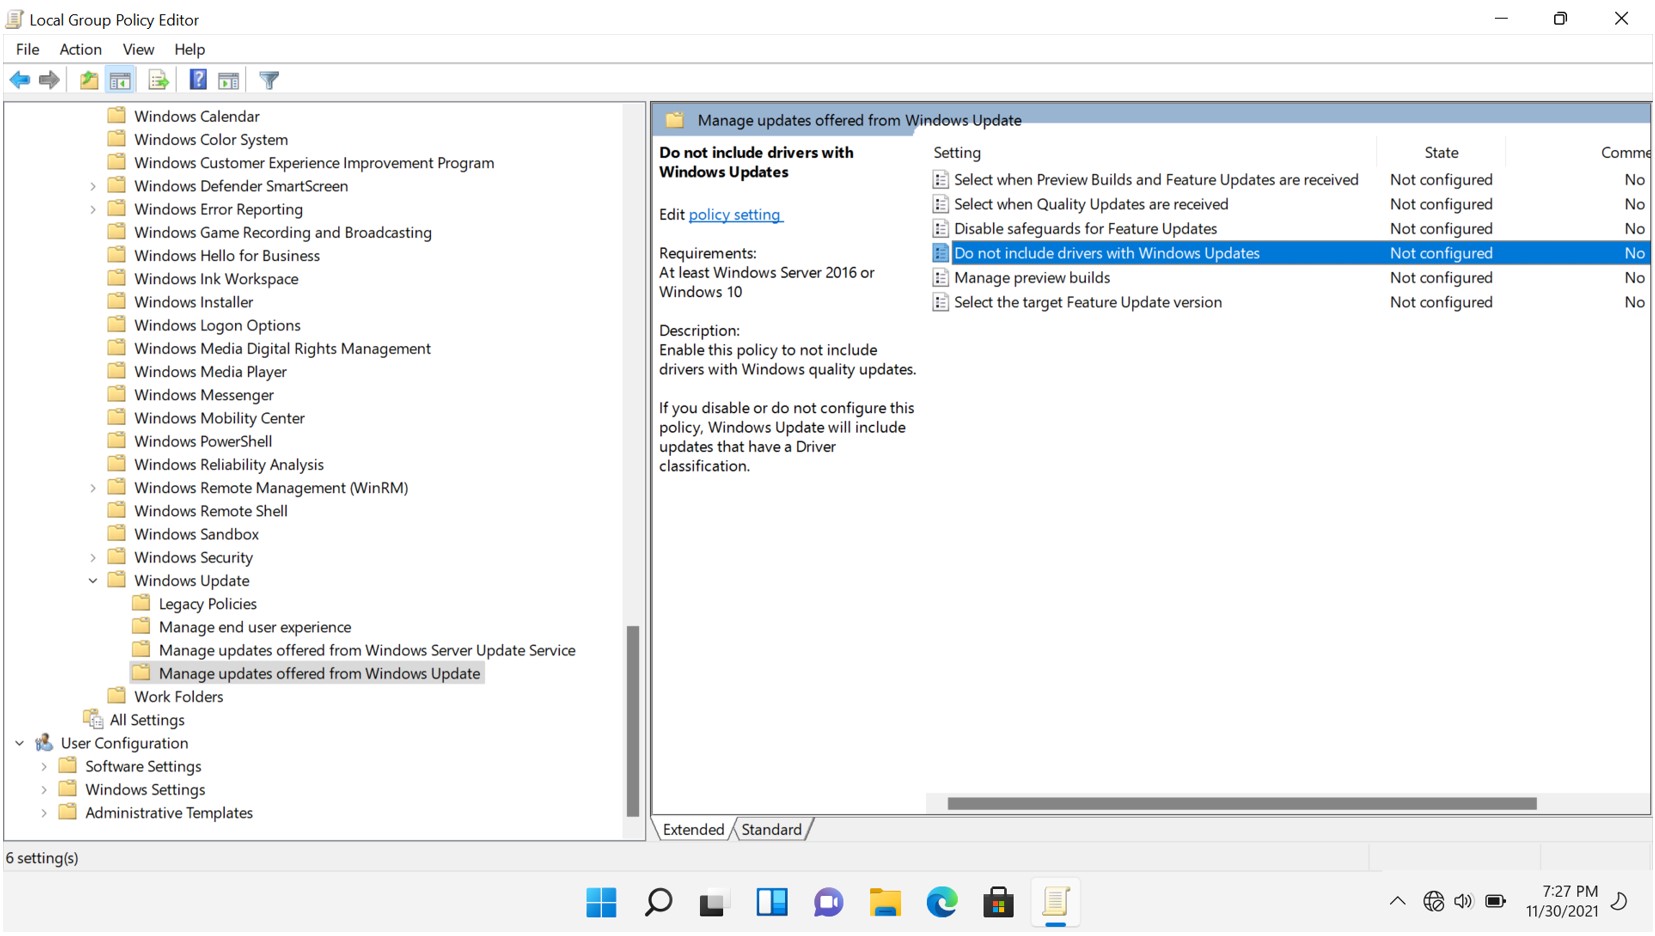
Windows Pro 可以通过组策略控制 Windows 更新行为。停止从 Windows 更新获取驱动程序和 BIOS 更新的最简单方法是:通过以下步骤使用本地组策略编辑器:
- 使用 Windows 键 + R 键盘快捷方式打开 Run 命令。
- 键入 gpedit.msc,然后单击 OK 以打开 Local Group Policy Editor。
- 浏览以下路径:
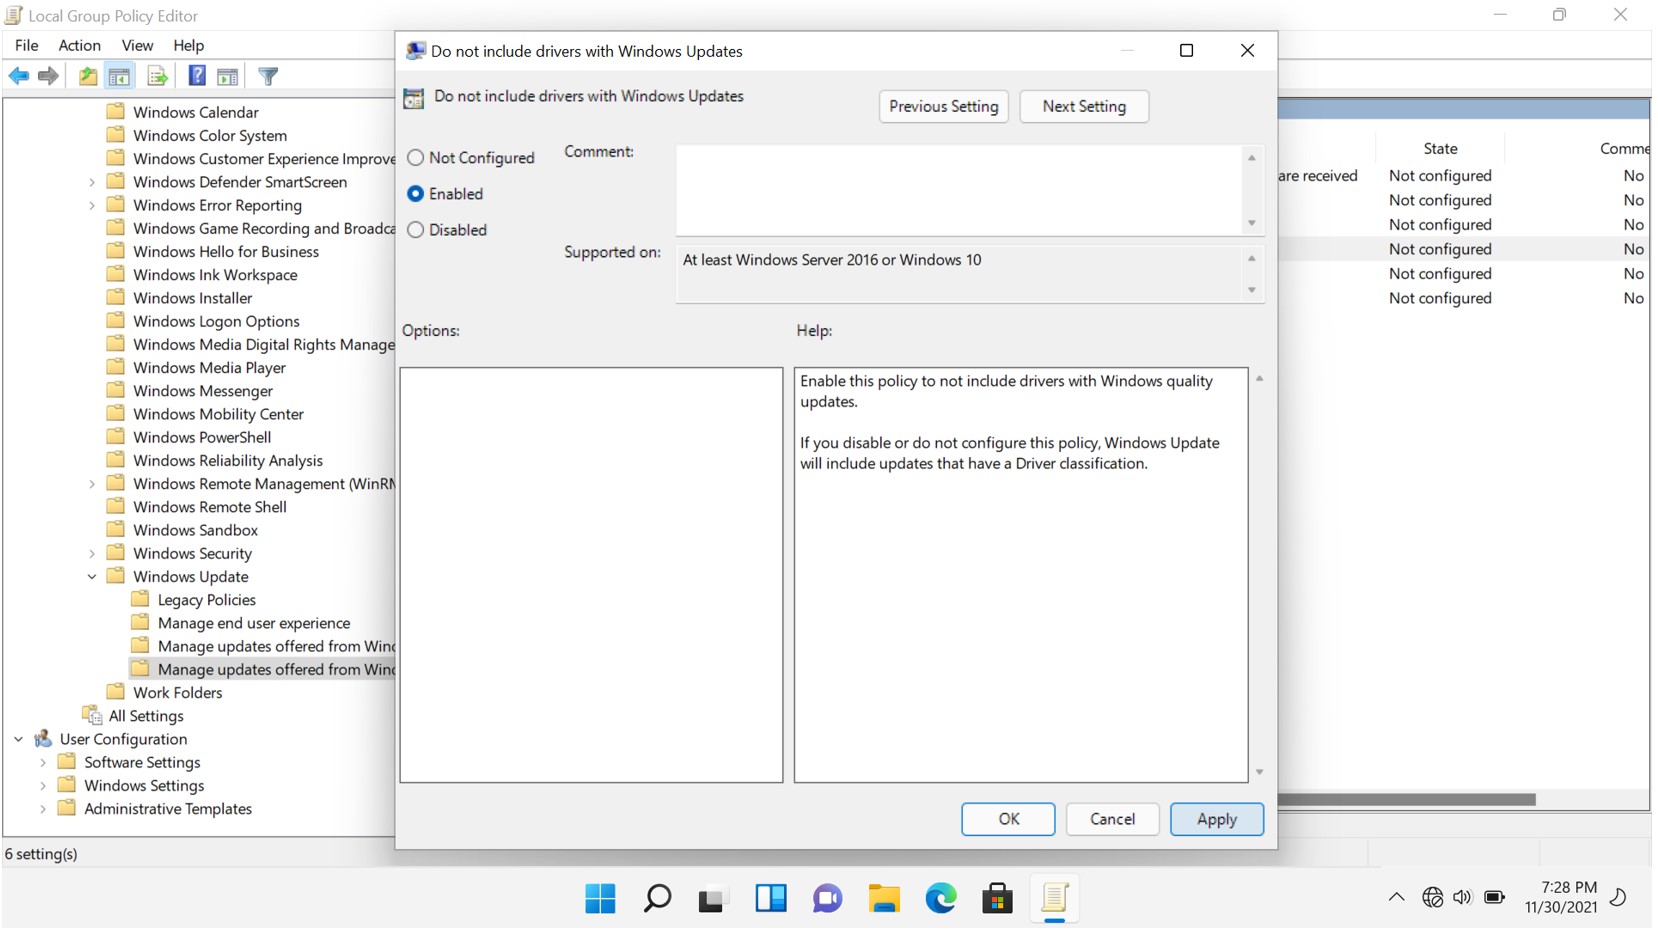
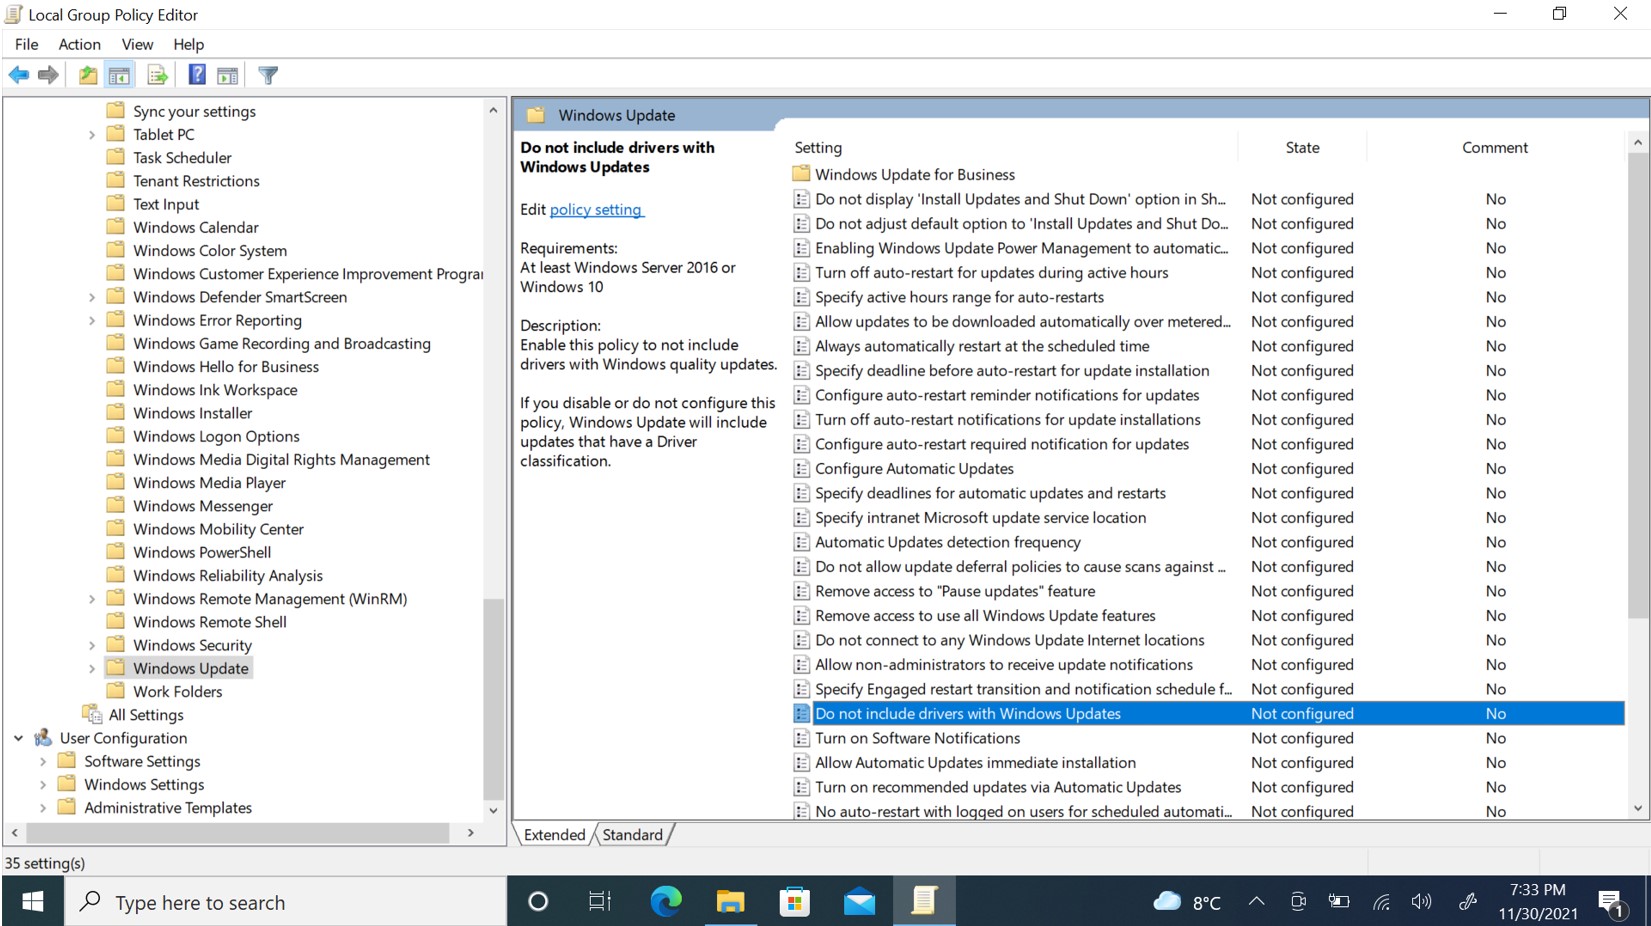
- 计算机配置>管理模板>Windows 组件>Windows 更新>管理 Windows Update 提供的更新
- 在右侧,双击 Do not include drivers with Windows Update 策略。
- 选择 Enabled 选项。
- 单击 Apply。
- 单击 OK。
完成这些步骤后,您的计算机将继续收到安全和其他修补程序,但驱动程序将被排除。
- 使用 Windows 键 + R 键盘快捷方式打开 Run 命令。
- 键入 gpedit.msc,然后单击 OK 以打开 Local Group Policy Editor。
- 浏览以下路径:
- 计算机配置>管理模板>Windows 组件>Windows 更新
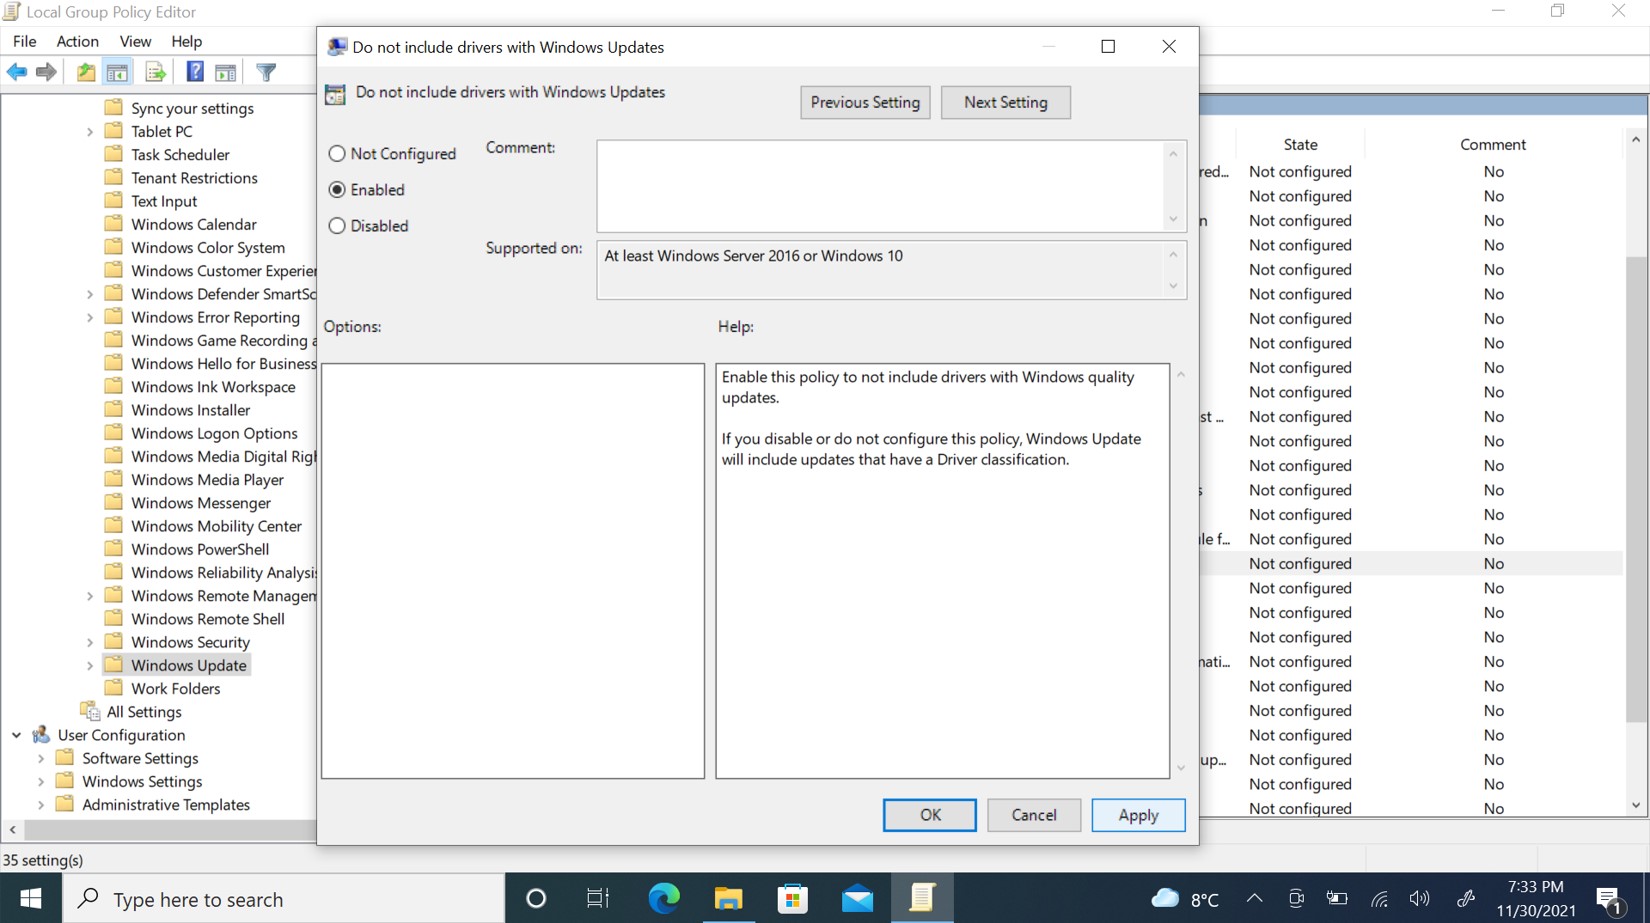
- 在右侧,双击 Do not include drivers with Windows Update 策略。
- 选择 Not Configured 选项。
- 单击 Apply。
- 单击 OK。
完成这些步骤后,您的计算机将获得安全性和其他修补程序(包括驱动程序)。
- 使用 Windows 键 + R 键盘快捷方式打开 Run 命令。
- 键入 gpedit.msc,然后单击 OK 以打开 Local Group Policy Editor。
- 浏览以下路径:
- 计算机配置>管理模板>Windows 组件>Windows 更新
- 在右侧,双击 Do not include drivers with Windows Update 策略。
- 选择 Enabled 选项。
- 单击 Apply。
- 单击 OK。
完成这些步骤后,您的计算机将继续收到安全和其他修补程序,但驱动程序将被排除。
- 使用 Windows 键 + R 键盘快捷键打开 运行 命令。
- 键入 gpedit.msc,然后单击 OK 以打开 Local Group Policy Editor。
- 浏览以下路径:
- 计算机配置>管理模板>Windows 组件>Windows 更新
- 在右侧,双击 Do not include drivers with Windows Update 策略。
- 选择 Not Configured 选项。
- 单击 Apply。
- 单击 OK。
完成这些步骤(包括驱动程序)后,您的计算机将获得安全性和其他修补程序,包括驱动程序。
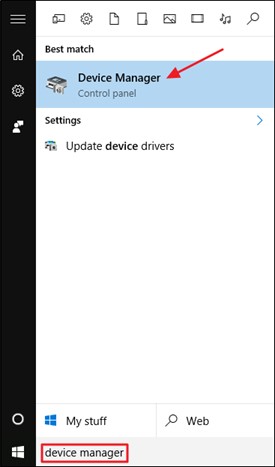
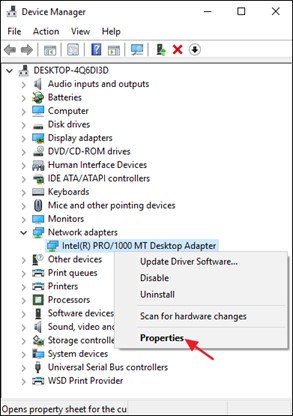
- 在 Windows 搜索栏上键入 设备管理器 ,然后单击 设备管理器 应用程序。
- 找到要阻止更新的驱动程序,右键单击它并选择 “属性”。
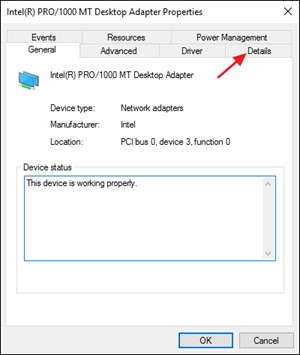
- 在驱动程序的属性窗口中,单击 详细信息 选项卡
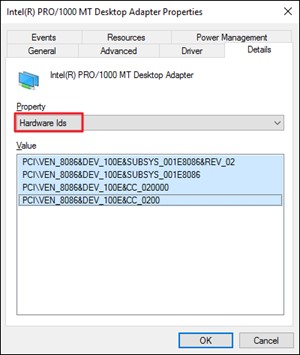
- 从 属性 下拉菜单中,选择 硬件 ID
- 复制 值 字段中显示的 ID。
- 按 Windows + R 打开 运行 命令。
- 键入 gpedit.msc ,然后单击“ 确定 ”以打开 本地组策略编辑器
- 转至 计算机配置>管理模板>系统 >设备安装>设备安装限制
- 单击 阻止安装与这些设备 ID 中的任何一个匹配的设备

- 在策略窗口中,选择 Enabled 选项,然后单击 Show 按钮。
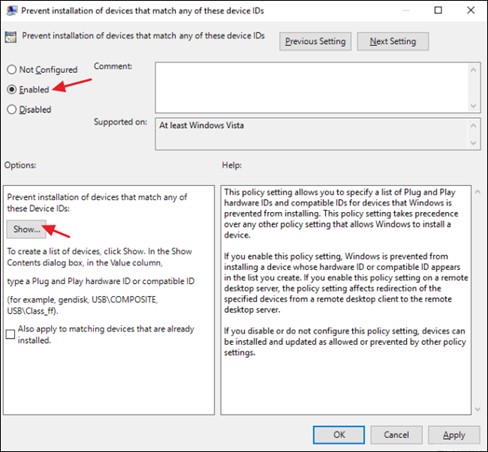
- 在 显示内容 窗口中,在值列中添加设备的硬件 ID(在步骤 5 中复制)。
