How to Create a Bootable WinPE USB for Dell Encryption Enterprise / Dell Encryption Personal
Summary: A Dell Data Security WinPE bootable USB may be created by following these instructions.
Symptoms
This article explains how to create a bootable Windows Pre-installation Environment (WinPE) for Dell Encryption Enterprise (formerly Dell Data Protection | Enterprise Edition) or Dell Encryption Personal (formerly Dell Data Protection | Personal Edition) using a USB storage device.
Affected Products:
Dell Encryption Enterprise
Dell Data Protection | Enterprise Edition
Dell Encryption Personal
Dell Data Protection | Personal Edition
Dell Data Protection | Server Edition
Affected Operating Systems:
Windows
Cause
Not applicable.
Resolution
A bootable WinPE USB requires:
- A Dell Data Security WinPE image.
- For more information, reference How to Download WinPE for Dell Encryption Enterprise or Dell Encryption Personal.
- A USB storage device.
- A third-party file compression utility.
- Examples of a third-party file compression utility include (but are not limited to):
- 7-Zip.
- Universal Extractor.
- WinRAR.
- Examples of a third-party file compression utility include (but are not limited to):
The process differs depending on whether the targeted endpoint is using UEFI or Legacy BIOS boot mode.
Click the appropriate boot mode for more information.
To create a UEFI bootable WinPE USB:
- Plug the USB storage device into the computer.
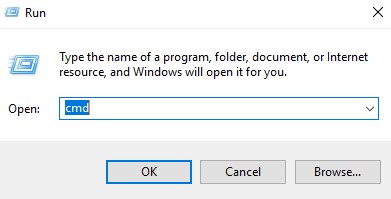
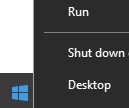
- Right-click the Windows Start menu and then click Run.

- In the Run UI, type
cmdand then press OK.
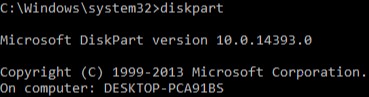
- Type
diskpartand then press Enter.

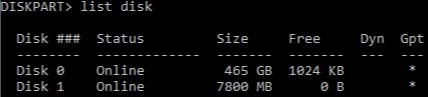
- Type
list diskand then press Enter.

- Identify the disk number that is assigned to the USB storage device.

- In the example, the disk number 1 is assigned to the USB storage device.
- DiskPart results will differ in your environment.
- Type
select disk [NUMBER]and then press Enter.

- Type
cleanand then press Enter.

- Type
create partition primaryand then press Enter.

- Type
select partition 1and then press Enter.

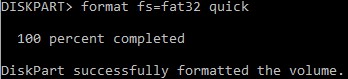
- Type
format fs=fat32quick and then press Enter.
- Type
activeand then press Enter.

- Type
assign letter=[LETTER]and then press Enter.

[LETTER] represents an unused drive letter that is assigned to the USB storage device. In the example, the letter F is assigned to the USB storage device. This may differ in your environment.
- From the downloaded WinPE image, use a third-party file compression utility to extract it.
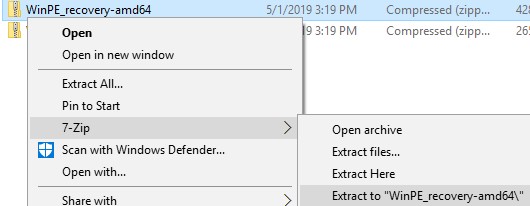
- UEFI bootable environments and Non-Volatile Memory Express (NVMe) drives require an x64 WinPE image.
- Your third-party file compression utility may differ from the screenshot example.
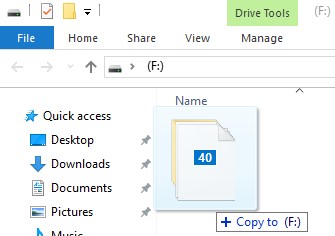
- Copy the extracted contents to the root of the USB storage device.
To create a legacy bootable WinPE USB:
- Plug the USB storage device into the computer.
- Right-click the Windows Start menu and then click Run.
- In the Run UI, type
cmdand then press OK.

- Type
diskpartand then press Enter.
- Type
list diskand then press Enter.
- Identify the disk number that is assigned to the USB storage device.

- In the example, the disk number 1 is assigned to the USB storage device.
- DiskPart results will differ in your environment.
- Type
select disk [NUMBER]and then press Enter.

- Type
cleanand then press Enter.

- Type
create partition primaryand then press Enter.

- Type
select partition 1and then press Enter.

- Type
format fs=ntfs quickand then press Enter.

- Type
activeand then press Enter.

- Type
assign letter=[LETTER]and then press Enter.

[LETTER] represents an unused drive letter that is assigned to the USB storage device. In the example, the letter F is assigned to the USB storage device. This may differ in your environment.
- From the downloaded WinPE image, use a third-party file compression utility to extract it.

- Non-Volatile Memory Express (NVMe) drives require an x64 WinPE image.
- Your third-party file compression utility may differ from the screenshot example.
- Copy the extracted contents to the root of the USB storage device.

To contact support, reference Dell Data Security International Support Phone Numbers.
Go to TechDirect to generate a technical support request online.
For additional insights and resources, join the Dell Security Community Forum.