Dell Encryption Personalで暗号化キーを手動でバックアップする方法
Summary: Dell Encryption PersonalおよびDell Data Protection Personal Editionの暗号化キーは、次の手順に従って手動でバックアップできます。
Symptoms
この記事では、Dell Encryption Personal(旧Dell Data Protection | Personal Edition)で暗号化キーを手動でバックアップする方法(キー エスクローとも呼ばれる)について説明します。
対象製品:
- Dell Encryption Personal
- Dell Data Protection | Personal Edition
対象オペレーティング システム:
- Windows
Cause
該当なし
Resolution
暗号化キーをバックアップする特定の手順については、該当するクライアント バージョンをクリックします。バージョン管理の詳細については、「Dell Encryption EnterpriseまたはDell Encryption Personalのバージョンを特定する方法」を参照してください。
注:
- Dell Encryption Personalでは、キーを正常にバックアップするために、(Dell Encryption Personalがインストールされているエンドポイントの外部にある)ストレージ デバイスが必要です。
- キーをバックアップするには、暗号化管理者パスワードが必要です。
- Windows PCにログインします。
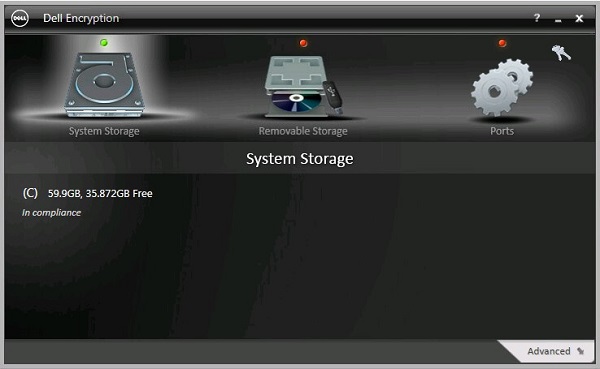
- Windowsのシステム トレイでDell Encryptionアイコンを右クリックし、次に[Open Dell Encryption]を選択します。
![[Open Dell Encryption]](https://supportkb.dell.com/img/ka06P000000smCrQAI/ka06P000000smCrQAI_ja_1.jpeg)
- 右上のキー アイコンをクリックします。
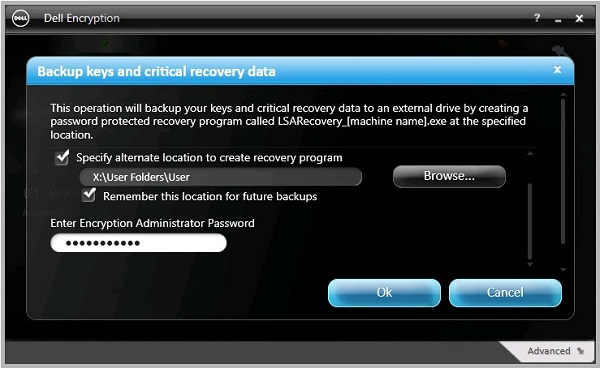
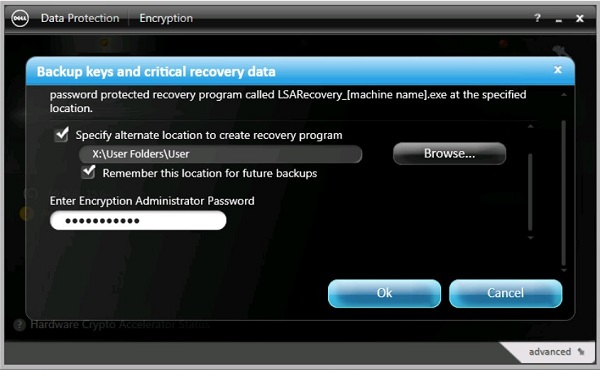
- [Backup keys and critical recovery data]メニューから、次の手順を実行します。
- [Specify alternate location to create recovery program]をオンにします。
- [Browse]をクリックして、セカンダリー ストレージ デバイスを参照します。
- 必要に応じて、[Remember this location for future backups]をオンにします。
- 暗号化管理者パスワードを入力します。
- 「OK」をクリックします。
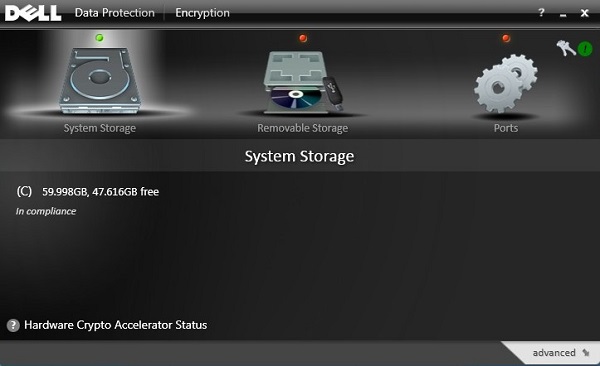
- バックアップが完了すると、キー アイコン(手順2)の横に緑色の「!」アイコンが表示されます。
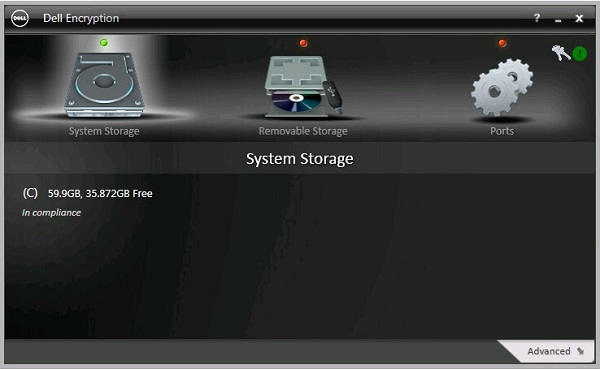
- 選択された場所に
LSARecovery_[NAME]が表示されます(手順4)。

注:
[NAME] = エンドポイントの名前
- Windows PCにログインします。
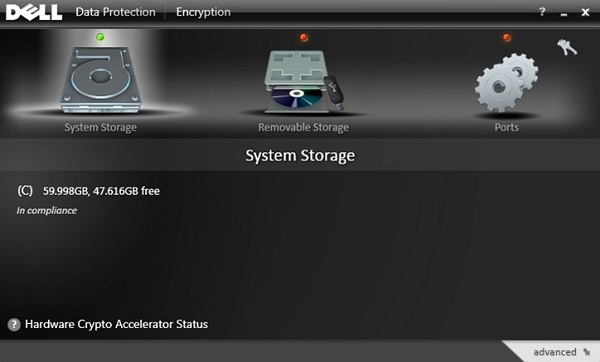
- Windowsのシステム トレイでDell Data Protection | Encryptionのアイコンを右クリックし、次に[Open Dell Data Protection | Encryption]を選択します。
![[Open Dell Data Protection Encryption]](https://supportkb.dell.com/img/ka06P000000smCrQAI/ka06P000000smCrQAI_ja_6.jpeg)
- 右上のキー アイコンをクリックします。
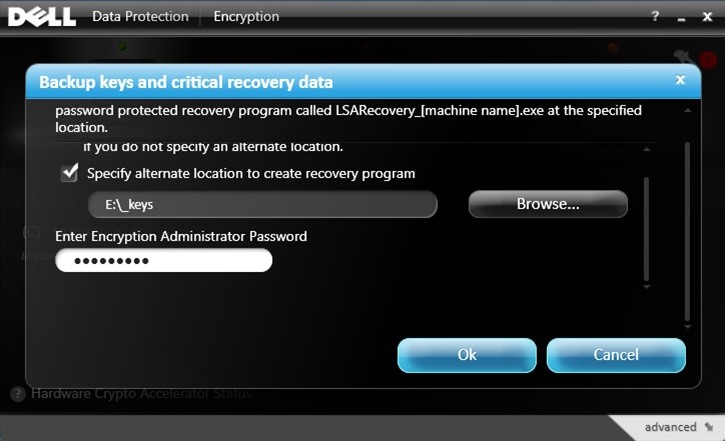
- [Backup keys and critical recovery data]メニューから、次の手順を実行します。
- [Specify alternate location to create recovery program]をオンにします。
- [Browse]をクリックして、セカンダリー ストレージ デバイスを参照します。
- 必要に応じて、[Remember this location for future backups]をオンにします。
- 暗号化管理者パスワードを入力します。
- 「OK」をクリックします。
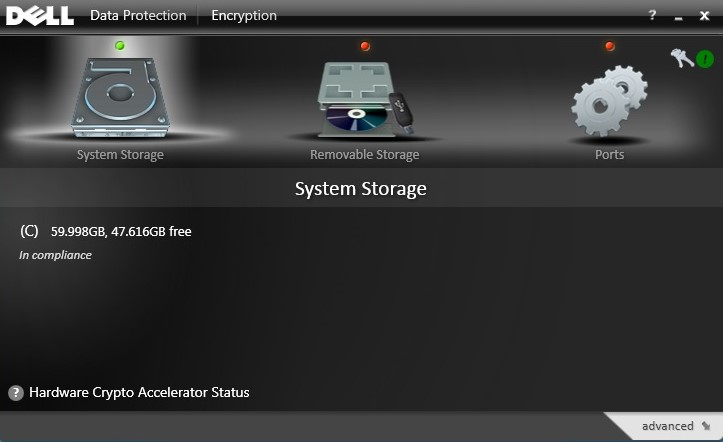
- バックアップが完了すると、キー アイコン(手順2)の横に緑色の「!」アイコンが表示されます。
- 選択された場所に
LSARecovery_[NAME]が表示されます(手順4)。

注:
[NAME] = エンドポイントの名前
- Windows PCにログインします。
- Windowsのシステム トレイでDell Data Protection | Encryptionのアイコンを右クリックし、次に[Open Dell Data Protection | Encryption]を選択します。
![[Open Dell Data Protection Encryption]](https://supportkb.dell.com/img/ka06P000000smCrQAI/ka06P000000smCrQAI_ja_11.jpeg)
- 右上のキー アイコンをクリックします。

- [Backup keys and critical recovery data]メニューから、次の手順を実行します。
- [Specify alternate location to create recovery program]をオンにします。
- [Browse]をクリックして、セカンダリー ストレージ デバイスを参照します。
- 暗号化管理者パスワードを入力します。
- 「OK」をクリックします。
- バックアップが完了すると、キー アイコン(手順2)の横に緑色の「!」アイコンが表示されます。
- 選択された場所に
LSARecovery_[NAME]が表示されます(手順4)。

注:
[NAME] = エンドポイントの名前
サポートに問い合わせるには、「Dell Data Securityのインターナショナル サポート電話番号」を参照してください。
TechDirectにアクセスして、テクニカル サポート リクエストをオンラインで生成します。
さらに詳しい情報やリソースについては、「デル セキュリティ コミュニティー フォーラム」に参加してください。
Additional Information
Affected Products
Dell EncryptionArticle Properties
Article Number: 000126842
Article Type: Solution
Last Modified: 24 Oct 2023
Version: 9
Find answers to your questions from other Dell users
Support Services
Check if your device is covered by Support Services.
Article Properties
Article Number: 000126842
Article Type: Solution
Last Modified: 24 Oct 2023
Version: 9
Find answers to your questions from other Dell users
Support Services
Check if your device is covered by Support Services.