How to Collect Logs for the VMware Carbon Black Cloud Endpoint Sensor
Summary: Learn how to collect logs for VMware Carbon Black Cloud Endpoint on Windows, Mac, or Linux by following these instructions.
This article applies to
This article does not apply to
This article is not tied to any specific product.
Not all product versions are identified in this article.
Instructions
This article discusses the methods for collecting VMware Carbon Black Cloud Endpoint sensor logs.
Affected Products:
- VMware Carbon Black Cloud Endpoint
Affected Versions:
- v3.3.0 and later (Windows)
- v3.1.0 and later (Mac)
- v2.5.0 and later (Linux)
Affected Operating Systems:
- Windows
- Mac
- Linux
Note: For information about capturing a HAR file for troubleshooting VMware Carbon Black Cloud, reference How to Capture a HAR File for VMware Carbon Black Cloud.
Click Windows, Mac, or Linux for more information about the log collection process.
Windows
Click the appropriate client version for specific installation steps. Reference How to Identify the VMware Carbon Black Cloud Endpoint Sensor Version for more information.
Note: For information about how to collect Windows logs using Live Response, reference How to Collect VMware Carbon Black Endpoint Sensor Logs Using Live Response.
- Log in to the affected endpoint.
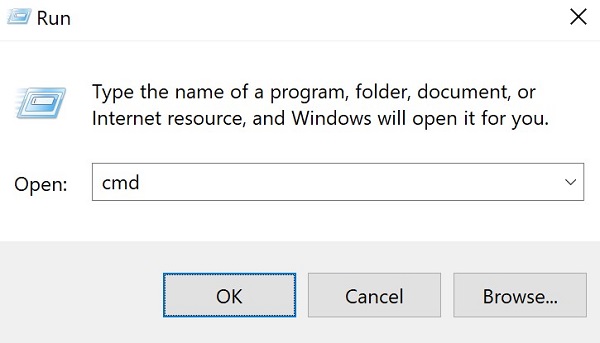
- Right-click the Windows start menu and then select Run.

- In the Run UI, type
cmdand then press CTRL+SHIFT+ENTER. This runs Command Prompt as an administrator.
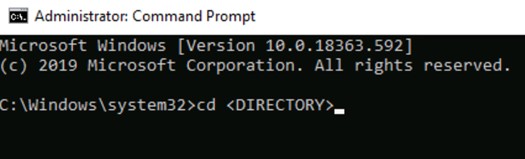
- In Command Prompt, type
CD [DIRECTORY]and then press Enter.
 Note:
Note:[DIRECTORY]= Directory of the VMware Carbon Black Cloud Endpoint sensor- The default installation
[DIRECTORY]isC:\Program Files\Confer.
- Type
repcli capture [DESTINATION DIRECTORY]and then press Enter.
 Note:
Note:[DESTINATION DIRECTORY]= Target destination for log bundle - In Windows Explorer, go to the
[DESTINATION DIRECTORY]used in Step 5. - Right-click
psc_sensor.zipand then click Rename.
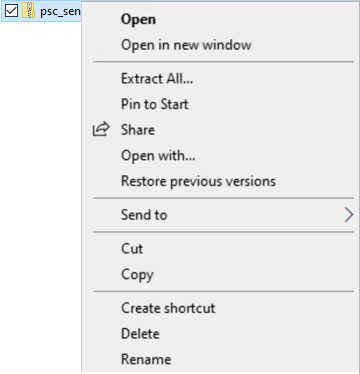
- Rename
psc_sensor.zipto[MACHINENAME]_psc_sensor.zip.Note:[MACHINENAME]= Fully qualified domain name of endpoint
- Log in to the affected endpoint.
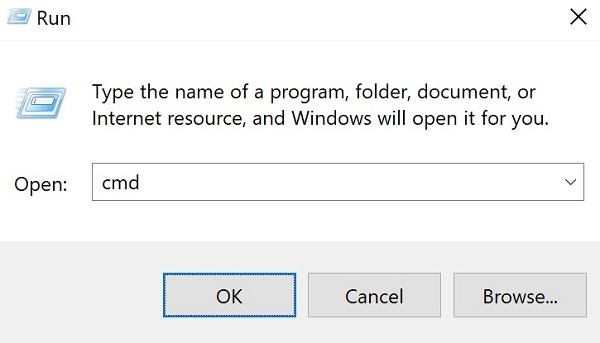
- Right-click the Windows start menu and then select Run.

- In the Run UI, type
cmdand then press CTRL+SHIFT+ENTER. This runs Command Prompt as an administrator.
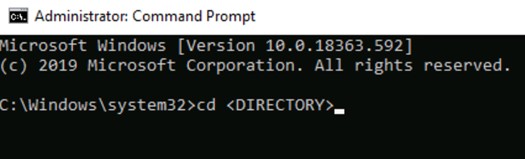
- In Command Prompt, type
CD [DIRECTORY]and then press Enter.
 Note:
Note:[DIRECTORY]= Directory of the VMware Carbon Black Cloud Endpoint sensor- The default installation
[DIRECTORY]isC:\Program Files\Confer.
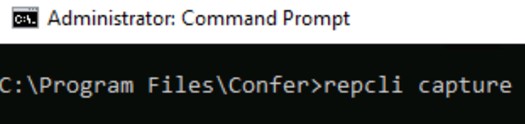
- Type
repcli captureand then press Enter.
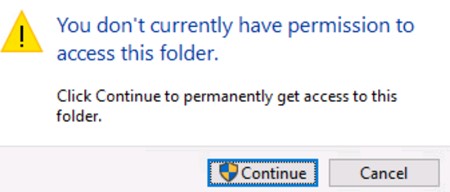
- In Windows Explorer, go to
C:\Windows\TEMP\confer-temp. - If prompted for folder access, click Continue. Otherwise go to Step 8.
- Right-click
confer_dump.zipand then click Rename.
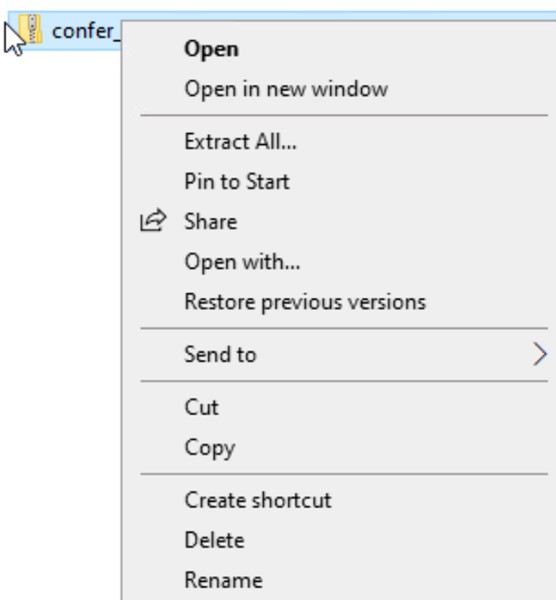
- Rename
confer_dump.zipto[MACHINENAME]_confer_dump.zip.Note:[MACHINENAME]= Fully qualified domain name of endpoint
Mac
Click the appropriate client version for specific installation steps. Reference How to Identify the VMware Carbon Black Cloud Endpoint Sensor Version for more information.
- Log in to the affected endpoint.
- In the Apple menu, click Go and then select Utilities.
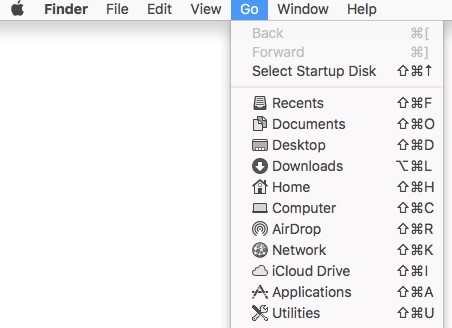
- Double-click Terminal.

- In Terminal, type
type sudo /Applications/VMware\ Carbon\ Black\ Cloud/repcli.bundle/Contents/MacOS/repcli capture [UNINSTALL_CODE] [DESTINATION DIRECTORY]and then press Enter.
 Note:
Note:[UNINSTALL_CODE]= Removal code for VMware Carbon Black Cloud Endpoint- For more information about removal codes, reference How to Manage the VMware Carbon Black Cloud Endpoint Uninstall Code.
[DESTINATION DIRECTORY]= Target destination for log bundle
- Populate the password for sudo and then press Enter.
- Go to
[DESTINATION DIRECTORY], right-clickconfer.zip, and then select Rename. - Rename
confer.zipto[MACHINENAME]_confer_dump.zip.Note:[MACHINENAME]= Fully qualified domain name of endpoint
- Log in to the affected endpoint.
- In the Apple menu, click Go and then select Utilities.
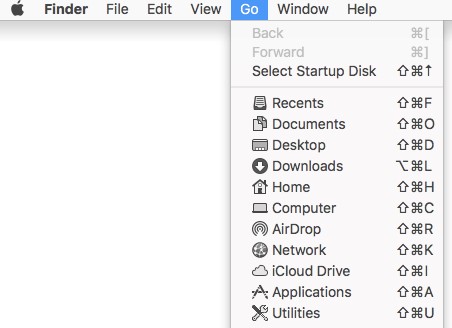
- Double-click Terminal.

- In Terminal, type
sudo /Applications/Confer.app/uninstall -l [UNINSTALL_CODE] -d [DESTINATION DIRECTORY]and then press Enter.
 Note:
Note:[UNINSTALL_CODE]= Removal code for VMware Carbon Black Cloud Endpoint- For more information about removal codes, reference How to Manage the VMware Carbon Black Cloud Endpoint Uninstall Code.
[DESTINATION DIRECTORY]= Target destination for log bundle
- Populate the password for sudo and then press Enter.
- Go to
[DESTINATION DIRECTORY], right-clickconfer.zip, and then select Rename. - Rename
confer.zipto[MACHINENAME]_confer_dump.zip.Note:[MACHINENAME]= Fully qualified domain name of endpoint
Linux
Click the appropriate client version for specific installation steps. Reference How to Identify the VMware Carbon Black Cloud Endpoint Sensor Version for more information.
- Log in to the affected endpoint.
- Open Terminal.
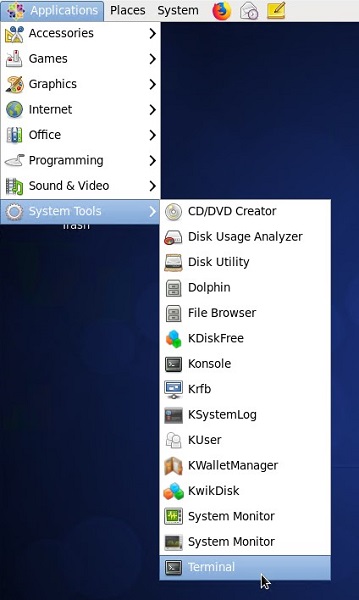 Note: The user interface (UI) layout may differ between Linux distributions.
 - In Terminal, type
su rootand then press Enter. - Populate the password for
rootand then press Enter.

- Type
sudo /opt/carbonblack/psc/bin/collectdiags.shand then press Enter. - Retrieve the log from
/tmp. The filename is in the formatdiags_[HOSTNAME]_[EPOCH_TIME]_[RANDOM].tgz
- Log in to the affected endpoint.
- Open Terminal.
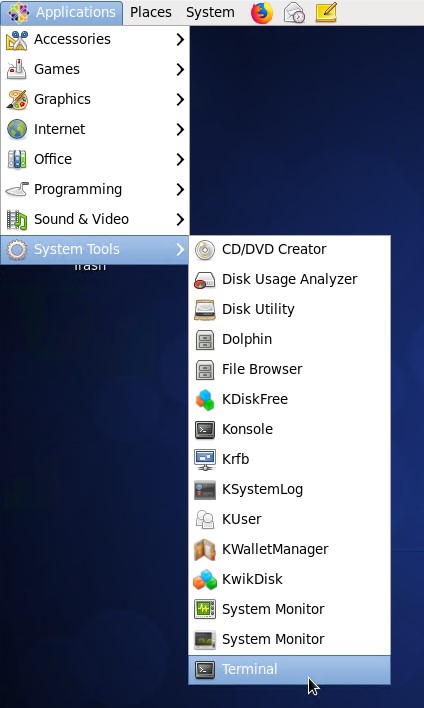 Note: The user interface (UI) layout may differ between Linux distributions.
 - In Terminal, type
su rootand then press Enter. - Populate the password for
rootand then press Enter.

- Type
sudo tar cvf $(hostname –long)_$(date +"%Y-%b-%d_%H-%M-$S")_logs.tgz /var/opt/carbonblack/psc/logand then press Enter. - Retrieve the log from
/var/opt/carbonblack/psc/log.
Affected Products
VMware Carbon BlackArticle Properties
Article Number: 000125504
Article Type: How To
Last Modified: 10 Aug 2026
Version: 24
Find answers to your questions from other Dell users
Support Services
Check if your device is covered by Support Services.